Reader's Choice: Most Popular Vocal Production Articles in 2014

by Dan Gonzalez

Optimizing vocals with DSP

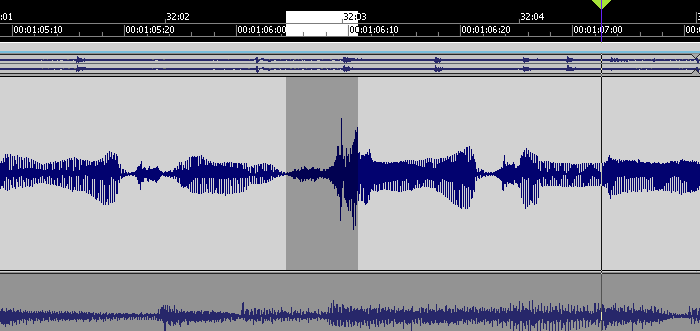
Craig Anderton brings you on a DSP-inspired journey through all the different ways in which you can get your vocals processed and finalized. Various topics involving the VX-64, EQ, Compression, Expansion, and much more. Check out the article here.

How to use a vocal double to enhance lead vocals

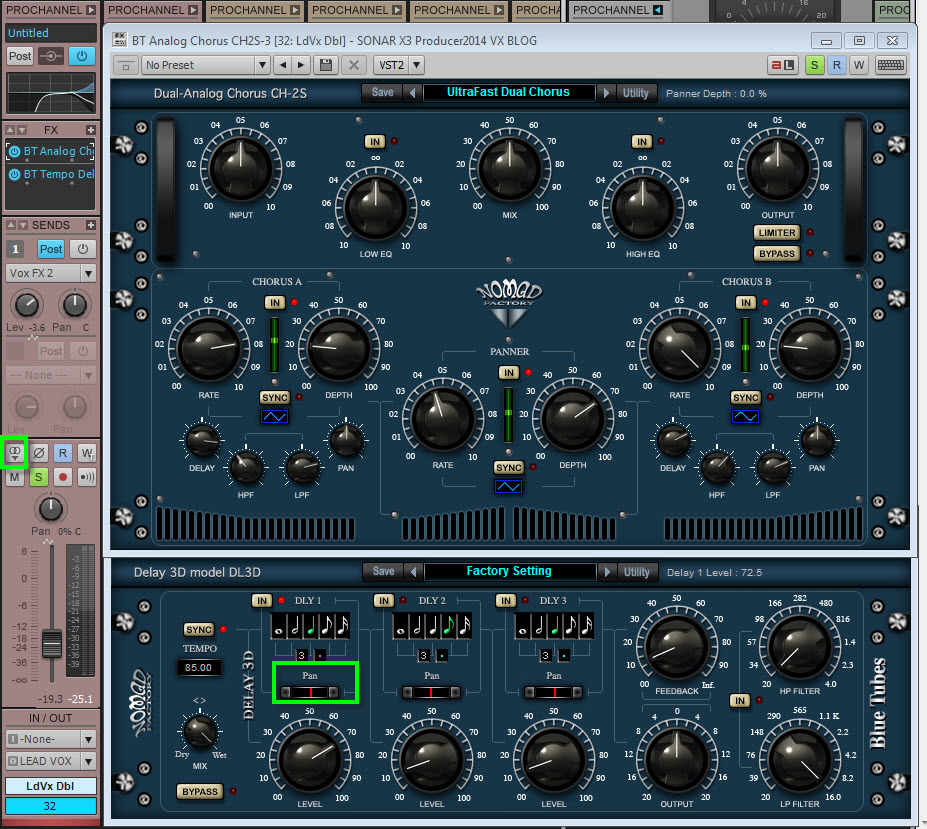
One of the toughest things about working with a lead vocal track is getting it to pop out, while allowing it to still sit in the track nicely in context with its surroundings [other tracks].  Every mixing engineer has her/his bag of tricks, but here are a few ideas to utilize a “vocal-double” which may help support and embellish the lead vocal track. Cakewalk guru Jimmy Landry shows you how he worked on the vocals for his Javier Colon demo track. Check out the article here.

Make your voice sound thicker (studio & producer)

Vocal production can lead to many different types of processing. Sometimes subtle enhancements to your vocals can make all the difference in the final mix. SONAR X3 Studio and Producer introduces Melodyne Essential as a fully integrated and pitch correction editor. This easy to use software allows users to access their Melodyne right from the Multi-Dock without needing to perform any special tricks within the software – including fattening up your vocals. Check out this highly-read article here.

Make your voice sound like Daft Punk with Melodyne Editor and SONAR X3 Producer

Certain effects have defined generations of music. The decade of the 80’s for example was a major era for reverb. In today’s pop music, the use of pitch correction software seems to be an effect that many artists and producers are utilizing creatively. Daft Punk has been using this effect for a number of years now, making them one of the first to bring this vocal style to the level of popularity it is today. Check out the article here.

Hum a melody and convert it to MIDI using ARA

As a musician, inspiration can hit you on the train, during dinner, or even while you’re driving somewhere. Many musicians carry some sort of recorder around with them. I know sound designers who always have a device ready for taking samples, and guitarists that hum melodies to themselves when they feel they’ve come up with something original that they want to remember. Now you can import your melodies right into SONAR and convert them to MIDI using the innovative ARA integration. Check out the articles here.

Reader's Choice: Most Popular Guitar Production Articles in 2014

by Dan Gonzalez

14 Tips for Guitars Before Entering the Studio

Entering the studio can be a stressful task if it is your first time. Here at Cakewalk we’ve outlined a few things that every guitarist should know before walking into a tracking session. This article has been brought to you by the our reader’s community as one of the most-read articles, so enjoy! You can check out the article here.

Guitar Month Bonus Pack (Free Downloads)

Cakewalk vetern Craig Andertons brings you some of the top guitar-related content that he has in his vast collection of creations. Check out Continue reading “Reader's Choice: Most Popular Guitar Production Articles in 2014”

Multi-track Drum Editing – Crossfading and Critical Listening

by Dan Gonzalez

In the past 3 articles we have looked at basic tools for drum editing as well as identifying, splitting, cropping, and aligning clips. All of these techniques can be followed pretty accurately by reading along and performing the functions as I’ve written them. This portion of the blog series will require that you listen intently to what you’re doing as we work through it.

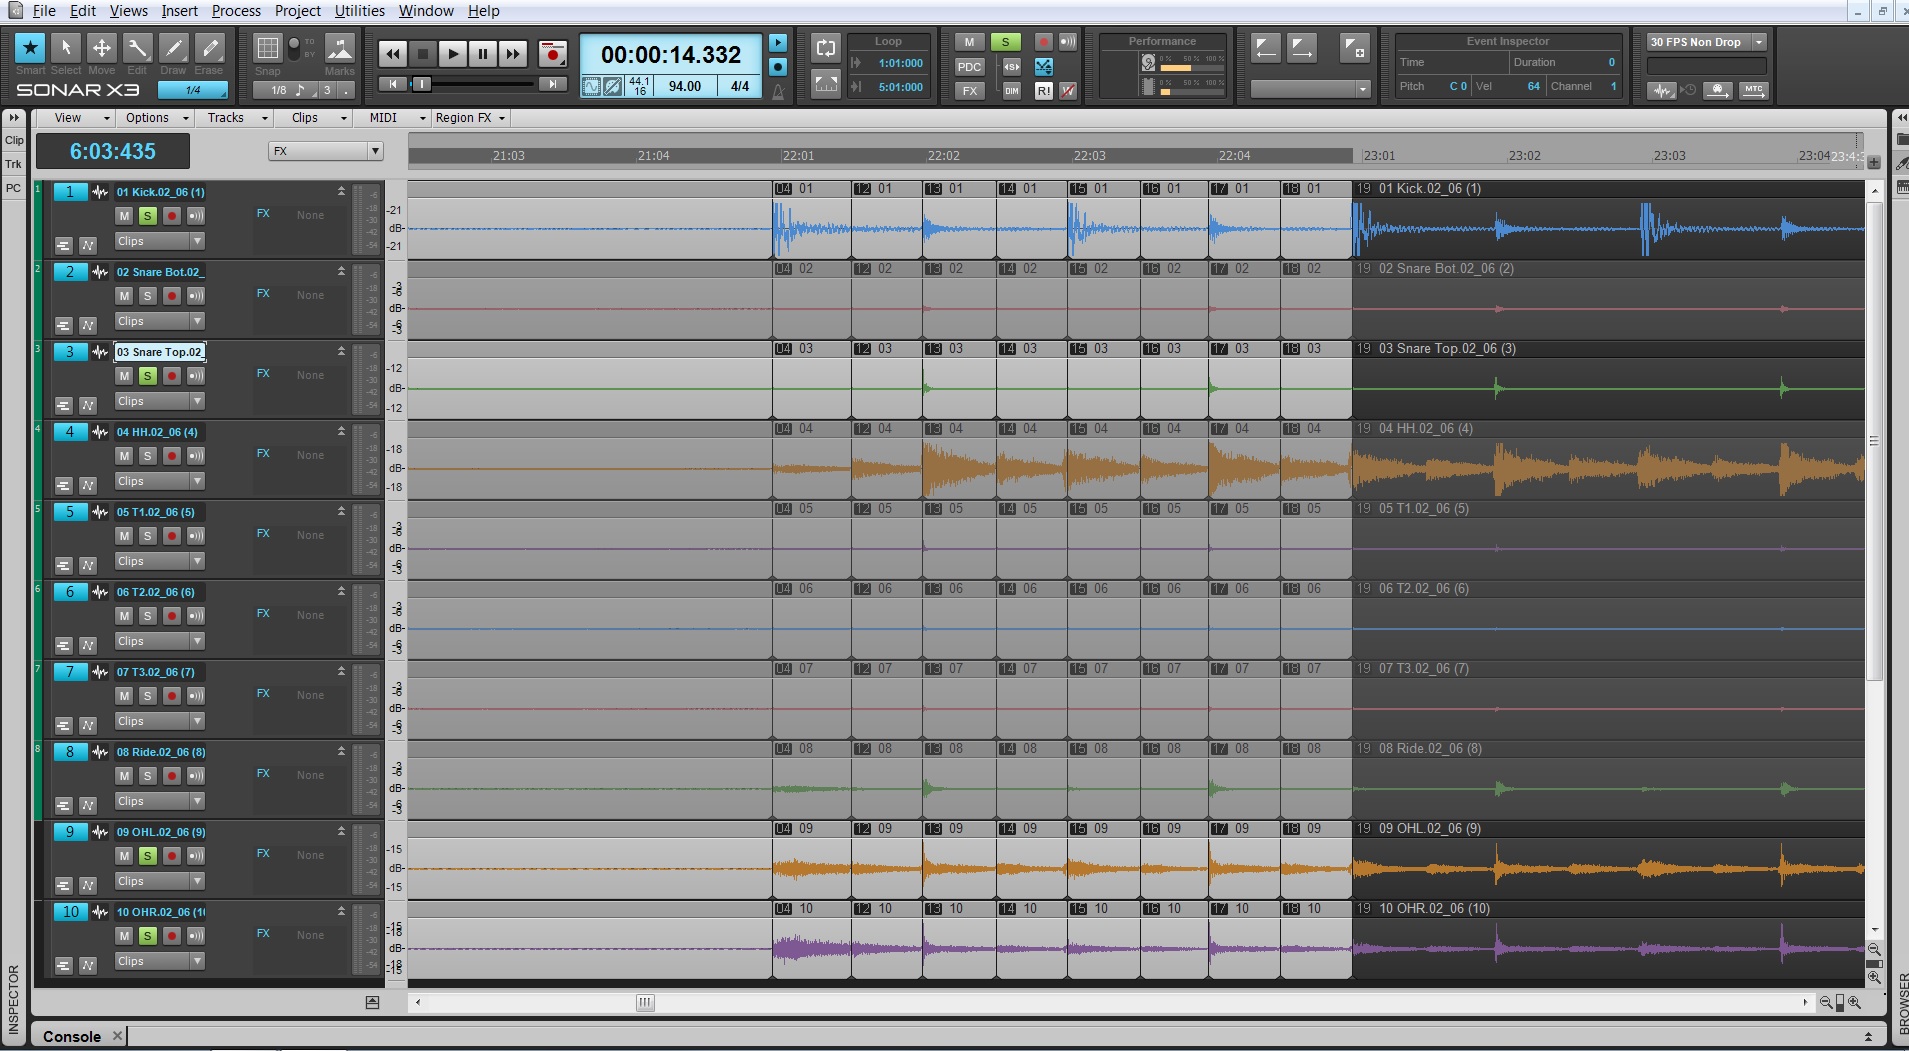
Make sure to wear headphones and get your critical listening ears on so that your drum edits are clean and not full of pops. Previously I mentioned that we would need to monitor our drums as we edit them and that erroneous edits come through the most in the cymbal microphones. In order to make this possible we’re going to mute the tom tracks and lower the volume for the kick and snare tracks. This exposes mostly high hat, ride, and overhead microphone signals. Also, make sure to pan the overhead microphone signals hard left and right too.

STEP 14: Turn on Auto Crossfade

SONAR is known for it’s streamlined feel and quick functions. One of the best examples of this is SONAR’s auto cross-fade functionality. Since we’re  putting this drum pattern back together we’ll need some speedy way of making sure the clips do not pop when overlapping.

Within the track view click on the Options > Auto Crossfade. This feature allows you to crop one clip into another and automatically yield a cross fade. Continue reading “Multi-track Drum Editing – Crossfading and Critical Listening”

Multi-Track Drum Editing – Cropping and Aligning Clips

In this part of the blog series we’ll cover cropping and aligning the clips that we sliced and diced in the previous post.

STEP 09: Cropping Multiple Clips

SONAR rocks when it comes to cropping multiple clips at once. Now that we’ve sliced up the first measure, select all the split clips from measure 22 to 23 including the blank waveforms leading up to measure 22. You can select multiple clips by clicking the header of each Clip Group and holding SHIFT.

While holding SHIFT, crop the right side of any of the selected clips.

This will crop all of these clips at once. The end Continue reading “Multi-Track Drum Editing – Cropping and Aligning Clips”

Multi-Track Drum Editing – Identifying & Splitting Drum Hits

You need to start with a great performance

Before you begin to edit drum stems you have to make sure that you are working with tracks that were recorded close to a click. They need to be consistent. Tightening up the performance is something that is very invasive and requires a lot of time. If the drummer can’t put in the time to learn the parts then you should wait until they are ready to record their parts properly. Having this knowledge will make your life easier and should be something you think about during the preproduction stages of any record.


A note about the editing process.

The purpose of this type of editing is to identify the strong hits of the drum beat, split them into tiny parts, and then crop and align those small parts. The splits will depend on which part of the drum falls on each down beat.

In this tutorial Kicks happen every 1/4 note, snares every 2nd and 4th beat, and high hats on every 1/8th note. This happens for about 20 measures with various fills here and there and then it switches to a different pattern. We’ll move in measure by measure increments so that we don’t bite off more than we can chew at first.

Engage the metronome so that you can hear the pulse.  This will help you check your work as you edit. Download the project files here (if you didn’t download them from our previous post)  to get started:

Multi-Track Drum Editing Tutorial

Multi-track drum editing requires you to listen intently to the audio you’re editing. I recommend using headphones for this tutorial so that you can hear subtle edits. Erroneous edits are most exposed in the overheads, high hat, and cymbal frequencies so we’ll need to solo those as well as the kick and snare track while we work through this project.

As we work through the session the high hat and ride will need to be solo’d due to the spot mics that were placed on these. Everything else will follow suit with your editing.

You can also adjust your Track Height in the Track View by dragging the borders of the Continue reading “Multi-Track Drum Editing – Identifying & Splitting Drum Hits”

DAW Best Practices: How to get a bigger drum sound with reverb

The Biggest, Baddest Drum Reverb Sound Ever

[Originally posted as a daily tip on the SONAR forums and reposted for viewers here on the blog.]

by Craig Anderton

You want big-sounding drums? Want your metal drum tracks to sound like the Drums of Doom? Keep reading. This technique transposes a copy of the reverb and pans the two reverb tracks oppositely. It works best with unpitched sounds like percussion.

1. Insert a reverb send.

Insert a send in your drum track, then insert your reverb of choice in the Send bus.


2. Render the reverb, isolated from the drum track. Continue reading “DAW Best Practices: How to get a bigger drum sound with reverb”

Multi-Track Drum Editing – DLC and Basic Tools

The need for perfect drum production is at an all time high.

In today’s world there is a huge need for all types of drum production. Everything from VST instruments to advanced drum replacement software has been growing in popularity. For the most part, records that require the tracking of live drums always have some sort of drum editing applied. This process is meticulous, long, and can be frustrating if you have never done this much in depth editing before.

Downloadable Content:

Let’s start by getting you the files you need to follow along with this tutorial.

Multi-Track Drum Editing Tutorial

Once downloaded, they should open just fine inside of SONAR X3.

Understanding the basics.

Before diving in, let’s take a look at some essential tools that we’ll be using for major drum editing. These tools may be basic to some, but are definitely the right functions we’ll need in SONAR to edit down these drums.

Creating selection groups

The first step in editing multi-track drums is making selection groups. Once created, these clips will be synced to one another for batch editing tasks – like multi-track editing. During the course of this tutorial we’ll be relying heavily on splitting clips – grouping will make this faster and more efficient.

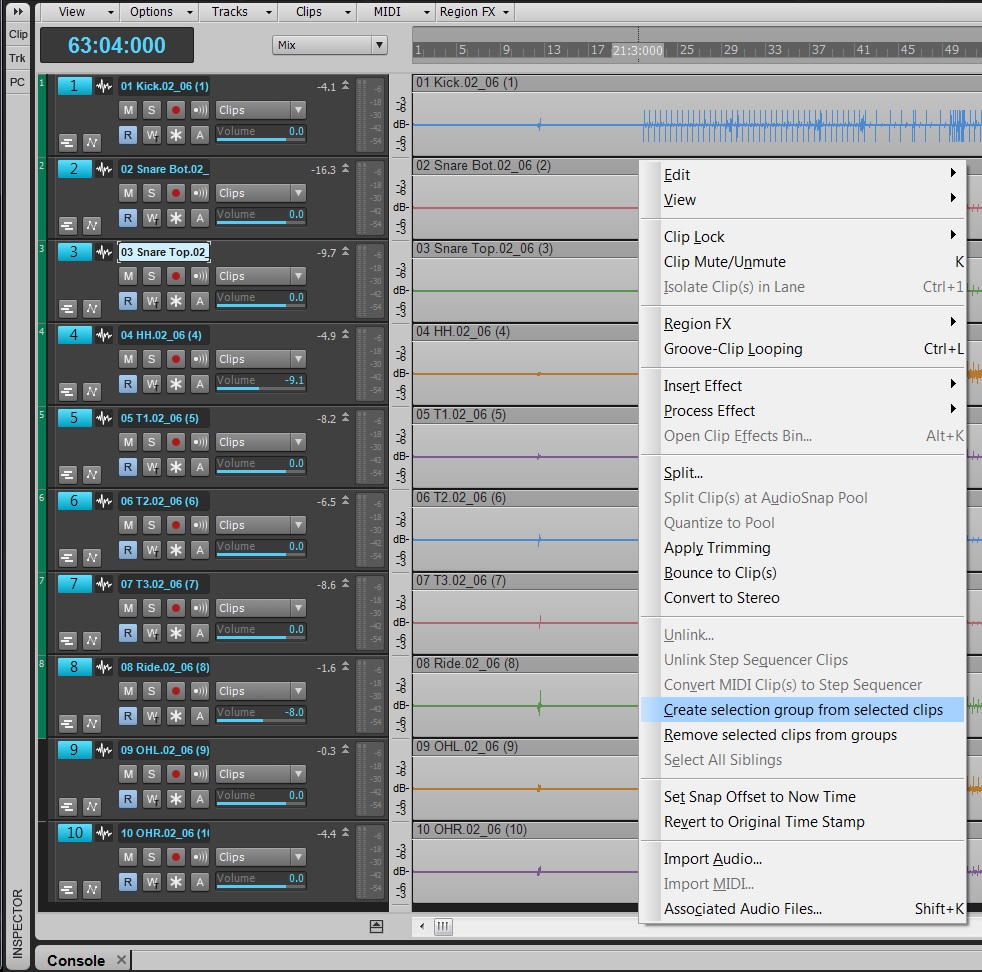
To create these, choose CTRL+A within the Track View and then right-click on your clips. Near the bottom of the menu there will be an option that says Create Selection Group from selected clips. Select this and a number will appear in the header of your clips indicating that your clips are all in a group now.

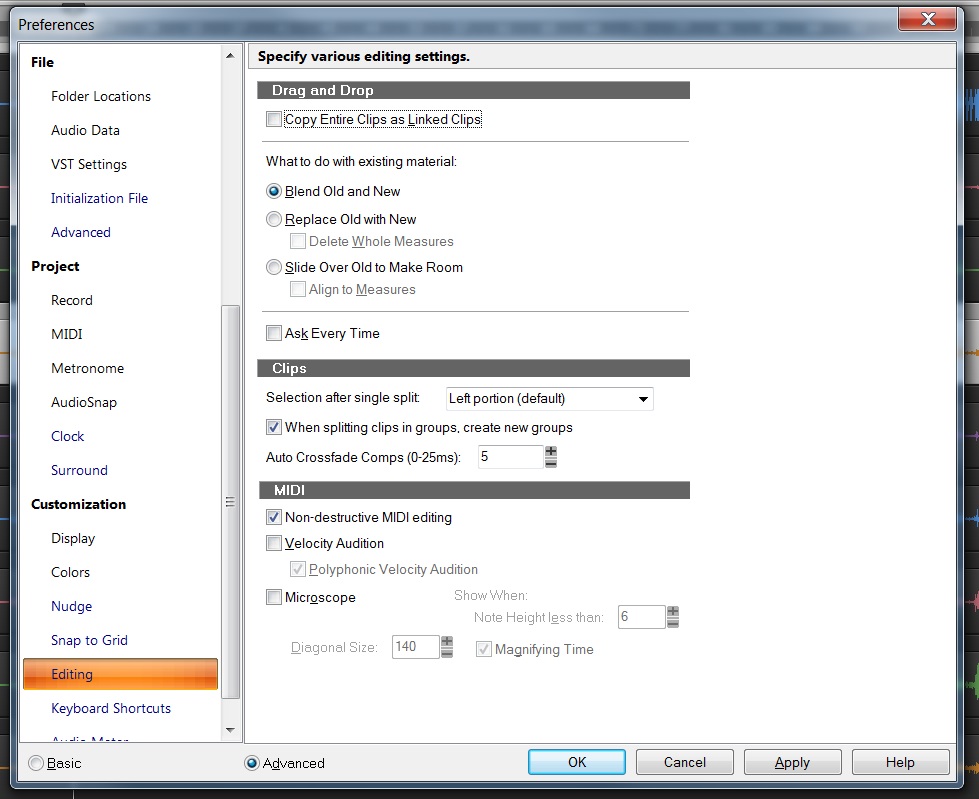
As we work through the song the different Split edits will cause the group number to increase. This indicates that a new group has been made. You can change whether or not this occurs within the Preferences here:


Tab to Transients

Tabbing to transients locates strong transients and moves Continue reading “Multi-Track Drum Editing – DLC and Basic Tools”

Basics: Five Questions about Filter Response

By Craig Anderton 

You can think of filters as combining amplification and attenuation—they make some frequencies louder, and some frequencies softer. Filters are the primary elements in equalizers, the most common signal processors used in recording. Equalization can make dull sounds bright, tighten up “muddy” sounds by reducing the bass frequencies, reduce vocal or instrument resonances, and more. 

Too many people adjust equalization with their eyes, not their ears. For example, once after doing a mix I noticed the client writing down all the EQ settings I’d done. When I asked why, he said it was because he liked the EQ and wanted to use the same settings on these instruments in future mixes. 

While certain EQ settings can certainly be a good point of departure, EQ is a part of the mixing process. Just as levels, panning, and reverb are different for each mix, EQ should be custom-tailored for each mix as well. Part of this involves knowing how to find the magic EQ frequencies for particular types of musical material, and that requires knowing the various types of filter responses used in equalizers. 

What’s a lowpass response? A filter with a lowpass response passes all frequencies below a certain frequency (called the cutoff or rolloff frequency), while rejecting frequencies above the cutoff frequency (Fig. 1). In real world filters, this rejection is not total. Instead, past the cutoff frequency, the high frequency response rolls off gently. The rate at which it rolls off is called the slope. The slope’s spec represents how much the response drops per octave; higher slopes mean a steeper drop past the cutoff. Sometimes a lowpass filter is called a high cut filter.

 Fig. 1: This lowpass filter response has a cutoff of 1100 Hz, and a moderate 24/dB per octave slope.
What’s a highpass response? This is the inverse of a lowpass response. It passes frequencies above the cutoff frequency, while rejecting frequencies below the cutoff (Fig. 2). It also Continue reading “Basics: Five Questions about Filter Response”

Basics: Five Questions about Audio Specs

By Craig Anderton 

Specifications don’t have to be the domain of geeks—they’re not that hard to understand, and can guide you when choosing audio gear. Let’s look at five important specs, and provide a real-world context by referencing them to TASCAM’s new US-2×2 and US-4×4 audio interfaces. 

First, we need to understand the decibel (dB). This is a unit of measurement for audio levels (like an inch or meter is a unit of measurement for length). A 1 dB change is approximately the smallest audio level difference a human can hear. A dB spec can also have a – or + sign. For example, a signal with a level of -20 dB sounds softer than one with a level of -10 dB, but both are softer than one with a level of +2 dB. 

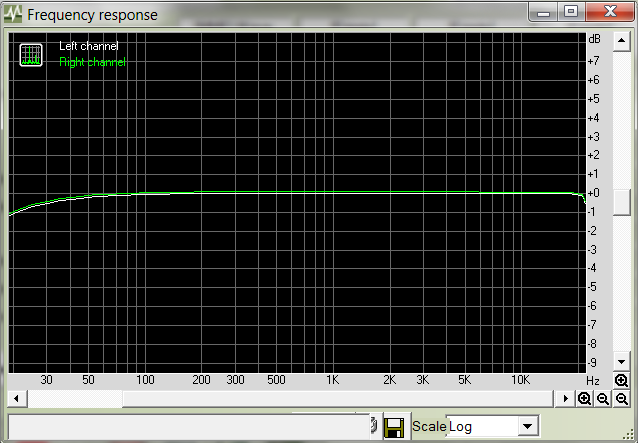
1. What’s frequency response? Ideally, audio gear designed for maximum accuracy should reproduce all audible frequencies equally—bass shouldn’t be louder than treble, or vice-versa. A frequency response graph measures what happens if you feed test frequencies with the same level into a device’s input, then measure the output to see if there are any variations. You want a response that’s flat (even) from 20 Hz to 20 kHz, because that’s the audible range for humans with good hearing. Here’s the frequency response graph for TASCAM’s US-2×2 interface (in all examples, the US-4×4 has the same specs).

This shows the response is essentially “flat” from 50 Hz to 20 kHz, and down 1 dB at 20 Hz. Response typically goes down even further below 20 Hz; this is deliberate, because there’s no need to reproduce signals we can’t really hear. The bottom line is this graph shows that the interface reproduces everything from the lowest note on a bass guitar to a cymbal’s high frequencies equally well. 

2. What’s Signal-to-Noise Ratio? All electronic circuits generate Continue reading “Basics: Five Questions about Audio Specs”

Basics: Five Questions about Latency and Computer Recording

Get the lowdown on low latency, and what it means to you

By Craig Anderton 

Recording with computers has brought incredible power to musicians at amazing prices. However, there are some compromises—such as latency. Let’s find out what causes it, how it affects you, and how to minimize it.  

1. What is latency? When recording, a computer is often busy doing other tasks and may ignore the incoming audio for short amounts of time. This can result in audio dropouts, clicks, excessive distortion, and sometimes program crashes. To compensate, recording software like SONAR dedicates some memory (called a sample buffer) to store incoming audio temporarily—sort of like an “audio savings account.” If needed, your recording program can make a “withdrawal” from the buffer to keep the audio stream flowing. 

Latency is “geek speak” for the delay that occurs between when you play or sing a note, and what you hear when you monitor your playing through your computer’s output. Latency has three main causes: 

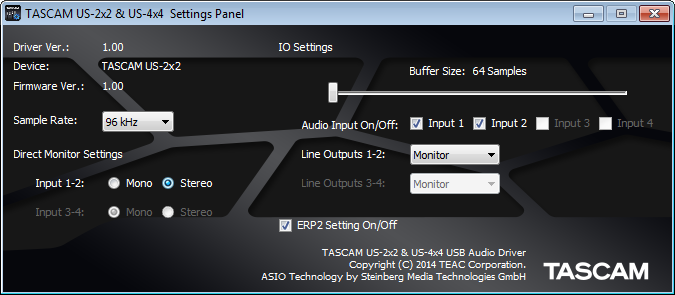
  • The sample buffer. For example, storing 5 milliseconds (abbreviated ms, which equals 1/1000th of a second) of audio adds 5 ms of latency (Fig. 1). Most buffers sizes are specified in samples, although some specify this in ms. 

 Fig. 1: The control panel for TASCAM’s US-2×2 and US-4×4 audio interfaces is showing that the sample buffer is set to 64 samples. 

  • Other hardware. Converting analog signals into digital and back again takes some time. Also, the USB port that connects to your interface has additional buffers. These involve the audio interface that connects to your computer and converts audio signals into digital signals your computer can understand (and vice-versa—it also converts computer data back into audio).
  • Delays within the recording software itself. A full explanation would require another article, but in short, this usually involves inserting certain types of processors within your recording software. 

2. Why does latency matter? Continue reading “Basics: Five Questions about Latency and Computer Recording”