In this part of the blog series we’ll cover cropping and aligning the clips that we sliced and diced in the previous post.
STEP 09: Cropping Multiple Clips
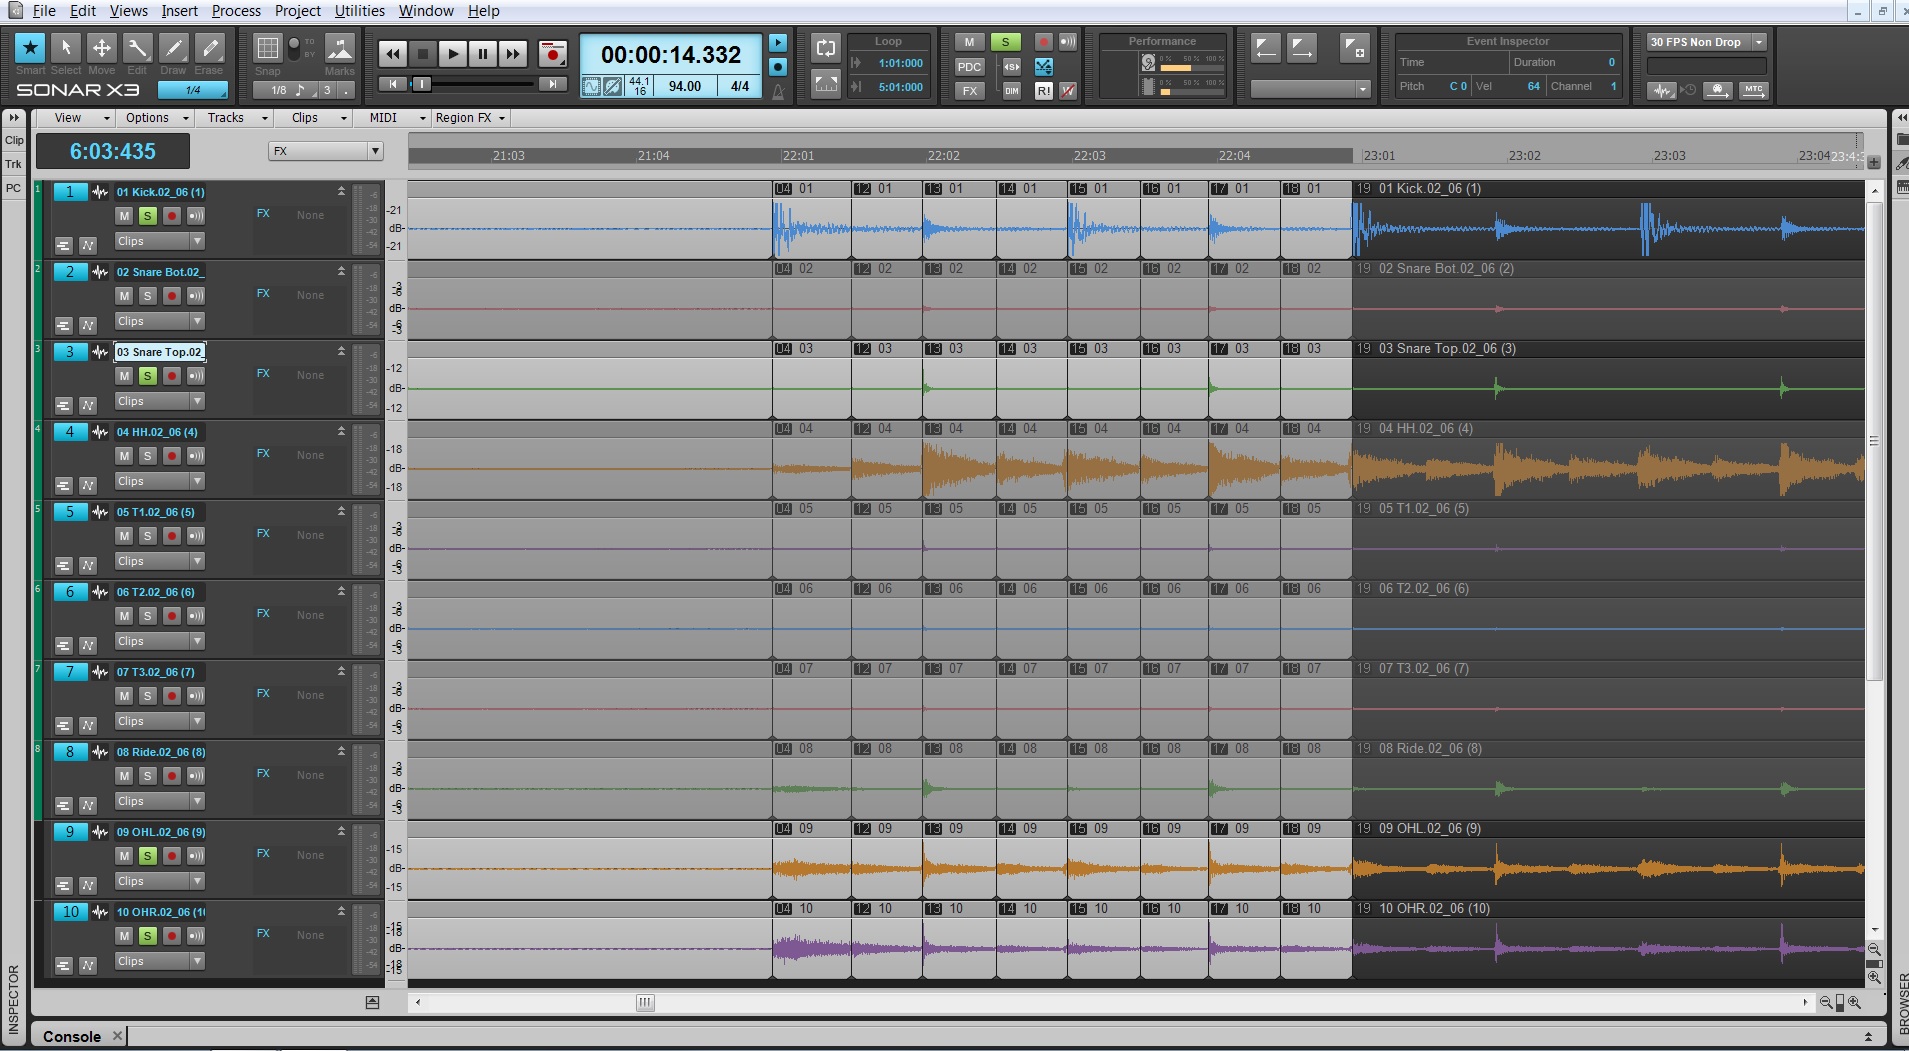
SONAR rocks when it comes to cropping multiple clips at once. Now that we’ve sliced up the first measure, select all the split clips from measure 22 to 23 including the blank waveforms leading up to measure 22. You can select multiple clips by clicking the header of each Clip Group and holding SHIFT.
While holding SHIFT, crop the right side of any of the selected clips.
This will crop all of these clips at once. The end result will look like the following screenshot. Make sure there is a decent amount of space in these edits.

STEP 10: Turn on Snap to Grid
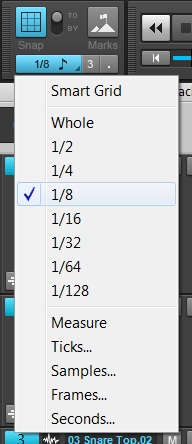
Now that we have made a decent amount of space between these clips we need to align these sections to SONAR’s grid. The goal here is to individually align each section to it’s ideal position on the timeline to achieve near-perfect timing. Turn on Snap to Grid (Shortcut N) and set the resolution to 1/8. Make sure that Smart Grid is not checked as well.
STEP 11: Select and Quantize the first column of clips
Select the first column by clicking on the header of the very top clip. These are the clips that we split first in the previous article that start at measure 22:01.
Once you make your selection press the shortcut Q to open the Quantize menu. Once open, tick the box next to Audio Clip Start Times and set the main duration to 1/8.
Step 12: Quantize the next column of clips
Move to the next column, hit Q, and then [Ok]. The quantize window should keep the settings and allow you to move quickly by each hit.
Edit with confidence using Grid Lines
Enable grid lines if you want to have a better idea of where these hits are going. You can do this by going to View > Display > Vertical Grid Lines > In Front of Clips
So for your resolution of 1/8 you’ll see a grid line every 1/4th note on your timeline. This gives you an idea of where these clips are snapping to.
Changing the snap resolution will change how grid lines you see and where they occur if you have Smart Grid activated. These are very useful for drum editing when you want to align to the grid.
STEP 13: Repeat!
Continue to repeat this process for all hits in the first measure of this drum passage. Just like we did in the previous tutorial – go one by one until you get to measure 23:01. With the Grid lines enabled you’ll be able to see how each strong hit that we have split and cropped is now aligned to a measure.
A quick review of the steps involved:
- Select all of the split clips from measure 22 to measure 23
- Hold Shift and perform a crop function to crop all selected clips at once
- Turn on Snap to Grid
- Set the Snap to Grid resolution to 1/8
- In the same menu, make sure Smart Grid is disabled
- Select the first column of clips
- Hit Q to open the Quantize menu
- Tick the boxes next to Audio Clip Start Times and select 1/8 as the resolution
- Click [Ok] and the first column will snap to 22:01
- Repeat the selection and quantizing until measure 23:01
Stay tuned
Now that you know how to crop and align multiple clips stay tuned for the next installment of this series.


One Reply to “Multi-Track Drum Editing – Cropping and Aligning Clips”
Comments are closed.