The need for perfect drum production is at an all time high.
In today’s world there is a huge need for all types of drum production. Everything from VST instruments to advanced drum replacement software has been growing in popularity. For the most part, records that require the tracking of live drums always have some sort of drum editing applied. This process is meticulous, long, and can be frustrating if you have never done this much in depth editing before.
Downloadable Content:
Let’s start by getting you the files you need to follow along with this tutorial.
Multi-Track Drum Editing Tutorial
Once downloaded, they should open just fine inside of SONAR X3.
Understanding the basics.
Before diving in, let’s take a look at some essential tools that we’ll be using for major drum editing. These tools may be basic to some, but are definitely the right functions we’ll need in SONAR to edit down these drums.
Creating selection groups
The first step in editing multi-track drums is making selection groups. Once created, these clips will be synced to one another for batch editing tasks – like multi-track editing. During the course of this tutorial we’ll be relying heavily on splitting clips – grouping will make this faster and more efficient.
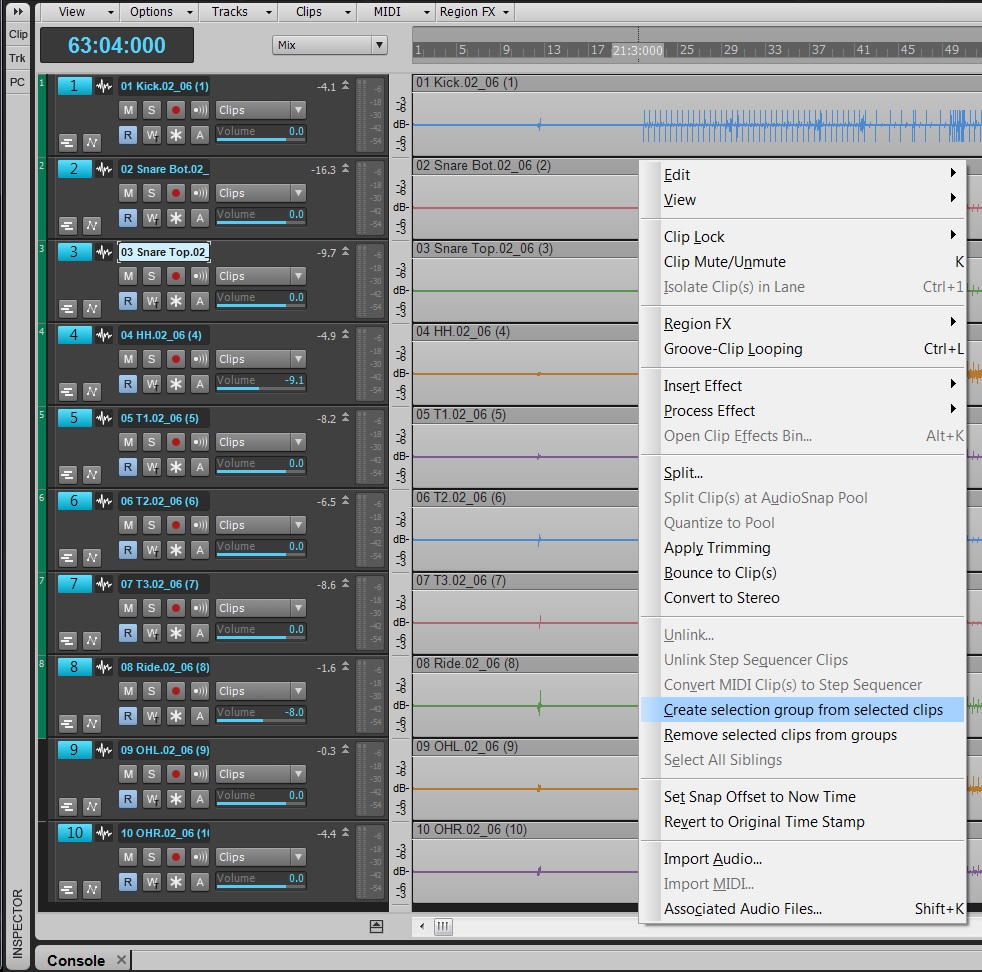
To create these, choose CTRL+A within the Track View and then right-click on your clips. Near the bottom of the menu there will be an option that says Create Selection Group from selected clips. Select this and a number will appear in the header of your clips indicating that your clips are all in a group now.
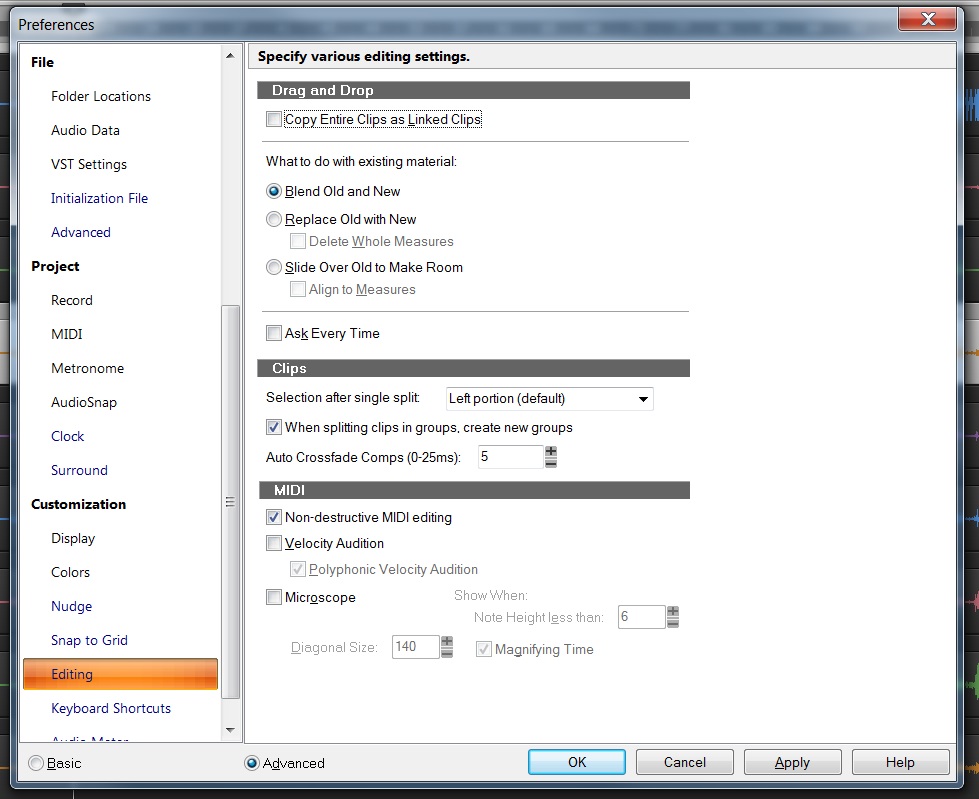
As we work through the song the different Split edits will cause the group number to increase. This indicates that a new group has been made. You can change whether or not this occurs within the Preferences here:
Tab to Transients
Tabbing to transients locates strong transients and moves the Now-Time marker directly to the beginning of them. This is going to be the most useful feature that we’ll use in SONAR to locate the different drum hits that we want to edit.
Open the project that we supplied you. You can zoom out (CTRL+Arrow Left) and place your cursor on the top half of the first track labelled “Kick”. Hit the TAB button on your computer keyboard and you’ll see your Now Time Marker jump along to each Kick Drum transient.
Think about a transient as the instant drum hit becomes noticeably louder than the noise floor. SONAR understands this data and places your cursor directly where that hit starts. Pretty cool right?
The Smart Tool
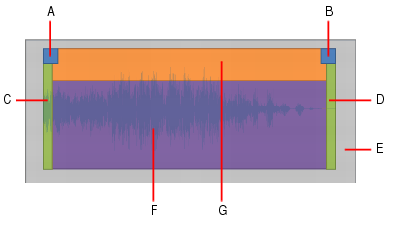
A combination of multiple different SONAR editing tools all in one place. This context sensitive tool changes based on where the cursor is placed on both Audio and MIDI clips. We’ll be using the Smart Tool throughout this entire series so it’s important to know how it works. The following picture shows how the Smart Tool interacts with audio clips in SONAR X3.
Split Functionality
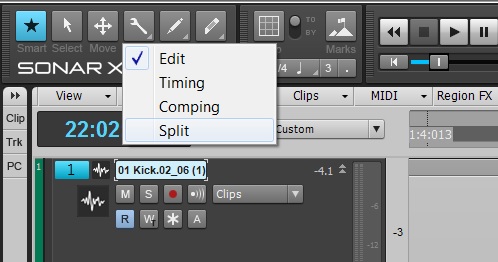
Editing drums requires tons of splitting and cropping. This Split Tool is located in the Tools HUD or Tools Module. This can also be accessed with the shortcut “S” as well
SONAR’s splitting gets even more in depth if you right-click on a clip and select “Split…” Here are the split options available in this menu.
Split at Time allows you to split at a specific time format in any of the 4 time selections SONAR uses: Samples, Measures Beats Tick, Timecode, and Second. This time defaults to the Now Time Marker location on your timeline.
Split at Selection allows you to split a clip at the beginning and end of a selection on a clip.
Split Repeatedly allows you to select a starting measure, and however many re-occurrences of that split you want to make. So, starting at measure 22 with a “and again every” selection of 1 will split every downbeat for the first beat for every consecutive measure starting at measure 22. Got that?
Split at Each Marker will split at the Marker’s you’ve created in SONAR using the M shortcut or the Markers view.
Split When Silent removes “silent” stretches of one measure or more from selected MIDI clips. The presence in a measure of any event—including those that make no sound, such as a patch change or lyric event—will cause that measure to be retained. This Split Function applies only to MIDI. For Removing Silence functionality go to Process > Apply Effect > Remove Silence.
Snap to Grid
 Within SONAR there is a snapping mechanism for editing in the Track View. The snap module allows you to set a resolution for clips to snap to. Let’s briefly cover the “To” and “By” switch since this setting is the least obvious out of all the settings in this feature.

When the Snap Module is set to “To”, clips will snap to the closest event determined by your resolution setting. So, for a resolution of 1/4 (quarter notes) snapping will quantize your clips to the closest quarter note(s) on the timeline in the Track View.“By” will snap your clips to a relative distance of the resolution from the current location of your clip. For example, if you need to shift something along the timeline, but your timeline is not in sync with your audio, then you can still shift your audio by increments that are set in the snap module.
Quick note about Smart Grid
When clicking on the resolution menu you’ll see something called Smart Grid. Selecting Smart Grid will change your snap resolution based on your zoom level. The idea here is that you’re zoom level dictates the resolution. At a far zoom level one could be snapping by Measure, and at a larger zoom level you may be working in increments of 1/16 or 1/32 notes. It’s all relative to where you start once you switch it on. For the most part we’ll be choosing a single resolution length and sticking to it so Smart Grid does not need to be enabled.
Quantize

Quantizing snaps selected audio and midi clips to the closet resolution that you set within the Quantize menu. For Drum Editing we’ll be using this feature frequently to snap selected clips to their desired area in time. Use the Shortcut “Q” to pop the menu and the [Enter] to actually quantize a clip. We’ll cover this menu once we actually start quantizing audio.
The Metronome
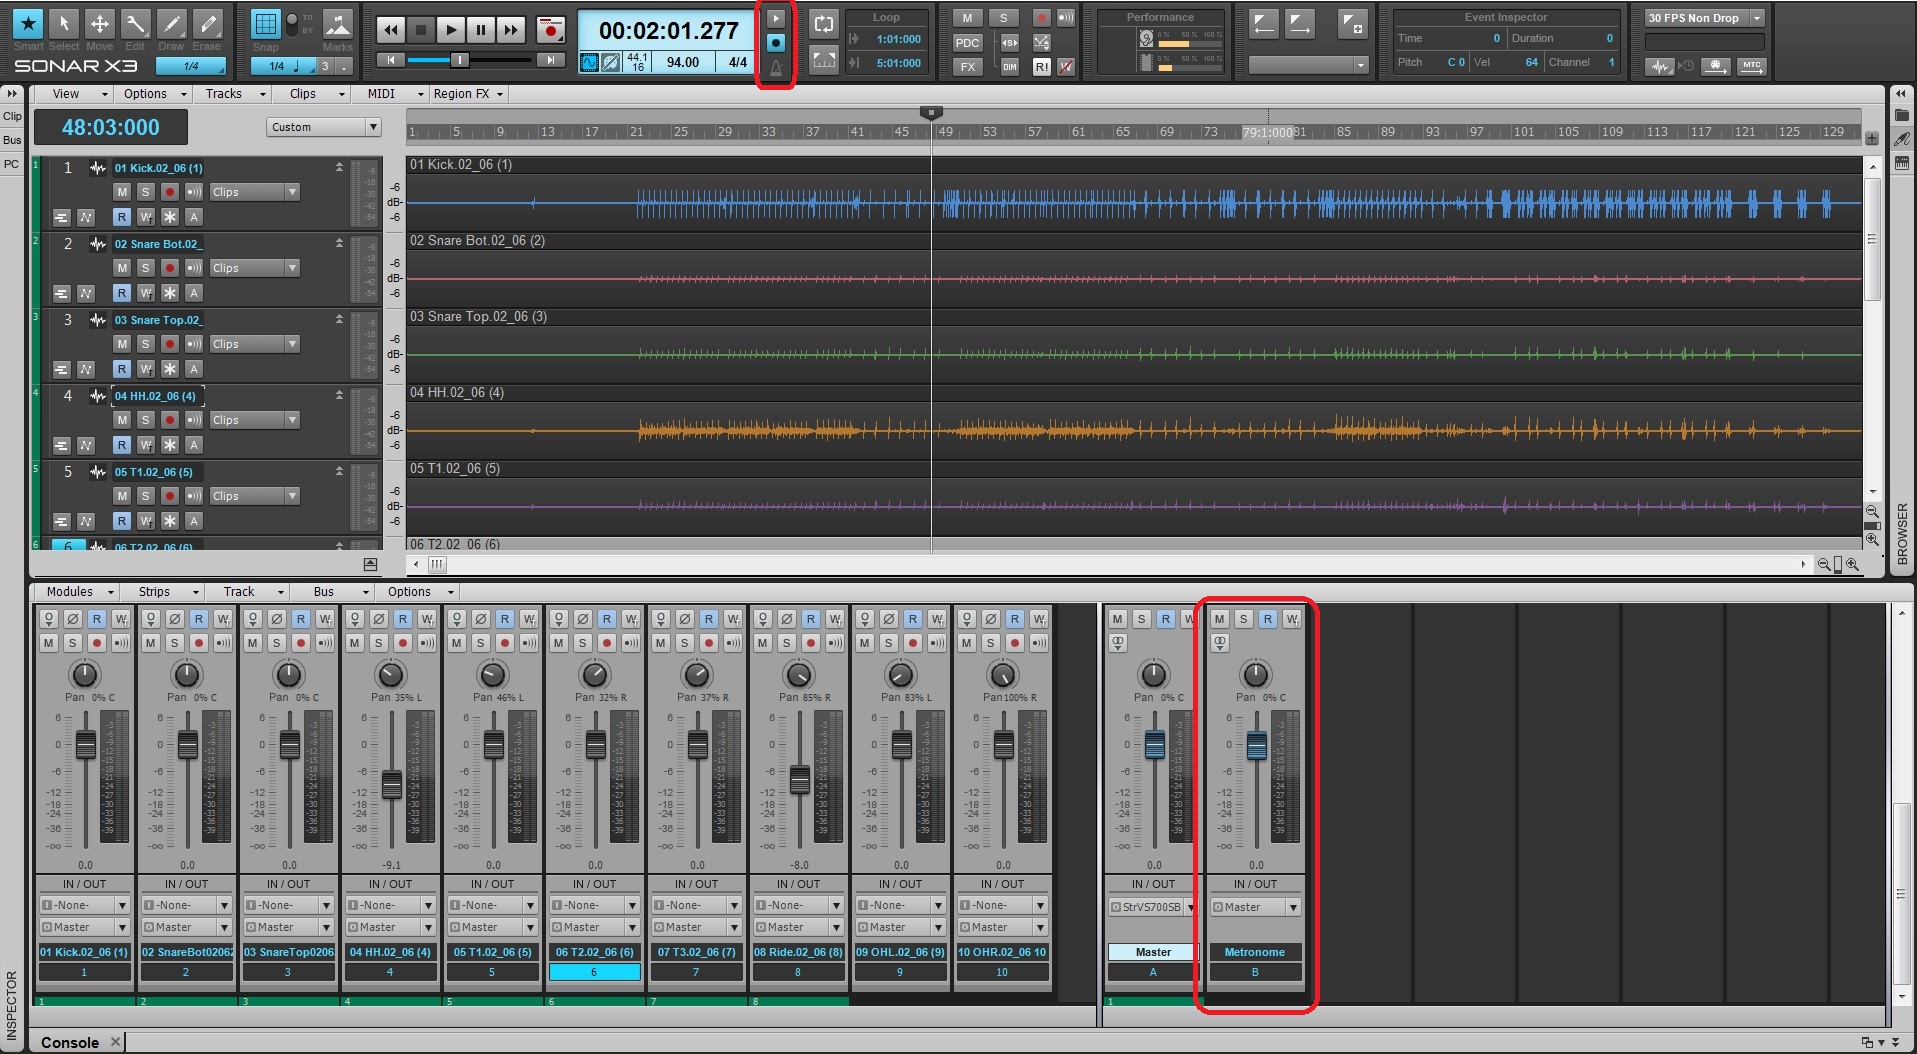
SONAR’s Metronome is relatively easy to understand once you see where it comes from and how it’s routed in SONAR. In the main window you can see that there is a metronome option to the right of the transport. From top to bottom these are: Enable Metronome During Playback, Enable Metronome During Recording, and then the metronome icon take you directly to the Metronome settings in there Preferences.
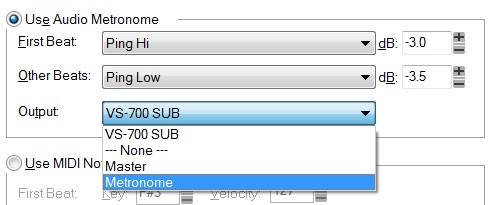
Within the Preferences you can set Count-in, Playback, Recording, and Beat subdivisions. The lower half allows you to choose whether you generate a click from the internal instrument that SONAR uses as a metronome – or whether you want to generate a raw MIDI note.
Using an audio metronome is the most practical use of this feature. In the Output section of the preferences lives an output selection. Here you can choose from any of the buses that are currently loaded into your session.
No metronome? Well here’s how you create one and route it.
Right-click in the bus area of SONAR’s console view
Rename the bus by double-clicking on the name. Type Metronome.
Go to the metronome’s preferences and set the output to Metronome.
Enable metronome during playback. Voila!
Let the editing begin!
We’ll be posting Part 2 shortly.
Haven’t checked out SONAR yet? Try the 30-day trial for free here.







One Reply to “Multi-Track Drum Editing – DLC and Basic Tools”
Comments are closed.