Subtractive EQ Part 5: When Should I Boost EQ?

Missed Part 1? Read it here.

When should I boost?
Some of you may read this and field this very question.  Boosting is something that you can do any time you want with any given instrument.  Obviously it is your own choice in the matter but if you find yourself constantly pulling your faders up and down because your master level is clipping then you may want to apply these EQ techniques to your workflow. In my world it is always a matter of reducing first and then boosting later.

Conclusion
Mixing is as much of an art as it is understanding the logical ways that instruments interact with one another. Continue reading “Subtractive EQ Part 5: When Should I Boost EQ?”

Subtractive EQ Part 4: Bass

Miss part 1? Read Subtractive EQ – Snare Drum.

Bass
The bass in this track caters to fans of the early Metallica era.  Bassist Cliff Burton popularized this distorted sound on such tracks as (Anesthesia) Pulling Teeth.  It’s important to blend this type of bass tone into the bottom of the guitars.  In this mix the guitars and the bass become a single unit ebbing and flowing with one another at certain points through the song.

Understandably one can assume that there was much processing done to this track before it’s transfer into SONAR.  It’s important to capture the sound before you start mixing so that your mixing process is not a patch-job.

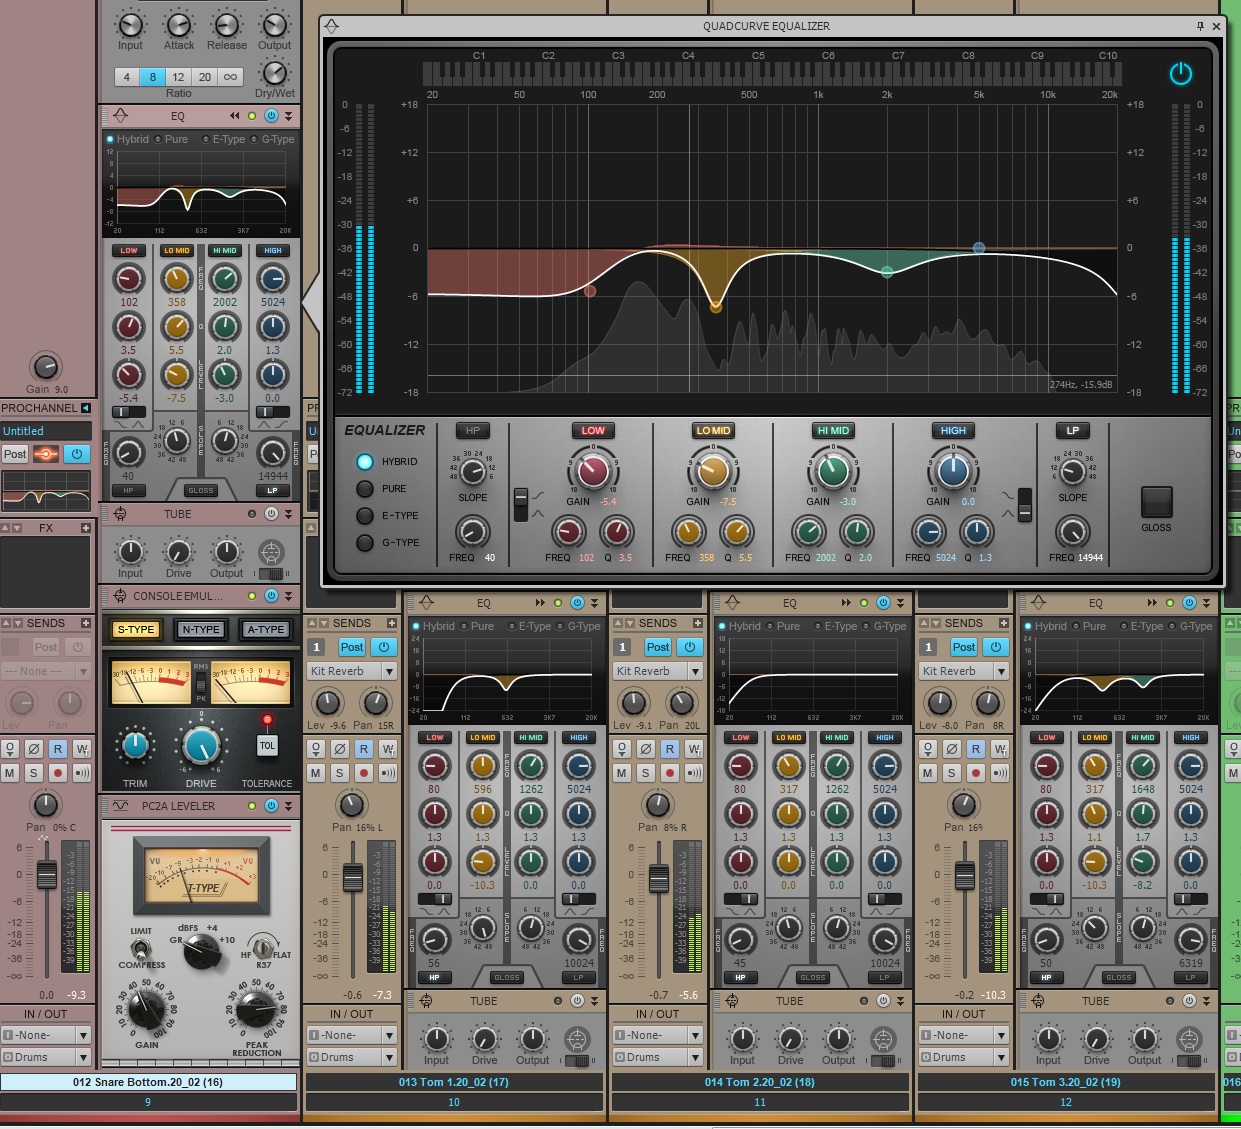
This tone is aggressive and piercing to the ear.  A significant way to know that this instrument needs attention is by the aural fatigue that you may experience while soloing this track and listening to it rather loudly for more than 10 seconds.  I aimed to adjust the bass track to fit like a glove under the mix by applying a HPF at 78Hz with a steep bandwidth setting.  The amount of bass here needs control. Using a compressor to control the sound would be redundant because of how much overdrive was applied to this track.  The overdrive has ultimately eliminated any trace of strong transients.

Lastly, there is another dip in the EQ around 2.2kHz.  This adjustment reduces some of the aforementioned piercing sound. Any harsh tones in this register will be too overbearing in the mix.

Subtractive EQ Part 3: Kick Drum

Miss part 1? Read Subtractive EQ – Snare Drum.

The Kick Drum
If the snare was the primary listening point for Rock music then the kick drum is the second most important. By working in the guitars in over the snare I was then met with the challenge of working in a solid kick drum sound. This kick drum was tracked using two different kick drum microphones, one deeper into the drum than the other. For reference, the first kick signal is called the “Kick-In” microphone and the second is the “Kick-Out” signal. (This is one example of the nomenclature used by many engineers to differentiate between the different microphones placed on a drum set)

Kick In

I started by blending the two signals Continue reading “Subtractive EQ Part 3: Kick Drum”

Subtractive EQ Part 2: Heavy Rhythm and Lead Guitars

Did you miss Part 1? Read Subtractive EQ for Snare Drum.

Guitars
Your guitar tone can change significantly by carving out the correct frequencies and reducing those that introduce unwanted noise. Distorted electric guitars tend to occupy most of the mid-range based on their nature of their sound. This mix was tricky because the band is instrumental and their music relies heavily on the layering of multiple guitar tones.

Rhythm Guitar 1

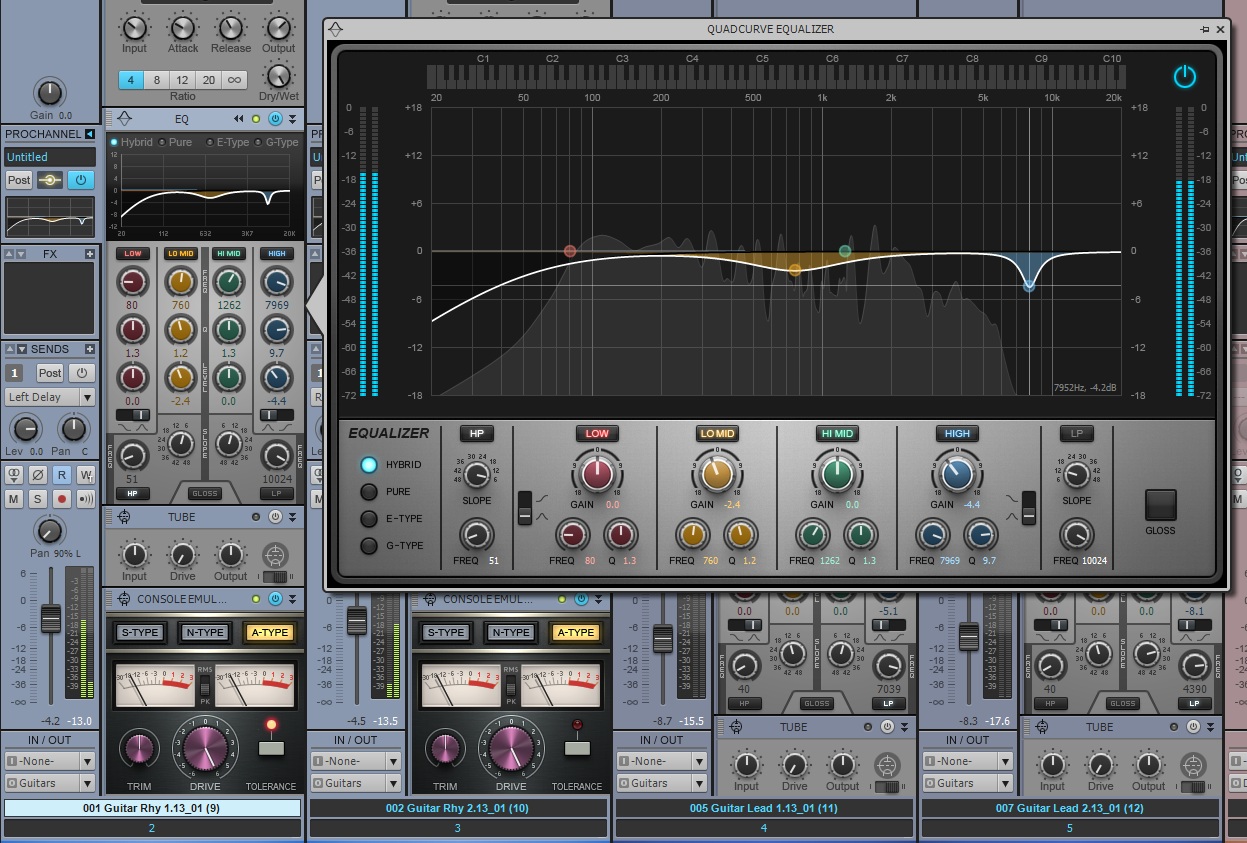
Here I have chosen to attenuate the unwanted rumbling of the of the low end of the rhythm guitars using the supplied HPF. The bass guitar is rather guitar-like in this song therefore it is important to make room for that. The HPF for Guitar 1 was applied at 50Hz and similarly to Guitar 2 at 47Hz. Why not the exact same frequency you ask? Having the slightest Continue reading “Subtractive EQ Part 2: Heavy Rhythm and Lead Guitars”

Subtractive EQ Part 1: Snare Drum

Introduction
Equalization is one of the most powerful tools that an audio engineer can get their hands on. Live engineers, post-production engineers, and recording engineers all have their specific uses for it. It’s so powerful that some beginner engineers habitually reach for it without understanding what it can ultimately do to a mix.

Overview
Let’s resonate on the concept of volume momentarily. It is in our human nature to enjoy music at high volume levels. Concerts are a great examples of this. Outdoor festivals and the like tend to blast our eardrums with massive amounts of volume that we cannot experience in any other format. To most, increasing volume directly correlates to better sound. In a mix setting, dramatically boosting various frequencies can be a crutch for inexperienced mix engineers. By increasing the gain of a specified frequency band on an EQ one can subsequently add unwanted gain to the overall mix. Typically the problem that follows is a battle to keep your master fader from clipping and you all of sudden feel stuck in a gain-staging paradox. This can happen to best of us.

In Use
Apply subtractive EQ techniques to your instruments. Instead of boosting your favourite signals try limiting yourself to cutting. We can call this concept “carving”. Let’s take a look at a musical example. This series of articles will demonstrate some key elements of a typical Rock Mix.

Snare
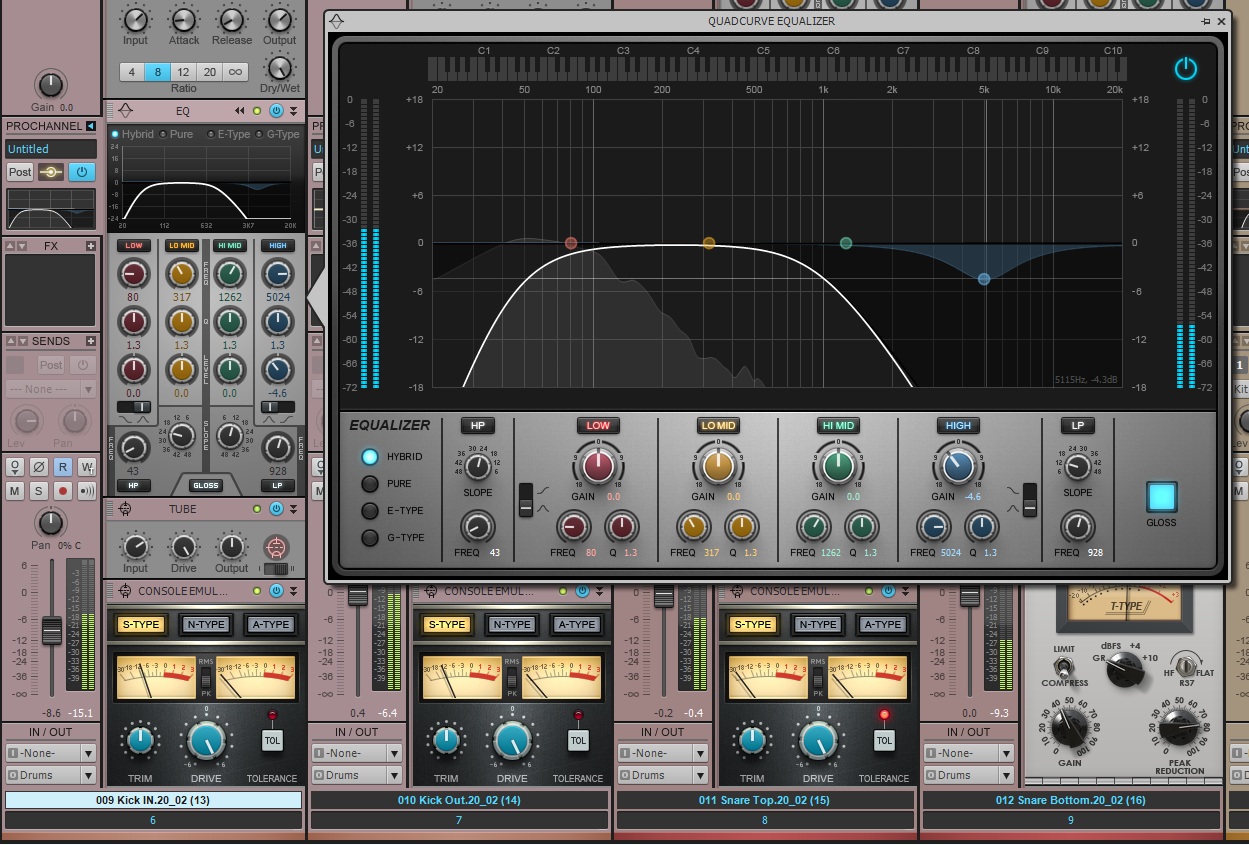
Generally the snare is the focal point of a typical rock oriented mix. I’ve started with all my faders down and raised the snare to a suitable level: 0dBu. This recording was tracked with two snare microphones. The bottom snare microphone captured the sizzle of the snare and the top microphone captured much of the attack.

Snare Bottom EQ

The first drawbacks I noticed when isolating the snare recordings Continue reading “Subtractive EQ Part 1: Snare Drum”

Knowing Your Effects in Addictive Drums Part 1 (SONAR X3 Producer)

Intro

XLN Audio has mastered the art of sampling with their flagship program Addictive Drums. Not only have they been able to capture three incredible kits (standard in full version), but they allow the user complete control over the samples with an in depth effects engine. At first listen the provided presets speak for themselves, but as a power user you should not rely on the presets to define your sound. Let’s take a look at how much control you, as the user, have over the Snare drum and how that can benefit you.

First off, where does a great Snare sound come from?

The answer is easy, it comes from a great snare drum. A drum that is in tune, has a good balance of midrange and high-end, and is properly in phase with the rest of the drum set will always produce good results. A “great” snare sound can be subjective in the music world because many people have their own ideals and opinions about styles. The tactics and techniques used for capturing that snare drum is where the “magic happens” so to speak. XLN Audio provides three solid drum sets with three different kinds of Snare Drums.

Control, Control, Control!

Open up Addictive Drums, solo the Snare, and drop in a simple set of 4 hits and set them to loop mode. Like so:

Let’s take a look at the different options you have within Addictive Drums for creating a great Continue reading “Knowing Your Effects in Addictive Drums Part 1 (SONAR X3 Producer)”

Professional SONAR users weigh in on SONAR X3 – Stability, Performance, & Workflow

X3 is being hailed as the most rock solid edition since SONAR’S inception.  Beyond the new tools and features, a lot of work was put into the core functionality of the program to make sure that even top-notch music-making professionals would find performance improvements.  From the Skylight User Interface enhancements, to audio engine improvements – and everything in between, professional users who depend on SONAR day-in and day-out for their livelihood are weighing in:


Timothy Wynn (Sonic Fuel Studios / SonicFuel.net) – Los Angeles, CA

Congratulations to SONAR X3 user Timothy Wynn on winning Best Score at the CineRockom Film Festival for “The Liberator” this year.  With several globally successful franchises already to his credit ranging from blockbuster video games such as Command & Conquer, Dungeon Siege, GUN, The Punisher, Red Faction, 2K’s The Darkness II, The Simpsons and Warhawk to music in the hit television series Supernatural, Tim Wynn has gained international recognition as a leader in a new generation of highly talented and versatile composers.

Most recently, Timothy used SONAR to work on the feature films “The Starving Games” and “MK Reloaded (2014),” while also scoring EA Sports Madden 25 with Chris Lennertz.

“Cakewalk software has always been great for me in general, but this round of SONAR has really been stepped up.  SONAR X3 is the most stable DAW I have ever used.   I’m running huge projects Continue reading “Professional SONAR users weigh in on SONAR X3 – Stability, Performance, & Workflow”

DEVELOPER NOTES – SONAR X3 QUADCURVE EQ (UI ENHANCEMENT)

Introduction

Since it first appeared in SONAR X1 Producer, the QuadCurve EQ has become my go to EQ. That’s saying something given the abundance of killer plugins in my collection (yes, like many of us, I own far too many plugins).

Maybe I’m just lazy, but I love the fact that it’s always there, ready to go on any track or bus at a moments notice. No need to wade through plugin menus – it’s already waiting patiently in the ProChannel.

And it’s no slouch either. There’s no trade-off for that convenience. The QuadCurve EQ is up there with the best of them.

But, as much as I love it, I admit I have, in the past, occasionally found myself reaching for one of the alternative plugins in my arsenal.

Why? The QuadCurve EQ user interface could be, well, a bit cramped. The small EQ plot is fine for quick adjustments, but not so great for fine-tuning. Metering is also important to me, which the QuadCurve EQ was lacking.

The good news? SONAR X3 Producer addresses these issues, and much more besides.

So what’s new?

See me!

First off, it’s easier on the eyes. The UI is cleaner, clearer, and you no longer need a magnifying glass to read the knob values!

Then there’s the EQ plot, or should that be “plots”? The small ProChannel plot is still there of course, and it’s as useful as ever, but now there’s a new secret weapon at your disposal…

…the QuadCurve EQ Zoom Window:

As you can see, it’s essentially a much larger EQ user interface which, among other benefits, provides a much finer degree of control.

I say ‘secret weapon’ because it may not be immediately obvious how to get to it Continue reading “DEVELOPER NOTES – SONAR X3 QUADCURVE EQ (UI ENHANCEMENT)”

DAW Best Practices: 11 Easy Tips For Project Organization

1. Categorize your tracks by Color

Categorizing your tracks by color can be one of the biggest advantages to keeping a solid workflow when recording or mixing. If your DAW has the ability to do this then figure it out, it should be fairly obvious where these options are located. Try dedicating color schemes to instruments, types of tracks, and the buses associated with your tracks. This makes the overall environment easier to work with, especially if you are handing your work off to another engineer or the artist themselves.
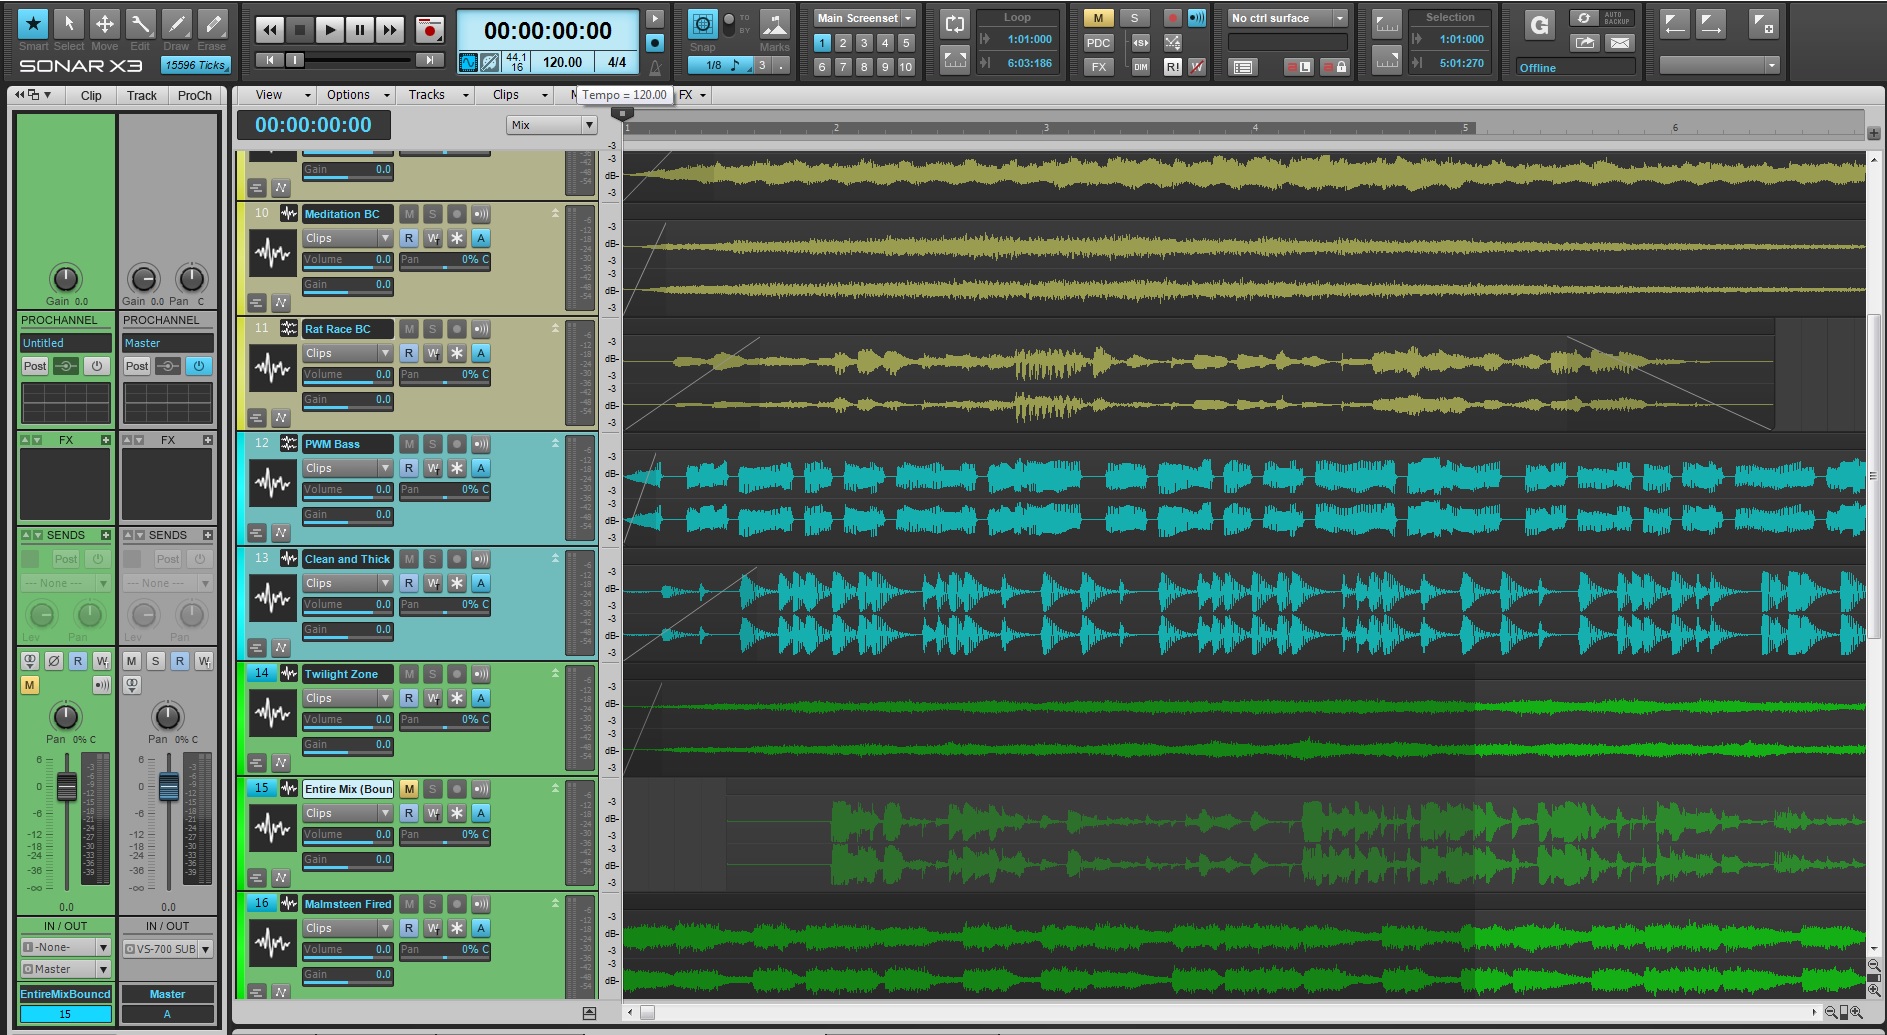
2. Dedicate a Bus to each one of your tracks or groups of tracks

Making final adjustments to your tracks will become easier and more organized once you take advantage of the bus section within your DAW. Setting your tracks to their own dedicated buses reduces them to a single track so that you can adjust an entire section of instruments with one fader, compressor, EQ, or any other plugin you feel is needed. If you are in the final stages of mixing with an artist at your side, I’ve found that typical comments can consist of “The drums could be louder.” or “Can the vocals come up a bit?” These kinds of adjustments could be difficult if you have tons of automation already laid down on your individual tracks. Sending your tracks to a bus will allow you to adjust overall levels easier and more efficiently.

SONAR X3 allows you to organize your tracks by color or choose to follow bus colors based on routing. Read more about Color Customization in SONAR X3.

3. Name your tracks in a way that makes sense

Audio files will take the names associated with the tracks they were recorded on. If your tracks are set to “Audio Track 1-16” then your audio files will be recorded as “Audio Track 1-16”. Make sure to name your tracks in a way that someone could understand them in a passing glance. My naming convention consists of the instrument type, number, amp name (if applicable) and microphone or DI box used. Here are some useful ways to name your tracks.

  • Guitar 1 Egnator 57
  • Guitar 1 5150 421
  • Bass 1 DI
  • Bass 1 Ampeg
  • Vocal 1 U47
  • Kick IN 52
  • Snare Bottom 414

Here are some examples of inefficient ways to name your tracks:

  • Mic 1 John
  • Drum 1 AWESOME
  • Guitar Right 1
  • Bass HEAVY tone 3
  • Kevin
  • Audio Track 27

Notice the difference? Figure out a system that works for you and stick with it.

4. Group tracks that have variations of mic placements

When recording or editing multi-mic’d instruments its useful to group your tracks in a way where all the tracks can be edited at once. At one point in your career you will record an amp that could have 5 microphones on it or a drum set that consists of 20 microphones. Setting up this type of group will allow you make alterations to these tracks without too much headache.
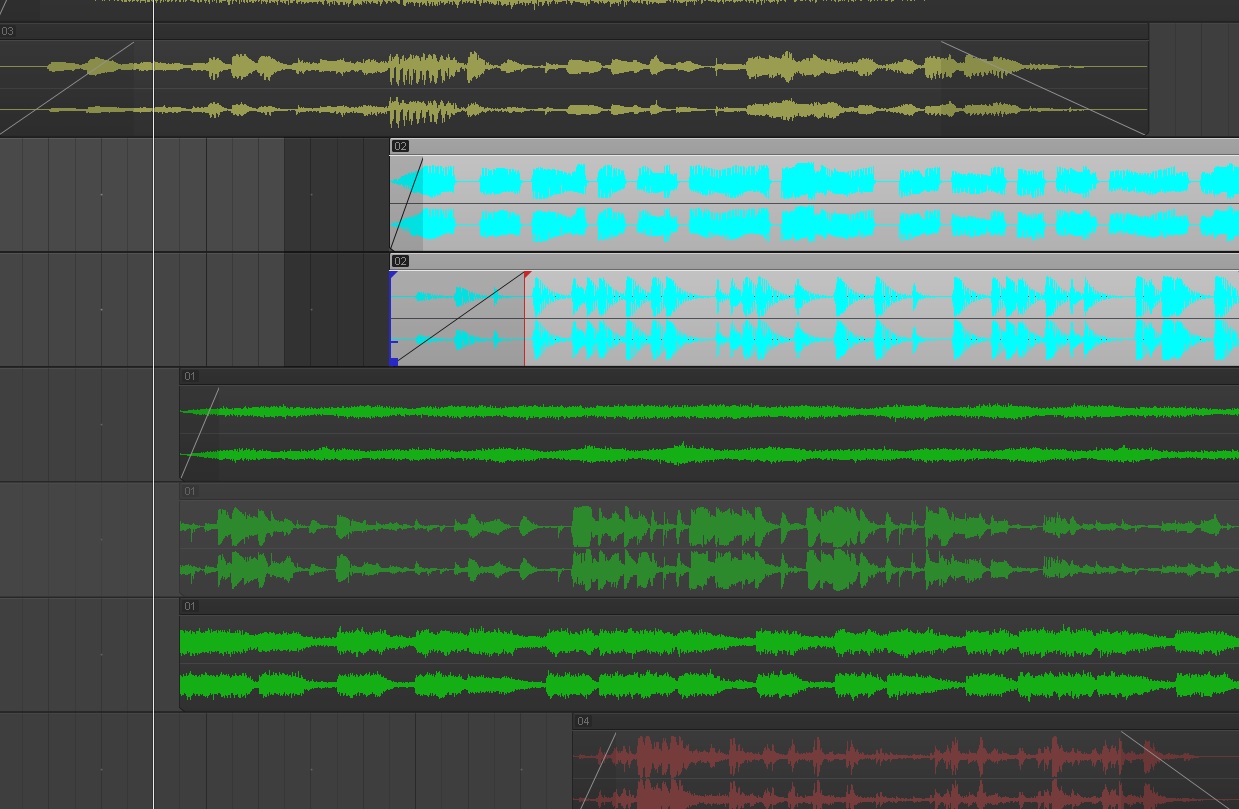
SONAR X3‘s “Region Groups” feature makes it easy to group and edit multiple audio regions at once.

5. Version your projects manually

Manually versioning your projects should be second nature regardless of whether or not your DAW contains an automatic save feature. Every 5 minutes go to Save As and label your project as “Project Name” followed by a number. This keeps your projects organized in a way that allows you to recall your work at a moments notice without relying on some sort of invisible background process. It’s important to have a system in place for saving your projects. It will save you in some of the worst case scenarios.
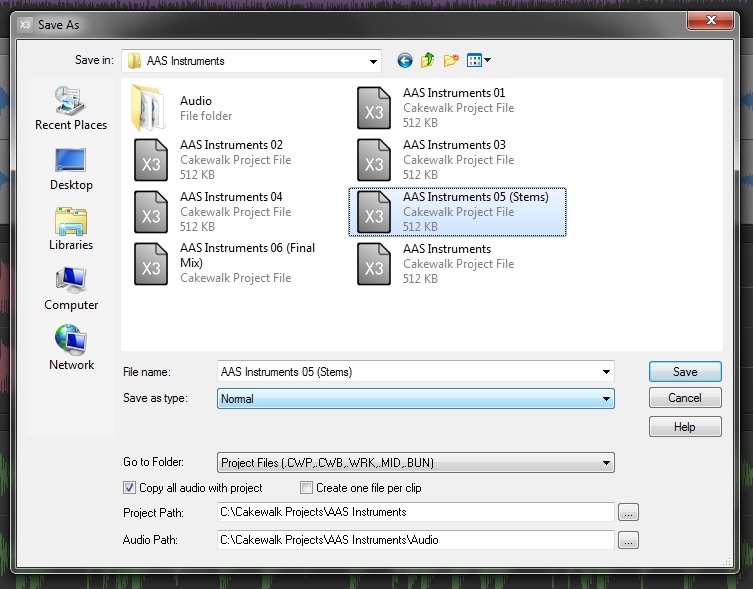
6. Make a dedicated “Bounce” or “Stems” folder

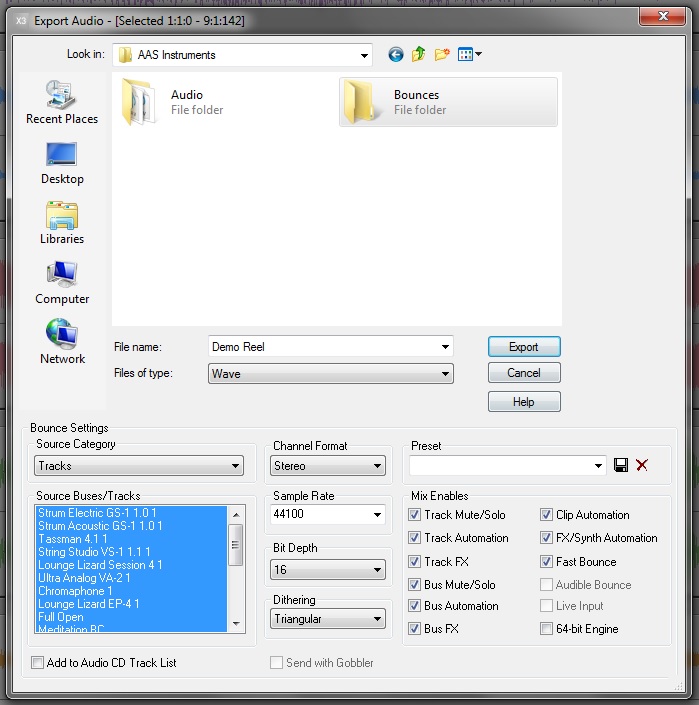
Some DAWs perform this function by default, but you don’t have to change your platform to take advantage of this easy tip. When processing your mixes or rendering stems always make sure to save this audio data to a dedicated folder separate from your audio files folder. This will save you the headache of scrolling through your audio files folder looking for your latest mix or batch of stems.

Just about every DAW has an “Export Audio” window. Change the filepath for this to your project folder and make a new folder called “Bounces” or “Stems”.

  • PC shortcut is CTRL+SHIFT+N for a new folder

  • Mac short is Cmd+Shift+N for a new folder

Once you make the new folder, make another new folder within your Bounce or Stems folder with the current date. Save your audio accordingly.

Now as you send mixes out for review you, will know what mixes were sent and when they were sent. Obviously you can use email for this information, but why not have this data available right in your project folder?
7. Save your plugin presets

This might come as an obvious detail to some, but to others it doesn’t sound so obvious. Saving your plugin presets is definitely worth your time and effort. Everyone eventually switches to another computer or needs to rebuild a project. Having a folder with your presets saved as separate files can be useful in the event your presets do not load or load incorrectly. Never assume that your presets will stay intact, especially with projects that are a few years old.
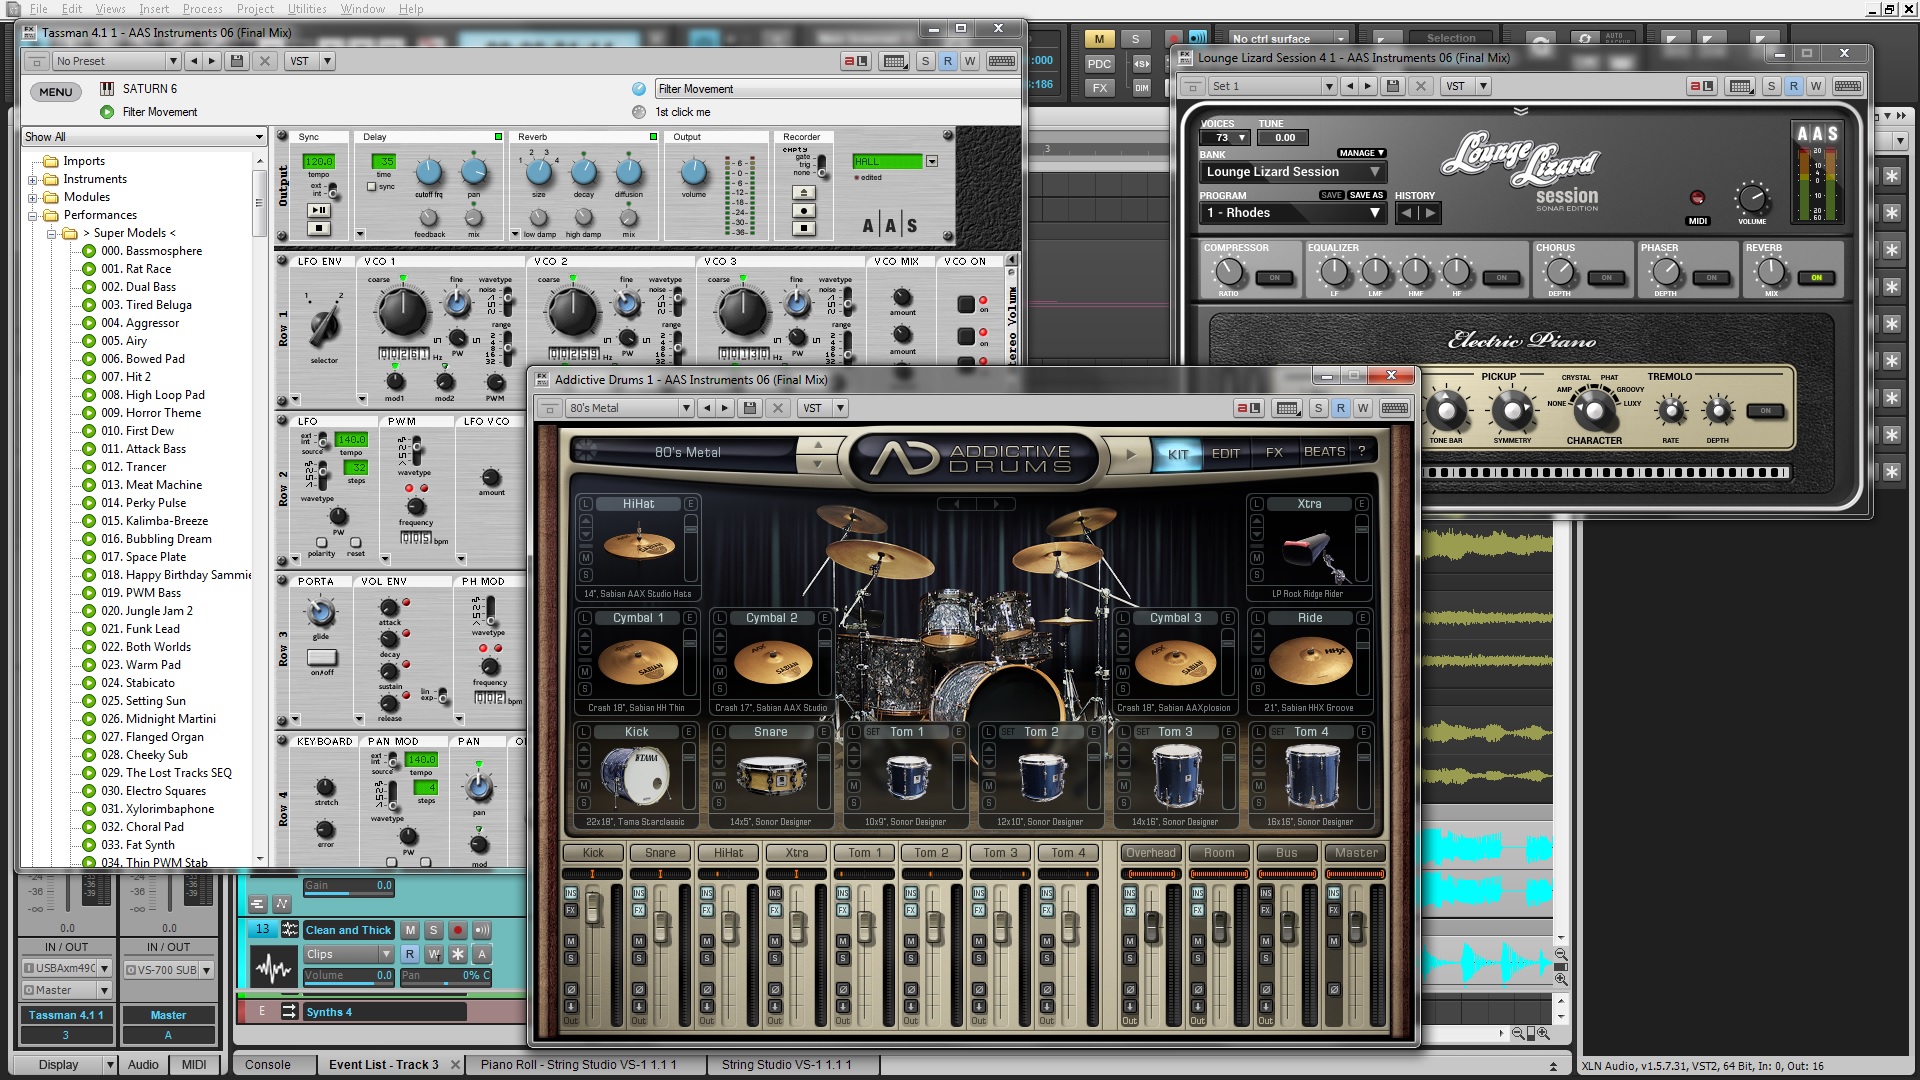
Learn how to set up your Addictive Drums in SONAR X3.

8. Always render your instrument tracks

Make a decision and stick with it. Once you find a sound you like, render it, or mix it down so that idea is encapsulated in an audio file. Loading large sample libraries or syncing external sound generators slows down your session flow. It’s hard to hit the creative ground running when your computer and DAW are constantly keeping you waiting and waiting for unneeded reasons. Do not be afraid to make a decision about a sound. It boils down to knowing your tools and how they work. If you achieved a specific sound once, then you can definitely do it again and better than before.

Rendering your instrument tracks has other benefits too. You don’t need to worry about the MIDI sequencing misaligning with your project tempos, or other computers not having the same plugins you’ve purchased. Saving your data as workable stems or mixes will keep your ideas flowing without any technical speedbumps in the way.

SONAR X3 has been using Fast Bounce capabilities for over 10 years. Choose to bounce your tracks in place, bounce your tracks with buses, bounce tracks to a new track, bounce through your mixbus, or just simply freeze your audio in place.

9. Create templates

Templates will save you time and keep your session organized. Working on full length records can be tedious depending on the style of recording that needs to be done. Some albums start with the drums, move to the guitars, and then vocals, etc. Other albums can be made one song at a time regardless of instrumentation. In the end it’s the engineer’s job to make sure that transitioning from project to project is an easy task with quick setup. Making templates with plugins, routing, and naming conventions already inputted will allow you to move faster than you would think.

The same kind of logic can be applied to the mixing world. Make a template of your typical 2Mix bus, audio buses, and favorite processing plugins so that you can just drop in audio files and begin working. Time saving is important, but being organized is what makes or breaks your session flow.
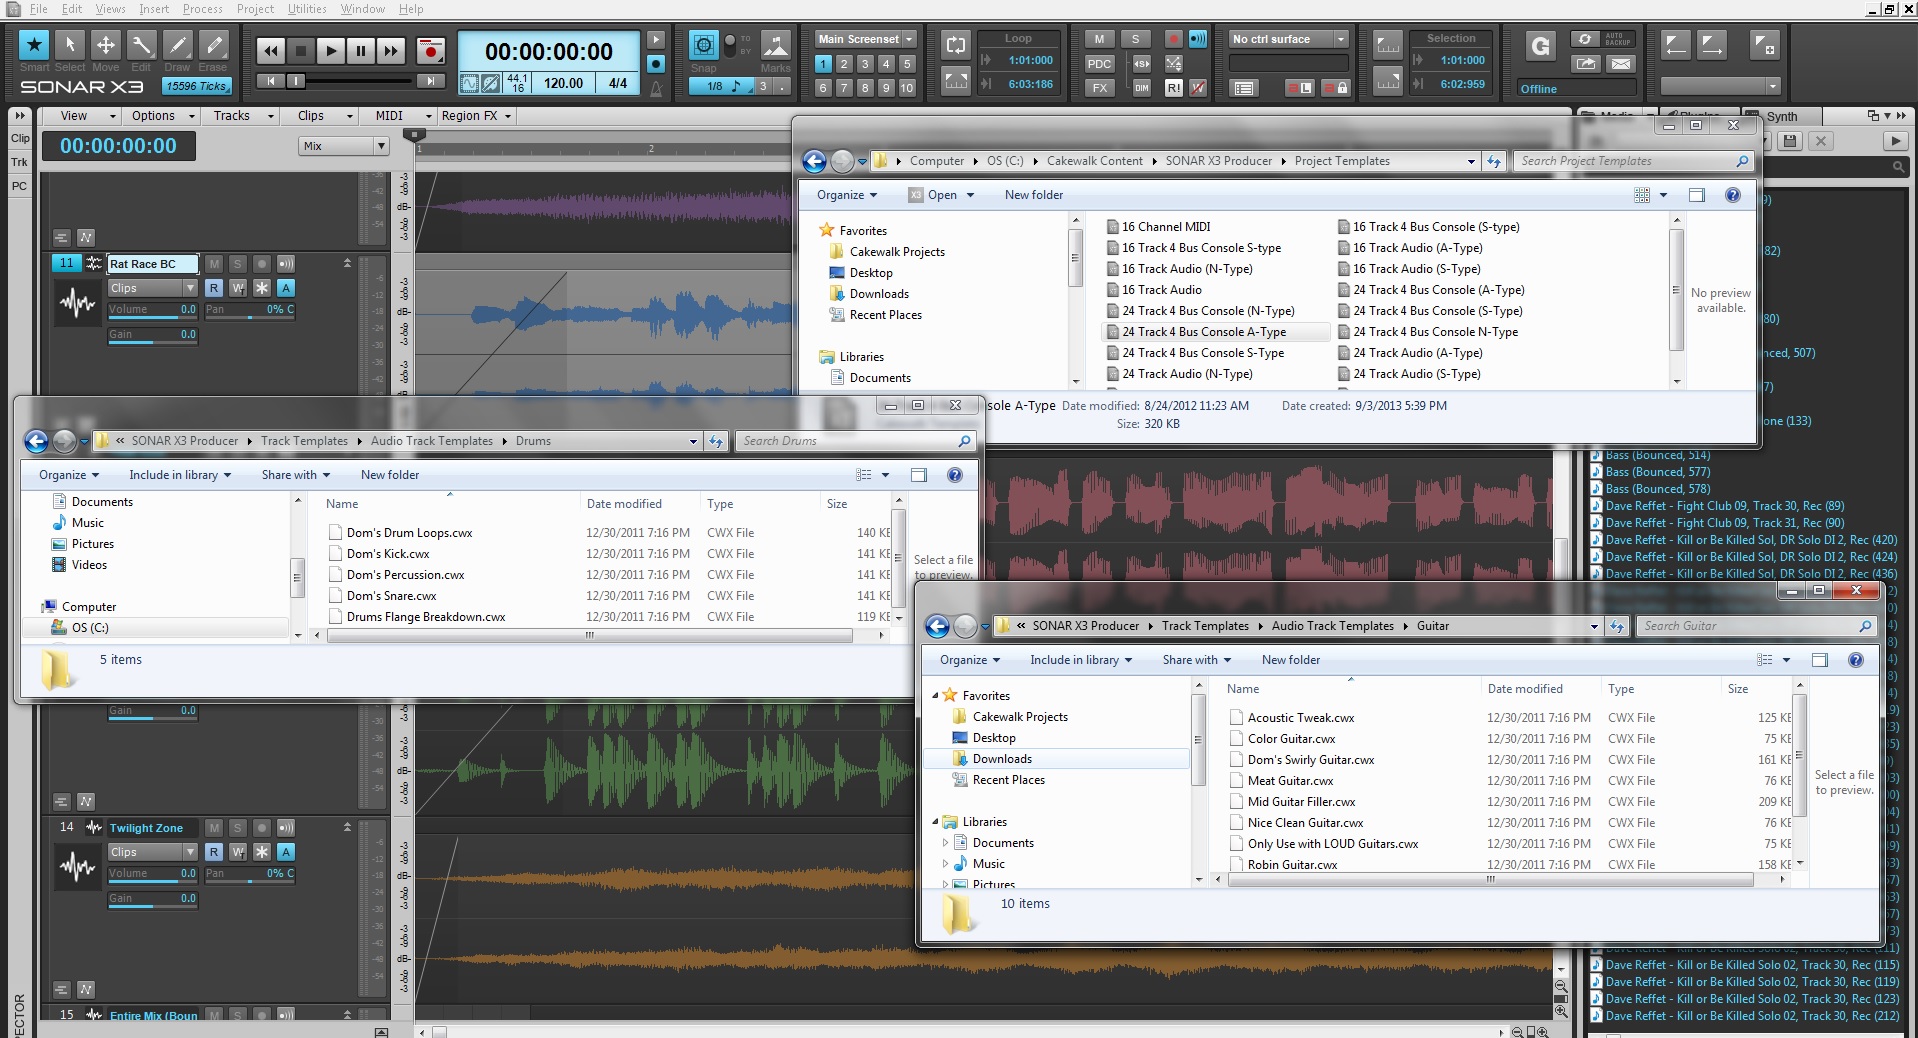
SONAR X3‘s powerful track and project templates allow users to fully customize a project for any environment.

10. Master your keyboard shortcuts

Everyone should have a set of their favorite keyboard shortcuts within their DAW. Know them and master them so that your workflow does not suffer from mis-clicking or awkwardly sensitive mouse scrolling configurations. Some DAWs allow for customizable keyboard shortcuts and the ability to import and export shortcut libraries. Get to know these types of features because speed and efficiency is what will save you time in the studio and allow you to focus on the music. Create shortcuts for recording, mixing, composing, or even audio editing so that you can fly between different workflows without fumbling around in menus and with mouse clicks.
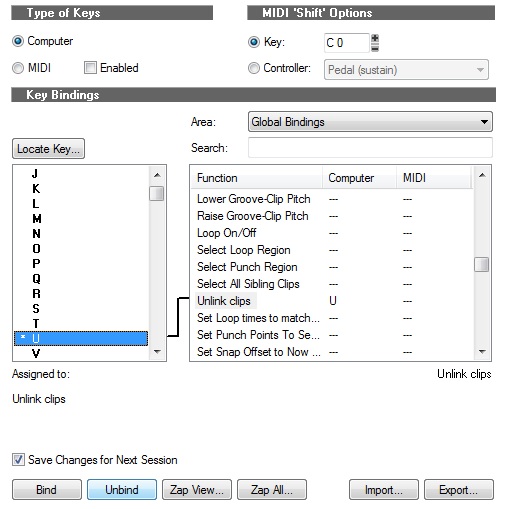
SONAR X3 comes with keyboard shortcuts from other DAWs and allows it’s users to make their own and save them externally.

11. Use Markers and name them accordingly

Markers can be overlooked by aspiring engineers and producers, so make sure to understand how to generate them and modify their names. Mark the verse, chorus, lead section, bridge, intro, outro, and possible punch points so that you know exactly where to go when the artist or producer needs to jump to different sections. You are never going to know exactly where every small important detail of the track starts or even its timestamp unless you are very close to the music. Markers are there to be used, so use them!

\

SONAR X3 was used in these pictures, click here to find out more.

SONAR X3 Quicktip: Make Your Voice Thicker (Studio & Producer)

Vocal production can lead to many different types of processing. Sometimes subtle enhancements to your vocals can make all the difference in the final mix.

SONAR X3 Studio and Producer introduces Melodyne Essential as a fully integrated and pitch correction editor.  This easy to use software allows users to access their Melodyne right from the Multi-Dock without needing to perform any special tricks within the software.

One great way to process vocals is to add low end to them without using EQ. Thickening up a vocal can be a tricky task but now with the use of Melodyne you can take advantage of it’s pitch correction abilities.

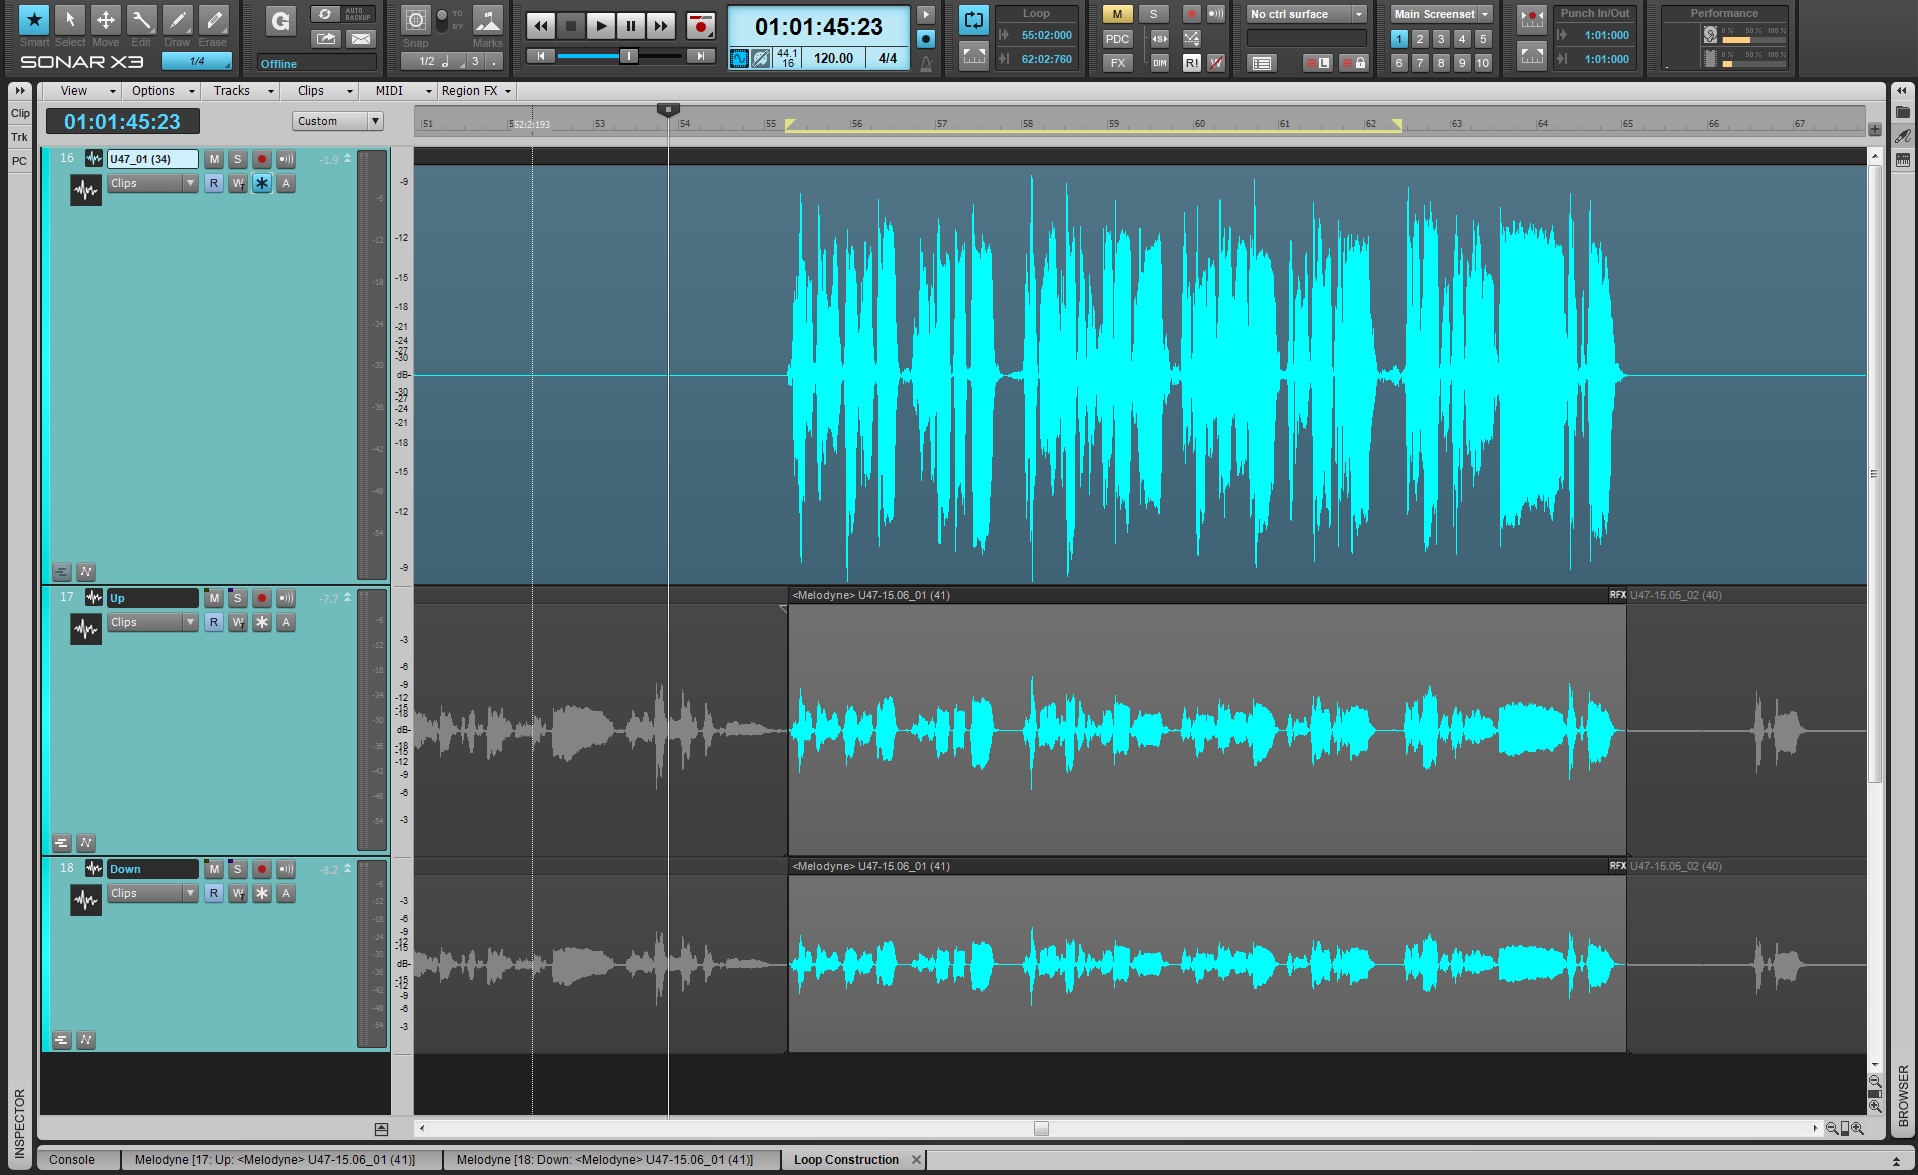
With the deep integration of ARA technology simply do the following to edit pitch:

  • Insert a vocal track that needs some help in the lower register.

  • Highlight the desired audio region

  • Go to Region FX and highlight Melodyne

  • Melodyne will appear in the Multi-Dock

Minimize the Melodyne Editor for now and do the following in the Track View

  • Highlight your audio track and right-click on the Track Pane

  • Select [Clone] and make sure to enter 2 in the selection for “repetitions”

This will load two tracks with the same Melodyne region enabled.

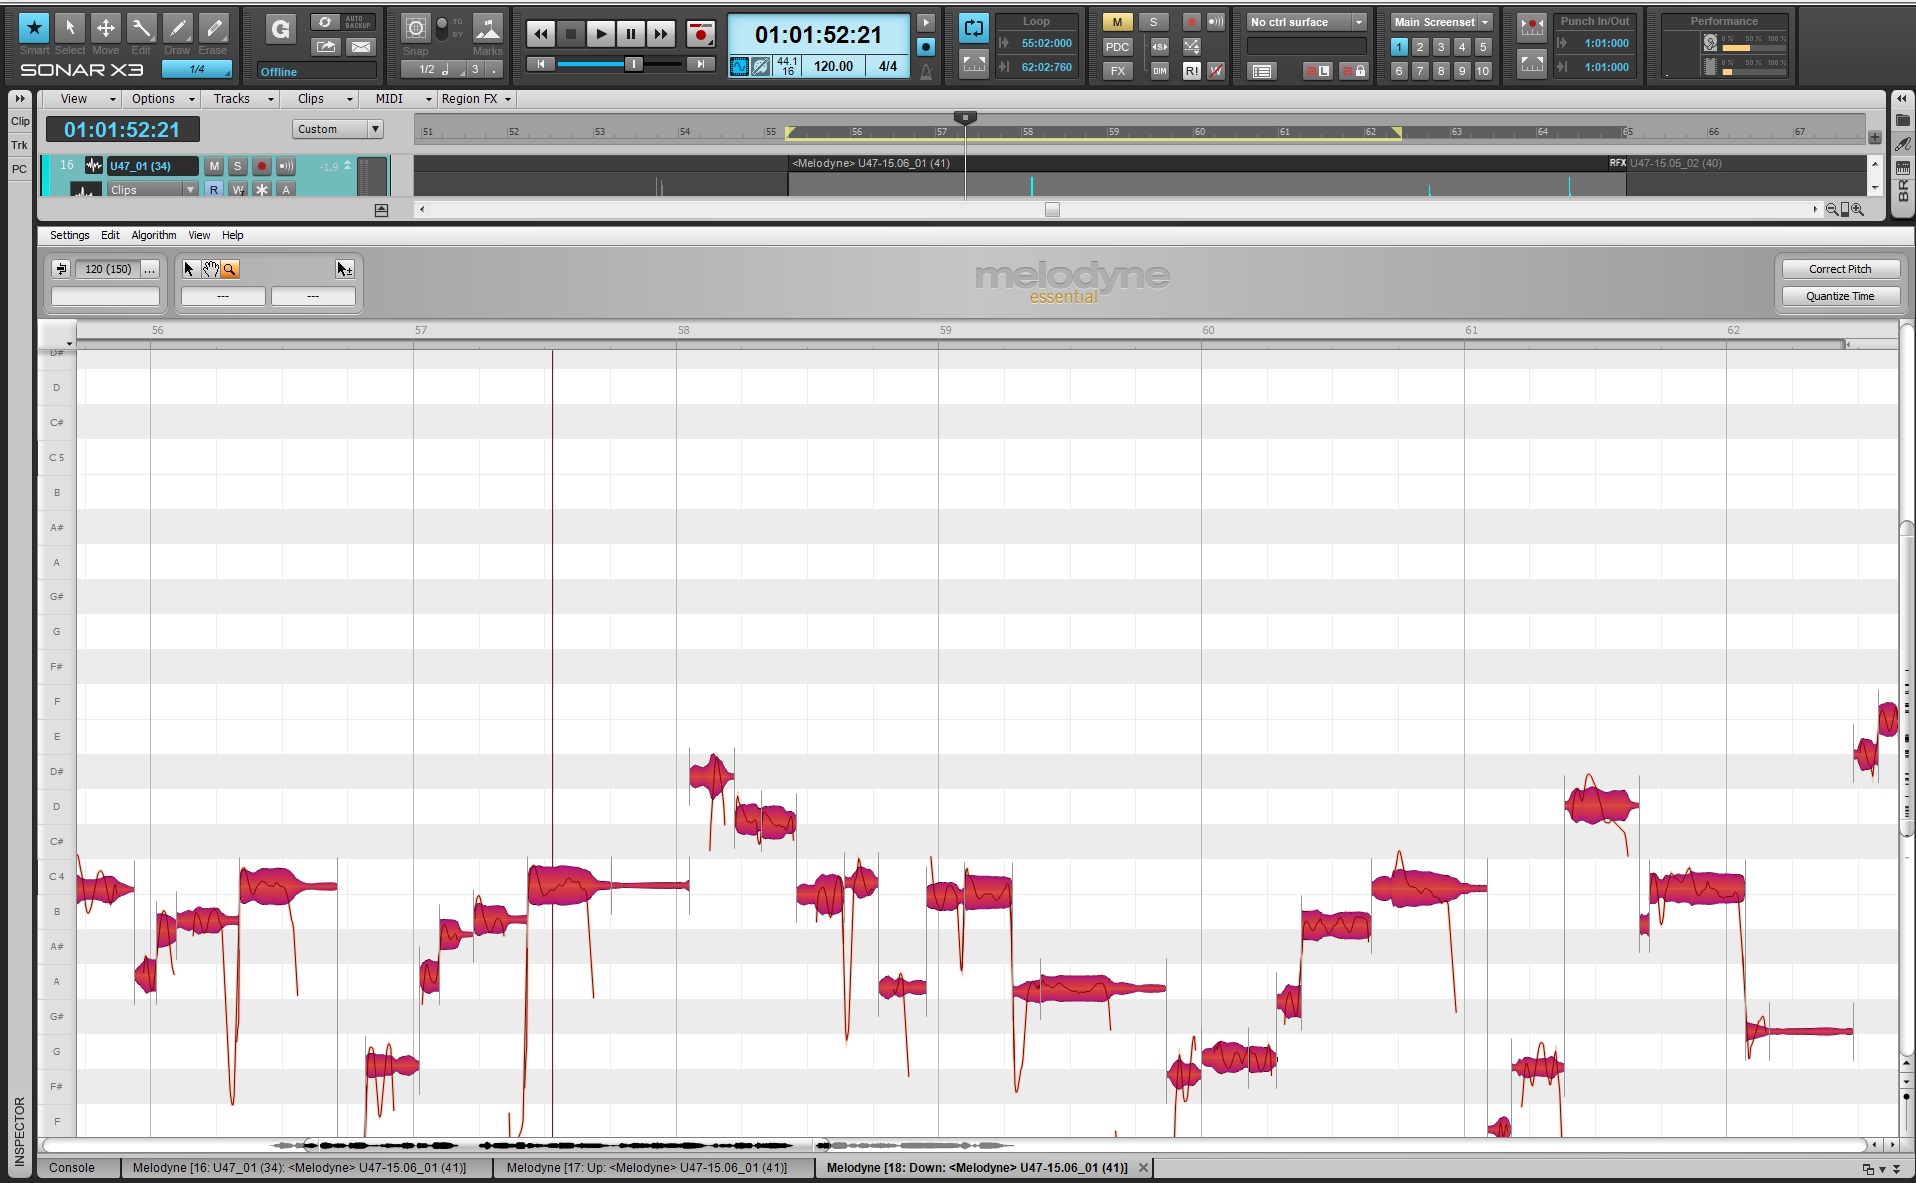
  • Open up the first region within Melodyne

  • Go to Edit > Select All or simply hit CTRL+A

  • Within Melodyne use the magnifying glass tool to zoom in on one specific blob

  • Within Melodyne go to Edit > Pitch Grid and select No Snap

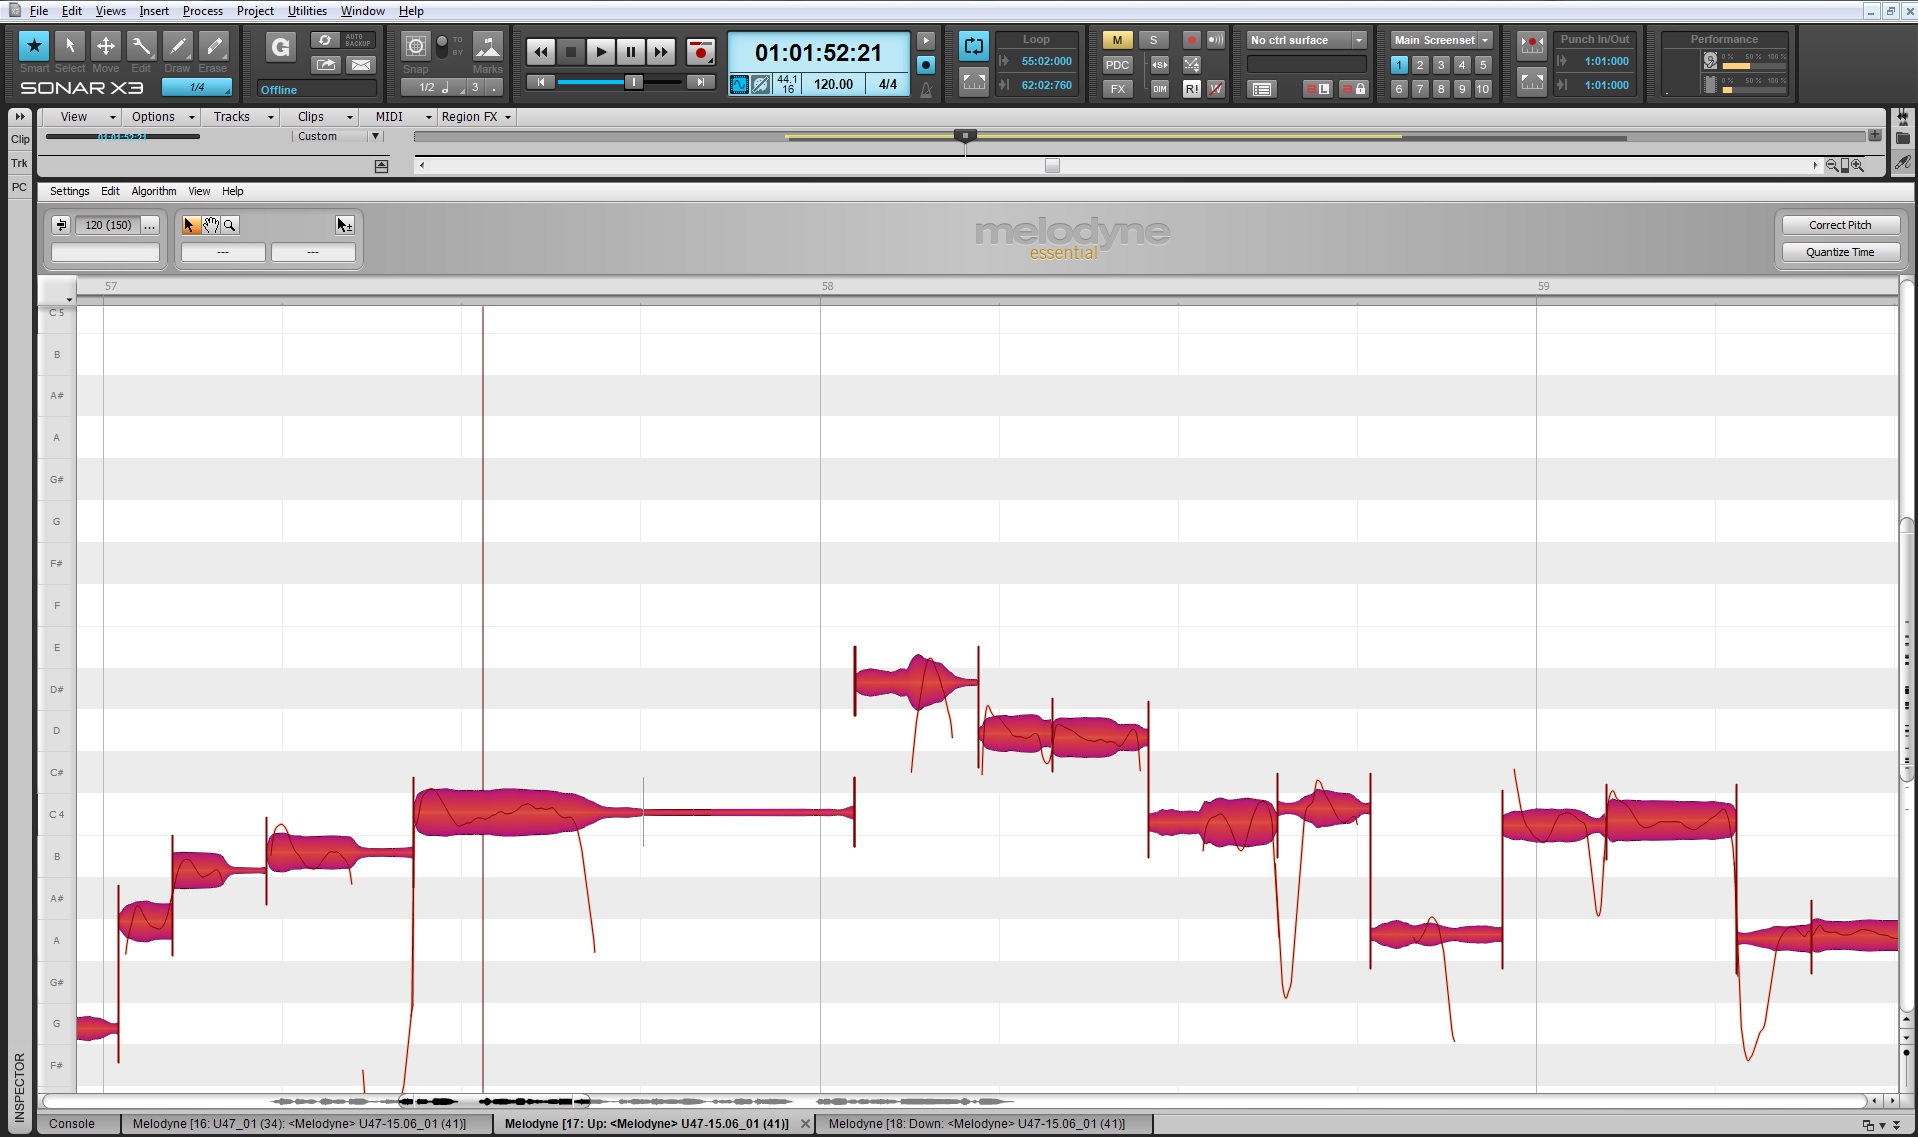
  • Using the “Main Tool” click and drag the entire selected track down every so slightly

  • Do the same with the second cloned track but in the opposite direction

  • Now pan both tracks somewhat out in width and mix them underneath your main vocal track

  • Apply a Low Pass Filter to both and any other processing you want to experiment with, here I added some saturation to both tracks

The goal here is to create a parallel thickness underneath your track so that your vocal becomes more present in the lower and punchier frequencies.

Try it out, and experiment with more parallel DSP effects and you’ll start down a route of unlimited effects.

Learn more about SONAR X3 here.