Melodyne is not only a great way to tune vocals and still maintain their musical quality it can also be used for several other unique purposes like creating a tempo map from a live audio recording or extracting MIDI from audio. In this tutorial, we’ll be looking at using Melodyne to make things multiply for added thickness and depth.
What is doubling?
Double tracking is an audio recording technique where a performer sings or plays along to their own performance, to produce a “bigger” sound than can be obtained with a single voice or instrument. It is a form of overdubbing; the distinction comes from the doubling of a part, as opposed to recording a different part to go with the first. The effect can be further enhanced by panning one of the performances hard left and the other hard right in the stereo field.
Doubling Audio with Pitch
If you are working with a single vocal track and want to thicken things up, a classic technique is to create two copies of the original track and tune one track up and the other down very slightly. When mixed into the original track this will add additional texture and thickness to the vocal. To add width, simply pan each copy slightly off-center from the original track.
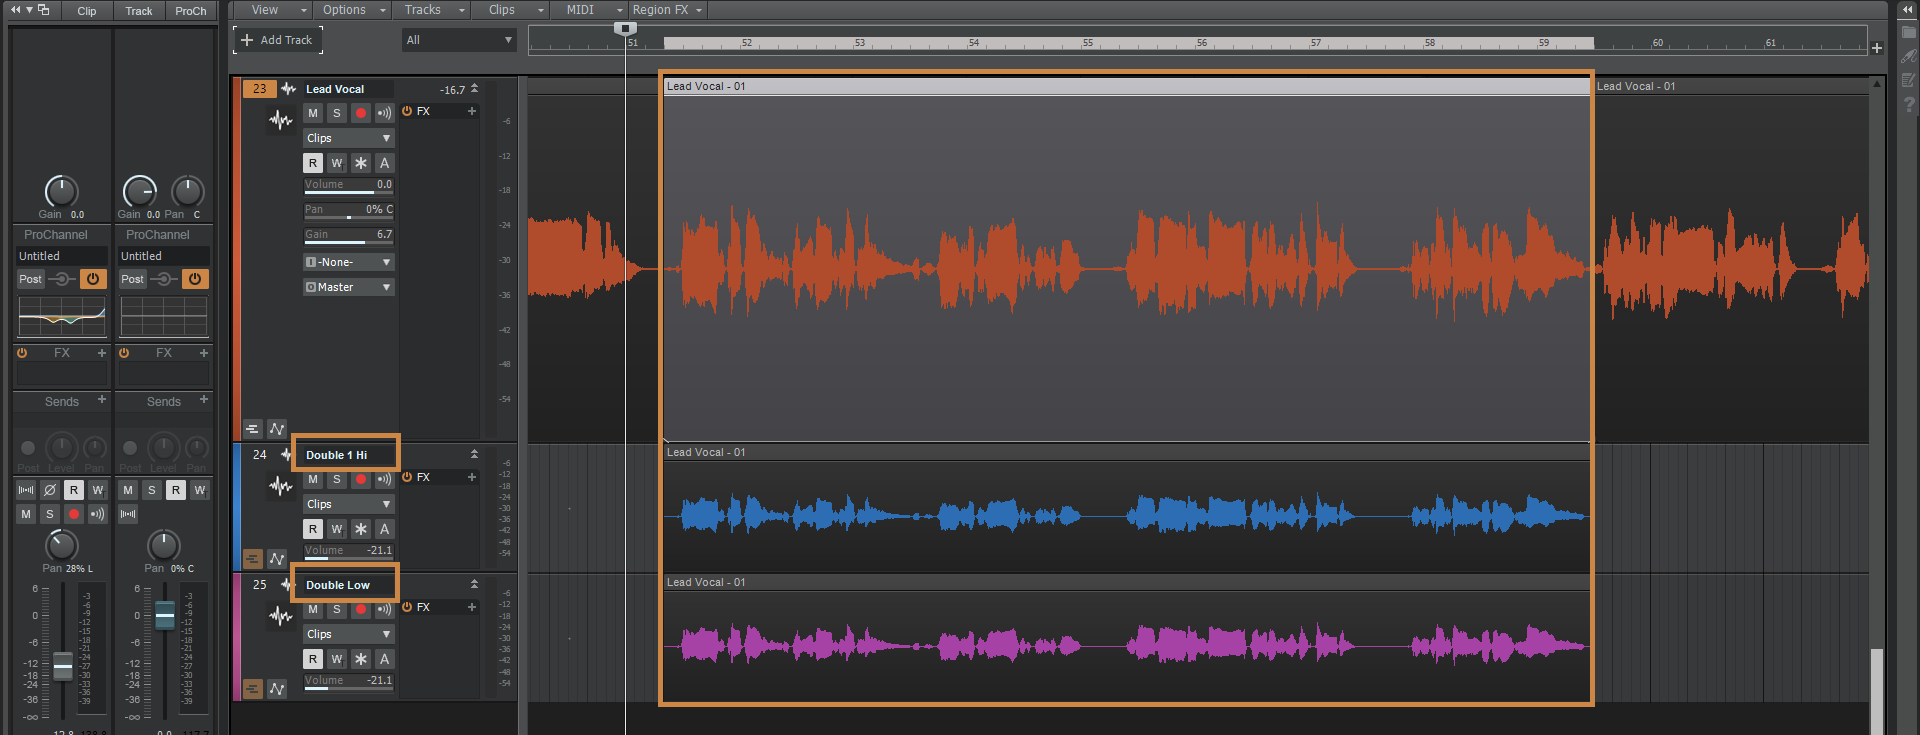
Open a project with a vocal track you want to double and click the Add Track button and make 2 additional audio tracks. Give each track a unique name and then hold down [Ctrl]+[Shift] to copy and lock the position and drag the vocal clip to each track to create both copies.
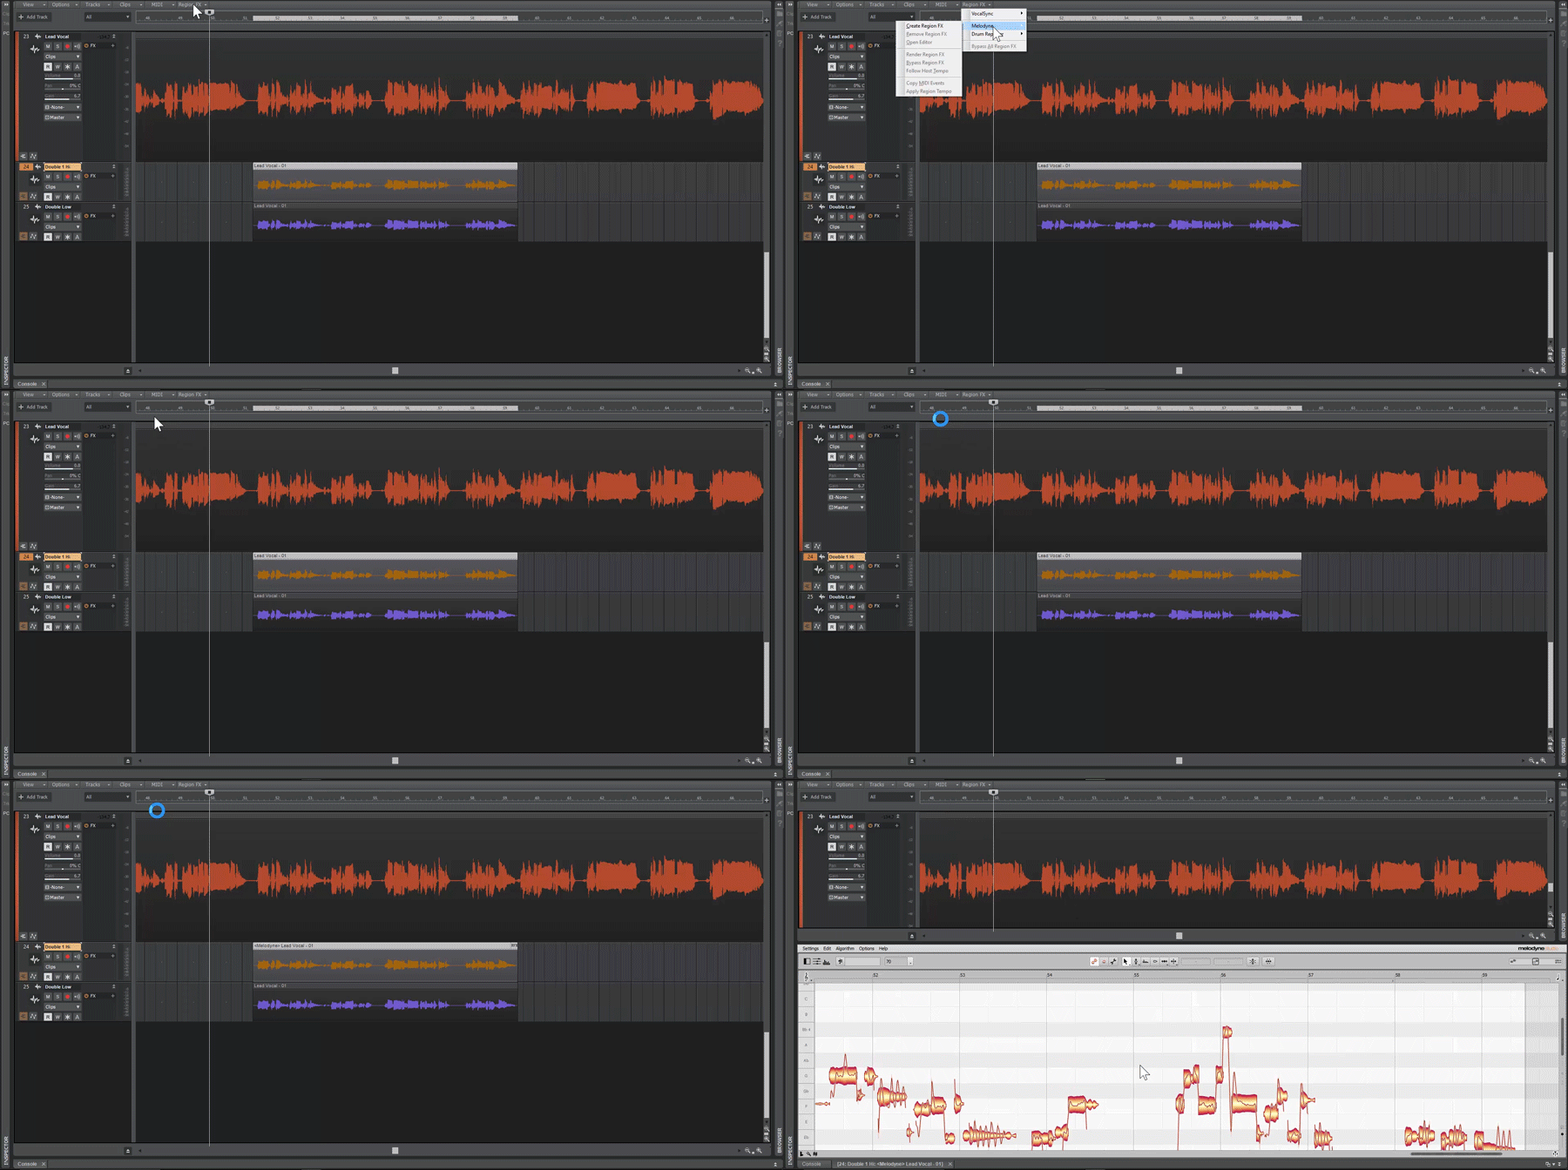
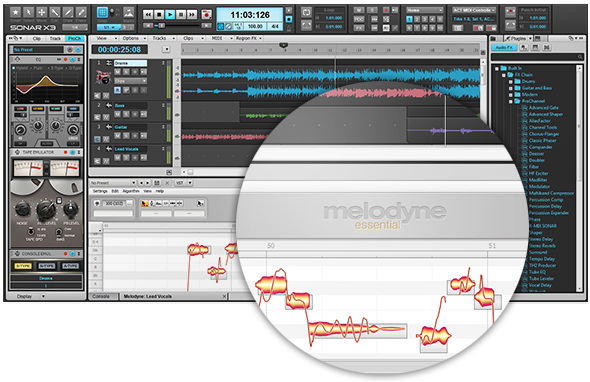
To create a Melodyne clip, click on the first copy and press [Ctrl]+[M]. Melodyne will open in the MultiDock. You can also use the Region FX menu and select Melodyne | Create Region FX.
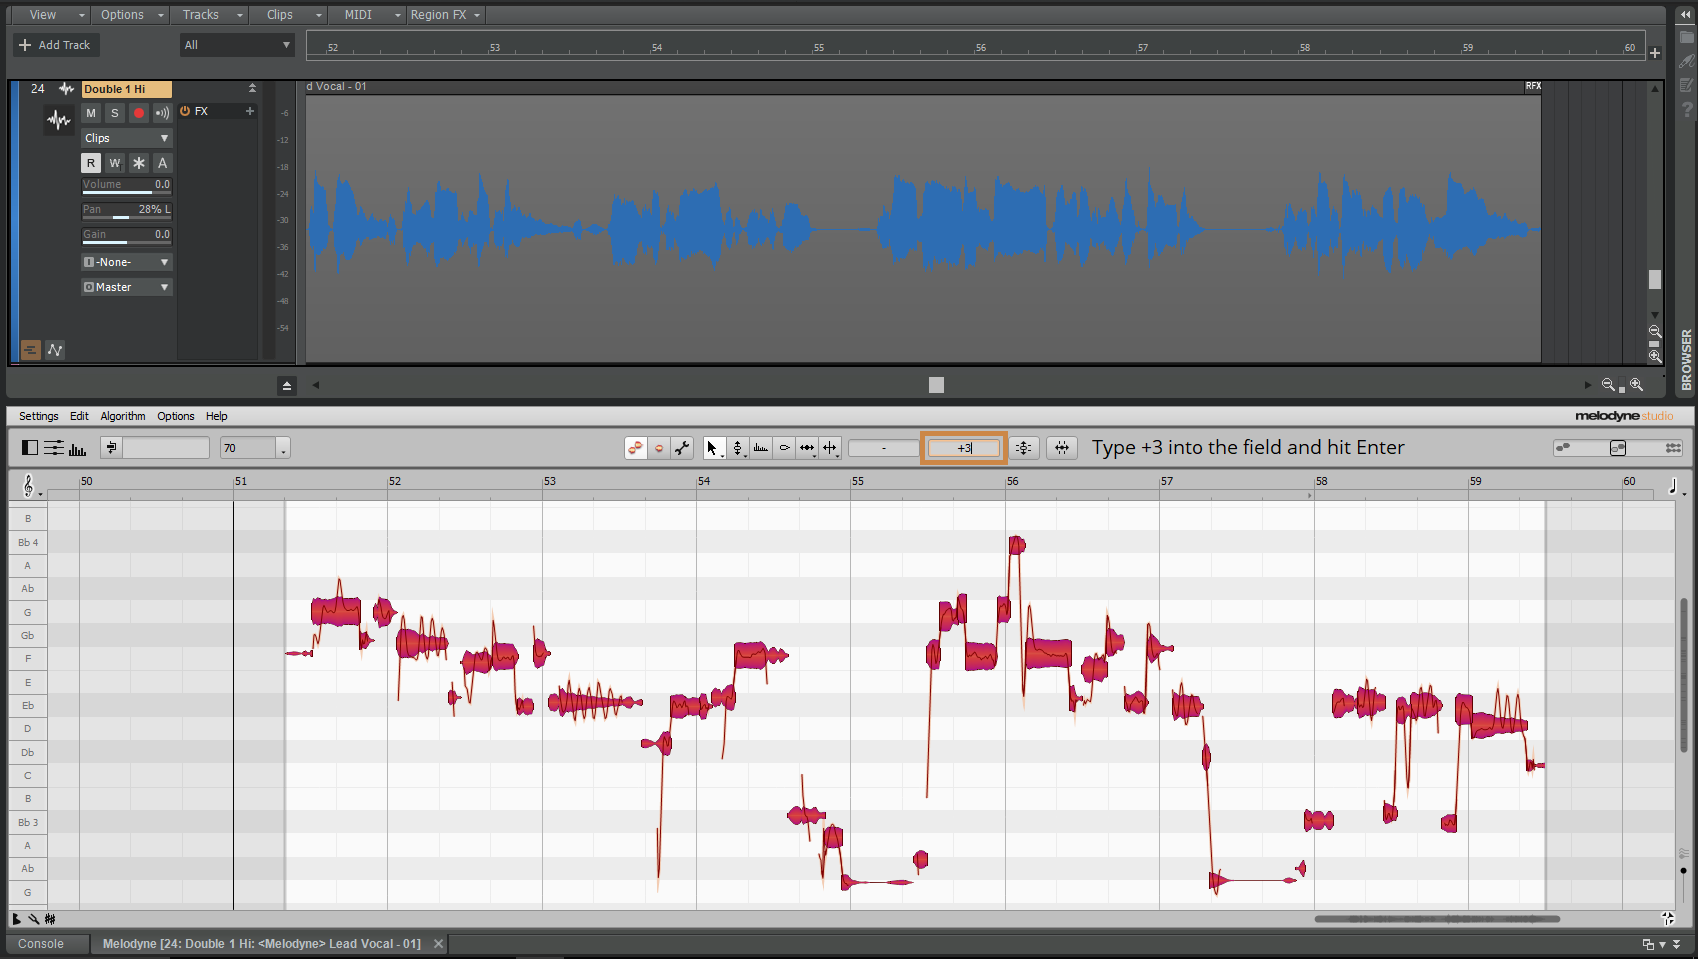
Select all the notes in the Melodyne window by clicking on one note then pressing [Ctrl]+[A]. Use the fine tuning control to tune the first track up by +3 cents. Double click in the area with the orange rectangle around it to type in the desired amount. Once you have entered the amount you can click away or hit [Enter] to apply.
Repeat the steps for the second copy and then use the Inspector to mix both track in to taste. You can select both tracks at the same time and then use [Ctrl] to create a Quick Group. You’ll then have the ability to bring the volume Up / Down and mix it into the original track. Play around with the panning as well to get different amounts of width in the mix.
Pro Tips:
- Use Pan to create additional width.
- You can use the format control to create even more separation from the original.
- Add additional processing to the doubles for other interesting sounds.
Doubling a Live Instrument with MIDI
More often than you can imagine producers want to hear an additional sound in a recording and those instruments or a player for them are not around. As a piano player, you have many options available to you with the use of virtual instruments and MIDI. What if you are a guitar player who wants to create a double on an instrument you don’t play or don’t own? You are in luck, with Melodyne and SONAR we make this a price of Cake.
* This process works best with single note lines but can also work well for simple chords or double stops as well.
Create a single note recording of a hook you want to double and use the Add Track button to create an instrument of your choice.
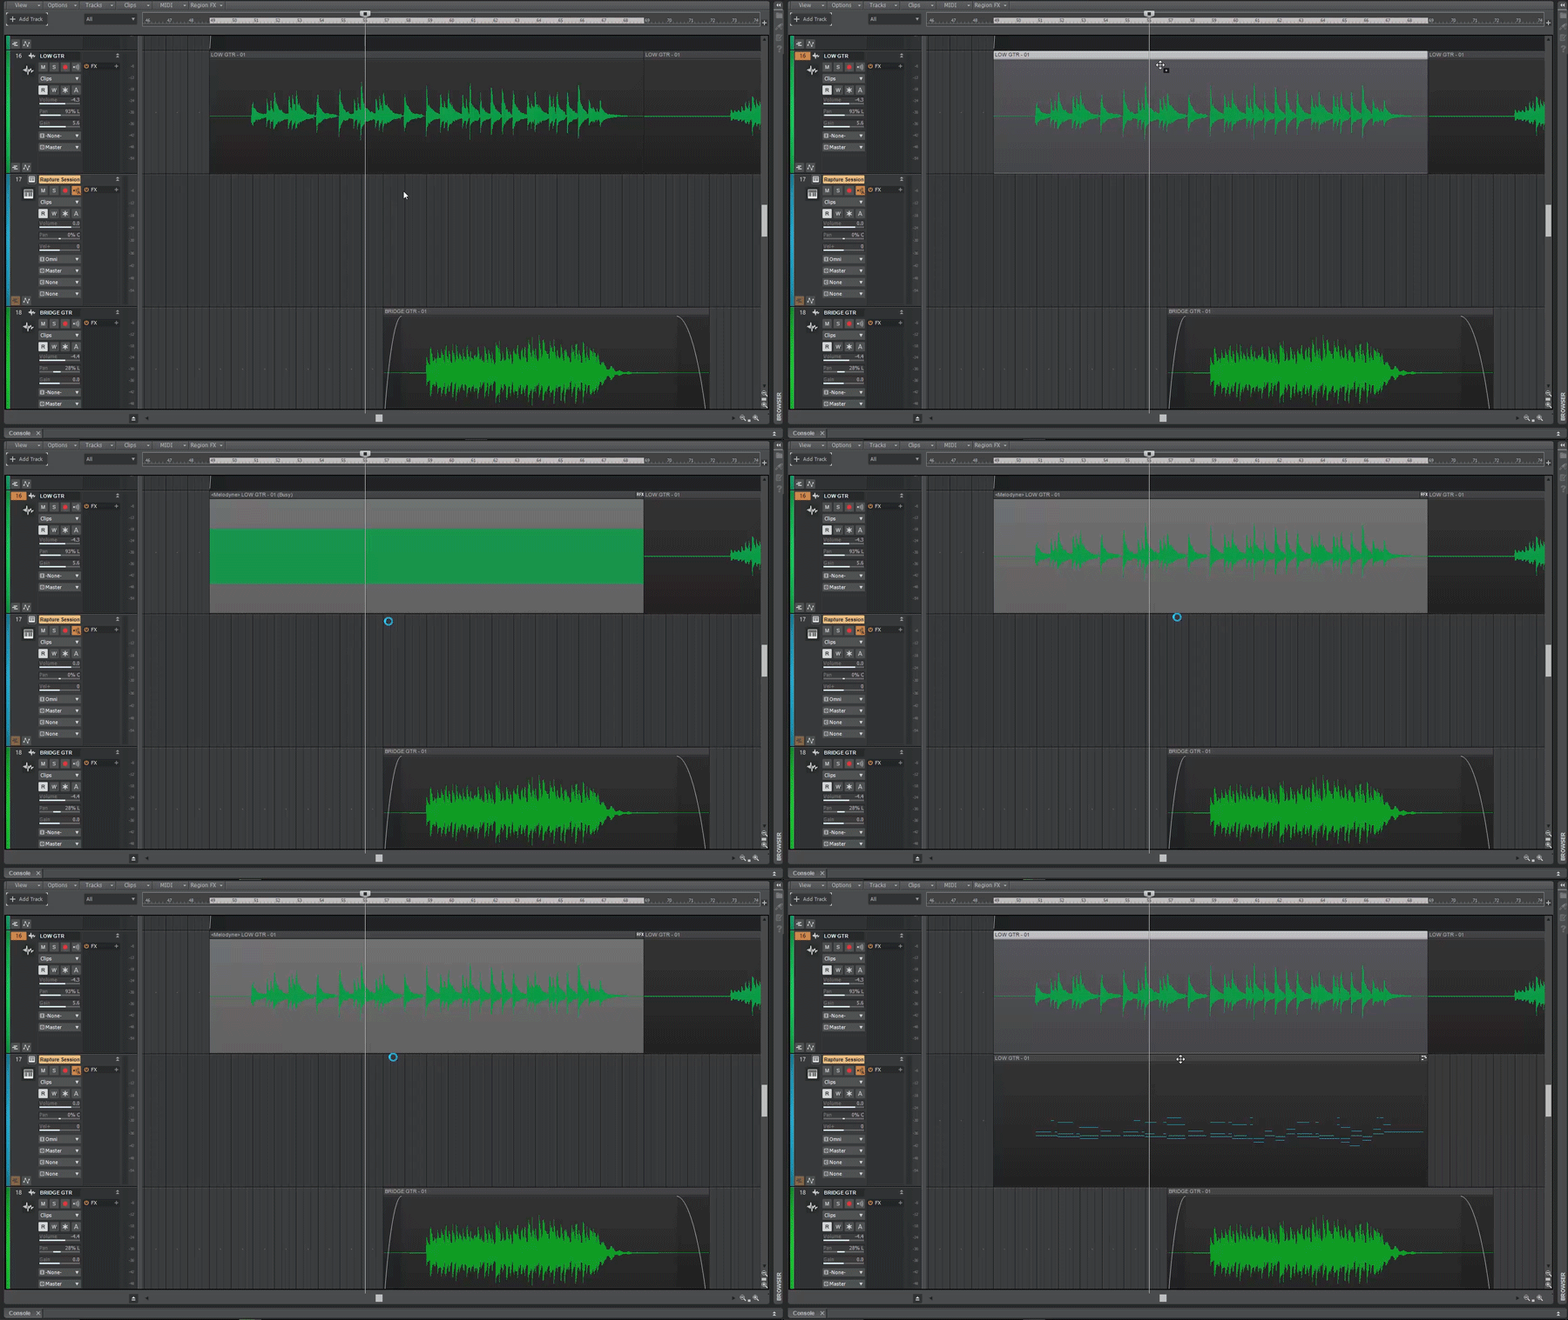
Hold down [Ctrl] and drag the audio clip to the Instrument track. Watch as Melodyne automatically converts the audio to MIDI. Double click the newly recorded clip to make any adjustments needed.
Pro Tips:
- Hold [Shift] while moving notes to maintain their original location in time.
- Select all the notes and drag to a higher or lower octave.
- Create a harmony by selecting a scale to snap to and then drag the notes up or down by a 3rd.
Melodyne Essential is included with SONAR Professional and SONAR Platinum. If you own SONAR Artist you can follow along using any demo of Melodyne from the Celemony Website.


