As you may know by now, the Bakers at Cakewalk are constantly on a mission to improve upon SONAR. Whether that’s a bug fix, a new feature, or a feature enhancement, we’re giving you the tools to be creative and get the job done. In 2016 we brought you workflow improvements for comping such as improved copy and paste functionality, keyboard shortcuts (adjusting stretch and crossfades), as well as visual improvements and customization options for take lanes. With the 2017.02 release we take things to a whole new level, with a host of new features based on your feedback. Don’t forget, if you have features or enhancements you’d like to see, drop us a line at bakery.cakewalk.com and let us make SONAR even better! For now, let’s dig in:
Free Impulse Responses For Your Convolution Reverb
by Daniel Gonz
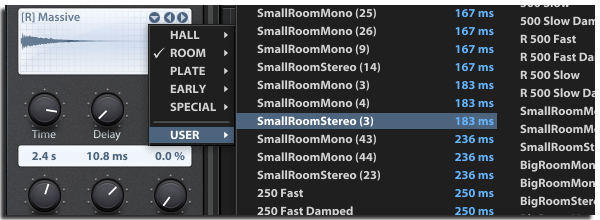
We’d like to release an impulse pack that we created last year in New York City. This free impulse response pack captures the simple ambience of two fantastic live rooms for drums, vocals, and pretty much any acoustic instrument you can imagine. Drop them into your choice of any convolution reverb to add depth to the elements of your mix.
Download the FREE Impulse Response pack here
Anatomy of a Project: A Nontraditional Approach to a Commercial Recording
By Jimmy Landry
 Last summer, Peppina—a young female artist from Finland— plunged herself into the NYC music scene for two months. With the help of renowned NYC entertainment attorney Steven Beer who discovered her, she managed to head back to Finland with a major-label sounding EP. The project was recorded in different ways, in different locations all over the city—and with budgets being slashed, these days it’s pretty much hand-to-hand combat when making a low budget recording where anything goes. But the upshot is yes, you can record a commercial-sounding record on a budget—so here are some of the techniques we employed to accomplish that goal. SONAR Platinum was instrumental in saving time on this EP. Between the Drum Replacer, VocalSync, onboard Melodyne, Speed Comping and general speed enhancements, I got to the finish line a lot faster than previous records. I highly recommend anyone who’s on SONAR XX to take a close look at what the program has brought to the table in the last year.
This all started when Steven Beer called about an artist he’d heard sing at a film festival, and invited me for a meeting at his office. Interestingly, there were two other producer/writers there as well—a bit unorthodox, but pretty much anything goes these days, so nothing really surprises me anymore. We discussed the artist’s interests, influences, and other variables, and then listened to some of my reel as well as music from the other producers. It turned out the lawyer’s master plan was to bring the three of us together to co-write, record, and mix a five-song EP before she went back to Finland in 45 days.
 Peppina already had some momentum in Finland from a loop she wrote and uploaded to a site called HITRECORD (owned by actor and director Joseph Gordon-Levitt). Her upload was so popular that Gordon-Levitt flew her to California to perform the piece at the Orpheum in LA during one of the show’s TV episodes. This all sounded good to me, so I signed on to a production team that would share in the production duties and heavy lifting. As to budgets…well, there was enough there for us to take it on as a challenge.
Continue reading “Anatomy of a Project: A Nontraditional Approach to a Commercial Recording”
Anatomy of a SONAR Project: Replacing the Placeholder
DELIVERING MUSIC FOR THE FILM “FOR BLOOD” (COFFEERING ENTERTAINMENT LOS ANGELES, CA)
 Sometimes I am fortunate enough to have the time to take on a project outside of Cakewalk, and I love that those projects let me put our current SONAR Platinum “Rolling Update” to the test in the field. Recently, the LA-based production company Coffee Ring Entertainment asked me to write, produce and deliver three tracks for their new movie, For Blood. This article describes highlights of the process involved in writing and producing one of those tracks for a specific scene in the film.
My first question to the director was, “Do you already have placeholder music in the rough cut?” When producers and directors have placeholder music they like already set into the cut, it speeds up and simplifies writing and producing the music. Fortunately the answer was “yes,” so all I needed to do was replicate what they liked about their placeholder tracks using the array of instruments and plug-ins in my home project studio rig.
A primary objective in writing music for film is to forget about yourself and your own emotional agenda. And oddly enough, for me at least, this notion really speeds up the workflow because you are writing/producing for someone else’s purpose other than your own thoughts. Adamantly keeping this in mind throughout the writing/producing process helps to stay focused on what the client wants. For this song, it’s exactly what I had to do because the producers had a Tarantino-ish type track set into the scene, and my innate production style tends to lean more towards big, clean commercial pop rock. Luckily, I could go to YouTube and analyze suitable styles of music but even luckier for me, SONAR’s Addictive Drums and TH2 plug-ins were ideal for dialing in the kind of music that was needed. Continue reading “Anatomy of a SONAR Project: Replacing the Placeholder”
Mixing Vocals: Create Depth with a Digital Reverb
by Dan Gonzalez
Depth is a factor of every mix, just like Height and Width. This is a harder concept to grasp because there really is no “Depth” adjust on a mixer. In this article we’ll talk about how to create depth using the Sonitus Reverb.
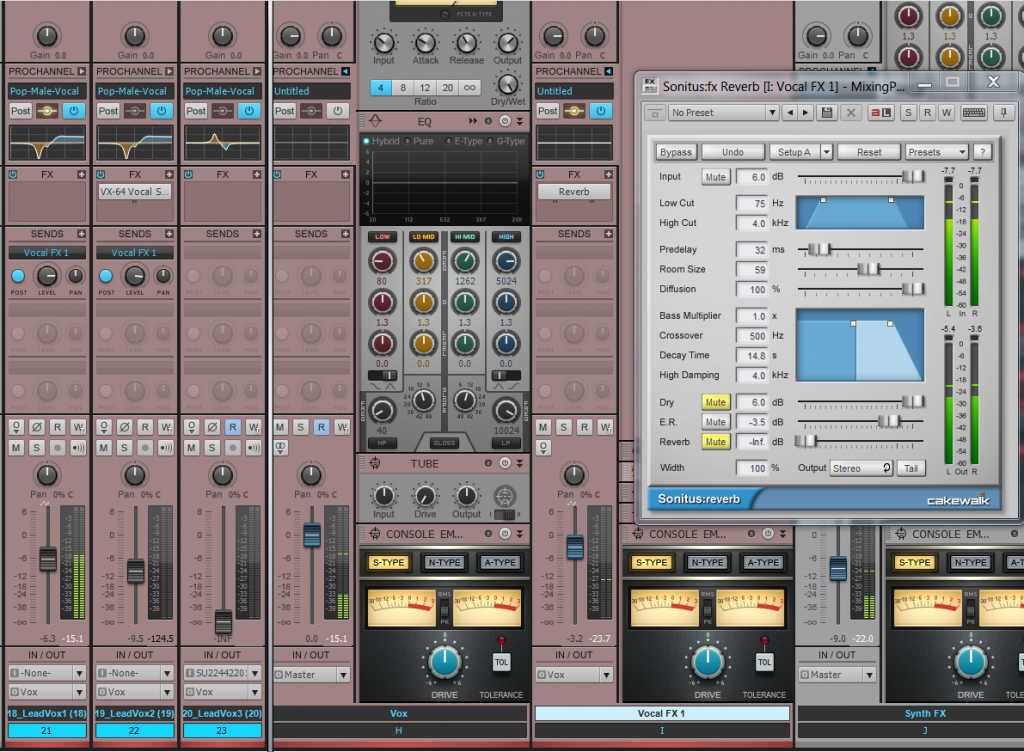
Creating Depth using the Sonitus Reverb
Digital reverbs are the proverbial swiss-army-knives of the mixing world. They are programmed in a way that emulates every part of a reverb. This includes the pre-delay, decay time, width, diffusion, early reflections etc. Since these emulate spaces like halls, plates, rooms, and other reverberant places – we can use them to create a room sound around our audio tracks for the purpose of creating depth. That’s a fancy way of saying that we can use reverb for depth. Here’s a vocal track that has no effects on it at all. It’s mixed into this track completely dry.

Continue reading “Mixing Vocals: Create Depth with a Digital Reverb”
Mixing Vocals: Easy Dynamic Vocal FX in SONAR
by Dan Gonzalez
A word on Vocal FX
 Mixing vocals is a tricky process since it is the most prominent element in any song. Vocals can be processed a very specific way to achieve an effect of sorts – or they can be processed in subtle ways to fit nicely into an overall mix. Most of the time you’ll be dealing with the latter of the two so it’s important to figure out ways to enhance your vocals without overpowering the other instruments.
Critical attention to detail is what makes any track sound like a polished mix and to achieve this a lot of engineers approach each section, instrument, entrance, exit, etc. dynamically. Obviously one way to do this is by mixing with tons of automation, but there are other ways to setup your mix so that you don’t have to write loads of automation data.
Setting up a dynamic vocal effect
Let’s take a pretty dry vocal track and add a dynamic effect to it. Here’s an example of a verse that we can use.
Continue reading “Mixing Vocals: Easy Dynamic Vocal FX in SONAR”
Achieve More Professional Sounding Vocal Tracks With VocalSync
by Jimmy Landry
 Things have obviously changed in music production over the years, but just recently a few technological advances have surfaced that are game-changers. One of these items includes the VocalSync technology inside the new SONAR Platinum. What exactly is VocalSync and why should you care? Here is one real-world practical example:
VocalSync is a tool that’s integrated directly inside of SONAR Platinum which gives anyone working with vocals 2 distinct benefits:
1. The ability to save a lot of time from manual editing
2. The sonic advantage of producing tight professional sounding multi-tracked vocals
It does this by “guiding” or conforming the information on one track to match another more fluently. The outcome of this is a much more professional production sound in the vocal tracks.
 Let’s take a look at a real-world example: Recently, I had the good fortune to work with a great artist from Finland by the name of Peppina who has made a name for herself through Joseph
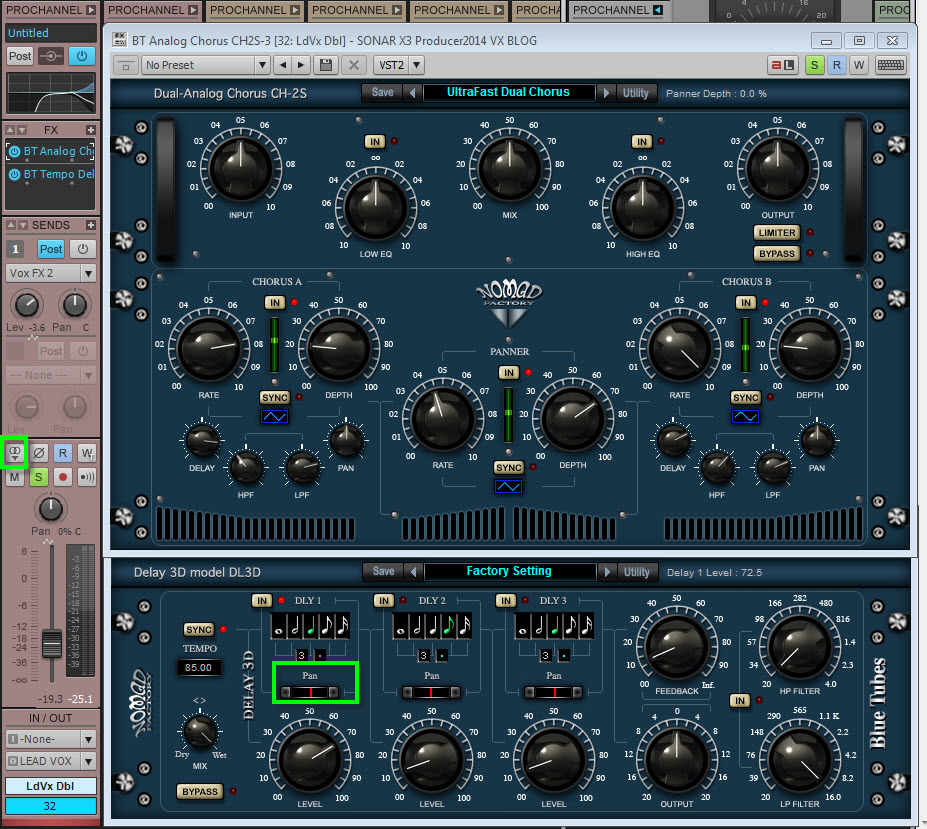
 Gordon-Levitt’s brainchild platform HitRecord. If I had to compare or categorize her music I would say it’s a modernized version of Dido sprinkled with some Sarah Bareilles and Ingrid Michaelson. With my producer hat on, I thought to myself that her vocals needed to be very large and wide on the tracks, but they also needed to sound authentic, realistic and intimate. To achieve this sound for the lead vocal, I used VocalSync to tighten 3 “takes” that would work together strategically in the stereo field. Continue reading “Achieve More Professional Sounding Vocal Tracks With VocalSync”
SONAR Platinum: What is VocalSync?
by Dan Gonzalez
New Technology
VocalSync (SONAR Platinum exclusive) is a new technology developed by the DSP gurus here at Cakewalk. We’ve engineered an algorithm that analyzes and synchronizes phonemes (among other characteristics specific to vocals) between similar vocal parts. This type of technology is often used to synchronize backing vocals, doubled vocal parts, and used to align dialogue to picture.
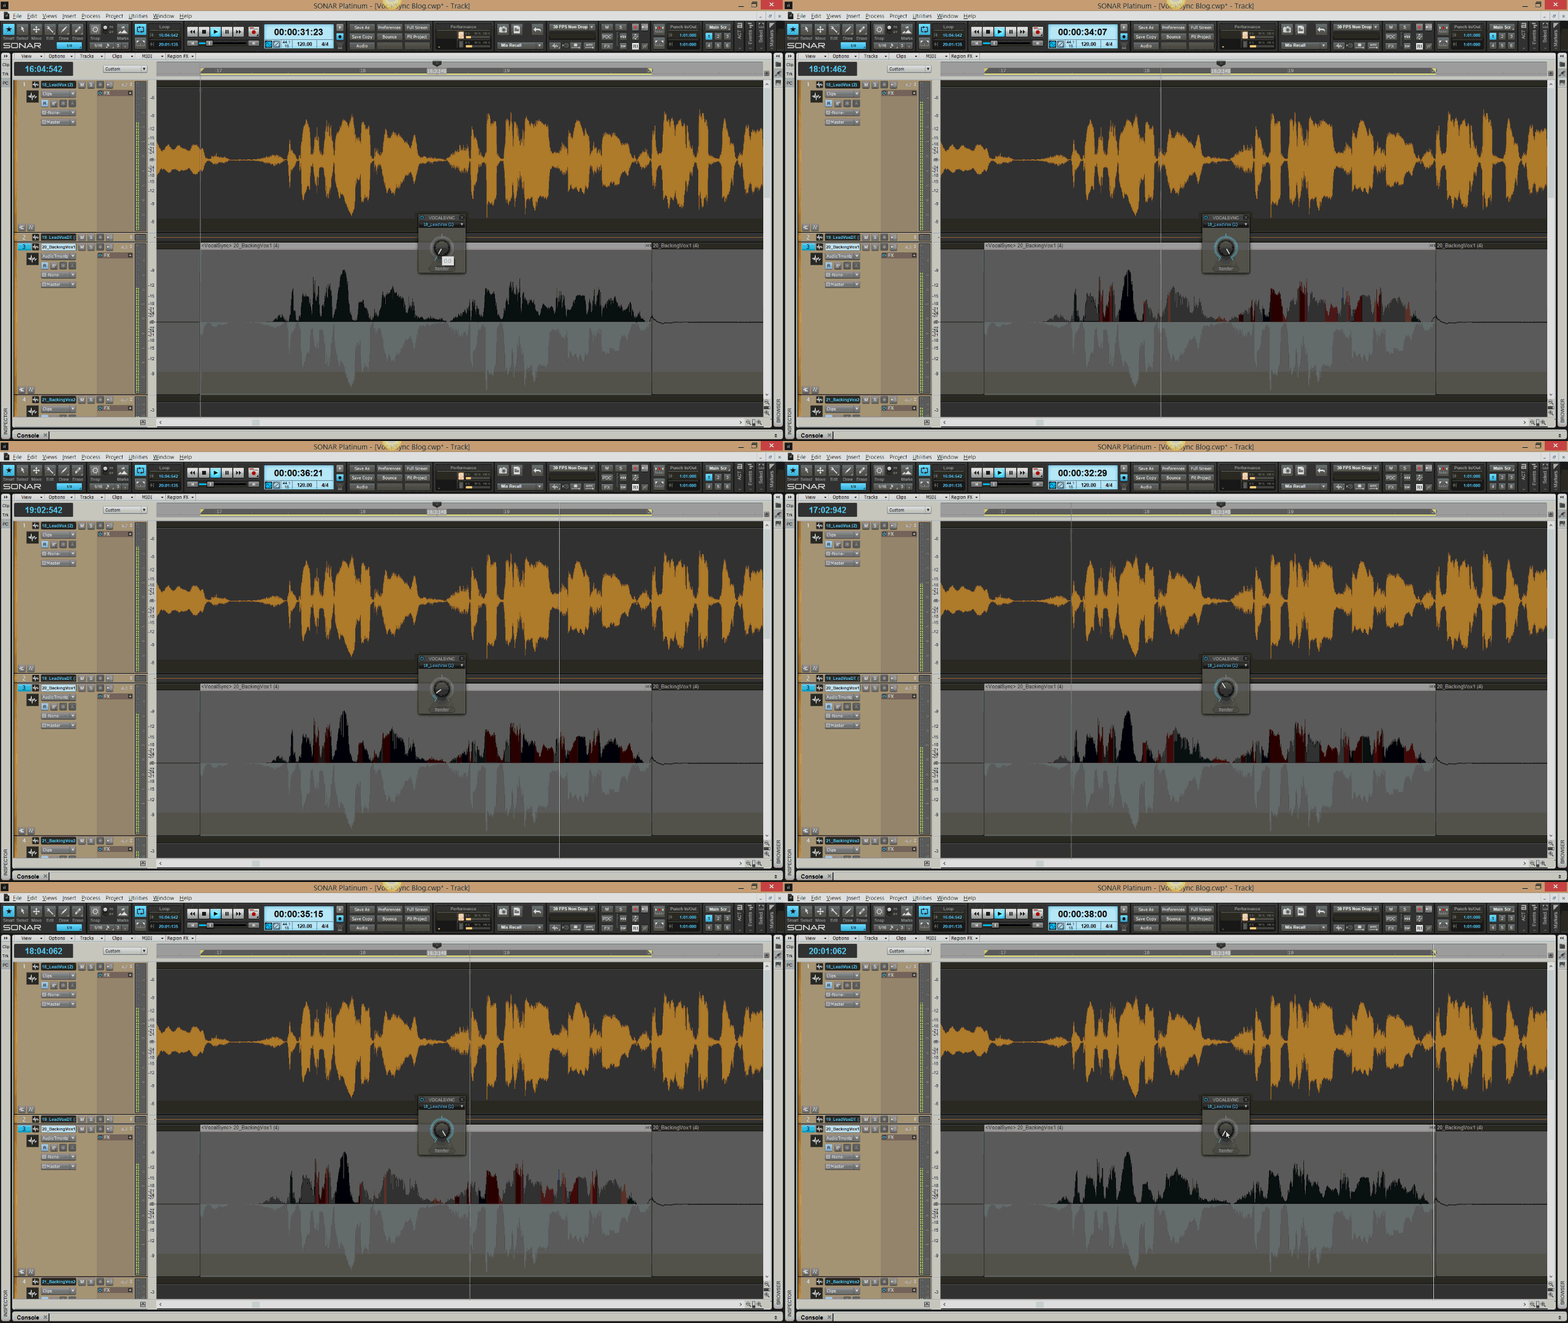
Something you’re probably wondering is, well – “Why would I use such a thing?” Well the question you should actually be asking yourself is “Why haven’t I been using vocal synchronization?”
What does it do?
Vocal Synchronization is something that has been around for a long time but by methods unfit for today’s demanding deadlines. Before, vocal editing would consist of manual cutting, editing, moving and quantizing – kind of like multi-track drum editing but with less instruments. We’ve taken this idea and tied it into our Region FX technology so that users can work inside the Track View and not in another part of the program. With VocalSync Continue reading “SONAR Platinum: What is VocalSync?”
Reader's Choice: Most Popular Vocal Production Articles in 2014
by Dan Gonzalez
Optimizing vocals with DSP
Craig Anderton brings you on a DSP-inspired journey through all the different ways in which you can get your vocals processed and finalized. Various topics involving the VX-64, EQ, Compression, Expansion, and much more. Check out the article here.
How to use a vocal double to enhance lead vocals
One of the toughest things about working with a lead vocal track is getting it to pop out, while allowing it to still sit in the track nicely in context with its surroundings [other tracks]. Every mixing engineer has her/his bag of tricks, but here are a few ideas to utilize a “vocal-double” which may help support and embellish the lead vocal track. Cakewalk guru Jimmy Landry shows you how he worked on the vocals for his Javier Colon demo track. Check out the article here.
Make your voice sound thicker (studio & producer)
Vocal production can lead to many different types of processing. Sometimes subtle enhancements to your vocals can make all the difference in the final mix. SONAR X3 Studio and Producer introduces Melodyne Essential as a fully integrated and pitch correction editor. This easy to use software allows users to access their Melodyne right from the Multi-Dock without needing to perform any special tricks within the software – including fattening up your vocals. Check out this highly-read article here.
Make your voice sound like Daft Punk with Melodyne Editor and SONAR X3 Producer
Certain effects have defined generations of music. The decade of the 80’s for example was a major era for reverb. In today’s pop music, the use of pitch correction software seems to be an effect that many artists and producers are utilizing creatively. Daft Punk has been using this effect for a number of years now, making them one of the first to bring this vocal style to the level of popularity it is today. Check out the article here.
Hum a melody and convert it to MIDI using ARA
As a musician, inspiration can hit you on the train, during dinner, or even while you’re driving somewhere. Many musicians carry some sort of recorder around with them. I know sound designers who always have a device ready for taking samples, and guitarists that hum melodies to themselves when they feel they’ve come up with something original that they want to remember. Now you can import your melodies right into SONAR and convert them to MIDI using the innovative ARA integration. Check out the articles here.
Optimizing Vocals with DSP
Optimizing tracks with DSP, then adding some judicious use of the DSP-laden VX-64 Vocal Strip, offers very flexible vocal processing.
By Craig Anderton
This is kind of a “twofer” article about DSP—first we’ll look at some DSP menu items, then apply some signal processing courtesy of the VX64—all with the intention of creating some great vocal sounds.
PREPPING A VOCAL WITH “MENU” DSP
“Prepping” a vocal with DSP before processing can make the processing more effective. For example, if you want to compress your vocal and there are significant level variations, you may end up adding lots of compression to accommodate quiet parts. But then when loud parts kick in, the compression starts pumping.
Here’s another example. A lot of people use low-cut filters to banish rogue plosives (e.g., a popping “b” or “p” sound). However, it’s often better to add a fade-in to get rid of the plosive; this retains some of the plosive sound, and avoids affecting frequency response.
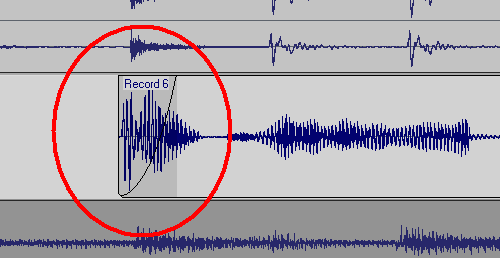
Adding a fade-in to a plosive can get rid of the objectionable section while leaving the vocal timbre untouched.
Also check if any levels need to be evened out, because there will usually be some places where the peaks are considerably higher than the rest of the vocal, and you don’t want these pumping the compressor either. The easiest fix is to select a track, drag in the timeline above the area you want to edit, then go Process > Apply Effect > Gain and drop the level by a dB or two.
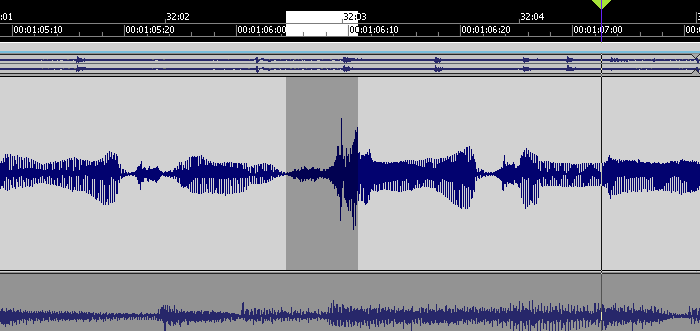 This peak is considerably louder than the rest of the vocal, but reducing it a few dB will bring it into line.
Also note that if you have Melodyne Editor, you can use the Percussive algorithm with the volume tool to level out words visually. This is really fast and effective.
While you’re playing around with DSP, this is also a good time to cut out silences, then add fadeouts into silence, and fadeins up from silence. Do this with the vocal soloed, so you can hear any little issues that might come back to haunt you later. Also, sometimes it’s a good idea to normalize individual vocal clips up to –3dB or so (leave some headroom) so that the compressor sees a more consistent signal.
 The clip on the left has been normalized and faded out. The silence between clips has been cut away. The clip on the right fades in, but has not been normalized.
With DSP processing, it’s good practice to work on a copy of the vocal, and make the changes permanent as you do them. The simplest way to apply Continue reading “Optimizing Vocals with DSP”


