By Jimmy Landry
 Last summer, Peppina—a young female artist from Finland— plunged herself into the NYC music scene for two months. With the help of renowned NYC entertainment attorney Steven Beer who discovered her, she managed to head back to Finland with a major-label sounding EP. The project was recorded in different ways, in different locations all over the city—and with budgets being slashed, these days it’s pretty much hand-to-hand combat when making a low budget recording where anything goes. But the upshot is yes, you can record a commercial-sounding record on a budget—so here are some of the techniques we employed to accomplish that goal. SONAR Platinum was instrumental in saving time on this EP. Between the Drum Replacer, VocalSync, onboard Melodyne, Speed Comping and general speed enhancements, I got to the finish line a lot faster than previous records. I highly recommend anyone who’s on SONAR XX to take a close look at what the program has brought to the table in the last year.
This all started when Steven Beer called about an artist he’d heard sing at a film festival, and invited me for a meeting at his office. Interestingly, there were two other producer/writers there as well—a bit unorthodox, but pretty much anything goes these days, so nothing really surprises me anymore. We discussed the artist’s interests, influences, and other variables, and then listened to some of my reel as well as music from the other producers. It turned out the lawyer’s master plan was to bring the three of us together to co-write, record, and mix a five-song EP before she went back to Finland in 45 days.
 Peppina already had some momentum in Finland from a loop she wrote and uploaded to a site called HITRECORD (owned by actor and director Joseph Gordon-Levitt). Her upload was so popular that Gordon-Levitt flew her to California to perform the piece at the Orpheum in LA during one of the show’s TV episodes. This all sounded good to me, so I signed on to a production team that would share in the production duties and heavy lifting. As to budgets…well, there was enough there for us to take it on as a challenge.
THE SONGS
 After getting to know her work—a huge variety, from loops to complete songs to just her with a ukulele, but with lots of potential—the writing began and we whittled down eight prospects to five songs. Most were written with me on acoustic guitar, Jeffrey Franzel on piano, and Peppina and Michael Spivack on multiple instruments. [PHOTO] All of the songs except one called for a traditional acoustic drum set, so Jeffrey called in favor #1 to drummer/percussionist Shawn Pelton, Saturday Night Live’s drummer.
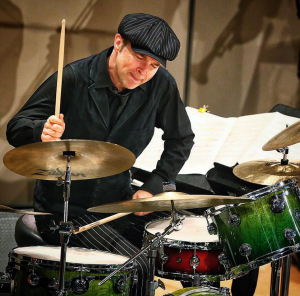 DRUMS WITH SNL DRUMMER SHAWN PELTON
Shawn familiarized himself with the songs for about a week from demo tracks, and then we recorded the drums in some underground studio in Bushwick, Brooklyn that didn’t even have a name—it was one of those “under the radar” hybrid studios with great mics and preamps where you get in-and-out for under $500 a day. We mic’d the kit in a fairly ordinary fashion, including 414s for overheads measured symmetrically to the snare. An SM7 aimed right at the front of the kit about 3’ away gives the option to add some “slam-lift” in choruses when mixing. In a very nontraditional fashion, Shawn played to the demo tracks we created but with the demo drums omitted. The great thing about working with someone like Shawn is that you get your money’s worth; we left in about five hours with stellar performances.
 Next was importing the tracks into SONAR, then setting up the sessions. I recorded the drums in Pro Tools in the Brooklyn studio, but have to admit that going back to that software really made me realize how far SONAR has come. For example in SONAR I simply created a track template after I set up the first song with drums, so for the next four songs all my routing architecture, including busing and initial EQ’ing, was ready to go. By doing a mix even at this stage, all other drum tracks recorded with the same mic’ing scheme sounded great with just a few minor tweaks. The Quadcurve EQ is phenomenal for situations like this because it’s not only efficient, but baked into the channels so there’s no delay compensation to get in the way of further tracking.
 For the drum editing, Shawn Pelton’s performances were really energetic and special so I felt very little need to use AudioSnap. The “feel” outweighed any minor pushes or pulls that were happening, and his humanization added to the energy of the songs―imagine that! J After some very minor adjustments, we were ready to tackle tracking the piano. (Tip: When editing multi-tracked drums for timing, to avoid phasing headings in spots with heavy processing, move all the tracks at the same time and not just the kick and snare.)
TRACKING PIANO IN A NON-TRACKING ATMOSPHERE
We didn’t do the customary procedure of tracking bass after drums, but went for the piano because if you analyze many of the great songs of the 70s (and 80s for the most part), you’ll notice something that was truly magical. Many bass players back then intuitively created counterpart bass lines that strayed away from the root notes just enough to create mesmerizing musical emotions. I knew we truly had a great pianist and bass player here with Jeffrey and Michael, so I thought by tracking the piano first Michael would be able to come up with some of that bass-mojo that would lend itself well to the authenticity of these songs.
 To stay on budget, we called in more favors and went to Yamaha’s NYC showroom with my SONAR laptop rig, a small headphone distribution amp, five mics, five preamps and an unbelievable array of Yamaha grand pianos at our disposal. For mics I brought a pair of ADAs (Hamburg and Vienna) for the top overheads, an AT4033a, a Neat Worker Bee prototype (it helps to have Gibson connections), and finally a trusty ole SM58 for some added depth wherever it might land.
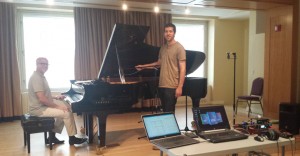 It took two hours before Michael and I found the best mic positioning; it was important to test out many combinations of the mic, mic pre, and positioning options since we were recording outside of a studio environment and had no known sound reference for comparison. I brought a small, trustworthy pair of KRK ROKIT 4” monitors to listen back outside of headphones.
 We ended up with the ADK mics about two feet above the grand, the Worker Bee and AT4033a close to the hammers, and the SM58 directly under the piano. Jeffrey started knocking out the tracks one by one, and thanks to SONAR’s Speed Comping mode, I could comp piano tracks in between songs while Jeffrey took breaks. For me, this is a real-world reason why SONAR really shines as a DAW, because comping the best takes together so quickly meant being able to review those parts on the spot during tracking. This allowed returning to some parts at the end of the day to “beat the comp” and have a better performance for a better master—these little things add up quickly when making a commercial record.
THE LOW END
Since I’m on SONAR and bassist Michael Spivack uses Pro Tools, I bounced out stereo wav reference files of the drums and keyboards that he snapped into his system starting at “0.” This way everything would line up when I received the bass parts. Michael did all the bass tracks in his Brooklyn apartment with nothing more than solid bass performances, a good instrument, and a good D.I. After two days, I had five superb bass performances which I simply imported into SONAR…who says DAWs can’t get along?
LAYING DOWN GUITARS—“MY ONLY HEART”
 This rest of this article focuses on one song—“My Only Heart.” Here is where the magic started coming together. Already with the bass and piano laid into the drum tracks, we had a very full “Keane-ish” sounding vibe. I had brought this song in as a close-to-completed song idea, but wanted a different guitar flavor than what I could play. Thankfully Michael’s guitar picking chops were up to speed, so we tracked those in my project studio with ADK mics going into stereo Yamaha PM1000 mic preamps. (These preamps were pulled out of boards and racked in the early 80s, and were considered very close to Neve 1073s― I highly recommend them as cost-effective workhorses.) We ended up passing the same guitar back and forth throughout the track until we came up with the parts we wanted. I had never really approached a track like this in terms of recording, so it was fun to experiment and feed off another player.
VOCALS: A BIRDHOUSE IN BROOKLYN
 After tracking the guitar parts, a little compression and EQ helped them sit well in the song. This is another aspect of working in SONAR that I truly love—that it’s easy and fast to get things sounding wonderful with the ProChannel, and not have latency concerns. Again following a nontraditional approach, Peppina felt most comfortable tracking the vocals in Brooklyn at Michael’s apartment close to where she was staying for her NYC trip. Although a noisy Brooklyn apartment isn’t the best place to track vocals, we had a secret weapon: “The Bird House.” Michael had built a NYC-proof vocal contraption that looked more like a birdhouse belonging in NJ rather than at a vocal session in NYC.
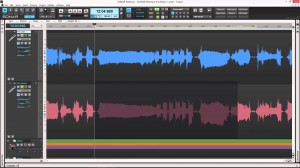 I started tracking with the song’s last chorus first, because some songs call for an energetic performance at the end of the track. This way you don’t have to be as concerned if the singer tires while tracking multiple takes for the best comp. I can talk all day long about how great SONAR is for its plug-ins, sound engine and such—and I sometimes do!—but the program’s innate workflow is its true value, because it saves time in the trenches. For example, with this song I could track four full performances of each song section, and by the time Peppina would come back from a break I’d have everything comped and doubled using SONAR’S comping tool and VocalSync.
Also concerning workflow, the ProChannel’s ability to provide quick, on-the-fly, non-destructive EQ and compression when tracking backing vocals is important. You can set them into the song while tracking in real-time, which allows making better decisions on the parts moving forward. The more you can hear how the song will fit together in terms of the mix while tracking, the better. Rolling off the low end on playback with the ProChannel opened up the spectrum, allowing Michael and Jeff to come up with some background vocal parts that were different than what I’d had in mind. Finally all the parts came together well, and the song’s vocals were comped before I left Michael’s apartment. Next up: my favorite part―the overdub embellishments.
We now had huge drums, big full piano, warm bass parts, massive string sections tracked by one player live in Michael’s apartment, angelic vocals with interesting backing counterparts, and acoustic guitar parts that rounded out the track. Since I was mixing a little as I went along, I was able to know “when to say when.” The remaining to-dos were something interesting in the verses, and maybe some light electric guitar work in the choruses. To address the first element, Peppina’s ukulele skills were ideal—plucked single notes with added slapback delay worked. They gave the verses a lift without getting in the way.
 The added electric guitar parts gave the choruses a bit of weight without interfering with the other guitars. The secret weapon here was Michael’s Les Paul going through my old Line6 AX2, which served as a DI/Amp Simulator. I usually track a fairly clean signal with this hacked-up rig, and then add TH2 elements and other effects to the signal after the fact. When it comes to guitars in the digital age, I’m a big proponent of using different guitars, sources, and plug-ins brands on a single track so that it doesn’t all start to sound the same. often combine my AX2, Overloud’s TH2, SONAR’s CA-X amps, and Native Instruments Guitar Rig 5.
THE MIX
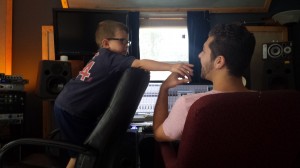 We ended up mixing the whole EP in my project studio (Michael, my 6 year old Mack 😉 and I). Fortunately, mixing a bit as I went along allowed decent enough tracking decisions—this was one of those tracks that just fell together. Although the track count was pretty light (52 tracks and 27 busses), I still used Track Folders and Track Colors to the fullest extent to help keep things organized and differentiated visually. Here are a few of the key interesting elements in the mix.
 The lead vocal track used heavy processing, but still sounded authentic. The chain was SONAR’s N-Type Console Emulation, Waves REQ 6, PSP RetroQ for added top-end, Waves RVox, Waves RDeEsser, and the QuadCurve EQ to back down some lower mids. I sent this track directly to a “Lead Vox” bus which was also the target for the “Lead Double” and “Lead Oct” tracks. The “Lead Oct” track appeared during the chorus for a lower octave effect using Waves Doubler2, compressed with the CA-2A ProChannel module, and rolled off below 1 kHz and above 3 kHz to get it out of the way of everything else. The “VocDble” track was processed sparingly by VocalSync in different parts of the song. This track was also sent to the “Lead Vox” bus which had a touch of compression on it to glue all the vocal tracks together.
 I also used a parallel compression bus on the lead vocals to help define her voice. The fader on this bus landed around -16 dB, which didn’t overprocess the track but gave it just enough juice to work well with the rest of the mix. Some of the other effects were the ReMatrix reverb, Waves SuperTap2 Delay, Sonitus Delay, and the UAD TreModEcho. The ReMatrix track output was sent to another bus for processing with EQ, synced mod delay, echo, and compression using the CA-2A, with many of the faders automated as needed.
 The ukulele part mentioned above was carved up with the QuadCurve EQ (Hybrid) and compressed with the CA-2A ProChannel module, then sent to a bus with Guitar Rig 5 for processing with the Delay Man and Tape Echo modules. The Tape Echo parameters were set to take down some high end, widen the stereo delay, and add reverb; I also adjusted some of the other knobs such as Dropouts, Headroom, and Head Mix (I have no idea what they manipulated from a technical standpoint―I just knew they affected the sound to my liking).
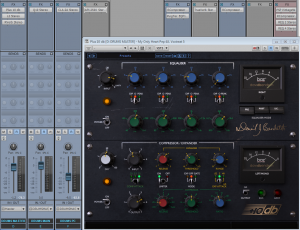 The drums came together without much effort. 15 individually EQ’d and sometimes compressed drum tracks went to a main drum bus, with a send from each going to a separate parallel compression track. Both of those buses fed a Master drum bus processed mainly with David Bendeth’s/Boz Digital Lab’s +10db (bundle), which is a beast on drums no matter what sound you want. As with most segments of the mix, I used many different “types” and “brands” of processing to give the mix a variation of sound—like using the ProChannel on individual drum tracks.
 Another recent SONAR feature I can’t live without is the Drum Replacer. Even though I had world-class drummer who tuned and played his drums meticulously, it was easy to vary the drum sounds using Drum Replacer. This feature is like having the ability to record multiple kits without actually switching out kits…brilliant!
For mastering, Steve Fallone at Sterling Sound Mastering in NYC did a fine job in polishing up the project. Overall, this experience was a great one for many reasons. Working with Jeffrey Franzel and Michael Spivack re-opened my eyes to the possibilities of production-collaboration. The fact that we took on a production like this with a small budget gave the project a certain gritty flair, and it was fun overcoming the challenges inherent with a project of this nature. Getting to know and help guide Peppina— who literally landed in NYC as a young striving artist from another country—was a fantastic experience as well.
My Only Heart Soundcloud:
More information:
Peppina: http://www.peppinamusic.com/
Jeffrey Franzel: http://www.jefffranzel.com/
Michael Spivack: http://michaelspivackmusic.com/
Steven Beer: http://www.fwrv.com/attorneys/21–steven-c-beer.html
Shawn Pelton: https://en.wikipedia.org/wiki/Shawn_Pelton
Jimmy Landry: https://noelborthwick.com/cakewalk/meet-the-bakers-jimmy-l/
(From L – R): Michael Spivack, Peppina, Jeff Franzel, Jimmy Landry


