Multi-track Drum Editing – Crossfading and Critical Listening

by Dan Gonzalez

In the past 3 articles we have looked at basic tools for drum editing as well as identifying, splitting, cropping, and aligning clips. All of these techniques can be followed pretty accurately by reading along and performing the functions as I’ve written them. This portion of the blog series will require that you listen intently to what you’re doing as we work through it.

Make sure to wear headphones and get your critical listening ears on so that your drum edits are clean and not full of pops. Previously I mentioned that we would need to monitor our drums as we edit them and that erroneous edits come through the most in the cymbal microphones. In order to make this possible we’re going to mute the tom tracks and lower the volume for the kick and snare tracks. This exposes mostly high hat, ride, and overhead microphone signals. Also, make sure to pan the overhead microphone signals hard left and right too.

STEP 14: Turn on Auto Crossfade

SONAR is known for it’s streamlined feel and quick functions. One of the best examples of this is SONAR’s auto cross-fade functionality. Since we’re  putting this drum pattern back together we’ll need some speedy way of making sure the clips do not pop when overlapping.

Within the track view click on the Options > Auto Crossfade. This feature allows you to crop one clip into another and automatically yield a cross fade. Continue reading “Multi-track Drum Editing – Crossfading and Critical Listening”

Basics: Five Questions about Effects Placement

By Craig Anderton

There are plenty of places in SONAR where you can process the audio signal, but you need to know how to choose the right one.

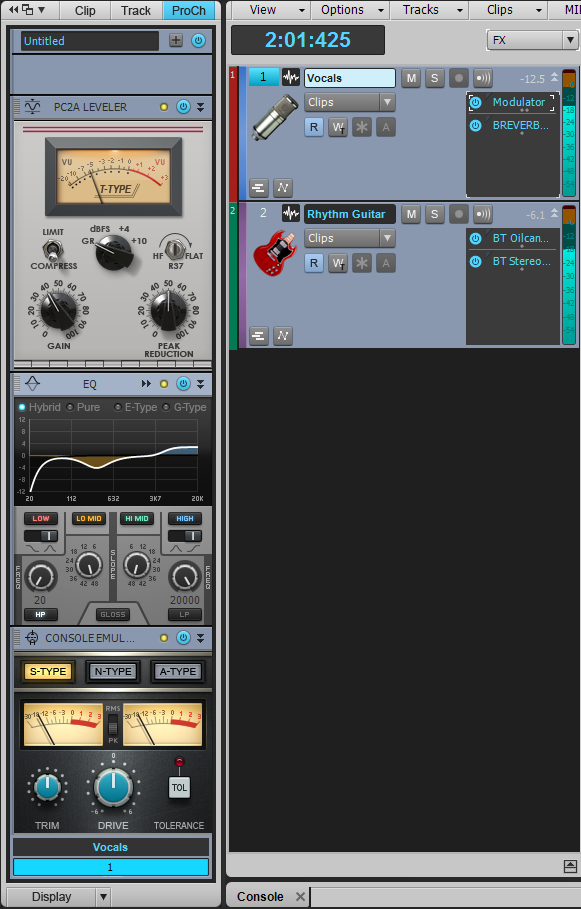
What’s an “insert” effect? Don’t you always “insert” an effect? You indeed “insert” effects, but there’s a specific effect type usually called an Insert effect that inserts into an individual mixer channel. In SONAR, this inserts into a channel’s FX Bin or the ProChannel (Fig. 1).

Fig. 1: The FX bin for two channels have insert effects, as does the ProChannel for the Vocals channel.

Insert effects affect only the channel into which they are inserted. Typical insert effects include dynamics processors, distortion, EQ (because of EQ’s importance, it’s a permanent ProChannel insert effect), flanging, and other effects that apply to a specific sound in a specific channel.

Then what’s a “send” effect? Also called an Continue reading “Basics: Five Questions about Effects Placement”

Basics: Five Questions About Panning Laws

By Craig Anderton

It’s not just a good idea, it’s the law…panning law, that is. Let’s dispel the confusion surrounding this sometimes confusing topic.

What does a panning law govern? When a mono input feeds a stereo bus, the panning law determines the apparent and actual sound level as you sweep from one side of the stereo field to the other.

But why is a “law” needed? Doesn’t the level just stay the same as you pan? Not necessarily. Panning laws date back to analog consoles. If a pan control had a linear taper (in other words, a constant rate of resistance change as you turned it), then the sound was louder when panned to center. To compensate, hardware mixers used non-linear resistance tapers to drop the level, typically by -3 dB RMS, at the center. This gave an apparent level that was constant as you panned across the stereo soundstage. If that doesn’t make sense…just take my word for it, and keep reading.

Okay, then there’s a law. Isn’t that the end of it? Well, it wasn’t really a “law,” or a standard. Come to think of it, it wasn’t a specification or even a “recommendation.” Some engineers dropped the center level a little more to let the sides “pop” more, or to have mixes seem less “monoized” and therefore create more space for vocalists who were panned to center. Some didn’t drop the center level at all, and some did custom tweaks.

Why does this matter to a DAW like SONAR, which doesn’t have a hardware mixer? Different DAWs default to different panning laws. This is why duplicating a mix on different DAWs can yield different results, and lead to foolish online discussions about how one DAW sounds “punchier” or “wimpier” than another if someone brings in straight audio files and sets the panning and faders identically.

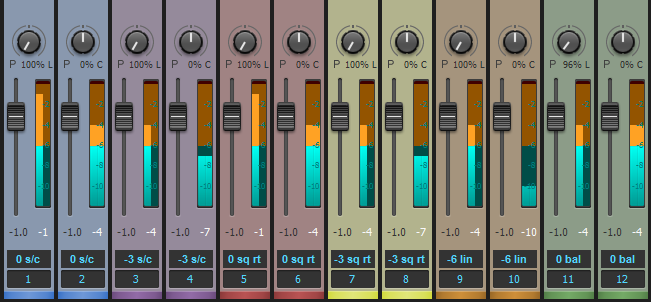
A mono signal of the same level feeds each fader pair, and each pair is subject to different SONAR panning laws. Note the difference in levels with the panpot panned to one side or centered. The tracks are in the same order as the descriptions in SONAR’s panning laws documentation and the listing in preferences. Although the sin/cos and square root versions may seem to produce the same results, the taper differs across the soundstage between the hard pans and center.

This sounds complicated, and is making my head explode—can you just tell me what I need to do so I can go back to making music? SONAR provides six different panning law options under Preferences, so not only can you choose the law you want, the odds of being able to match a different DAW’s law are excellent. The online help describes how the panning laws affect the sound. So there are really only two crucial concepts:

  • The pan law you choose can affect a mix’s overall sound if you have a lot of mono sound sources (panpots with stereo channels are balance controls, which is a whole other topic). So try mixes with different laws, choose a law you like, and stick with it. I prefer -3 dB center, sin/cos taper, and constant power; the signal level stays at 0dB when panned right or left, but drops by -3 dB in each channel when centered. This is how I built hardware mixers, so it’s familiar territory. It’s also available in many DAWs. But use what you like…after all, I’m not choosing what’s “right,” I’m simply choosing what I like.
  • If you import an OMF file from another DAW or need to duplicate a mix from another DAW, ask what panning law was used in creating the file. One of SONAR’s many cool features is that it will likely be able to match it.

There, that wasn’t so bad. Ignorance of the law is no excuse, and now you have answers to five questions about panning laws.


Mixing Heavy Metal with the ProChannel & Softube Mix Bundle

The Softube Mix Bundle is a strong and creative addition to SONAR’s ProChannel strip.  This bundle adds 5 solid effects, great for any mix, to the Softube Saturation Knob already in SONAR X3 Producer.

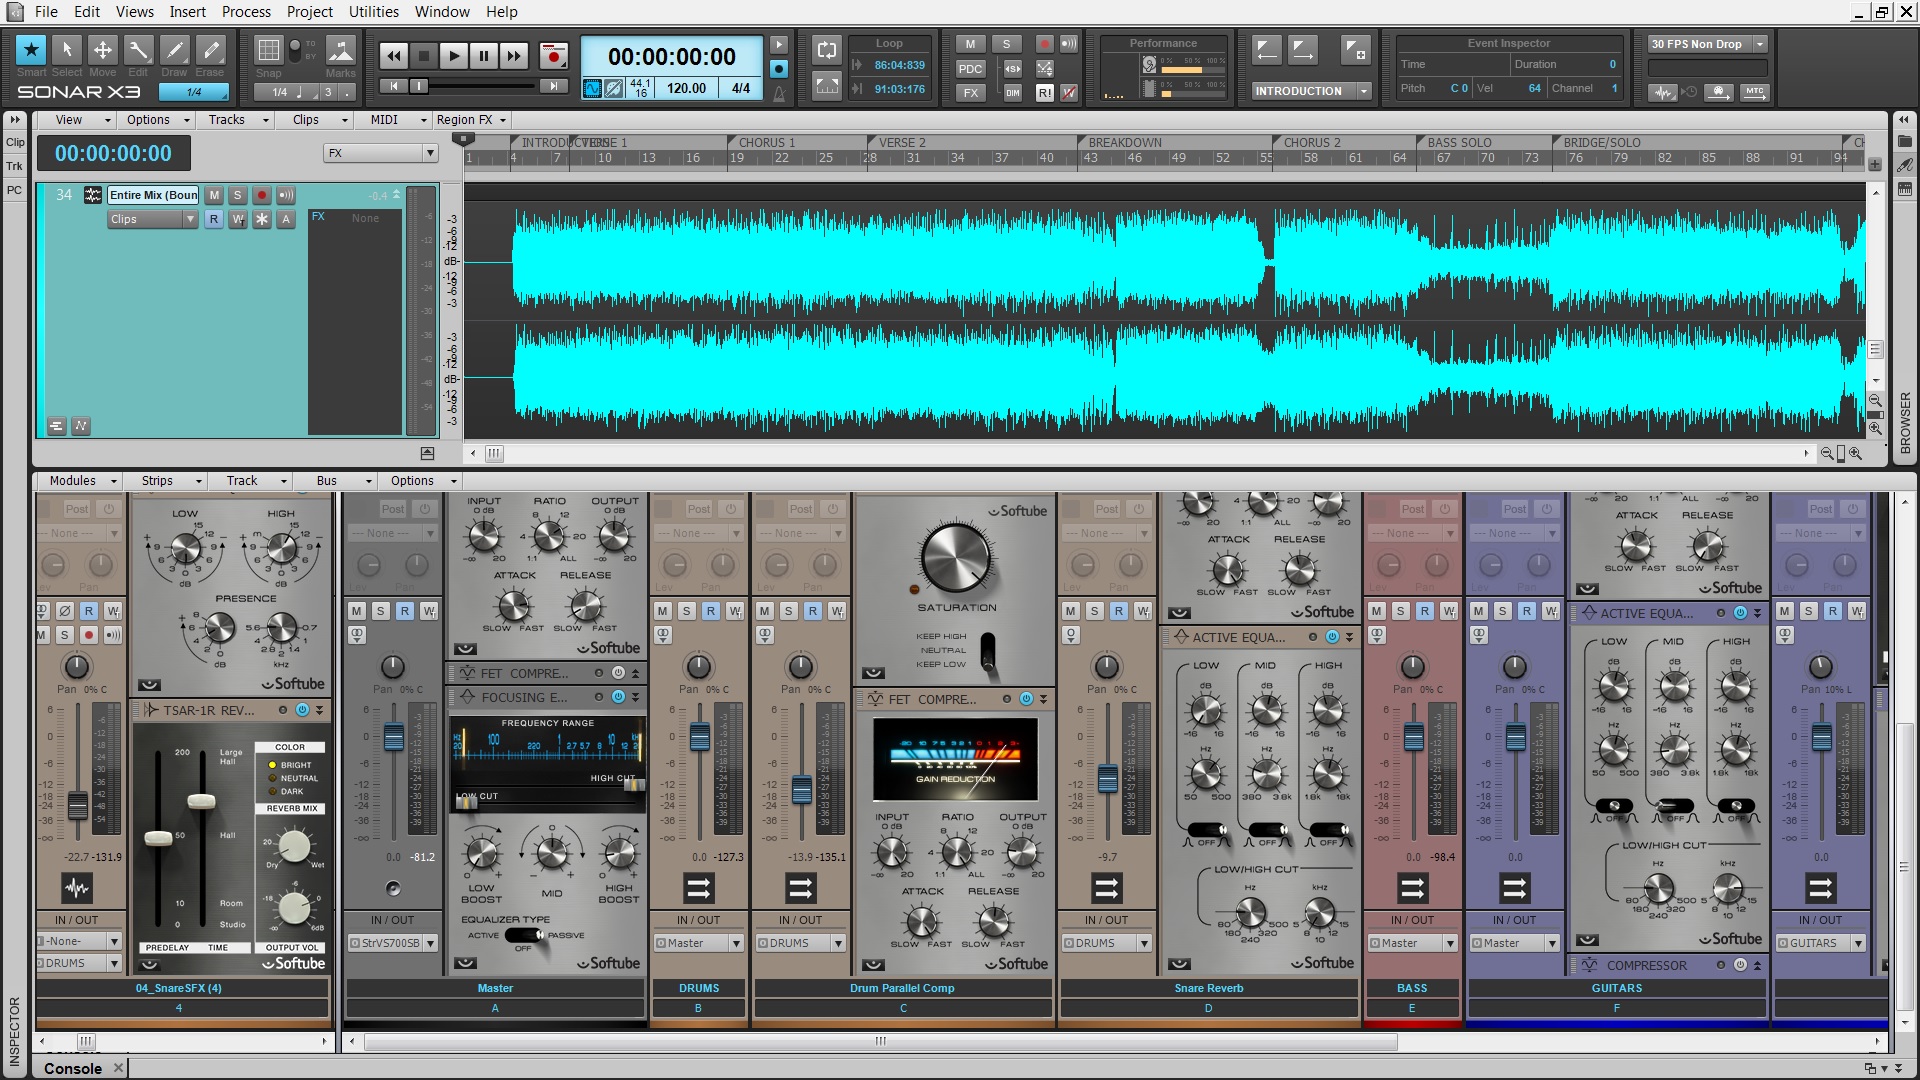
For this article I’ve mixed a Heavy Metal track from the group Dark Ride using mostly Softube ProChannel effects. You can download the project here and follow along if you have the Softube Mix Bundle. If not then the screenshots in this article should suffice.

Setting up the Mix

Listen & add Markers

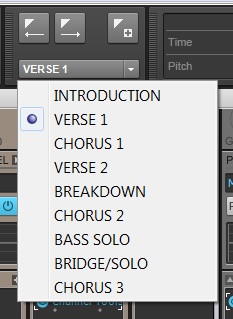
At first listen I put in Markers throughout the entire project to make navigation and looping sections much easier. Using the shortcut M – it’s pretty easy to drop in a Marker wherever your Now Time Marker resides. After that, you can name them accordingly. This paticular song was relatively short and included an introduction, two verses, 3 choruses, bridge, solo section, and breakdown.

Routing, grouping, and track folders

While you’re mixing it’s easy to become slightly overwhelmed by larger projects. What I do in this instance is make a stereo bus for every group of instruments that I have in the project. This allows me to apply mixing effects to the instrument groups as whole before they hit my main mix bus. The tracks route directly to the buses and then the buses route directly to the 2 bus. For each instrument group I also assigned them a color category and a track folder to make things a bit easier to manage within the Track View.

Levels & panning

Metal in general consists of abrasive-wide rhythm guitars, huge-punchy drums, Continue reading “Mixing Heavy Metal with the ProChannel & Softube Mix Bundle”

DAW Best Practices: How to get a bigger drum sound with reverb

The Biggest, Baddest Drum Reverb Sound Ever

[Originally posted as a daily tip on the SONAR forums and reposted for viewers here on the blog.]

by Craig Anderton

You want big-sounding drums? Want your metal drum tracks to sound like the Drums of Doom? Keep reading. This technique transposes a copy of the reverb and pans the two reverb tracks oppositely. It works best with unpitched sounds like percussion.

1. Insert a reverb send.

Insert a send in your drum track, then insert your reverb of choice in the Send bus.


2. Render the reverb, isolated from the drum track. Continue reading “DAW Best Practices: How to get a bigger drum sound with reverb”

Basics: Five Questions about Filter Response

By Craig Anderton 

You can think of filters as combining amplification and attenuation—they make some frequencies louder, and some frequencies softer. Filters are the primary elements in equalizers, the most common signal processors used in recording. Equalization can make dull sounds bright, tighten up “muddy” sounds by reducing the bass frequencies, reduce vocal or instrument resonances, and more. 

Too many people adjust equalization with their eyes, not their ears. For example, once after doing a mix I noticed the client writing down all the EQ settings I’d done. When I asked why, he said it was because he liked the EQ and wanted to use the same settings on these instruments in future mixes. 

While certain EQ settings can certainly be a good point of departure, EQ is a part of the mixing process. Just as levels, panning, and reverb are different for each mix, EQ should be custom-tailored for each mix as well. Part of this involves knowing how to find the magic EQ frequencies for particular types of musical material, and that requires knowing the various types of filter responses used in equalizers. 

What’s a lowpass response? A filter with a lowpass response passes all frequencies below a certain frequency (called the cutoff or rolloff frequency), while rejecting frequencies above the cutoff frequency (Fig. 1). In real world filters, this rejection is not total. Instead, past the cutoff frequency, the high frequency response rolls off gently. The rate at which it rolls off is called the slope. The slope’s spec represents how much the response drops per octave; higher slopes mean a steeper drop past the cutoff. Sometimes a lowpass filter is called a high cut filter.

 Fig. 1: This lowpass filter response has a cutoff of 1100 Hz, and a moderate 24/dB per octave slope.
What’s a highpass response? This is the inverse of a lowpass response. It passes frequencies above the cutoff frequency, while rejecting frequencies below the cutoff (Fig. 2). It also Continue reading “Basics: Five Questions about Filter Response”

Optimizing Vocals with DSP

Optimizing tracks with DSP, then adding some judicious use of the DSP-laden VX-64 Vocal Strip, offers very flexible vocal processing. 

By Craig Anderton 

This is kind of a “twofer” article about DSP—first we’ll look at some DSP menu items, then apply some signal processing courtesy of the VX64—all with the intention of creating some great vocal sounds. 

PREPPING A VOCAL WITH “MENU” DSP 

“Prepping” a vocal with DSP before processing can make the processing more effective. For example, if you want to compress your vocal and there are significant level variations, you may end up adding lots of compression to accommodate quiet parts. But then when loud parts kick in, the compression starts pumping. 

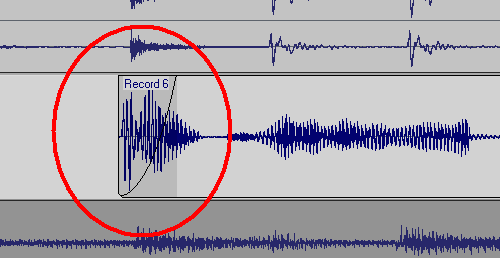
Here’s another example. A lot of people use low-cut filters to banish rogue plosives (e.g., a popping “b” or “p” sound). However, it’s often better to add a fade-in to get rid of the plosive; this retains some of the plosive sound, and avoids affecting frequency response. 

Adding a fade-in to a plosive can get rid of the objectionable section while leaving the vocal timbre untouched. 

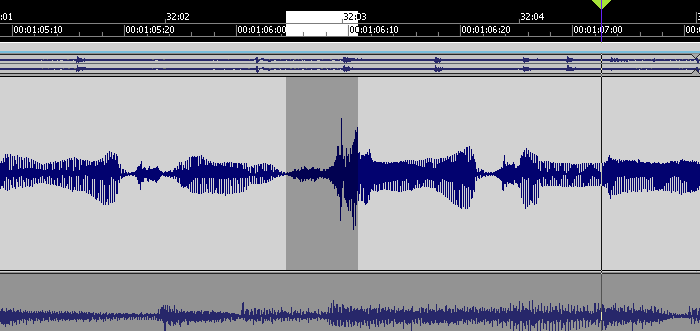
Also check if any levels need to be evened out, because there will usually be some places where the peaks are considerably higher than the rest of the vocal, and you don’t want these pumping the compressor either. The easiest fix is to select a track, drag in the timeline above the area you want to edit, then go Process > Apply Effect > Gain and drop the level by a dB or two. 

This peak is considerably louder than the rest of the vocal, but reducing it a few dB will bring it into line. 

Also note that if you have Melodyne Editor, you can use the Percussive algorithm with the volume tool to level out words visually. This is really fast and effective. 

While you’re playing around with DSP, this is also a good time to cut out silences, then add fadeouts into silence, and fadeins up from silence. Do this with the vocal soloed, so you can hear any little issues that might come back to haunt you later. Also, sometimes it’s a good idea to normalize individual vocal clips up to –3dB or so (leave some headroom) so that the compressor sees a more consistent signal. 

The clip on the left has been normalized and faded out. The silence between clips has been cut away. The clip on the right fades in, but has not been normalized. 
With DSP processing, it’s good practice to work on a copy of the vocal, and make the changes permanent as you do them. The simplest way to apply Continue reading “Optimizing Vocals with DSP”

The Art of Transient Shaping with the TS-64

Understand this often-misunderstood processor, and your tracks will benefit greatly 

By Craig Anderton 

Transient Shapers are interesting plug-ins. I don’t see them mentioned a lot, but that might be because they’re not necessarily intuitive to use. Nor are they bundled with a lot of DAWs, although SONAR is a welcome exception. 

I’ve used transient shaping on everything from a tom-based drum part to make each hit “pop” a little more, to bass to bring out the attacks and also add “weight” to the decay, to acoustic guitar to tame overly-aggressive attacks. The TS-64 has some pretty sophisticated DSP, so let’s find out how to take advantage of its talents.

But first, a warning: transient shaping requires a “look-ahead” function, as it has to know when transients are coming, analyze them, filter them, and then calculate when and how to apply particular amounts of gain so it can act on the transients as soon as they occur. As a result, simply inserting the TS-64 will increase latency. If this is a problem, either leave it bypassed until it’s time to mix, or render the audio track once you get the sound you want. Keep an original of the audio track in case you end up deciding to change the shaping later on. 

TS-64 TRANSIENT SHAPER BASICS

A Transient Shaper is a dynamics processor that modifies only a signal’s attack characteristics. If there’s no defined transient the TS-64 won’t do much, or worse yet, add unpleasant effects. 

Transient shapers are not just for drums—guitars, electric pianos, bass, and even some program material are all suitable for TS-64 processing if they have sharp, defined transients. And it’s not just about making transient more percussive; you can also use the TS-64 to “soften” transients, which gives a less percussive effect so a sound can sit further back in a track. 

There are two main elements to transient shaping. The first is Continue reading “The Art of Transient Shaping with the TS-64”

The Sound of Console Emulation in SONAR X3

The age of hybrid studios

The day has come where digital audio has caught up to the analog trends of the pre-xyz age. Hybrid (digital/analog) home-studios are more common and the need for more analog flavored plugins is a must. Cakewalk has harnessed these trends in some of the latest software additions to the X-series with their track by track Console Emulation ProChannel plugin.

At a glance

Simplicity is one of the key ingredients in the world of plugin interfaces and the Console Emulator is no stranger to that. It’s an easy tool to use, just turn up the Drive! Each algorithm has the same 3 parameters for locking in the sound, Drive, Tolerance, and Trim. Each version of the plugin reflects the circuitry of 3 classic large format console from the past 30 years. Every board has it’s own sound because each circuit is completely different than the other.

Let’s take a closer listen 

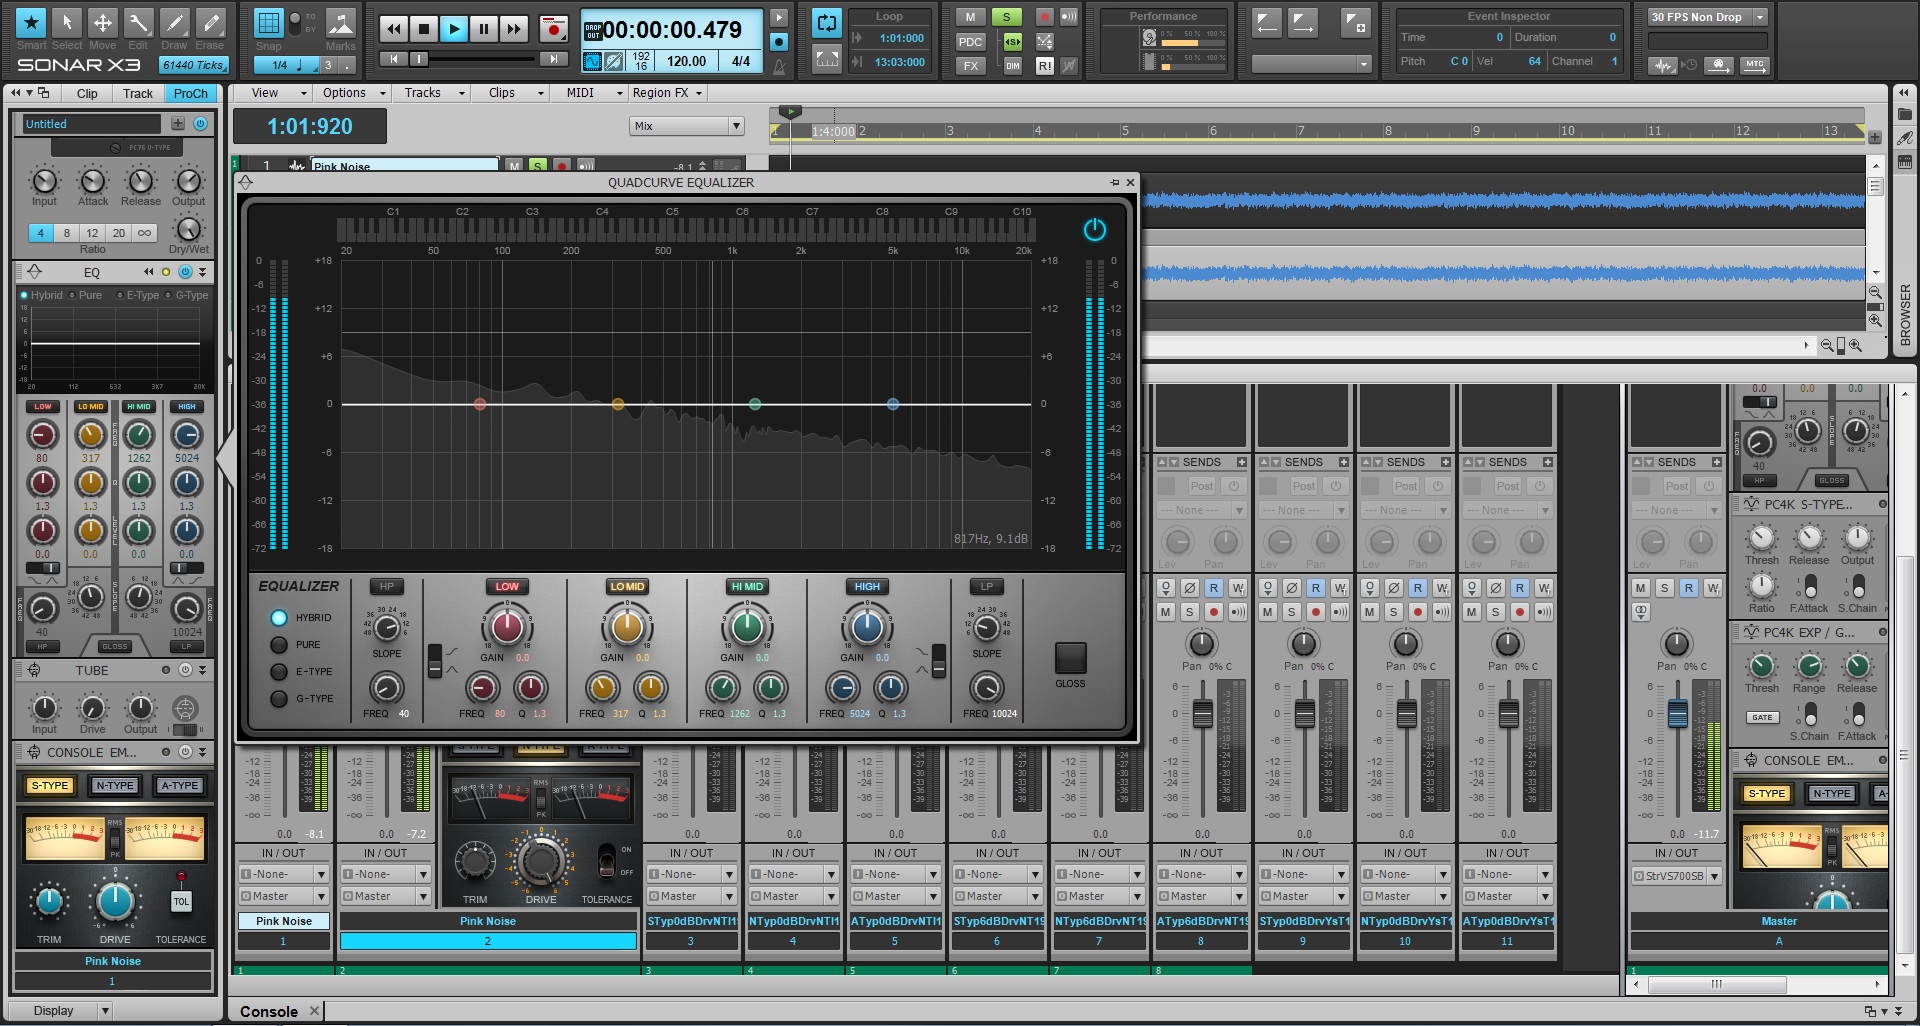
For most part, Console Emulation is about subtle character. If you apply subtle changes to your entire mix it will collectively sound different. One track may not sound all that different in the final mix, but if you apply this effect to the entirety of your session, well then you’ll probably start to hear some differences. These DSP algorithms are tuned Continue reading “The Sound of Console Emulation in SONAR X3”

How Eliud “Liu” Ortiz used SONAR X3 for his recent Jennifer Hudson mix (RCA Records)

These days, some professional mixing and recording engineers are doing work for major labels completely missed the analogue age. Others are still mixing on consoles.  We have come to a point where there really is no “right” or “wrong” in terms of mixing.  Some tracks are mixed so perfectly that they are not signed off on by the label because they are lacking something “distinct” or “of a raw nature.”  Other times, indie songs are mixed by a band itself and find their way to the top, where at that point the label just has someone remix the single for mainstream radio. (For example compare the normal and radio mixes of Gotye “Somebody That I Used to Know.)

NYC based mixing and recording engineer Liu Ortiz has seen it from all sides of the music and business spectrum.  Starting out at such a young age of 16 as an engineer, his career has placed him with a perfect balance (at still a young age) with a ton of knowledge in both the digital and analogue worlds.  He has worked on tracks with and for artists such as Mary J. Blige, Pink, Luther Vandross, Christina Aguilera, and even RZA to name a few, and was quite a successful engineer at the Hit Factory in New York City.

Coming from the world of Cubase and Pro Tools, and after hearing all the buzz about the full feature-set of SONAR X3, Liu decided to give SONAR X3 a whirl on a new track by Jennifer Hudson feat. R Kelley for RCA Records.  After mixing the track, he found himself gravitating towards the workflow so he continued the journey onto another project called The Summer Set; a very well established band from Scottsdale Arizona who are quickly making waves internationally.  I recently got a chance to visit with Liu at the new Cakewalk Room which is ironically enough in the old Hit Factory where he often worked.  Liu showed me some of his new mixes, showed me where his picture and plaques were on the wall, and even gave me a few interesting stories about some of the “good ole days” featuring Missy Elliot, Queen Latifah and Sean Puffy Combs [don’t worry Liu – I’ll never tell 😉

Cakewalk Artist Relations:           Since you grew up on analogue consoles, what are there big sonic differences you hear now that you mix “in the box”?

 Liu Ortiz:           Well in the beginning way back when DAWs first started, I noticed that no matter what I did as I progressed with more plugins and inserts of each channel, the mix coming out the box would progressively get thinner; especially with vocals. I couldn’t really do much to fix that problem until not too long ago where technology has progressed with DAWs and computers in general.  Now, I can pretty much faithfully emulate hardware with EQ’s and compressors of pretty much all the consoles I have worked on in the past.

Neve and SSL’s had such distinctive qualities about them similar in comparison to that of Strats and Les Pauls. Since I worked on both extensively, I remember all the little nuances that each series had. So when I am mixing I just try my best to EQ with those particular traits in mind since they were my personal favorites. Pretty much all DAWs now are inherently very neutral, so I can dial in whatever tone I want and don’t have to worry about the vocals or guitars becoming shrill. I really appreciate technology now and just concentrate on crafting the best mix possible.  I must add that it is pretty amazing to me that SONAR X3 has a Console Emulator built into every bus and every track – this blew me away Continue reading “How Eliud “Liu” Ortiz used SONAR X3 for his recent Jennifer Hudson mix (RCA Records)”