Thanks to Melodyne’s advanced tempo detection and SONAR’s powerful ARA drag-and-drop integration, your projects can now follow a live recording’s tempo. Simply drag a standard audio clip (or Melodyne region effect) to SONAR’s timeline, and SONAR creates a tempo map that follows the clip tempo. Watch the new video for more information.
MONTH-END ARTIST RECAP: 3/2016 – Wrestlemania, Croatia and More!
With South by Southwest over and the Northeast starting to thaw out, we checked in with a few of our professional artists to see what they have been up to.
Norman Matthew and Murder FM Announce New Tour and Wrestlemania
Just when we thought it could not get any more murderous, Norman Matthew of Murder FM is jumping into the wrestling ring??? Fresh off of a national tour with Drowning Pool, in support of their latest record Happily Neverafter which was produced in SONAR X3 & Platinum and doing very well, Murder FM have announced April tour dates. The shows kick off with the wrestling debut of vocalist Norman “The Gnar” Matthew, during “Wrestlemania” Weekend at the 1010 Collins Ctr in Arlington, TX! (Yes, you heard us right – Wrestlemania.)
 April 1 – 3, the Trifecta of wrestling brands, Knokx Pro/ Territory League, Samoan Dynasty Wrestler “TMD” Teams up with Murder FM in Arlington, TX. Murder FM Vocalist Norman “The Gnar” Matthew takes the corner of “TMD” during WRESTLEMANIA weekend, featuring WWE Hall Of Famer “Rikishi”.
Recently we also found out Norman is using SONAR Platinum live on stage. Next month we will be focusing an article around that setup and how he uses SONAR in a live application… [this is if he makes it out of Wrestlemania this weekend ;)]
Other New Tour Dates:
04/14 – Dubuque, IA – The Venue
04/15 – Crest Hill, IL – Bada Brew
04/16 – Springfield, IL – Capitol City
04/17 – Pekin, IL – Twisted Spoke
04/20 – Kent, OH – The Outpost
04/21 – Toledo, OH – Realm
04/22 – Chesterfield, MI – Diesel
04/23 – Battle Creek, MI – The Music Factory
04/24 – Harrison, OH – The Blue Note
For more information, please visit: www.murderfmmusic.com.
Yogi Lonich on the Loose in Croatia
 What do Zagreb Croatia and SONAR have in common? The answer to that question is one talented musician/producer by the name of Yogi Lonich. LA based Lonich who has worked with iconic artists such as Shakira, Buckcherry, Wallflowers, Fuel and most recently Chris Cornell is on hiatus from LA and producing a few great rock artists in Croatia in SONAR Platinum.
 “UP,“ is an alternative rock band formed in Zagreb Croatia by singer/guitarist Leo Angelcovich. In 2015 Leo started recording demos by himself and caught the ear of Yogi who has now joined him in person as a producer and collaborator. The efforts so far are focused on turning out a few singles, following an album in 2017 before world domination. The bands influences: AC/DC, Led Zeppelin, Pink Floyd, Free, Nirvana, AiC and Rage Against the Machine to name a few.
 Yogi has also been working with Blues(ish) guitarist/songwriter Dario Brnad who is also located in Zagreb Croatia. “I’m so used to my SONAR rig in LA that it took a bit to get used to my mobile setup here in Croatia. Platinum has been an inspiring creative tool here on these projects and I have been using a lot of Rapture and Dimension Pro as well.”
Chillwalker Announces New Recording Project Inspired by Mobile Recording
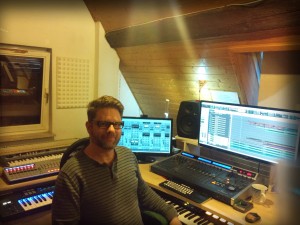 German artist Chillwalker has just announced the plans for what we think is a very unique project: “Holy Grounds.” Starting in August he will be touring to 12 sacred locations to which will eventually end up in a full-length 12-track release all inspired and taking direction from each location’s character. “With SONAR being so stable now, and the ability to create music virtually anywhere on devices that have longer battery life with core i7 processing, doing a project like this makes perfect sense to me. I will also be preforming live during the trip to help offset some of the costs.”
After releasing close to 70 tracks and remixes, Chillwalker took a bit of a break in 2015 to rebuild his musical spirit. He also took the time to physically build a new SONAR studio setup where he is currently working. “Platinum has really brought my music to another level since the last record on an older version of SONAR. I actually upgraded my Melodyne  the DNA version just because of the fact that it works so incredibly well with SONAR. The Browser is a feature I cannot live without either—it’s always open and I am constantly auditioning and manipulating sounds. The ProChannel is another item I use all the time. I do a lot with sidechaining for compression with it. Finally, huge time-savers for me are both project and track templates.”
We will be checking in on Chillwalker’s interesting upcoming trip/project and will be doing a full length story on the project as he gets going. He will be updating his information in real-time here https://www.facebook.com/Chillwalker/ . In the meantime you can Chill[walker] here:
Javier Colon Anounces New Tour to Support April 15th Concord Music Group Release
 NBC The Voice winner Javier Colon has been setting up for his new record to be released next week on Concord Music Group, and a few new songs are being leaked including “Giant” which was uploaded to Youtube not too long ago. Javier wrote much of the record in SONAR Platinum in his home project studio before recording in different locations. Along with the new full length 15 track record (yes… that’s right… 15), he has just announced an national tour for April/May/June that spans cross-country starting in Atlanta on 4/23. The tour so far from east to west and tourdates/tickets can be viewed here on his site http://javiercolon.com/tour-dates/ .
In a recent interview, Jav told us, “A lot of the songs on this new record started right in my home studio on SONAR Platinum. The thing I like about SONAR for writing is that it’s really quick for getting ideas down. It’s like a creative partner. Of course it’s great for mixing and creating masters too, but for me since I was fortunate enough on this record to be working with top-notch mixing engineers, the single most important thing was getting the songs right. The features in Platinum are great for songwriting. Even just the loops in Addictive Drums 2 are a great starting place to generate ideas—there’s just no shortage of inspiration in the program.”
The album is for presale on Amazon and iTunes.
Gravity Tour Week 1:
04/23/16 Atlanta, GA Vinyl
04/25/16 Vienna, VA Jammin Java
04/26/16 Philadelphia, PA World Cafe Live
04/28/16 Ridgefield, CT Ridgefield Playhouse
04/29/16 New York, NY Le Poisson Rouge
04/30/16 Carmel, IN The Palladium
SONAR Artist, Professional and Platinum are used by countless artists worldwide who are are taking their music into their own hands. If you are a musician who owns a PC, why not turn it into a recording studio? Please visit the SONAR pages for more information on getting started. No matter what stage you are in your career, there is a version of SONAR right for you.
Cakewalk Talk Episode 1: SONAR X3 vs SONAR Platinum – Adding Tracks
Artist Spotlight: Eric Hansen—How He Gets Big Pro Soundinig Results at Home
 “Is it World Music?” “Is it Spanish Music?” “Is this Jazz?” “Is this in the Acoustic Genre?” Fortunately for guitar virtuoso and now-Pro D.I.Y’er Eric Hansen, the simple answer to these questions he faces regularly about his music is, “YES.” Eric is another longtime SONAR user who depends on SONAR daily for his livelihood. He is based out of Southern Florida which might just be where his Spanish and Latin influences come from, where at a young age he had a unique fondness for Flamenco infused Pop music.
Eric began studying the guitar at age 14 and was performing professionally with local rock groups by the age 16. He then attended Florida Atlantic University where he studied Classical and Jazz guitar and was the first actual guitarist to complete the Honors Performance Program at F.A.U. He went on to graduate with academic honors while simultaneously studying Flamenco and Latin American music with musicians from Spain and Peru.
 In his professional career, Eric is no stranger to the Billboard Charts with 6 records under his belt all crafted in different versions of SONAR spanning over 15 years. Eric is in the final stages of another record, but this one is being tracked, mixed and recorded all in SONAR Platinum. After Eric getting Cakewalk an exclusive preview to 3 of the new songs on the record, we were interested in finding out more about how all these great tracks are coming together in Platinum [DEMO PREVIEW]:
Continue reading “Artist Spotlight: Eric Hansen—How He Gets Big Pro Soundinig Results at Home”
Mining Gold from PA Recordings with SONAR
by Craig Parmerlee – SONAR user since SONAR 7
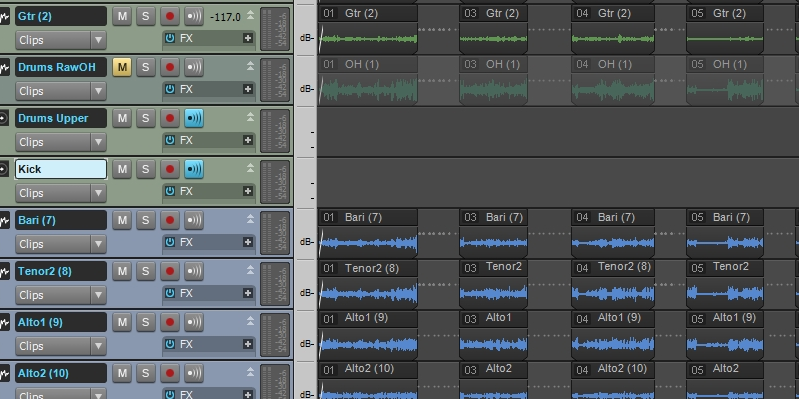
SONAR and other DAWs are used heavily to produce high-quality recordings, while other people use SONAR as part of a compositional process. I find that most of my SONAR usage is a little different, processing live recordings tracked in a concert or club setting. This usage presents various problems that aren’t as apparent in a controlled studio setting. This blog will present a workflow and various SONAR features I have found valuable when processing live recordings.
Objectives
- In most cases, my primary objective is to produce a recording that the musicians can study in order to improve their performance.
- In some cases, the performance and production quality will be high enough to serve as demo material to promote the group.
- I try to deliver a mixed and mastered copy to the musicians within 48 hours, while the event is still fresh in mind, so speed and efficiency are very important.
- Often a musician will ask for a further edit on one of the songs, for example, to include in their personal résumé. Flexibility and ability to recall settings are important.
Changing Expectations
Years ago, I did such projects using Audacity, which seemed adequate at the time. However, expectations have changed radically.
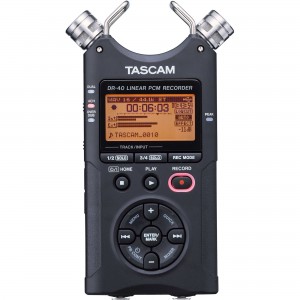
Today many musicians have a low-cost stereo field recorder such as the TASCAM DR-40.These recorders are the equivalent of point-and-shoot cameras. For around $100, they can produce remarkably good quality under ideal circumstances.
This has become the baseline against which many musicians judge other live recordings. Even though I want to produce quick results, if I can’t do substantially better than a TASCAM DR-40, for example, then I am wasting my time (I should note I love those small field recorders and often use them too, but that is not the subject of this blog).
Fortunately, with SONAR I have found a work flow and a set of “go-to” features that allow me to do much better than a stereo field recorder almost every time, using only the microphones that are already placed for the live PA system.
A Word About My Background
Continue reading “Mining Gold from PA Recordings with SONAR”
How SONAR user Bentley Ousley Executes a Crazy Idea
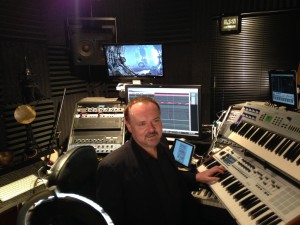 I love it when something comes across my desk that MAKES me want to dig deeper—find out more. Recently I have been spending more time reading our Cakewalk forum and I am amazed at how passionate and talented our user base is. I find myself going through posts, clicking links, poking around and being genuinely entertained and inspired. One recent post really got my attention and after inquiring directly to the user, I found myself turning into a CSI investigator (Cakewalk-SONAR Investigator) looking for clues to make some sense out of what I had just stumbled upon…
Opening the case:
Cakewalk User: bentleyousley – [My Inside Voice]: “…sounds a little suspicious to me—sounds like a Rock Star I should know.”
Case: Once and Future Cities: A Fractal Journey – [My Inside Voice]: “…I think I remember the word ‘fractal’ from some distant math class or something.”
Location: Kansas City – [My Inside Voice]: “best BBQ I’ve ever had in that city, but a SONAR user in Kansas City with a studio that looks like a rocket fuselage? Okaaaayyy???…”
Evidence: PBS, Kansas City Star, Kansas City Planetarium – [My Inside Voice]: “…PBS? A Planetarium? A home-brew large format projector and software? Fractal equations translated into visuals? A brilliant film all edited and scored meticulously in SONAR Platinum by one person made for planetariums? I’m IN…” Continue reading “How SONAR user Bentley Ousley Executes a Crazy Idea”
5 Ways to Widen Your Mix
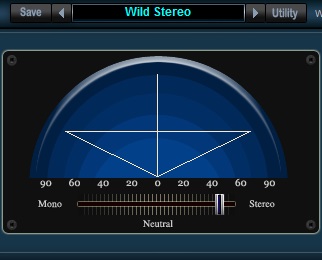
At some point, nearly every mixer has experienced this:
“My mix sounds great, but this mix by (Bob Clearmountain, George Massenburg, Joe Barresi, etc.) sounds so much wider… How do they do that?”
Aside from the highly classified mixer voodoo magic that they still swear isn’t real, there are a number of techniques you can employ to get a little more width out of your mix.
PANNING
I already know what you’re about to say: “But I pan my parts hard left and right, and it still doesn’t sound wide enough.” I struggled with this for a long time myself, but trust me, panning is listed first because it’s the first step toward a wide mix.
If you’ve got things hard-panned, you’re already halfway there. One trick to making this work is contrast; if everything is hard-panned, there’s no point of reference for what is narrow or wide.
EXAMPLE: In a rock or metal mix, it’s fairly common to find extremely wide guitars. What many folks don’t notice is that the drums are not always quite as wide.
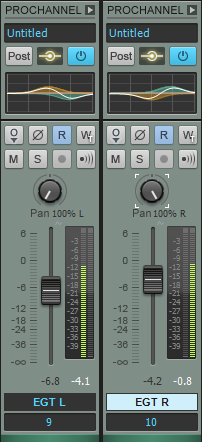
A pretty standard template for me is: guitars panned hard, drum overheads panned at about 50%, and if applicable, the drum room track at about 60-75%. This makes for a full stereo field and helps isolate the parts, creating a very wide image of the guitars while still having good stereo separation for the drums. It also helps prevent distorted electric guitars from eating up all that gorgeous drum ambiance you worked so hard to track perfectly.

Contrary to the above, I’ve heard a lot of folks swear by what’s known as “LCR Mixing,” or Left-Center-Right mixing, where – you guessed it – everything is either panned, hard left, center, or hard right.
I personally am not a major advocate of LCR Mixing, but I highly encourage everyone to try it out. It might work for one song or one style, but not another. If nothing else, it’s an excellent starting point in helping you quickly decide the rough stereo placement of each mix element .

And of course, never forget about automation–the most important part of any mix, in my opinion. Try panning a stereo track to about 80% width, and then at an appropriate point in the song, bump it up to 100%. I guarantee this will add apparent width to your mix.
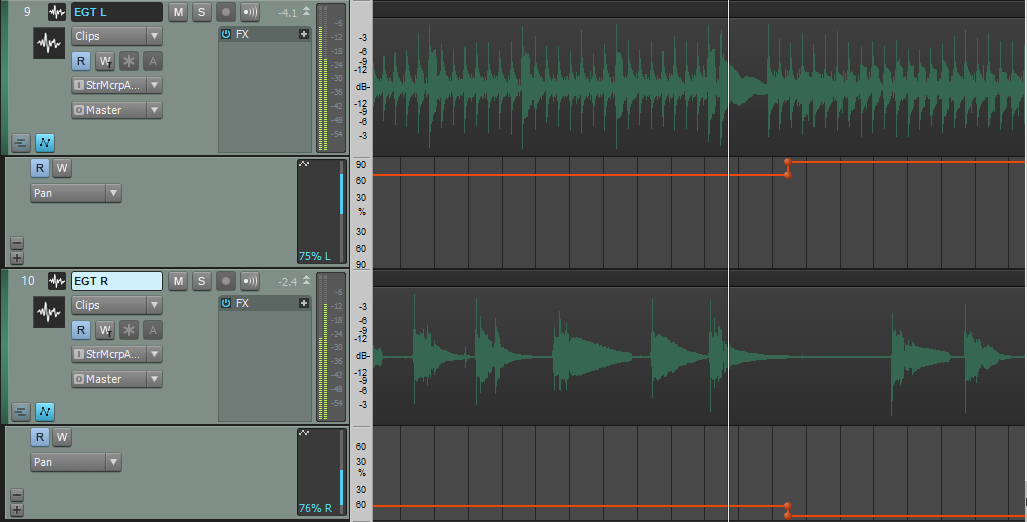
This goes back to contrast — you’re listening to the song and at its widest point, it’s at 80% width. Your ears believe that everything is as wide as it can be. Suddenly, everything gets wider and the apparent stereo width seems enormous! I’m not saying go crazy and use this trick all the time, but try it out and hear the effect for yourself.
EQ
Sometimes EQ can help you make your mix sound wider. And you’re probably thinking, “how is adjusting frequency content going to expand stereo width?” Well, technically it’s not…
It’s a psychoacoustical phenomenon that causes a bit of separation of the parts, making their perceived width much greater. That’s right, it’s not real. But we can fool our ears into thinking we’re actually adding width.
Here’s what to do: take a look at your left guitar track and find a place in the midrange where you might like to boost. Let’s say just for example’s sake, that we’ll add 2dB at 600Hz. Now we’re going to find another frequency and cut it: -2dB at 2.8kHz (again, just for example).
Now, go to your right guitar track and do the opposite: -2dB at 600Hz; +2dB at 2.8kHz.
Be careful — I wouldn’t add or subtract any more than about 2 or 3 dB here lest altering or totally destroying the tone (trust me, the guitar player will hear it and reveal his or her darker side very quickly). Make an adjustment that’s just enough and you’ll trick the listener into hearing an expanded stereo width.
Delay
This is how you get a mix to sound like it’s actually wider than the speakers themselves. It became ubiquitous in the 80s, but much like gated reverb, it’s used more tastefully in modern mixes.
First, a word of warning: this can completely dismantle the mono compatibility of your mix — proceed with caution!
The technique is quite simple, and is another one of those psychoacoustical tricks (come on, you didn’t think you could actually get your mix to be wider than the speakers themselves… did you?).
Insert a stereo delay plugin on your stereo track or bus (IMPORTANT: make sure the delay plugin has independent controls for the left and right sides) and set the mix to 100%. You could also use the Channel Tools plugin, which has this sort of functionality built in. Just add a few milliseconds of delay to one side of your stereo track or bus, and you’ll hear quite a difference right away.
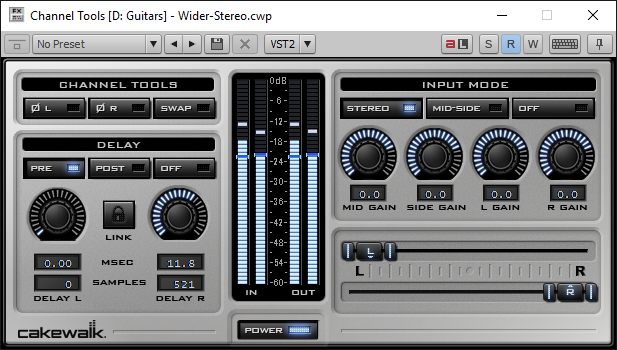
Of course, there’s always the question of how much is enough. Here are some tips:
-
Does it sound like one side is playing before the other? Too much. You’ll definitely want it below 20-25ms, or it’ll start actually sounding like, well, a delay.
-
More delay time will not always make it wider. The effect is caused by the phase relationship between the two sides, so you may find a sweet spot with hardly any delay at all.
-
Collapse the track/bus to mono. Does it sound terrible? Try making it a little narrower.
-
Does the tone change too much? Move the delay time up or down a little bit and see if that helps.
-
Remember, phase can truly make or break your mix, so again, tread cautiously when applying this effect.
Reverb
There are a few different ways reverb can help increase the apparent stereo width of your mix.
The first way is quite simple: Applying reverb to an already-wide signal can make it sound even wider. This has to do with those phase relationships we were just talking about.
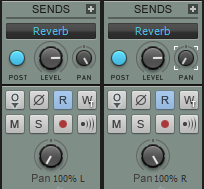
To take things a step further, try panning your reverb sends to the opposite side (Hard Left Audio w/ Hard Right Send; Hard Right Audio w/ Hard Left Send) to see if it makes any difference. If nothing else, it makes for a pretty cool creative effect.
The second way is also quite simple. What is reverb but a few thousand delay signals right after one another? What we’ll do is apply reverb to only one side of the stereo track or bus.
What this is doing, in addition to the delay trick mentioned above, is making one side sound slightly more distant. It’s ultimately creating a distinction between the left and right side (again, in your mind) that creates the illusion of greater width.
Mid/Side Processing
This is a bit of an advanced technique. There are plug-ins out there that will do all the thinking for you (The Hoser XT, for example) by allowing you the option to make separate adjustments for the individual “mid” and “sides” channels.
However, there are a few ways to make this work, even without a “smart” plug-in… I’ll keep this as simple as possible.
The best way to set yourself up for Mid/Side processing is to use the Mid/Side microphone configuration when recording. This is what I consider a true Mid/Side configuration, and I feel it balances better, has better mono compatibility, and is more “true to the source” when it’s being modified than its “fabricated Mid/Side configuration” counterpart.
If you don’t know how to do Mid/Side recording, I’ve provided you some resources here, here, and here.
Now, as for converting a standard stereo track or bus to Mid/Side tracks, you’ll have to do a bit of extra work…
-
Clone your stereo track or bus.
-
Collapse the original to mono with the interleave button. It should look like this: [mono interleave button]. This is now your “Mid” track.
-
Insert a plugin like Channel Tools, or any comparable plugin, on the cloned track.
-
Flip the phase on the left side (or the right side; one may sound better than the other). This is now your “Sides” track.
What we can do from here is process these tracks individually. A good starting point would be to apply some fast compression to only the “Sides” track, somewhat eliminating the dynamic peaks and valleys and making the sides seem louder, thereby increasing the apparent stereo width.
Similarly, you can add some upper-midrange frequencies to the “Sides” track, increasing their presence, and/or reduce the same frequency range in the “Mid” track.
Try all these techniques and take note of the qualities that each impart. Remember, the more techniques you have in your arsenal, and the more practice and experience you have with each of them, the quicker you’ll be able to make creative production decisions.
Anatomy of a Project: A Nontraditional Approach to a Commercial Recording
By Jimmy Landry
 Last summer, Peppina—a young female artist from Finland— plunged herself into the NYC music scene for two months. With the help of renowned NYC entertainment attorney Steven Beer who discovered her, she managed to head back to Finland with a major-label sounding EP. The project was recorded in different ways, in different locations all over the city—and with budgets being slashed, these days it’s pretty much hand-to-hand combat when making a low budget recording where anything goes. But the upshot is yes, you can record a commercial-sounding record on a budget—so here are some of the techniques we employed to accomplish that goal. SONAR Platinum was instrumental in saving time on this EP. Between the Drum Replacer, VocalSync, onboard Melodyne, Speed Comping and general speed enhancements, I got to the finish line a lot faster than previous records. I highly recommend anyone who’s on SONAR XX to take a close look at what the program has brought to the table in the last year.
This all started when Steven Beer called about an artist he’d heard sing at a film festival, and invited me for a meeting at his office. Interestingly, there were two other producer/writers there as well—a bit unorthodox, but pretty much anything goes these days, so nothing really surprises me anymore. We discussed the artist’s interests, influences, and other variables, and then listened to some of my reel as well as music from the other producers. It turned out the lawyer’s master plan was to bring the three of us together to co-write, record, and mix a five-song EP before she went back to Finland in 45 days.
 Peppina already had some momentum in Finland from a loop she wrote and uploaded to a site called HITRECORD (owned by actor and director Joseph Gordon-Levitt). Her upload was so popular that Gordon-Levitt flew her to California to perform the piece at the Orpheum in LA during one of the show’s TV episodes. This all sounded good to me, so I signed on to a production team that would share in the production duties and heavy lifting. As to budgets…well, there was enough there for us to take it on as a challenge.
Continue reading “Anatomy of a Project: A Nontraditional Approach to a Commercial Recording”
Coloring Your Sound With Reverb: Part 1 – Convolution Reverb
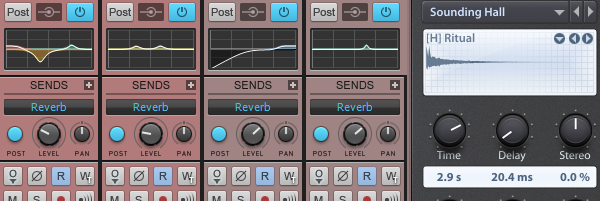
With so many different reverb options available, it can sometimes be hard to know where to begin. This series will focus on helping you make your reverb decisions more efficiently by identifying the function of every component, one at a time.
Sounds | Controls | Tips & Tricks
The Sounds
In convolution reverb, microphones capture the sound of an environment’s response to a full spectrum of frequencies, known as an Impulse Response (IR). Then, the resulting .wav file is introduced back into a convolution plugin – in this case ReMatrix Solo. The plugin plays the incoming audio, say your drum track, “through” the IR. This type of reverb is great for adding realistic ambience to dry sounding tracks.
Depending on the shape and material of the walls, ceiling, floor, and furniture in the sampled environment, different frequencies may be absorbed or reflected faster or slower than others. This is what gives any reverb its own characteristic sound. For example, a concert hall with hard, dense walls and plastic seats will have a much longer decay in high-frequency content than a living room with relatively soft wooden walls and a cushioned couch.
ReMatrix Solo recognizes 5 different categories of IRs: Hall, Room, Plate, Early, and Special. Let’s take a look at the characteristics of each of these.
Hall
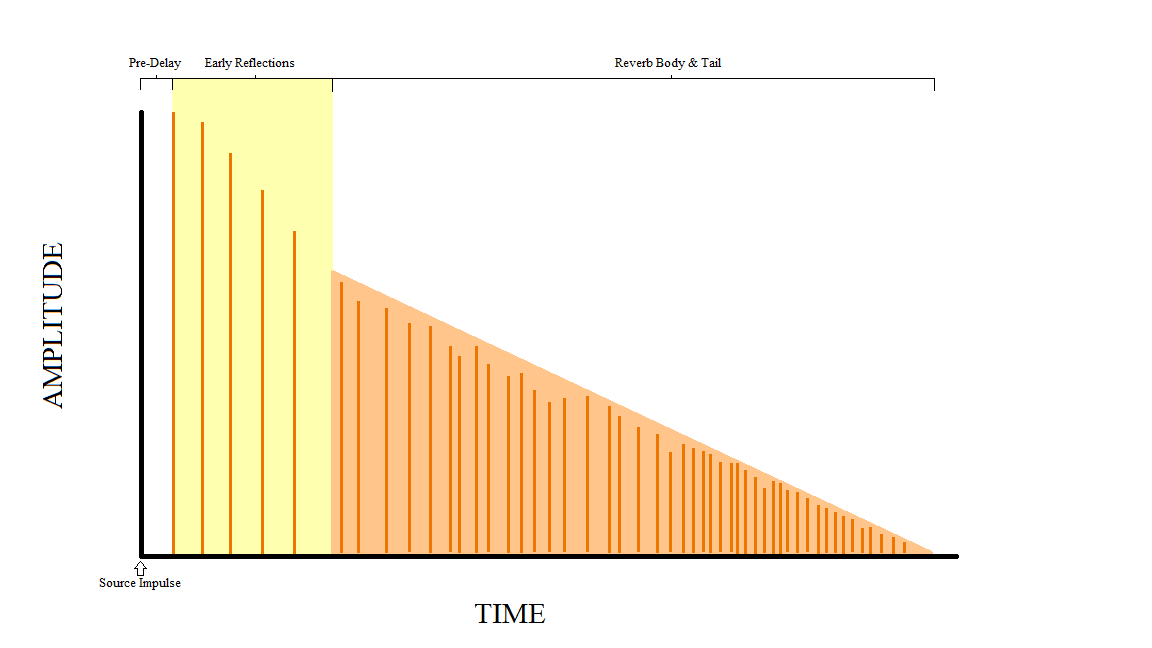
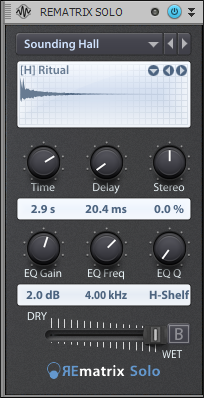 The first thing you’re likely to notice about Hall reverbs is that they’re usually longer than other types–about 2 seconds or more. This is because halls are rather large spaces with lots of room for sound to bounce around. Like great prose or a fine wine, reverb has a beginning, middle, and end. For reverb, we’ll refer to these as “Early Reflections,” “Body,” and “Decay (or Tail).” Common Hall reverb characteristics include an audible array of early reflections (more on this later), a dense, sustained body, and a smooth, often dark decay.
Here are some sonic examples of applications of Hall Reverb:
- If you listen carefully, you’ll notice the snare’s attack is quite present in the reverb itself.
- The guitar in this example loses some presence due to the heavy wash of conflicting frequencies.
- In the vocals, most of the consonants are lost to the diffusion, resulting in a reverb body consisting mostly of vowel sounds.
Room
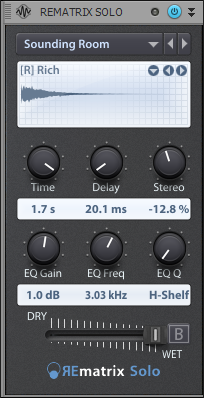 Room reverb times are much shorter than halls, due mostly to their smaller size. These will normally range between about a half-a-second to a few seconds. Rooms are often a bit “darker” sounding than most halls, since the size and materials are prone to more high-frequency absorption. However, any variations in size and material are going to have a large impact on the resulting reverberations, so you can expect much variation from one Room sound to the next. One may have almost no early reflections, a smooth body and quick decay, while another might have a booming attack, and thick body that slowly fades away.
Here are the same tracks as above, but with some Room reverb applied:
- The snare sound gains a presence boost from the stronger midrange information of this reverb.
- The guitar fits nicely with this reverb due to the dense and diffuse body.
- Notice how the vocal reverb now sounds like each word smears together, rather than just the vowel sounds in the hall example.
Plate
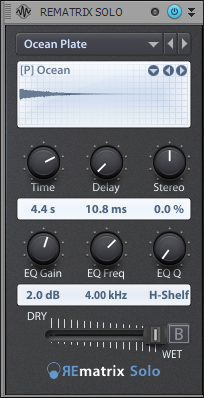 A plate reverb is a mechanical device that vibrates in response to an audio signal being passed through it. It has transducers that send and receive the signal, and a damping pad to adjust the length of the reverb. These reverbs are often a half-second to a few seconds in length, and have almost no early reflections, but a substantial body and gentle decay. Because of this, it’s not uncommon to see large amounts of predelay added to this reverb type.
Once again, the same tracks as above, but with Plate reverb applied:
- This reverb is quite bright. The snare gains a lush high end that otherwise is rather lacking
- You’ll notice that the guitar sounds a bit harsh running through this particular plate sound.
- The vocals have a bit of an “airy lift” to them, but sibilant sounds (S’s and T’s, for example) might need to be carved out with an EQ to avoid a similar harshness to the guitars.
Early
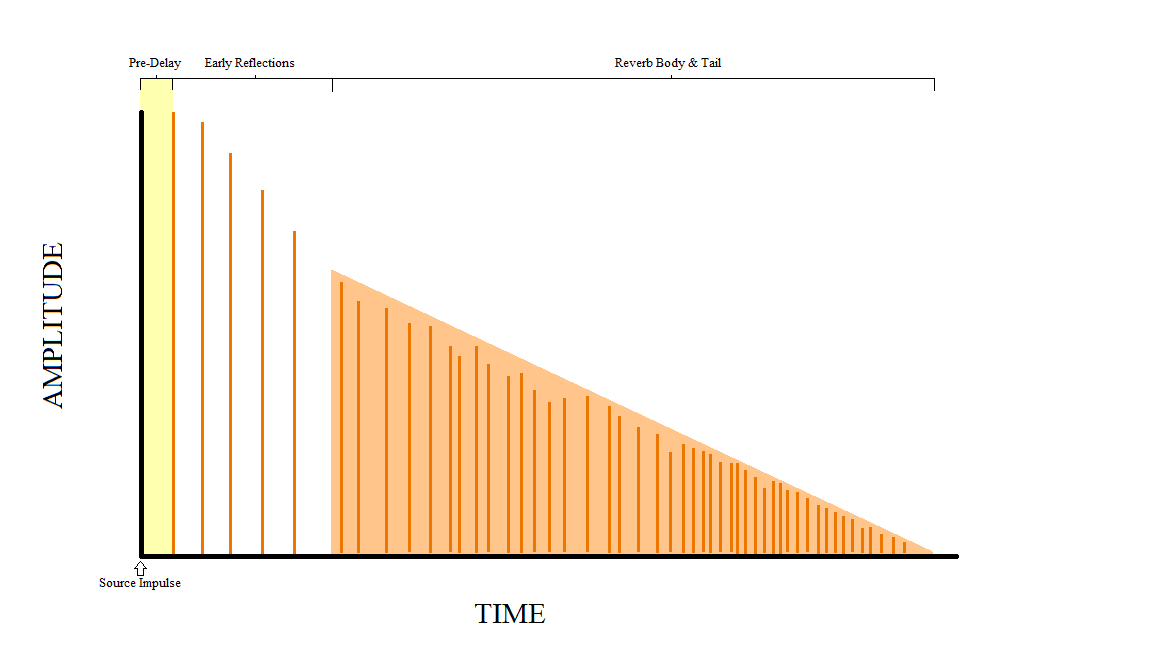
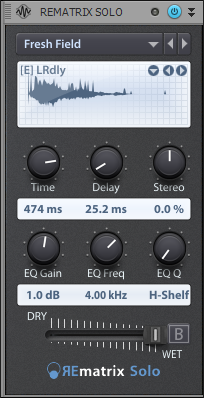 This one is sort of unique to ReMatrix. Nearly every type of reverb has early reflections, but this particular category isolates them as their own entity. Early reflections, as shown in the diagram below, are the sounds that you hear most immediately after the direct signal, usually within the first 60-80ms. For that reason, they have an almost imperceptible body and decay. Don’t let the short time fool you, though; these reverbs can introduce very unique and desirable sonic characters to any sound.
Here are some examples of early reflections applied to our drum, guitar, and vocal tracks:
Short and sweet, Early Reflections are fantastic for bringing a sound to the forefront while still maintaining a sense of depth and “live-ness.”
Special
 This is where all the outliers are found. These IRs include reverse reverbs, modulated sounds, and more. The modulated sounds are typically .wav files that have been modified in some way with another effect like an automated filter, a delay, some kind of pan effect, or just about anything else. Since there are no real rules to this IR type, there’s not much explaining to do here, so let’s jump right into some examples.
- The snare, high in transient information, also yields an interesting result with the panning echoes.
- The busy guitar covers up much of the effect, and you’re just as well reaching for a more suitable reverb program
- The vocals play quite nicely through it, sounding like a high-feedback slapback delay with some sort of weird FM filtering.
- This type of reverb may not fit so well in every mix you do, and the effect may not always be apparent, but it can bring a bit of spice to an otherwise dull part.
The Controls
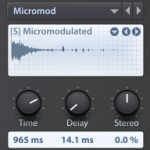
Time
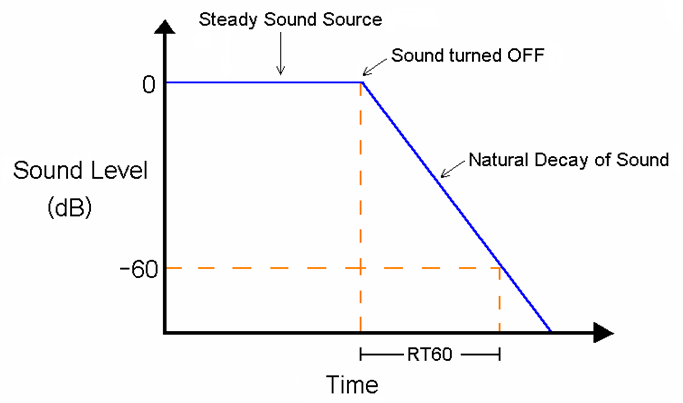
 This is the length of the reverb. Whenever you see a time control on a reverb, it is measured in RT60, or amount of time it takes for the reverb to be 60dB lower than its original level. Note that when you load a preset or IR in ReMatrix Solo, this setting adjusts to the IR’s original intended RT60 time. Be careful when making adjustments to this as it can sometimes make the reverb sound “chopped” or produce undesired artifacts.
Delay
 This is the Pre-Delay, or amount of time before the reverb signal is produced. For example, if your song is 120bpm and you want an eighth note’s worth of time between the dry snare hit and the wet reverb signal, you would set this value to 250ms. This is useful for when your original signal starts to sound oversaturated by the reverb. Providing a bit of time between the original signal and the reverb signal gives a sense of distance and depth.
Helpful Hint: 1 ms of pre-delay is equal to about 1 foot of distance from the source.
Stereo
 This knob controls the stereo width of the reverb. A value of 0% will be “mostly” mono. A value of 100% provides an extremely wide stereo image, and dipping into negative values results in an extremely collapsed reverb sound. Try a variety of settings–this parameter has an incredible ability to create a very realistic and controlled sense of space for your reverb.
EQ Gain
 This is, quite simply, the amount of gain applied at the EQ Freq setting. This applies only to the reverb return signal itself, so adding a high shelf to the snare reverb does not add the high shelf to the snare, just the snare’s reverb.
EQ Freq
 If you would like to apply a band of EQ to your reverb signal, this is the place to do it. This setting will determine the center frequency of your EQ adjustment. This is useful when you want to modify the coloration of the reverb, or to help it fit more neatly into your mix.
EQ Q
 As with any Q setting, this is the width of the EQ band you’re applying to your EQ signal.
— Hi-Shelf affects frequencies at and above the EQ Freq setting
— LPF (Low-Pass Filter) cuts all frequencies below the EQ Freq setting
— Numbers indicate a Band Pass filter — your standard bell-curve EQ. A smaller number creates a wider bell curve, and a larger number creates a very narrow curve.
Dry/Wet
![]() This is the blend of original, unprocessed signal and “wet,” processed reverb signal. A common workflow would be to create a send on the track to which you wish to apply reverb. Set up the send to go to an aux track, and add the ReMatrix ProChannel module to the Aux Track. Set the Dry/Wet slider to 100% wet. Now, your original track is still totally dry, and the aux track is only the reverb signal. To blend, simply adjust the send level from the original track. More send level = more reverb.
This is the blend of original, unprocessed signal and “wet,” processed reverb signal. A common workflow would be to create a send on the track to which you wish to apply reverb. Set up the send to go to an aux track, and add the ReMatrix ProChannel module to the Aux Track. Set the Dry/Wet slider to 100% wet. Now, your original track is still totally dry, and the aux track is only the reverb signal. To blend, simply adjust the send level from the original track. More send level = more reverb.
Tips & Tricks:
- Play around with settings and presets to get the most out of your reverb plugins! The sound examples demonstrated one of many different configurations for each reverb type.
- Be conservative — too much reverb can leave your mix sounding distant and oversaturated.
- Be judicious — in most cases, it’s not a good idea to apply reverb to every track.
- Send, not Insert. 9 times out of 10, you’ll have a better experience with separate source and reverb tracks. See the Dry/Wet section for more info.
- Use “just enough” reverb: Solo your source and reverb tracks, and bring up the send level until the reverb is audible. Then, bring it back down 1 dB or so and move on.
- Use your EQ. The built-in EQ on ReMatrix is great for adding color or carving out some space, but don’t be afraid to add another EQ to your reverb track to tailor it further to fit your mix.
- Play with dynamics. Applying Compression, Gating, and Side-Chaining to reverb tracks can result in some really useful and interesting effects.
- Pan your return. A guitar panned left with its reverb panned right can increase the apparent space the instrument occupies
- Not all reverbs will work for your track. It’s well worth the time investment to find the one that best suits your production.
- Don’t write off the harsher sounds. You may notice some IRs sound “better” than others, but the ones that sound “bad” when soloed tend to stand out better in a dense mix.
- It doesn’t need to be realistic for it to be pleasant. It’s okay to have your vocals in a hall, your snare in a dark room, your toms running through a plate, and your kazoo in a bright room.
- Automate the send. Reverb doesn’t have to be on all the time. Automate the send to apply reverb only to certain words, licks, or sections to add motion and excitement to your mix.
You can try REmatrix Solo for yourself in SONAR Professional and SONAR Platinum.
| You might also like… | |
|---|---|
 |
 |
| 15-COMPRESSOR SHOOTOUT: LEAD VOCALS |
MIXING VOCALS: EASY DYNAMIC VOCAL FX IN SONAR |
15-Compressor Shootout: Lead Vocals
No question, there are a lot of compressor plugins out there, and they all have their unique layouts, quirks, and sonic qualities. In the video below, we line up 15 different compressors and demonstrate these differences.
Below the video, you’ll also find a helpful updated list of key features, a downloadable chart, and links to learn more about the compressors that do not come standard with SONAR Platinum. If you’re not familiar many compressor plugins, I recommend starting here.
It’s worth noting that this video demonstrates a limited scope of each compressor’s capabilities. Since the compressor is being used to level out a vocal performance, each one has been set up optimally for the application, usually with a low ratio and fairly fast attack and release wherever applicable.
Every possible measure was taken to keep the responses and output levels of each compressor as uniform as possible so that the shootout makes for a consistent apples-to-apples comparison. In the future, keep an eye out for more of these shootouts, as the same tools might have totally different effects on a snare drum, acoustic guitar, electric bass, or saxophone.


