As you may know by now, the Bakers at Cakewalk are constantly on a mission to improve upon SONAR. Whether that’s a bug fix, a new feature, or a feature enhancement, we’re giving you the tools to be creative and get the job done. In 2016 we brought you workflow improvements for comping such as improved copy and paste functionality, keyboard shortcuts (adjusting stretch and crossfades), as well as visual improvements and customization options for take lanes. With the 2017.02 release we take things to a whole new level, with a host of new features based on your feedback. Don’t forget, if you have features or enhancements you’d like to see, drop us a line at bakery.cakewalk.com and let us make SONAR even better! For now, let’s dig in:
Cakewalk Announces Simpler SONAR Prices

A decade ago, we came up with a system in good faith to give our customers the best price possible based on what Cakewalk products they already owned. But as we developed new products and updates over the years, and the number of upgrade pricing paths multiplied, our system became more confusing to customers and became less helpful.
Now it’s time to simplify! Continue reading “Cakewalk Announces Simpler SONAR Prices”
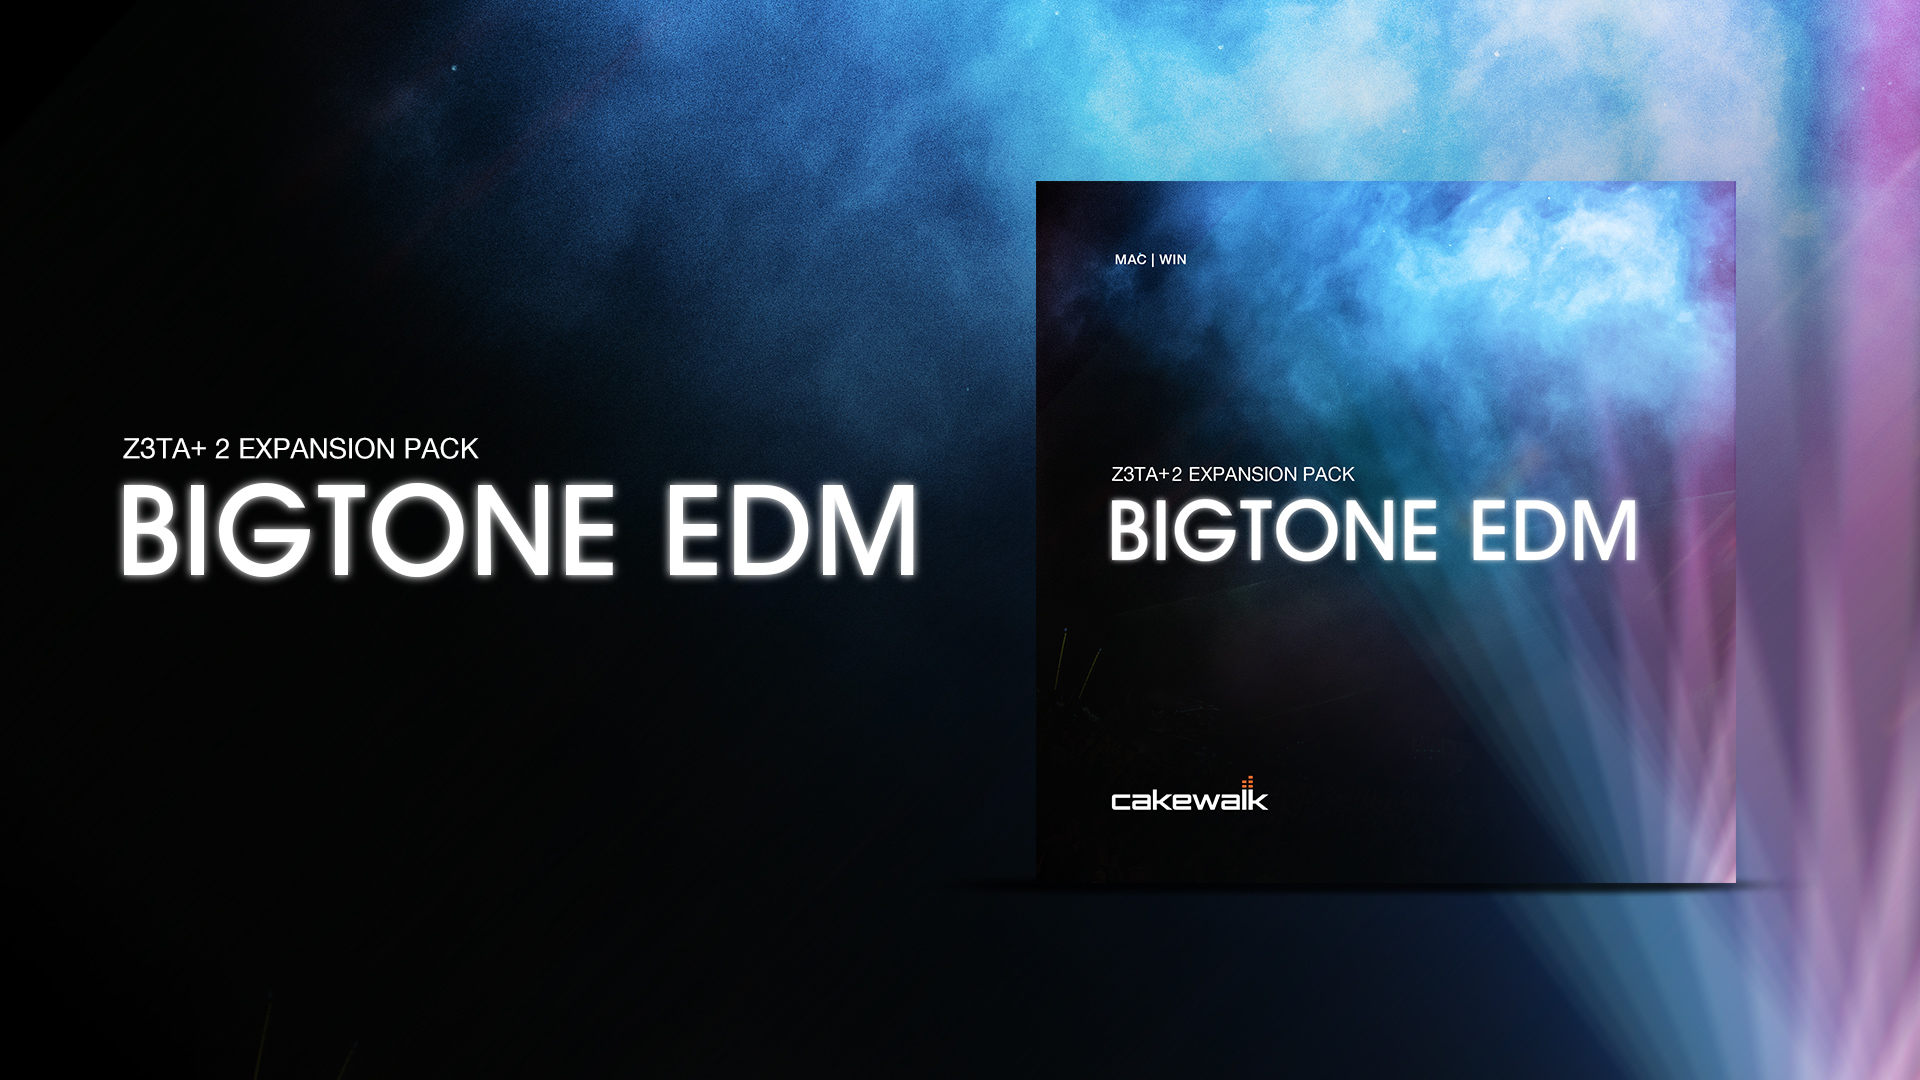
Review: BigTone EDM Expansion Pack for Z3TA+ 2
by Craig Anderton
Sound Designer Nico Herz has done sound design for a variety of companies, of course including Cakewalk. BigTone EDM, for Z3TA+ 2, is (as you can probably guess from the name) designed for EDM. So if you’re into traditional bluegrass, you probably should not continue reading this.
Anyway, the presets are designed for the EDM “sweet spot” of 125bpm. There are 127 presets total, arranged as eight banks: 7 Bass, 19 Keys, 11 Leads, 20 Pads, 11 Sequences, 6 Sound FX, 19 Textures, and 34 Arps. I’m going to assign each bank a letter grade average for two reasons—it might be helpful, and because sounds are so subjective, if you end up disagreeing with me you’ll know not to bother reading any sound reviews I do. Conversely, if you think my evaluations are correct, we can have an ongoing relationship with future sound reviews. Continue reading “Review: BigTone EDM Expansion Pack for Z3TA+ 2”
The Miracle of Mid-Side EQ: Rock Your Mixes and Masters
by Craig Anderton
Sure, the LP EQ is a great linear-phase, stereo EQ. But it was designed for mid-side processing as well as conventional stereo, so let’s explore what mid-side processing is about, and why it’s so important.
LP EQ BASICS
You can add up to 20 nodes, and each can have one of the following responses:
- Low shelf
- High shelf
- High pass
- Low pass
- Peak boost/cut
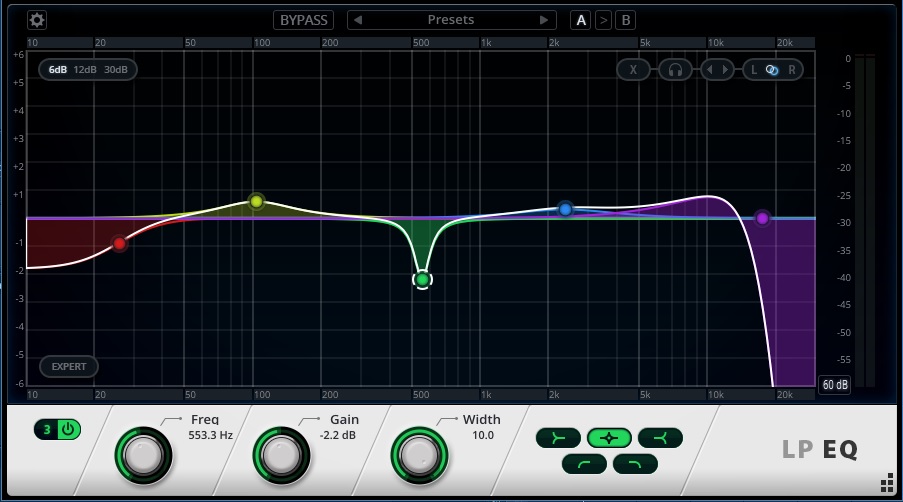
However, there’s some intelligence when adding nodes; for example if you double-click to enter a node close to the highest possible frequency, the LP EQ will insert a lowpass filter. At a somewhat lower frequency, there’s a shelving response (although you can of course change these default responses to whatever you like). Drag nodes horizontally to change the frequency or up/down to vary amplitude; a right-click + drag on a node alters the width, as does using the mouse scroll wheel on a selected node.
You can ctrl+click, or draw a marquee around, multiple nodes to select them, but there’s an interesting twist. Suppose a node is set to boost, and another to cut. If you select both, then click on the one that boosts and drag it downward, the amount of boost will decrease. However the one that’s cut will start boosting. This complementary motion allows increasing or decreasing the overall emphasis easily; for example, if you think you went too far with the amount of EQ and want to pull it back, this reduces all aspects equally.
If all the selected nodes either boost or cut, then their amplitudes vary together.
These basics give a flavor of the features, but there’s much more—so click on the UI to give the LP EQ the focus, then press F1 to call up the comprehensive documentation.
MID-SIDE EQ PROCESSING
Mid-side processing encodes a stereo track into two separate components: the center becomes the “mid” component in the left channel, while the stereo track’s right and left elements become the “side” component in the right channel. You can then process these components individually, with automatic decoding back into stereo.
To get started with mid-side processing, click on the LP 64’s Expert button and under Mode, choose Mid/Side. For best results, set the precision to High. This results in the most latency but the highest accuracy, which is important because with mid-side processing, you don’t want any phase shift or sample misalignment—that will interfere with the decoded stereo imaging.
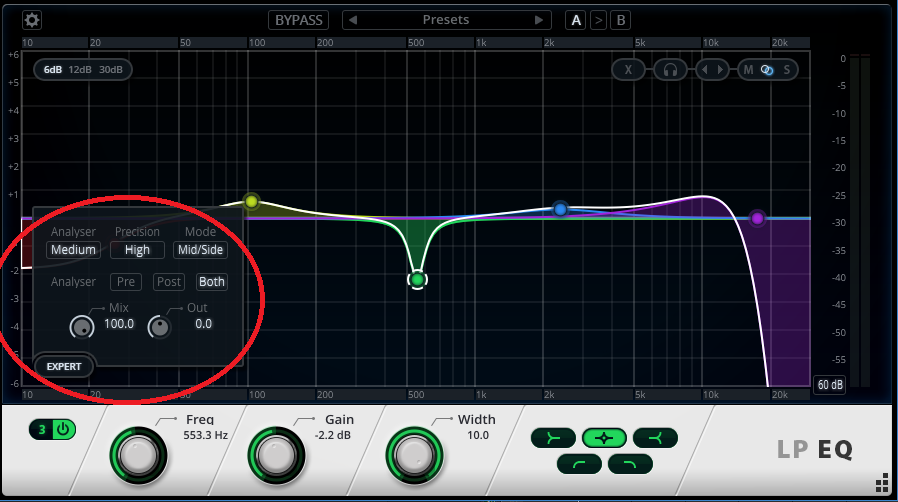
Processing can be independent for the mid and side components (as it is for the left and right channels in conventional stereo applications). You assign a node to the appropriate component by clicking on the node, and then clicking on M or S (toward the LP EQ’s upper right corner). Here are a few possible applications.
- With mastering, you can get “inside the file” to do pseudo-remixing on a stereo track. One typical application is giving a slight boost to the higher-frequency side components to provide a bit more “air” and a wider stereo image.
- If you’ve been seduced by vinyl’s comeback, remember that it’s crucial to center the bass and minimize bass excursions in the sides. With mid-side EQ processing, you can reduce the bass in the sides, and if needed, increase bass a bit in the center. Even if you’re not mastering for vinyl, taking this technique further can give a super-anchored, “center-channel” bass sound.
- Drums with lots of room ambience can benefit from a bit of upper mids in the sides for extra definition, and a little bit of lower mids in the center to accent the kick.
- If a synth bass has a wide image that “steps on” other instruments, you can bring down the bass in the sides.
- For taming reverb, set a node to Mid, select the high pass curve, and slide it all the way to the right to take out essentially everything. Then you can shape the remaining reverb with the side EQ, while chasing the away from the center, where it can muddy the bass and kick.
THE VALUE OF THE MIX CONTROL
But…how do you know whether you’re really making an improvement to the sound or not? The LP EQ includes a Mix control (accessed in the Expert section) so you can vary the mix from full EQ to no EQ. Yes, parallel processing for EQ…very handy, and even better, the Mix control can be automated (like virtually all other parameters, including display characteristics and bypass).
You can also switch quickly between two different EQ settings with the A/B comparison function.
Granted, there’s no shortage of EQ plug-ins, but the LP EQ truly brings something new to the party. If you’re not familiar what mid-side processing can do with EQ, there’s no better way to find out than with the LP EQ.
Free Impulse Responses For Your Convolution Reverb
by Daniel Gonz
We’d like to release an impulse pack that we created last year in New York City. This free impulse response pack captures the simple ambience of two fantastic live rooms for drums, vocals, and pretty much any acoustic instrument you can imagine. Drop them into your choice of any convolution reverb to add depth to the elements of your mix.
Download the FREE Impulse Response pack here
The Dynamic Gate | A Cleaner Way To Mix Drums
by Daniel Gonz
Gates are wonderful processors that can clean up background noise and bleed in your audio tracks. They’re a bit tricky to understand because the key to successfully using one is often a specific feature that’s hidden or buried in the interface. The feature I’m referring to is called the sidechain. It’s a powerful element of my mixing workflow and I’d like to show you why.
To follow along with this post, you can download the audio examples here.
In its simplest form, a gate allows a signal to pass through it only when its decibel level is above a set threshold. This means the gate is ‘open’. If the signal falls below the threshold then no signal is allowed to pass. This means the gate is ‘closed’. The sidechain becomes an integral part of this entire process because it’s what the gate uses to detect whether or not the signal is above or below the set threshold.
Continue reading “The Dynamic Gate | A Cleaner Way To Mix Drums”
CakeTV Live Ep 4 – Mixing Drums in SONAR Part 1
Designer's Notes: Smart Swipe
by Lance Riley
Background
In a world where consoles are less likely to be seen or even touched by musicians today and a control surface is referred to as a mixer occasionally, I always find myself missing the tactility of working in an analog studio. Don’t get me wrong though, I truly love all the affordances that our modern digital production environments allow for, but yet here I am… I wanted to make the mouse act more like a finger touching controls when working in SONAR, so we started working with that idea and came up with many ways that mouse gestures could be improved upon to do more than currently possible.
Introducing Smart Swipe
Workflow is extremely important to us, and we wanted users to see this as an improvement to their existing workflows without disturbing the way they use the app. We started looking at track state management and how we could make the app feel more responsive. There was already a lot of affordance to controlling groups of tracks through Quick Groups, but some gestures at times seemed like Quick Groups just weren’t quick enough. For example, I work a lot with 2 guitar mics, and sometimes I just want to solo or mute both tracks without using a bus. It seemed very natural to want to click and drag from a control on one track and have it affect the same control on neighboring tracks.
The benefits of using Smart Swipe
With Smart Swipe, you can:
- Quickly Mute or Solo multiple tracks that are in series like Guitars with 2 mics, recording Bass with a DI and a mic, etc
- Alleviate some situations where you would need to put tracks into a folder.
- Add additional control to tracks already in a folder.
- Quickly check the phase relationship across drum mics while playing back.
- Quickly A/B the processing of tracks by Smart Swiping the FX Bin Enables
- Isolate and listen to takes by looping a section and Smart Swiping the Solo Exclusive buttons on the take lanes.
- Quickly enable or disable multiple sends on the same track in the Console View
Track View vs. Console View
The Track View & Console View have some similar controls, but also several unique ones. Here are the areas in which you can currently use Smart Swipe.
- Track View:
- Track: Mute, Solo, Record, and Input Echo
- Track: Read, Write, and Archive
- Track: Take Lanes
- Mute, Solo (exclusive), and Record (exclusive)
- Track: Automation Lanes
- Read, Write
- Track: FX Bin Enable
- Bus: Mute, Solo, and Waveform Preview
- Bus: Automation Lanes
- Read, Write
- Bus: FX Bin Enable
Console View:
- Track: Mute, Solo, Record, and Input Echo
- Track: Read, Write, Interleave, and Phase
- Track: FX Bin Enable
- Track: Send Enable and Post (Vertically)
- Track: ProChannel Enable and Post
- Bus: Mute, Solo, Read, Write, and Interleave
- Bus: FX Bin Enable
- Bus: Send Enable and Post (Vertically)
- Bus: ProChannel Enable and Post
Summary
We are very excited to have added Smart Swipe to SONAR and we hope our users find it useful and meaningful to their workflow. Now that I have been using Smart Swipe for a while I can’t imagine using a DAW that doesn’t have this available. We already have further enhancements planned and are thinking of even more ways that we can continue to improve Smart Swipe and the SONAR workflow.
Smart Swipe in SONAR's 2016.06 Release
Smart Swipe
Here’s another workflow enhancement that becomes downright addictive once you start using it. With Smart Swipe Track Controls, you can quickly enable/disable buttons on multiple tracks by clicking a button in one track, then dragging across adjacent tracks without releasing the mouse button. Smart Swipe is also an extremely effective complement to Quick Grouping.
Smart Swipe works in the Track and Console Views with mouse gestures. The following controls support Smart Swipe:
- Mute
- Solo
- Record
- Input Echo
- Send knobs within individual track strip (Console View only)
- Phase (Console View only)
- Interleave
- Archive (Track View only)
- Automation Read
- Automation Write
- FX Bin Enable
- ProChannel Enable (Console View only)
- ProChannel Pre/Post (Console View only)
- Waveform Preview (Track View only)
A New Era For Cakewalk (an open letter from CTO Noel Borthwick)
Why we introduced Lifetime Updates
With the introduction of Lifetime Updates for SONAR Platinum, there have been many theories as to why Cakewalk would take such a bold move. For us it’s simple—it’s better for customers, it’s better for us, and we believe this way of doing business is the future, so we’re embracing it today.
Some history: In the past (pre 2015), we followed a more traditional annual upgrade cycle where we released a single version of SONAR each year. This model was flawed on many levels, both for developers and end users. As developers, we’re under extreme pressure to finish a product by a certain date to meet a revenue goal – often regardless of whether it’s ready or not.
Adding a lot of features to a product in a short cycle can create problems even skilled QA teams and beta testers won’t find. Furthermore, end users have to try and learn a huge amount of information at once—which is much less efficient than learning features at one’s own pace over time.
Rolling Updates: So we did away with annual versions of SONAR and decided to work on one version —continuously. We can make smaller incremental changes at a faster pace without disrupting the end user’s stability and workflow, as well as react more quickly to user requests. No more waiting until the next version to get problems resolved as is the case with many other products. We call this model “Rolling Updates” and as a developer and CTO of Cakewalk, I love it!
Rolling Updates also provides benefits beyond making new features available as soon as they’re ready. If something needs fixing or improving, we can just fix it and ship it without your having to wait a whole year. For example the Mix Recall, Patch Points, and Upsampling features all benefited from this interaction with end users. And doing features incrementally, in shorter time periods, promotes better stability and performance.
Although it’s never easy to do something disruptive in an industry that’s resistant to change (remember the outcry when Netflix decided to focus on streaming instead of DVDs?), the response has been decisive and positive. We didn’t want to end up like the record companies who refused to acknowledge the emergence of MP3s and digital media as a distribution model, and became almost irrelevant in the process.
Doing Rolling Updates for the past year-and-a-half has convinced us this approach is far superior to the huge yearly update—so much so, that for a limited time, we’ve made the bold decision to offer Lifetime Updates for SONAR Platinum, giving you all future SONAR updates for free.
Lifetime Updates shake up the mix even more, and offer a better way of doing business that benefits everyone. One great side effect is you get to help us improve SONAR during this process with your feedback and suggestions, creating a partnership with a common goal: You want to use the finest software in the world, and we want to create it. That’s why we are doubling down by offering the opportunity to join us on this journey.
With SONAR Analytics now at our disposal, and a responsive feedback portal on its way, we’ll be monitoring your comments, feedback, and requests closely so we can respond quickly and ensure that your experience with SONAR is…awesome. At Cakewalk, we believe that there’s no better way to succeed than by having happy customers. It really is that simple.
OS X Compatibility Coming
What’s more, SONAR will soon be available to a brand new audience of music creators with our SONAR OS X Alpha, coming this Fall.
With Windows and Mac split almost evenly among musicians, it made no sense to ignore half the market—or ignore the numerous requests over the years from music creators who’ve wanted to experience SONAR’s superior workflow, audio quality, and tools on the Mac.
For PC users who wonder if we will keep up the same pace of Windows development, the answer is an emphatic “yes”—we will never give up our lineage as a Windows-based DAW.
Since our announcement, I’ve received many e-mail’s from industry peers showing genuine excitement about SONAR on the Mac. In fact, having more people using SONAR will benefit Cakewalk long-term and improve the product as a whole. However we are still in the early stages of the Mac development project, so please be patient 🙂
All of this may seem too good to be true, and some people wonder if there’s a catch. But we’ve put a lot of thought into how we can make changes that benefit everyone. Cakewalk has experienced a major rejuvenation, and we want nothing more than to continue what has brought us to this point. We love the new Rolling Updates model, and even many users who resisted the idea at first have become converts after experiencing the many benefits.
Welcome to a better way to produce and experience music software, and thank you for joining us on this journey of innovation and excitement. We couldn’t have gotten to where we are without you.
Thank you for reading.
Sincerely,
Noel Borthwick
CTO, Cakewalk
[Noel Borthwick started at Cakewalk 18 years ago and has actively contributed to SONAR development since its inception. He is also a jazz guitar player and a SONAR user.]


