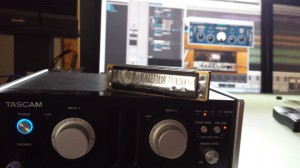
Recently I was asked to create a song for a new short film that will be making the rounds on this year’s film festival circuit. I got the creative brief [I had to write for a specific subject in the film] and got to work writing and recording everything myself in SONAR X3. Thankfully, SONAR X3 has pretty much everything you need to make a radio-ready track in the box; even if you are a #hack-of-all-trades like me. 😉 It was requested that this song have some grit to it, as well as some acoustic-oriented authenticity, so I grabbed my 5-Year Old’s harp out of his toy chest, my acoustic guitar, and got to work. The only outboard gear used on this track were a Tascam UH-7000, an AT4033a mic, my Les Paul DC and Carlos Robelli bass. I also played Dimension Pro organ through a controller.
THERE ARE NO MIXING RULES (KIND OF)
 After writing the song on an acoustic and then tracking everything, it was time to mix. I love mixing in the digital world because there really are no rules in terms of creativity. Once you understand the basics of frequencies and how to put tracks together properly, you can really get creative with the way you process sound. In this track, after I got everything recorded, I knew it needed a harmonica to give it a rustic vibe. The only harmonica I had was my son’s banged up F# harp (wrong key for the song), but I knew between X3’s Comping, the ProChannel, Melodyne and TH2 I had everything I needed to pull it off.
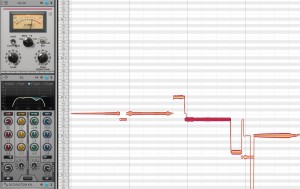
 By ear, I did the best I could creating a part that fit the song. Using the comping tool I recorded 5 different passes and was able to come up with something semi-solid. Next, I used Melodyne to analyze the part and was able to shift a few notes to make the part support the song better. After I got that all in line, I then turned to the ProChannel to Compress and EQ the harmonica so that it fit into the track. Now HERE is my point that there really are no mixing rules sometimes; since this was basically a broken down harmonica that had seen way too many fights with Buzz Lightyear, I had to use my ear and creativity to get it to sound as best as possible.
UTILIZING THE QUADCURVE EQ
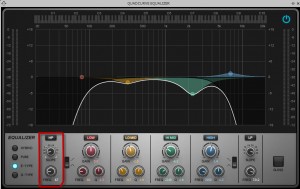
 By using the HP filter (LEARN HOW TO USE AN HP FILTER!) on the QuadCurve, I made a steep slope to completely cut off everything below 100hz, this really cleaned up the sound of the harp and also got it out of the way of the guitars. I also got rid of the frequencies above 8k to give it more of a vintage sound. By ear, I cut and swept my HI-MID frequency until it sounded like it was not in the way of the guitar and vocals. As my good comrades Dan Gonzalez and Craig Anderton have mentioned in the past, learning how to cut frequencies like this is the key to “fitting” things into a good sounding finished product. One thing I have learned about cutting frequencies is that you should turn up your fader first on the subject track and then cut – the reason being is because you will technically be bringing the db down on that track when you cut the frequency, and you need to hear what you are cutting. So first turn the track up louder than you need it to be, cut the frequencies, and then adjust the fader to get it to the ballpark-range; you can always automate after that.
SMOOTHING IT OUT WITH THE CA-2A
Next, using the CA-2A ProChannel module, I was able to smooth this performance out a bit. There was already a lot going on in the track so I elected to use the compressor to “control” the harp. As usual when using the CA-2A, I started with the R37 screw at 0% and then dialed it in until it sounded right to my ear. Again, with something like this, there are no rules – you just need to trust your ear with what you are doing and what sound you are going for. The CA-2A evened out this performance a bit so that I could use it in the background as more of an “instrument” instead of a lead part.
PILING ON THE CRAZY
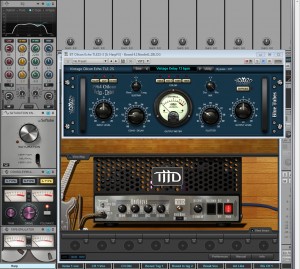
 Here is where everything in the rulebook goes out the window. To get this banged up harp to sound like it didn’t come out of my 5-Year Old’s toy box, I had to carefully combine multiple instances of effects that may seem odd at first “sight.” I know that back in the day of analogue, they used to run harmonicas through small distorted blues amps, so I brought in TH2 and pulled up the THD Univalve amp to start. Instantly it gave the performance more life so I adjusted all the parameters to my liking. I basically clicked the “rock n roll” switch, took down all the high-end, added “attitude,” pulled up some bass and then adjusted the volume.
Next, I elected to utilize the Console Emulator and Tape Emulator together. Again through trial and error using my ear, I found that the A-Range mode gave the harmonica some depth in the mix. With the Tape Emulator, I used the 7.5 ips with a normal bias and found that cranking the REC Level for this purpose was the way to go. At this point the harmonica was sounding pretty legitimate, but I could not stop myself from trying out the Softube Saturation Knob.
A bit to my disbelief, the Saturation Knob in moderation gave this busted up harmonica even more of a lift in the mix. Had I hit the law of diminishing returns since I had piled on EQ (x2 considering TH2), Distortion, Console Emulation, Tape Emulation and now more overdrive from the Knob? To answer my own question I simply bypassed the global ProChannel button along with TH2 to find that tiny stale sounding mouth harp that I pulled out of my son’s playroom. The answer – and my point – NO. My personal belief these days in this digital jungle is that as long as you abide by some basic rules (stay away from clipping, keep an eye on your gain-staging, clear up frequencies etc…) you have free reign to get creative with processing no matter where it takes you.
GETTING THE HARMONICA TO BLEND WITH THE TRACK
To finalize this harmonica processing, I created another bus (21st) and new exactly what to do. In order to get this part to “blend” in a bit, I added the Nomad Factory “Oilcan Echo” – just the sound of that plugin alone has harmonica written all over it 😉 I experimented with the settings and ended up on the 1977 mode while dialing in 100% wet for the reverb. For reverbs, delays and modulations on busses, I usually block out the original source sound coming from the track-send by keeping the effect at 100%. This helps to keep the gain from getting out of control on many levels. The Oilcan Echo really helped to spread the part out a bit while blending in nicely with the other tracks. Here is the harmonica part solo’d so you can hear what it sounds like before and after.
So as you can see and hear through multiple layers of EQ, Compression, Distortion, and Delay, I was able to take my 5-Year Old’s busted up harp in the wrong key of the song and turn it into something very useful. With all the tools and effects we have at our finger tips these days, I think it’s best to keep an open mind about mixing and “getting sounds” in general. Don’t worry so much about what effects are “supposed” to be with what. Some of the coolest sounds I have gotten on drum kits have been with amp simulators. I definitely do think that there is such a thing as “going overboard,” but I don’t think we should be afraid of it as long as we keep that aspect in check and in mind. When you are mixing something like this and go down a rabbit hole, get away from it for 10 minutes and then come back to it – your ears will tell you if it’s right.
Happy Experimenting and thanks for reading… ~jl
Try mixing with the ProChannel – Download the SONAR X3 Producer Free Trial


One Reply to “When To Break The "Rules" Of Digital Mixing”
Comments are closed.