You need to start with a great performance
Before you begin to edit drum stems you have to make sure that you are working with tracks that were recorded close to a click. They need to be consistent. Tightening up the performance is something that is very invasive and requires a lot of time. If the drummer can’t put in the time to learn the parts then you should wait until they are ready to record their parts properly. Having this knowledge will make your life easier and should be something you think about during the preproduction stages of any record.

A note about the editing process.
The purpose of this type of editing is to identify the strong hits of the drum beat, split them into tiny parts, and then crop and align those small parts. The splits will depend on which part of the drum falls on each down beat.
In this tutorial Kicks happen every 1/4 note, snares every 2nd and 4th beat, and high hats on every 1/8th note. This happens for about 20 measures with various fills here and there and then it switches to a different pattern. We’ll move in measure by measure increments so that we don’t bite off more than we can chew at first.
Engage the metronome so that you can hear the pulse. This will help you check your work as you edit. Download the project files here (if you didn’t download them from our previous post) to get started:
Multi-Track Drum Editing Tutorial

Multi-track drum editing requires you to listen intently to the audio you’re editing. I recommend using headphones for this tutorial so that you can hear subtle edits. Erroneous edits are most exposed in the overheads, high hat, and cymbal frequencies so we’ll need to solo those as well as the kick and snare track while we work through this project.

As we work through the session the high hat and ride will need to be solo’d due to the spot mics that were placed on these. Everything else will follow suit with your editing.

You can also adjust your Track Height in the Track View by dragging the borders of the tracks up and down. This helps keep everything in focus.
STEP 1: Select all the tracks and make a selection group.
Using your computer keyboard hit CTRL+A and then right click on the selected regions. Once you do this click on Create selection group from selected clips. A number will appear in the top left side of each clip. If this is your first Selection Group of the session then it should display 01. Make sure When splitting clips in groups, create new groups is checked in Edit > Preferences (Advanced) > Customization > Editing. This is very important. I mentioned how to do this in the first part of this series.

As discussed in the previous part of this series the groups are going to make our editing process a bit easier as we move through the session. Instead having to select 10 tracks every time we’ll only need to select 1 and the rest will select.
STEP 2: Tab to the first Kick transient.
The first kick transient should be right around measure 22. Disengage Snap to Grid (shortcut: N) and place your cursor on the kick clip and hit the Tab button on your computer keyboard until it steps all the way to the beginning of the very first kick transient. Use the shortcut CTRL+Right Arrow to zoom into clip to see if it’s placed correctly. If you miss the transient you can use the shortcut SHIFT+TAB to step through transients in reverse. The Now Time Marker should look like this at measure 22.
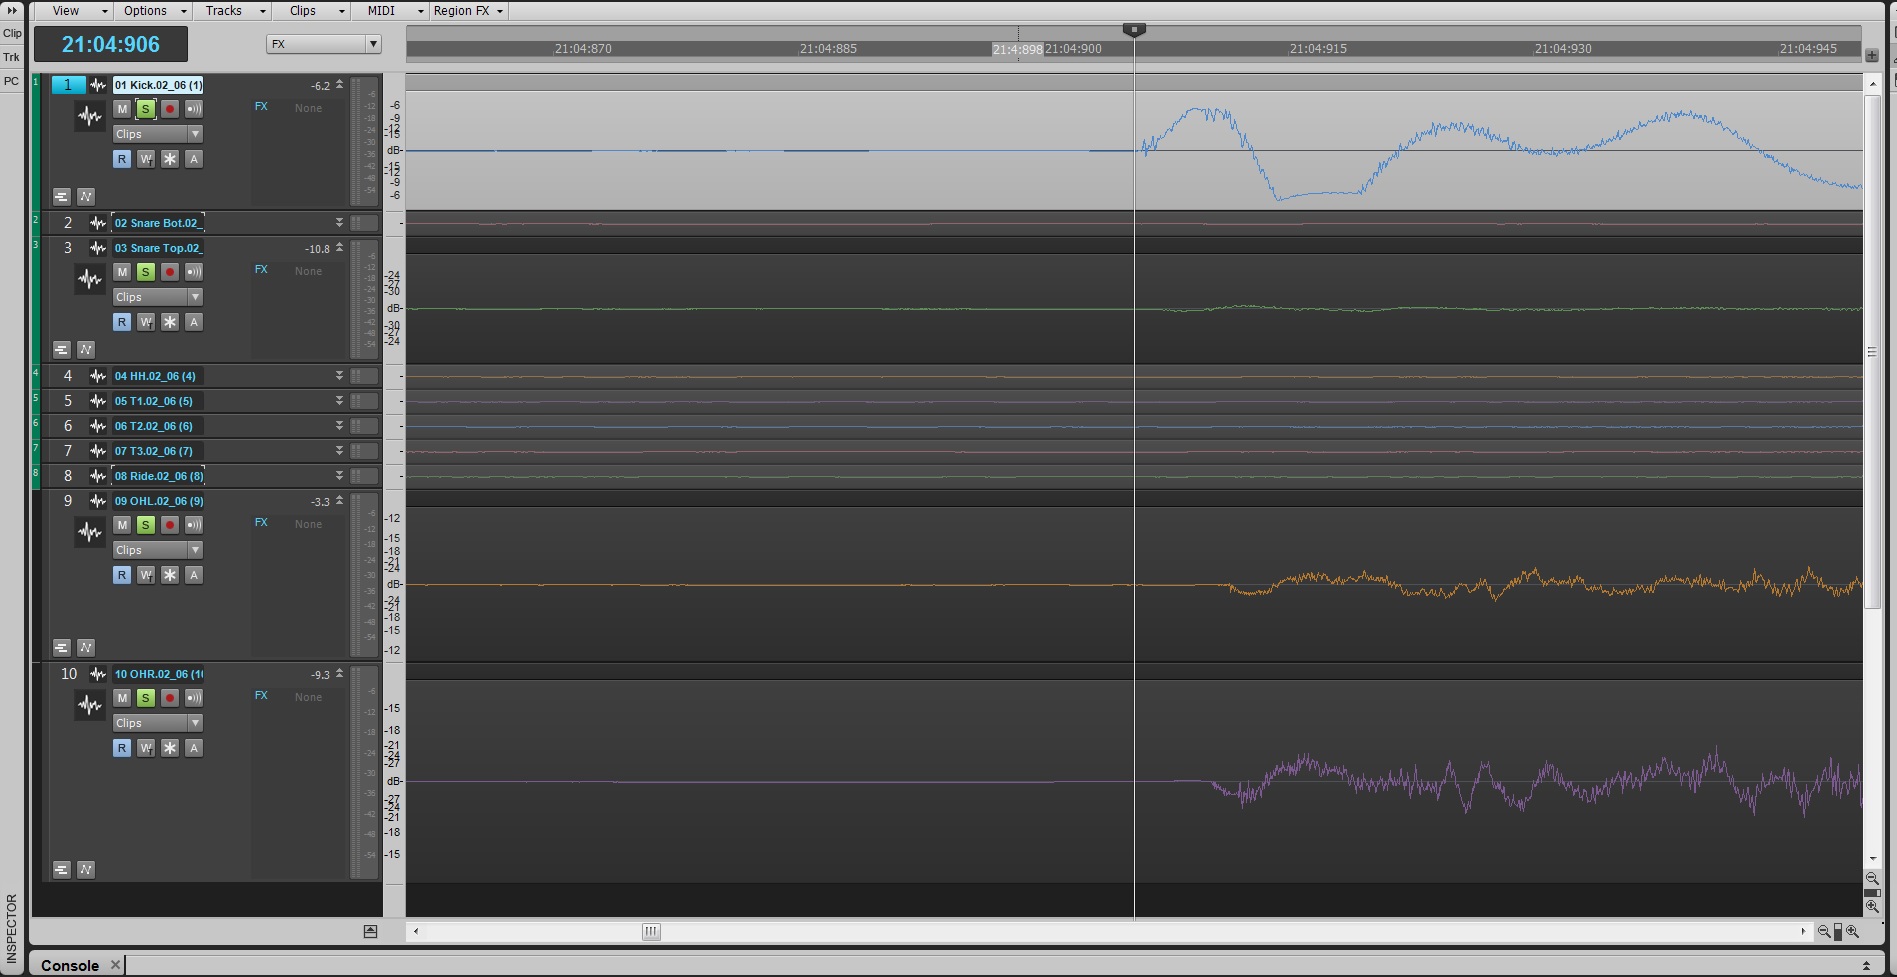
You’ll be able to see the time-delay from the kick microphone to other microphone sources like the overhead microphones and snare microphone.
Why the kick transient first?
The kick transient is the first signal in the entire drum set. To keep the rest of the audio tracks in time with the kick drum we need to start with the earliest occurring event in the drum pattern – which is the kick drum.
STEP 3: Make 1 split across all the clips.
Now that the Now Time Marker is right at the beginning of the kick transient, click the clip header of the kick clip and then select the Split (Shortcut: S) fucntion on your computer keyboard. This will make one giant split across every track.
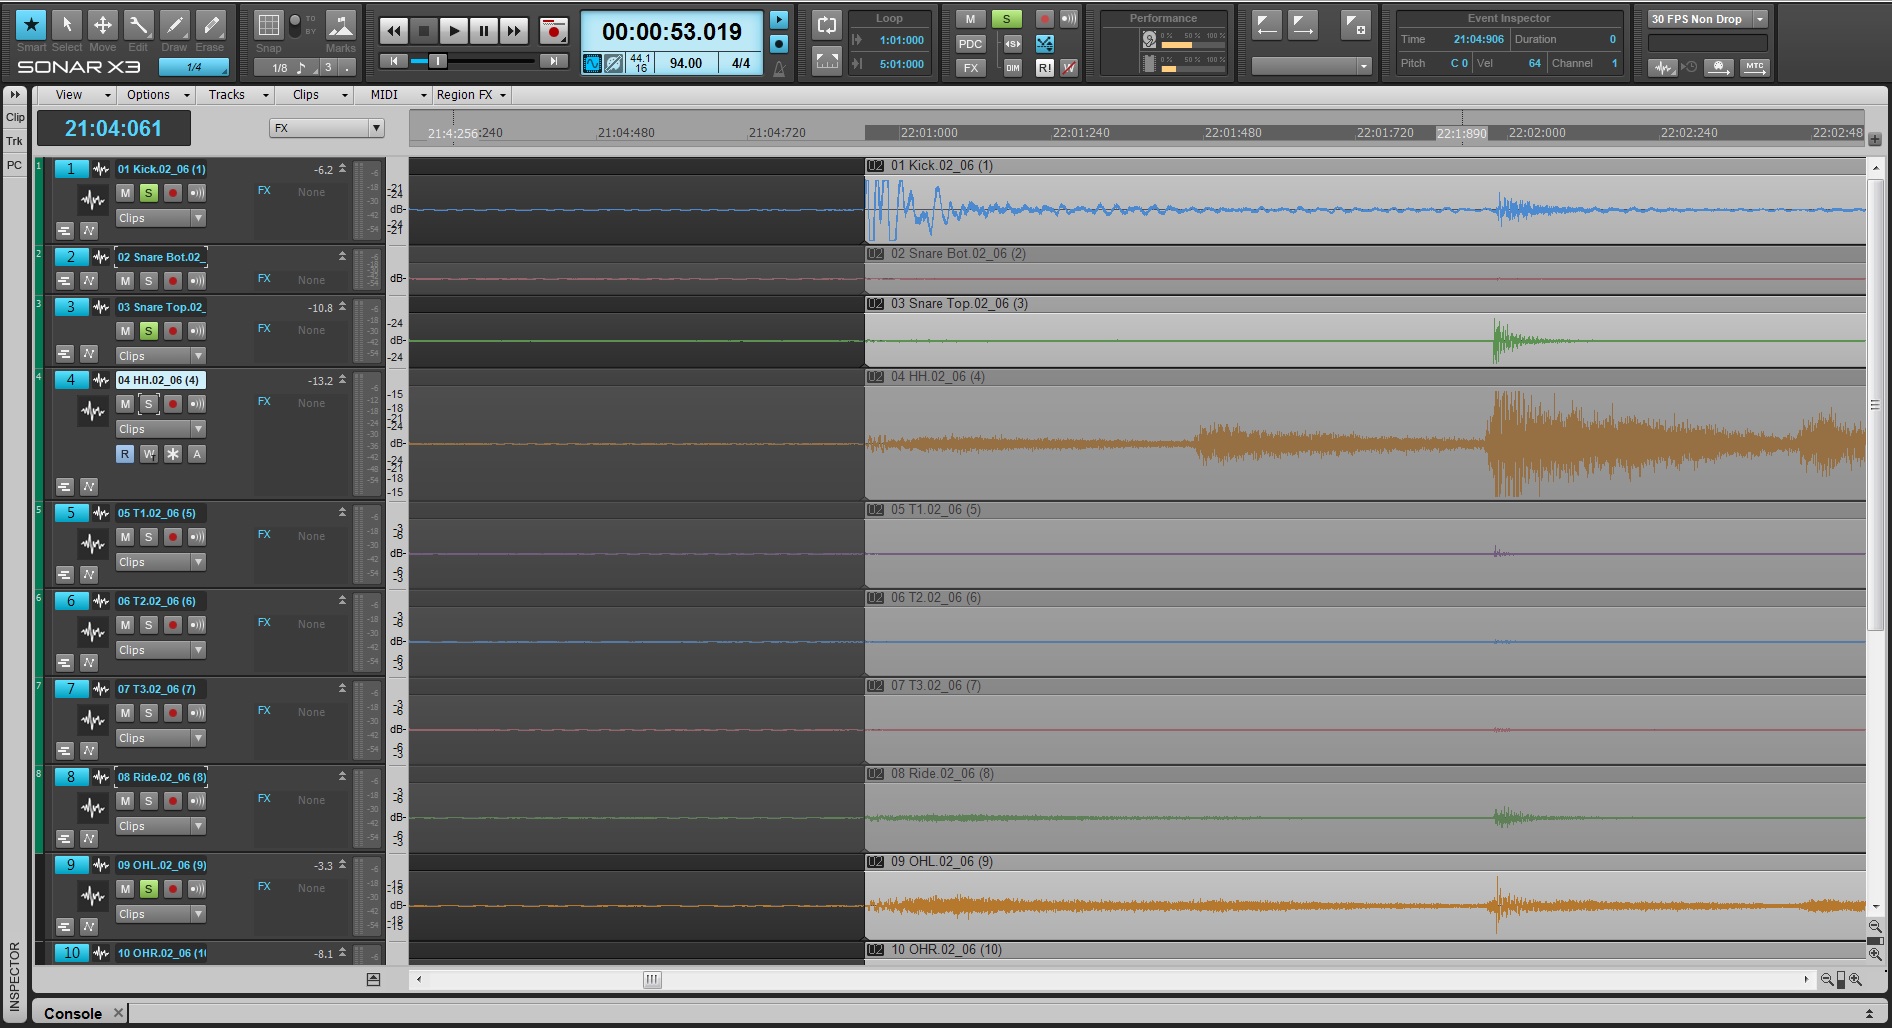
The clip header is the area along the top of the clips that contains the clip’s names. If you click on this it acts as a selection for the clips.
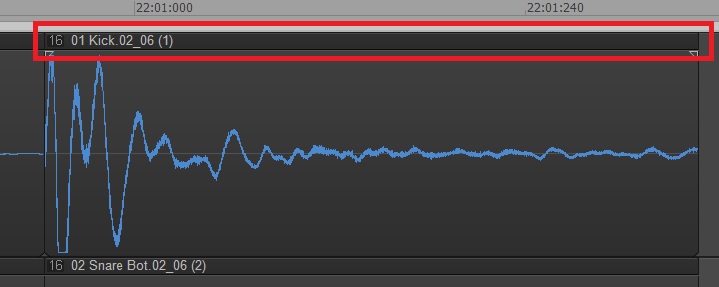
STEP 4: Tab to the first high hat transient and split again.
The next strong hit in the drum progression is a high hat pattern that pretty much stays at a constant 8th note (480 ticks) pattern throughout most of the song. Click on the high hat clip and tab to the first strong transient. This should be right around measure 22, beat 1, tick 480 on track 4.
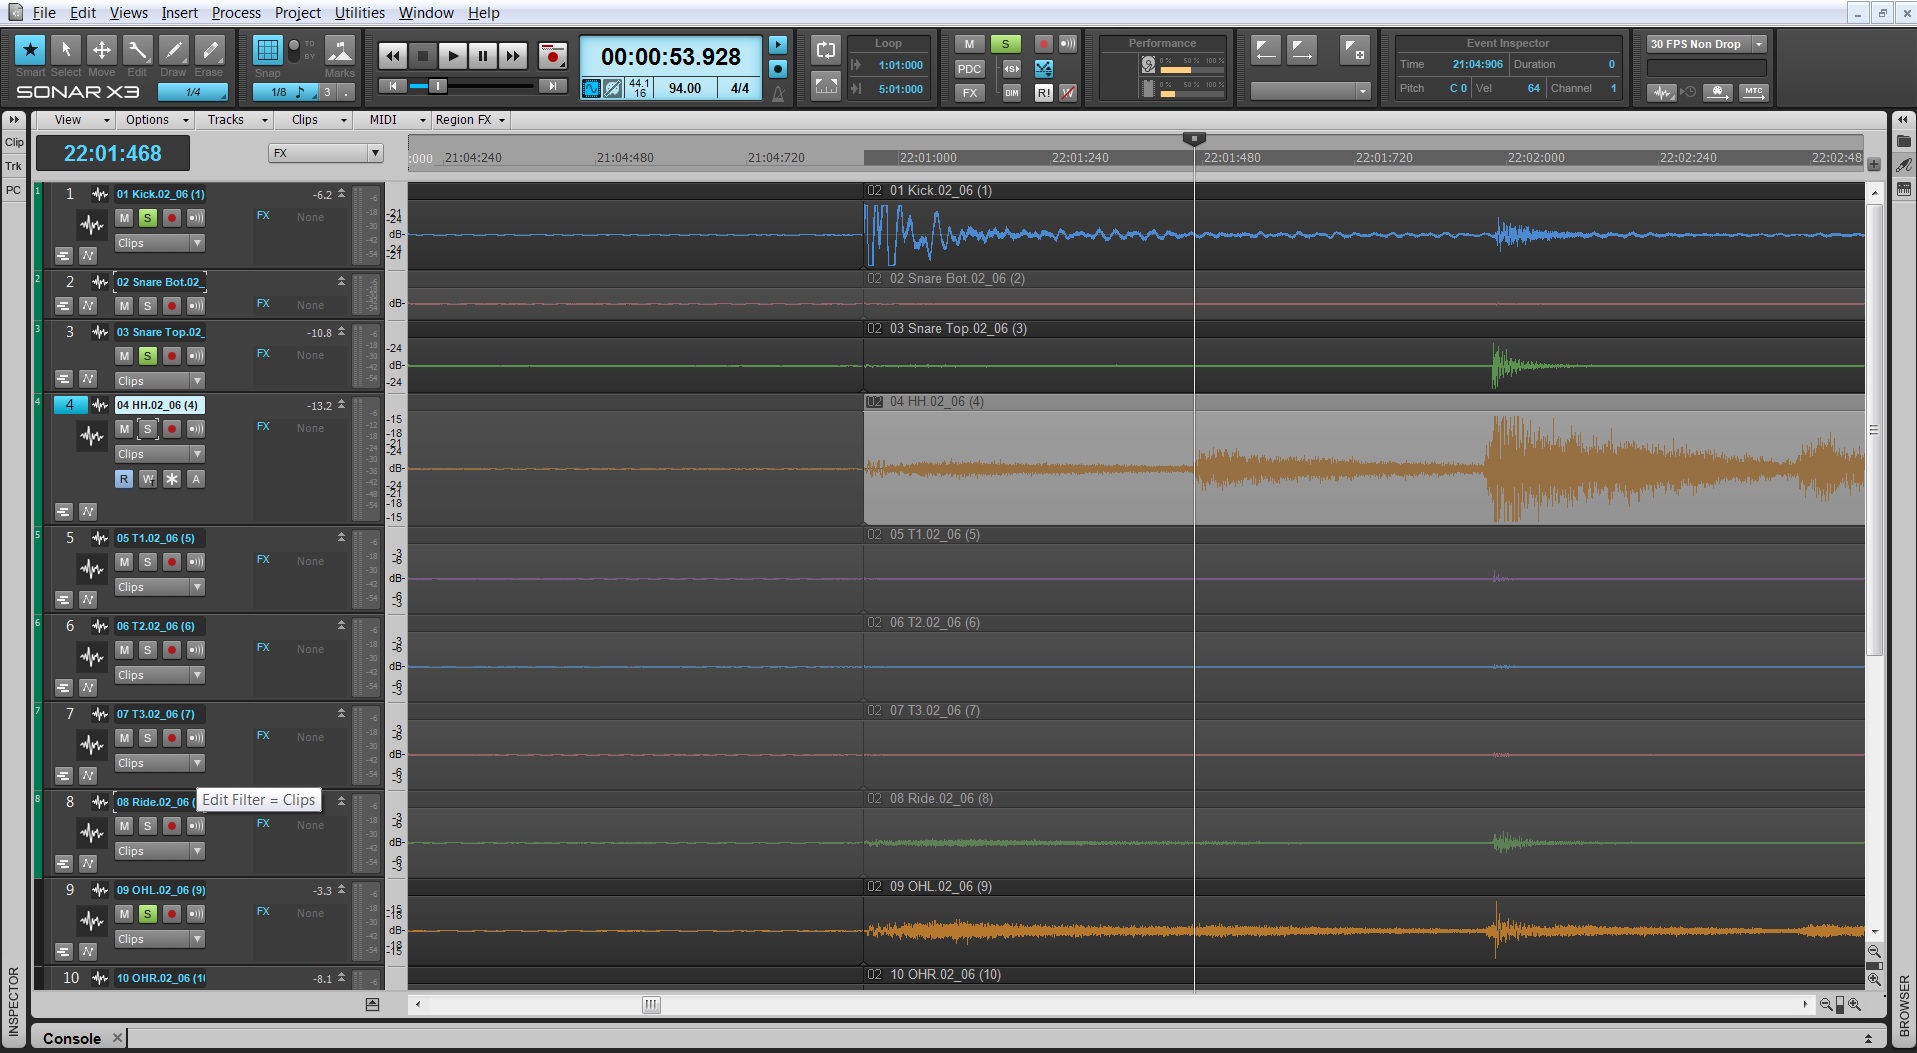
Select the header of the clip so that all clips are selected and then split (S) again. This will split all clips.
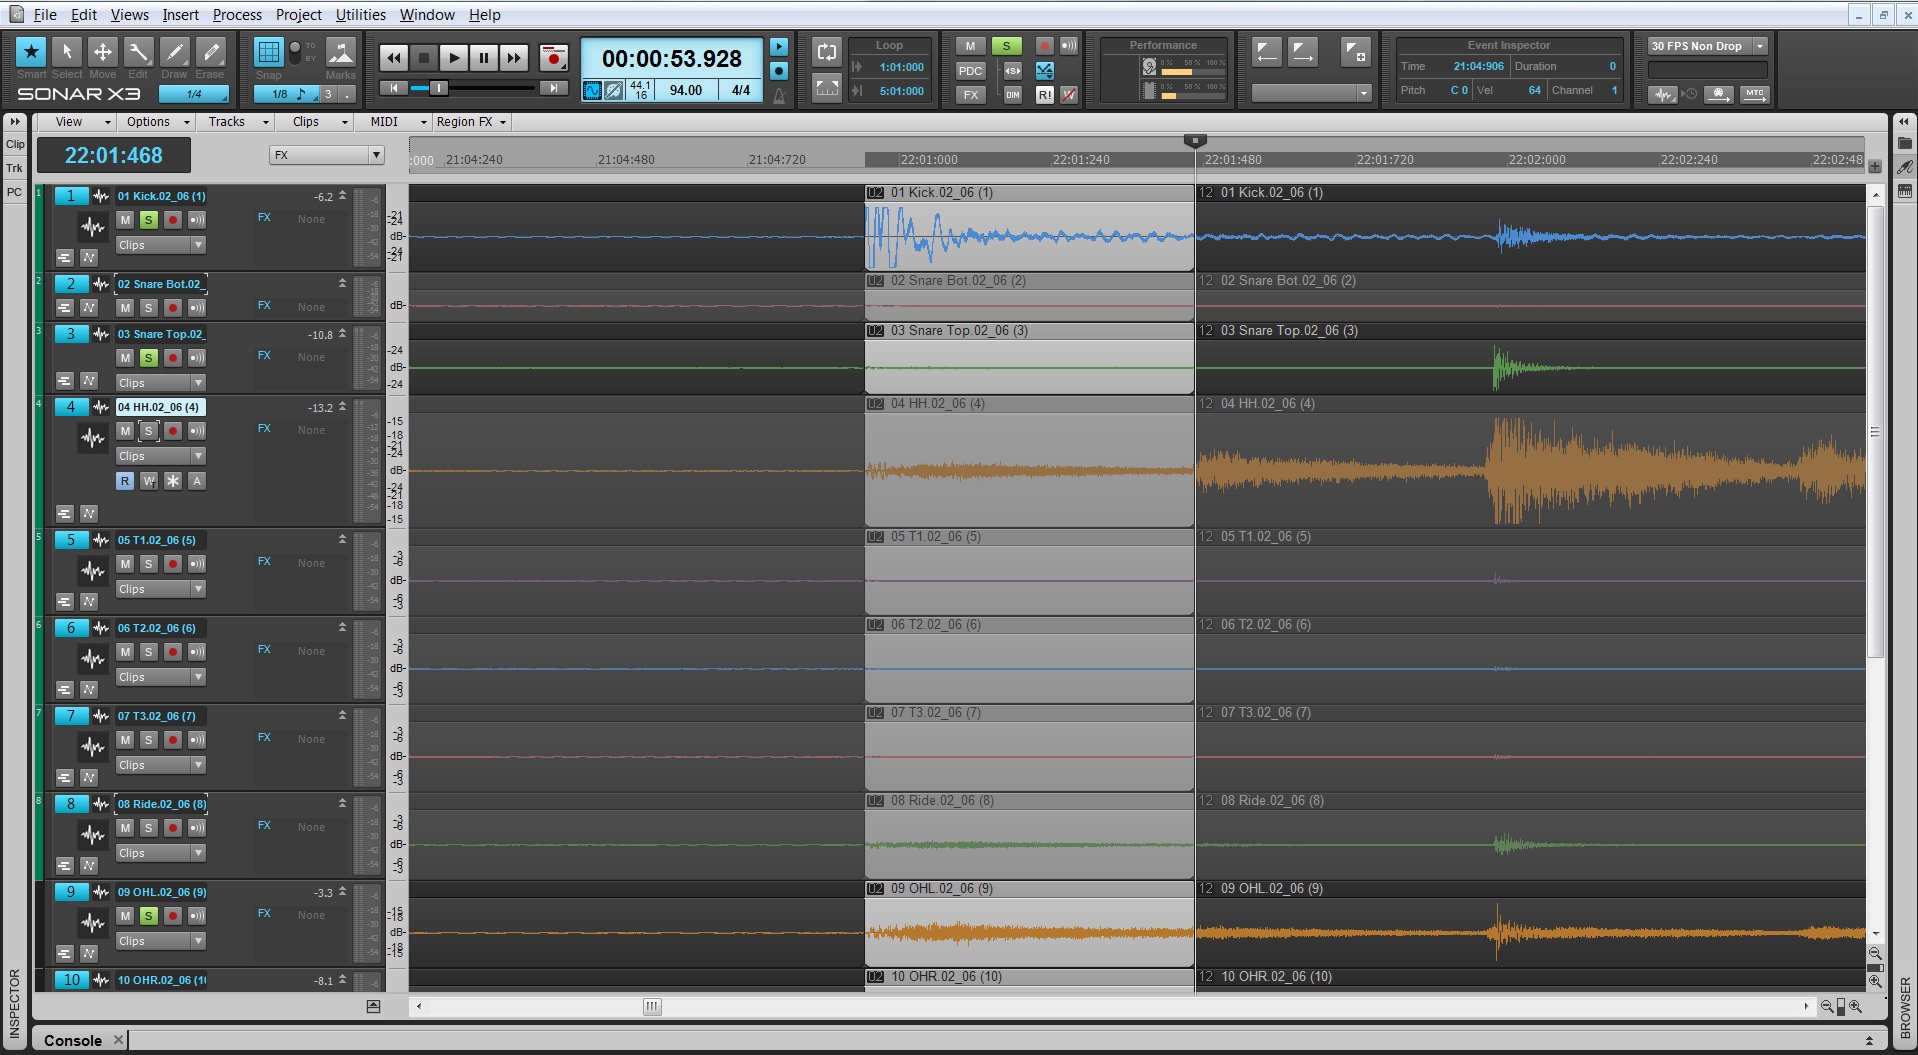
Why the high hat transient 2nd?
If you listen to the drum pattern, the high hat is the next occurring drum hit in this particular drum pattern after the kick drum.
STEP 5: Tab to the next strong Snare transient.
Measure 22, beat 2 has a concurrent snare and high hat hit. Since the high hat is just slightly earlier than the snare hit the Tab to Transient function will stop at the onset of the high hat bleed in the snare signal. Place your cursor on the snare clip and use the Tab to Transient. The picture below displays what this should look like. Zoom in on waveforms, and manually place your cursor right at the threshold of the snare hit. The hit that we’re looking to align here is the snare because it takes precedence over the high hat on this specific beat.

You can see in the picture above that the Aim Assist line is hovering right where the snare hit starts. Click here and that should place your Now Time Marker right where you need it.
Why the Snare hit 3rd?
The snare is the next occurring hit in the drum pattern. In most cases the Snare hit will also take priority over anything else. This is the drum that everyone listens for and in many genres could be considered the most important part of the pattern.
STEP 6: Slice right at the snare transient.
Click the header of the clip to select all tracks and split them. This will momentarily chop off the beginning of the high hat signal. Not to worry, I’ll address this as we get further into this process in the next part of this series.
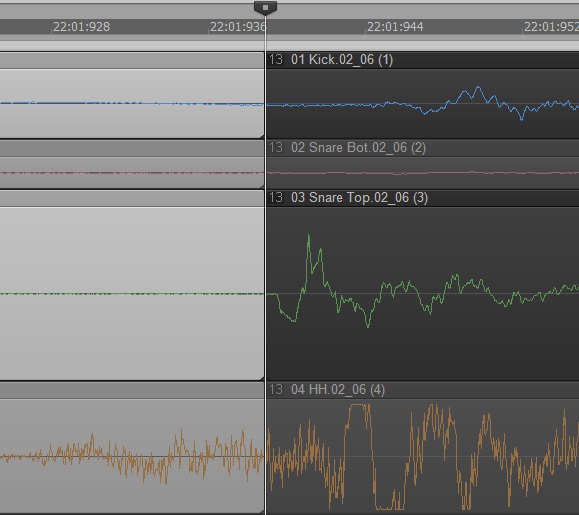
STEP 7: Tab to the next high hat transient and split.
Just like in step 4, tab to the next high hat transient. This is the next available strong transient in the drum pattern. Once you’re at the onset of this high hat transient, split across all transients. This edit is around measure 22, beat 02, tick 480.
After doing this the first beat of this DLC should look something like this.
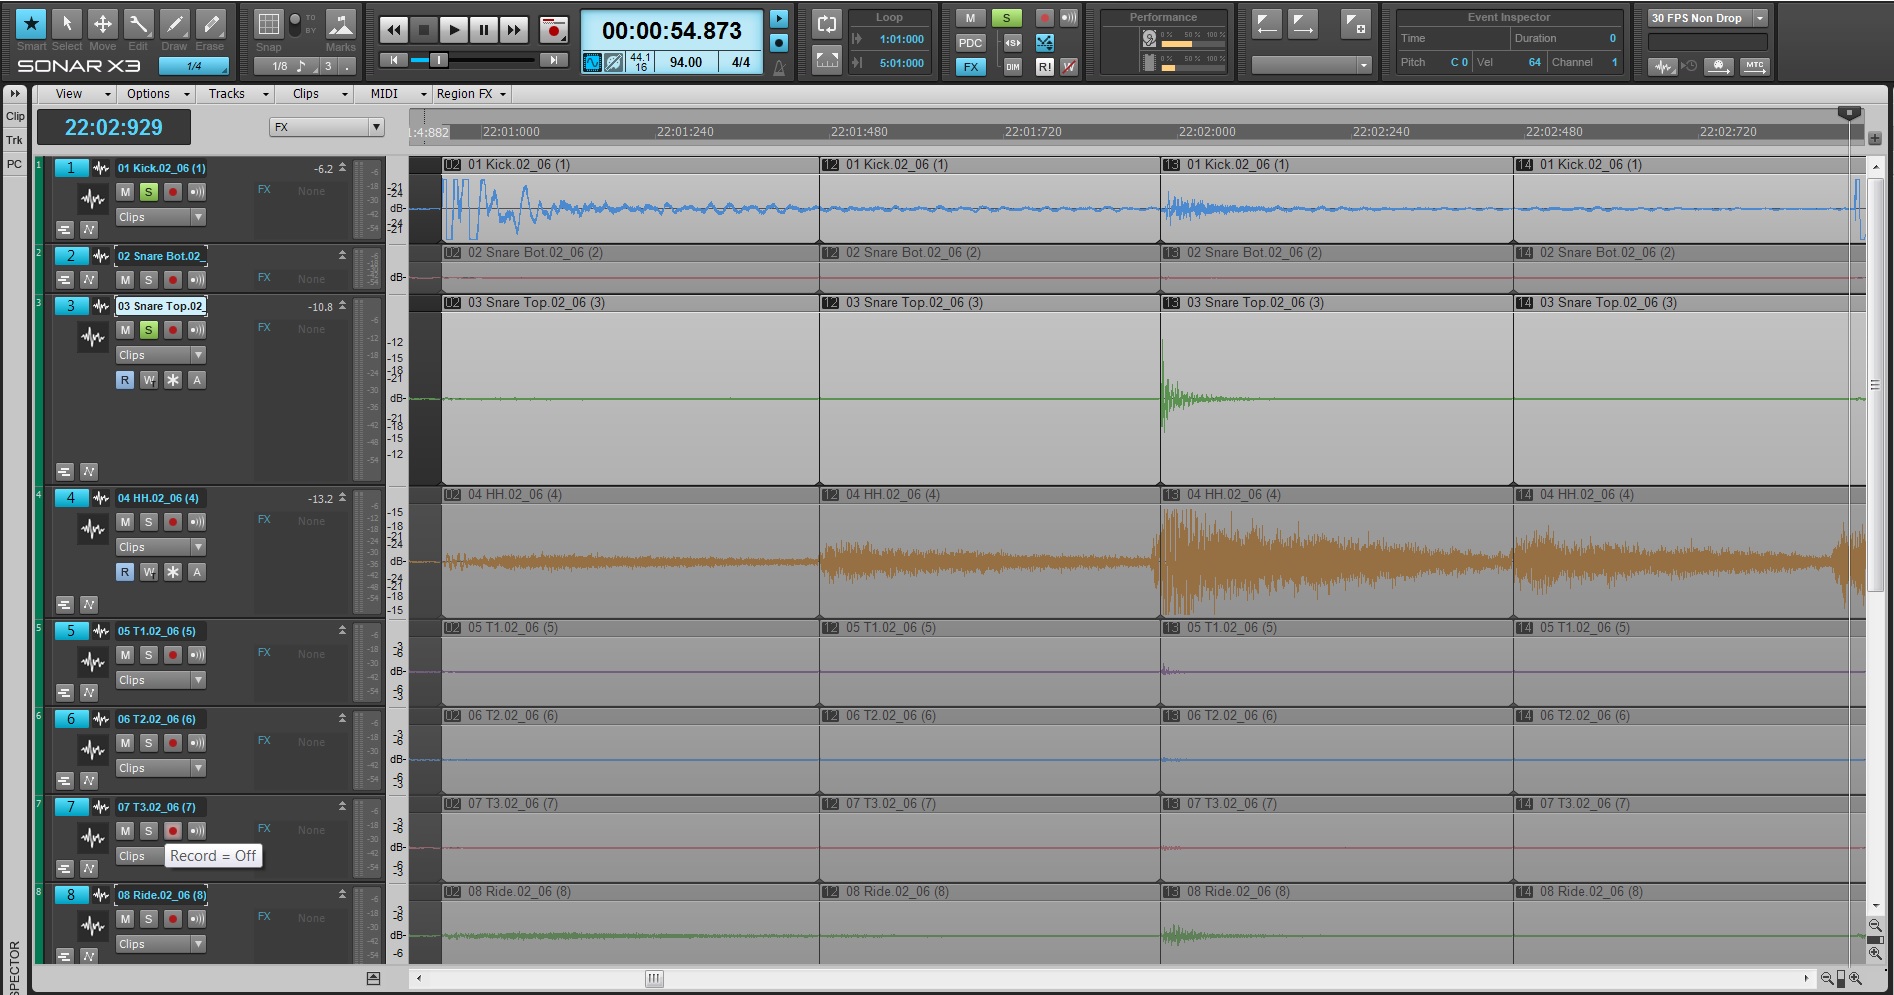
STEP 8: Repeat
Repeat steps 2 – 7 until you reach the downbeat of measure 23. The pattern for the drums is standard rock beat with a snare on the back-beat just like we’ve discussed at the beginning of this article.
Afterwards, your project should start to look like this.
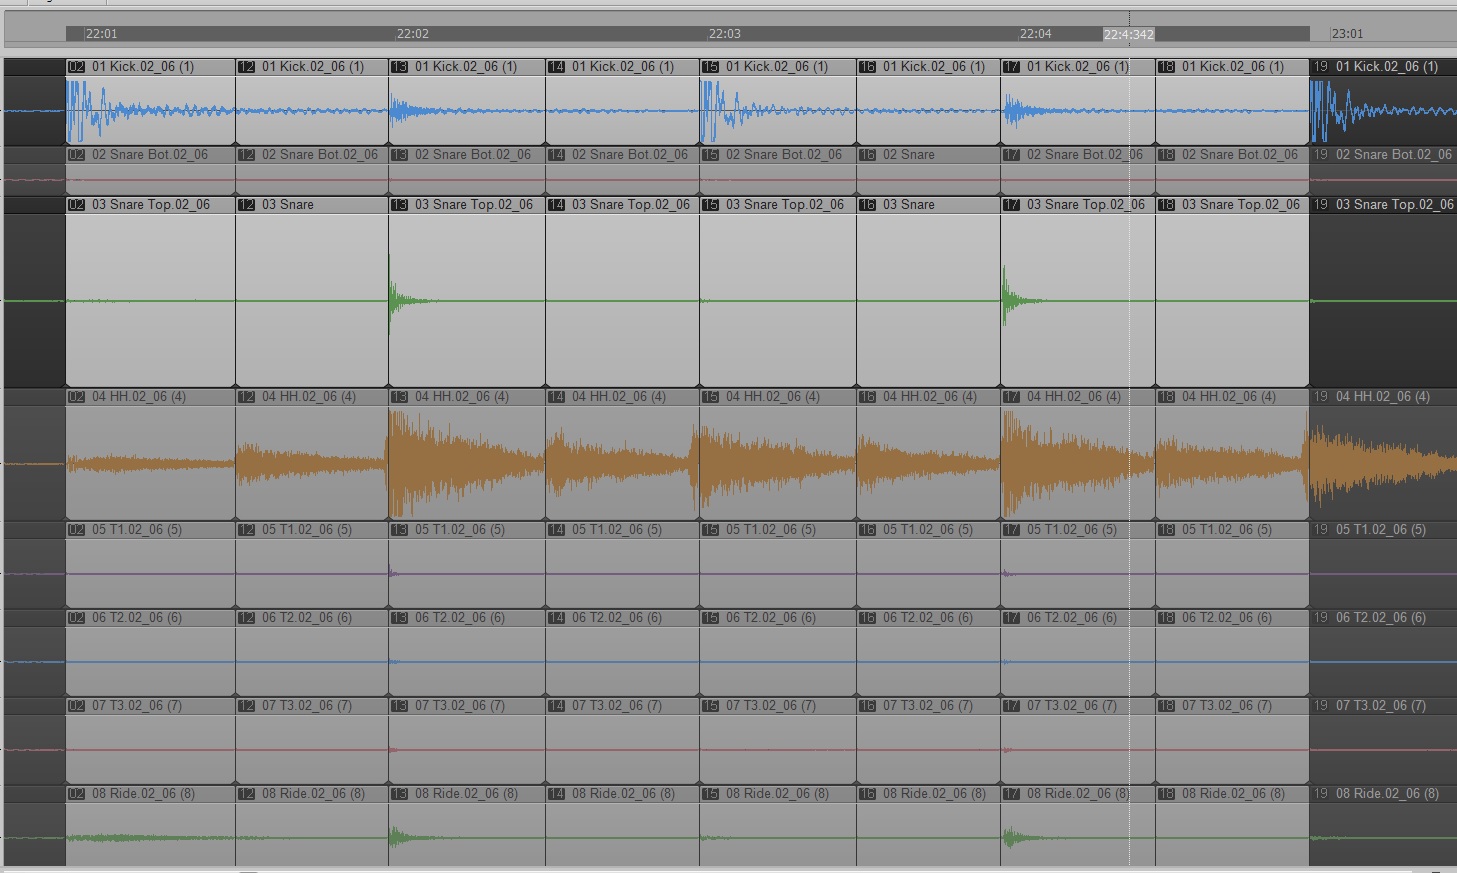
A quick review with M:B:T times:
- Make a Selection Group for all the drum stems
- Select kick clip
- Find the first strong kick transient using Tab to Transients – 22:01:000
- Click the Clip Header to select all the clips
- Use the shortcut S to Split all clips at the kick transient
- Click on the high hat clip
- Tab to the next high hat transient – 22:01:480
- Click the Clip Header to select all clips
- Use the shortcut S to Split all clips at the high hat transient
- Select Snare clip
- Find the next consecutive snare transient using Tab to Transients – 22:02:000
- Zoom in and manually place the Now Time Marker right before the snare transient if it’s inaccurately placed
- Click the Clip Header to select all clips
- Use the shortcut S to Split all clips at the snare transient
- Do this until you reach measure 23
Essentially you’ll move through the project like this:

Moving on
Now that you have an understanding of where and how to split multi-track drum transients you can move onto the next part: Cropping and Aligning Clips.


3 Replies to “Multi-Track Drum Editing – Identifying & Splitting Drum Hits”
Comments are closed.