Mixing Heavy Metal with the ProChannel & Softube Mix Bundle

The Softube Mix Bundle is a strong and creative addition to SONAR’s ProChannel strip.  This bundle adds 5 solid effects, great for any mix, to the Softube Saturation Knob already in SONAR X3 Producer.

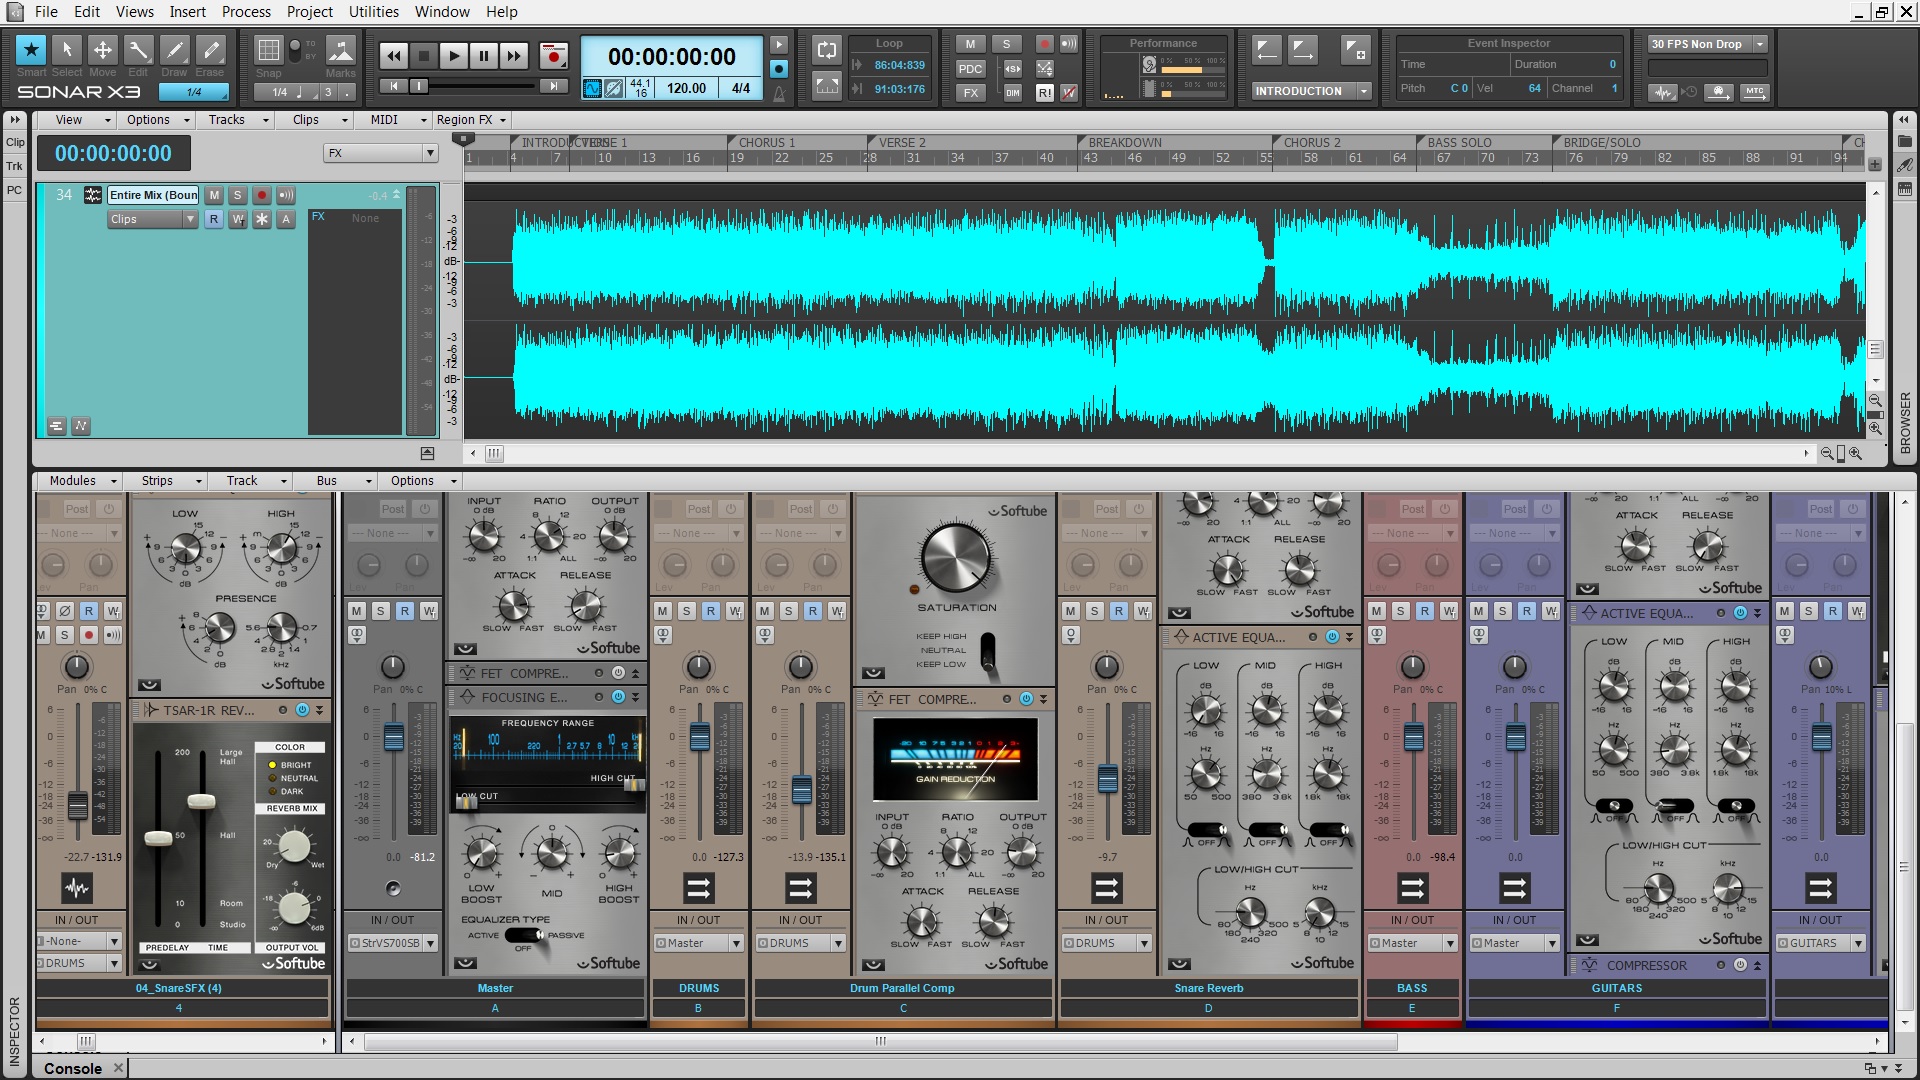
For this article I’ve mixed a Heavy Metal track from the group Dark Ride using mostly Softube ProChannel effects. You can download the project here and follow along if you have the Softube Mix Bundle. If not then the screenshots in this article should suffice.

Setting up the Mix

Listen & add Markers

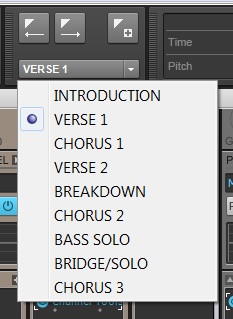
At first listen I put in Markers throughout the entire project to make navigation and looping sections much easier. Using the shortcut M – it’s pretty easy to drop in a Marker wherever your Now Time Marker resides. After that, you can name them accordingly. This paticular song was relatively short and included an introduction, two verses, 3 choruses, bridge, solo section, and breakdown.

Routing, grouping, and track folders

While you’re mixing it’s easy to become slightly overwhelmed by larger projects. What I do in this instance is make a stereo bus for every group of instruments that I have in the project. This allows me to apply mixing effects to the instrument groups as whole before they hit my main mix bus. The tracks route directly to the buses and then the buses route directly to the 2 bus. For each instrument group I also assigned them a color category and a track folder to make things a bit easier to manage within the Track View.

Levels & panning

Metal in general consists of abrasive-wide rhythm guitars, huge-punchy drums, Continue reading “Mixing Heavy Metal with the ProChannel & Softube Mix Bundle”

DAW Best Practices: How to get a bigger drum sound with reverb

The Biggest, Baddest Drum Reverb Sound Ever

[Originally posted as a daily tip on the SONAR forums and reposted for viewers here on the blog.]

by Craig Anderton

You want big-sounding drums? Want your metal drum tracks to sound like the Drums of Doom? Keep reading. This technique transposes a copy of the reverb and pans the two reverb tracks oppositely. It works best with unpitched sounds like percussion.

1. Insert a reverb send.

Insert a send in your drum track, then insert your reverb of choice in the Send bus.


2. Render the reverb, isolated from the drum track. Continue reading “DAW Best Practices: How to get a bigger drum sound with reverb”

Multi-Track Drum Editing – DLC and Basic Tools

The need for perfect drum production is at an all time high.

In today’s world there is a huge need for all types of drum production. Everything from VST instruments to advanced drum replacement software has been growing in popularity. For the most part, records that require the tracking of live drums always have some sort of drum editing applied. This process is meticulous, long, and can be frustrating if you have never done this much in depth editing before.

Downloadable Content:

Let’s start by getting you the files you need to follow along with this tutorial.

Multi-Track Drum Editing Tutorial

Once downloaded, they should open just fine inside of SONAR X3.

Understanding the basics.

Before diving in, let’s take a look at some essential tools that we’ll be using for major drum editing. These tools may be basic to some, but are definitely the right functions we’ll need in SONAR to edit down these drums.

Creating selection groups

The first step in editing multi-track drums is making selection groups. Once created, these clips will be synced to one another for batch editing tasks – like multi-track editing. During the course of this tutorial we’ll be relying heavily on splitting clips – grouping will make this faster and more efficient.

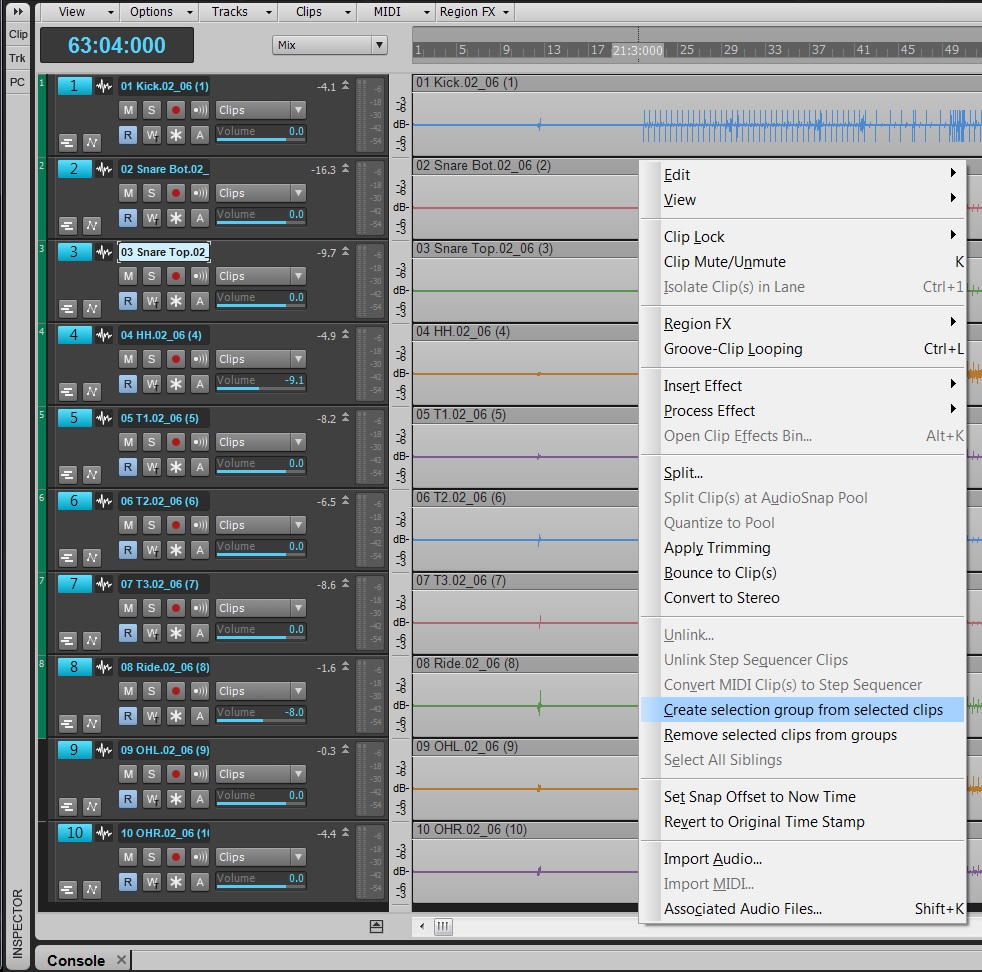
To create these, choose CTRL+A within the Track View and then right-click on your clips. Near the bottom of the menu there will be an option that says Create Selection Group from selected clips. Select this and a number will appear in the header of your clips indicating that your clips are all in a group now.

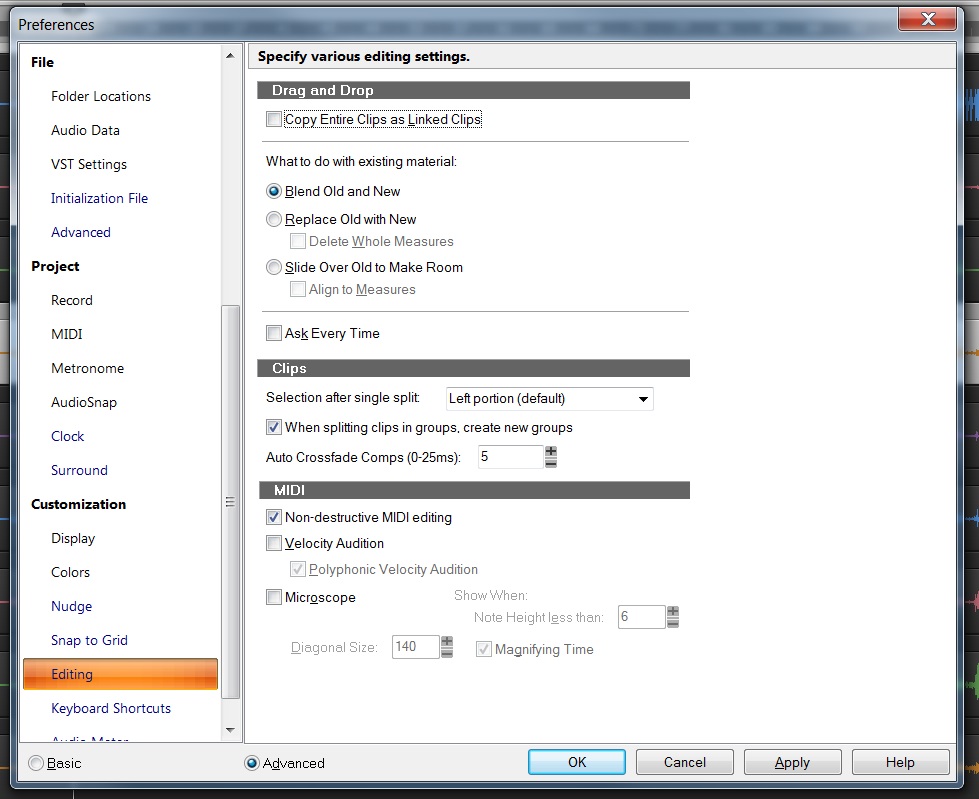
As we work through the song the different Split edits will cause the group number to increase. This indicates that a new group has been made. You can change whether or not this occurs within the Preferences here:


Tab to Transients

Tabbing to transients locates strong transients and moves Continue reading “Multi-Track Drum Editing – DLC and Basic Tools”