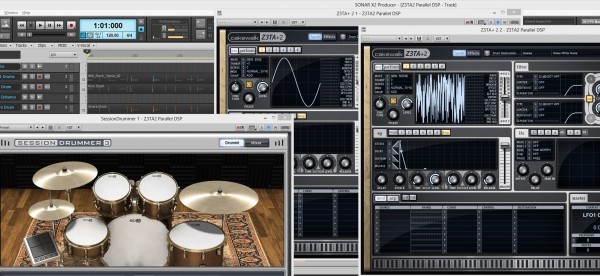
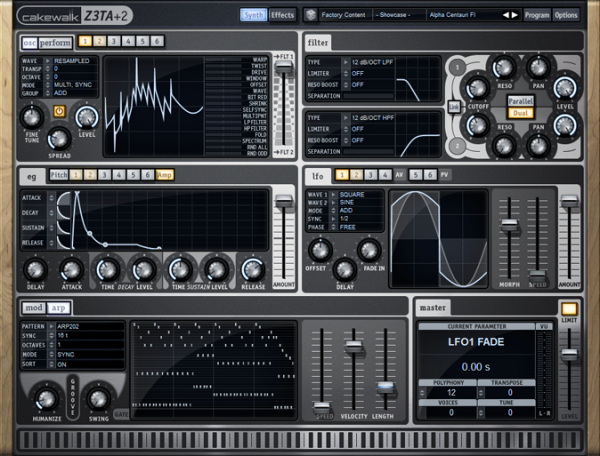
Review: BigTone EDM Expansion Pack for Z3TA+ 2

by Craig Anderton

Sound Designer Nico Herz has done sound design for a variety of companies, of course including Cakewalk. BigTone EDM, for Z3TA+ 2, is (as you can probably guess from the name) designed for EDM. So if you’re into traditional bluegrass, you probably should not continue reading this.

Anyway, the presets are designed for the EDM “sweet spot” of 125bpm. There are 127 presets total, arranged as eight banks: 7 Bass, 19 Keys, 11 Leads, 20 Pads, 11 Sequences, 6 Sound FX, 19 Textures, and 34 Arps. I’m going to assign each bank a letter grade average for two reasons—it might be helpful, and because sounds are so subjective, if you end up disagreeing with me you’ll know not to bother reading any sound reviews I do. Conversely, if you think my evaluations are correct, we can have an ongoing relationship with future sound reviews. Continue reading “Review: BigTone EDM Expansion Pack for Z3TA+ 2”

Virtual Instruments: 5 Tips For The Z3TA+ Junkie

Here are some of our favorite Z3TA+ tips and videos from our archive:

1. EDM Production – Enhance Your Drums with Z3TA+ 2

  • Insert two instances of Z3TA+ 2.
  • Copy your drum sequence to both Z3TA+ 2 tracks.
  • Isolate the Kick on one track and the Snare on the other.
  • Setup the first Z3TA+ 2 to generate a Sine Wave for the Kick.
  • Setup the second Z3TA+ 2 to generate White Noise for the Snare.
  • Adjust the Amplifier Envelope to match the duration of each hit.
  • Within Z3TA+ 2 add Reverb, Compression, and EQ.
  • Mix in under your existing Drum Loop.

2. How to Customize Z3tA+ 2’s Stock Arpeggios

Z3TA+ 2 comes packed with a massive pool of MIDI programs that power it’s internal Arpeggiator, but why stick to the stock programs when you can make your own?

Here’s how:

  • Open Z3TA+2 and activate the Arpeggiator Section
  • Right-Click on the sequence in the arpeggiator and make sure the following are checked
  • Auto Disable Pattern When Dragged to Host
  • Auto Fit Patterns to One Measure When Loaded
  • Load one of the Arpeggios from the Pattern menu
  • Drag and Drop the Arpeggios right into SONAR X2
  • Edit the MIDI Clip to your liking
  • Go to File > Save As
  • Select MIDI 0 in “Save as type”
  • Go to C:\Cakewalk Content\Z3TA+ 2\MIDI Arpeggios and Save it
  • Load it into Z3TA+2′s Arpeggiator by going to Pattern > Load MIDI File…

3. How to create a bass synth with Z3tA+ 2

Who doesn’t like bass? Especially synth bass. Z3TA+ 2 is the answer to all of your sound design needs especially when you are looking to improve your production in the low end. I’ve put together a short tutorial on how to make a simple bass synth inside of Z3TA+2. Once you understand how everything works together you’ll be able to really start to make this plugin work for you.

Picking the right Oscillators

Within Z3TA+2 the first section you need to start working with is the OSC section. First I’ve selected two different square waves for OSC 1 and 2. They were Vintage Square 1 and Vintage Square 2. When creating a bass synth you need to make sure that your patch will not break up in the low end so be sure not to drop the octaves on the individual oscillators too low. I typically set mine to -2 at the most. Once you get to a certain range the instrument will sound weak and lose it’s driving Bass Synth sound

[READ THE REST OF THE TIP HERE]

4. [VIDEO] Digital Sound Factory Z3TA+  Sound Design

5. [VIDEO] Mixing and Mastering a song using only the Z3TA+ effects engine in SONAR

Recording Virtual Synthesizers: The Art of Imperfection

Synths can make perfect sounds…but is that always a perfect solution?

by Craig Anderton

Recording a virtual instrument is simple…you just insert it, hit a few keys, and mix it in with the other tracks. Right?

Well…no. Synthesizers are musical instruments, and you wouldn’t mic a drum set by taking the first mic you found and pointing it the general direction of the drummer, nor would you record an electric guitar by just plugging it into a mixing console. A little extra effort spent on avoiding an unnatural sound when mixing synths with acoustic instruments, improving expressiveness, tightening timing inconsistencies, and other issues can help you get the most out of your virtual instruments.

But first, remember that “rules” were made to be broken. There is no “right” or “wrong” way to record, only ways that satisfy you to a greater or lesser degree. Sometimes doing the exact opposite of what’s expected gives the best results. So take the following as suggestions, not rules, that may be just what the doctor ordered when you want to spice up an otherwise ordinary synth sound.

THE SYNTHESIZER’S SECRET IDENTITY

The paramount aspect of recording a synth is to define the desired results as completely as possible. Using synths to reinforce guitars on a heavy metal track is a completely different musical task from creating a all-synthesized 30-second spot. Sometimes you want synths to sound warm and organic, but if you’re doing techno, you’ll probably want a robot, machine-like vibe (with trance music, you might want to combine both possibilities).

So, analyze your synth’s “sonic signature”—is it bright, dark, gritty, clean, warm, metallic, or…? Whereas some people attach value judgements to these different characteristics, veteran synthesists understand that different synthesizers have different general sound qualities, and choose the right sound for the right application. For example, although Cakewalk’s Z3TA+ is highly versatile, to my ears its natural “character” is defined, present, and detailed.

Regarding sonic signatures, perhaps one of the reasons for a resurgence in analog synths sounds is digital recording. Analog synths tended to use low-pass filters that lacked the “edgy” sound of digital sound generation. Recording the darker analog sounds on analog tape sometimes resulted in a muddy sound; but when recording on digital, analog sounded comparatively sweet. Digital also captured all the little hisses, grunts, and burps that characterized analog synths. This is a case where the “imperfections” of analog and the “perfection” of digital recording complemented each other.

Another thought: look at guitars, voices, pianos, etc. on a spectrum analyzer, and you’ll note there is little natural high end. If you’re trying to blend a virtual instrument in with physical instruments, remember that a virtual synth has no problems obtaining a solid high end. Using the ProChannel’s LP filter set to 48dB/octave and lowering the frequency just a little bit can introduce the “imperfection” that matches the spectral characteristics of “real” acoustic and electric instruments more closely, so the synth seems to blend in better with the other tracks (Fig. 1).
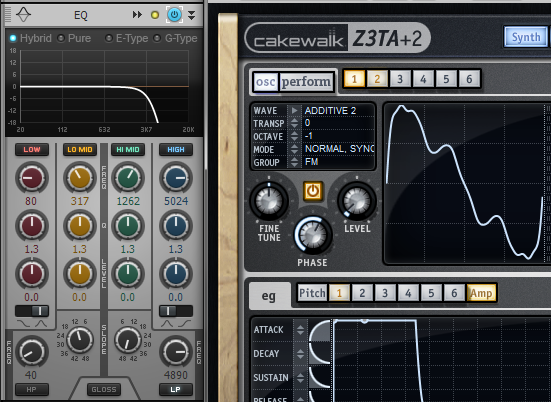
Fig. 1: The ProChannel QuadCurve EQ’s lowpass filter can help digital synths sit better in tracks that use multiple physical or acoustic instruments. Continue reading “Recording Virtual Synthesizers: The Art of Imperfection”

Approaching the Remix With Cakewalk Synths – Norman Matthew [MURDER FM]

PUTTING MY FACE ON YOUR NAME:

Remixing is one of my favorite things to do in the studio for many reasons. For one thing the song has been written, so the pressure of writing a masterpiece is off my shoulders. I’m also able to listen to a song from beginning to end; a completed thought, if you will. I get creatively juiced immediately if I connect to it. That’s where the magical third thing kicks in – I get to put my musical stamp on another artist and pay tribute to their work by recreating their art through my eyes. It’s an opportunity to let the world crawl inside my head (scary as that may be) and hear it the way I do. Continue reading “Approaching the Remix With Cakewalk Synths – Norman Matthew [MURDER FM]”

Is Z3TA+ 2 the best synthesizer plugin in the world? Try it and decide for yourself.

Z3TA+ 2Well, ultimately that’s up to you, but there are plenty of reasons to argue that it is.

Z2TA+ ClassicFirst and foremost is the legacy of Z3TA+ Classic. Released over 10 years ago, Z3TA+ set the bar for modern analog style soft synths with unparalleled tweakability and waveshaping control. Z3TA+ was pumping out synth leads and fat basses back when EDM was know to most as simply “Techno,” and Dubstep was in it’s infancy.  It’s impossible to quantify the impact of Z3TA+ on the EDM/Synth universe, but from what our users tell us, there are likely tens of thousands of musicians still using their trusty Z3TA+ 1.5 waveshaping synthesizer in music today.

Secondly, Z3TA+ 2 includes over 1000 new sounds AND all 1,093 that ship with the original. Frankly speaking, Z3TA+ 2 is a preset goldmine. These sounds hold up against any synth on the market. Listen to Z3TA+ 2 sound examples for a taste.

But of course there is also the UI redesign and usability overhaul that came with the second version. Z3TA+ 2 now has the sleek, modern interface that is easier on the eyes and easier to navigate. Controls are more spread out, intuitively placed, and easy to access.  Plus new controls have been added to allow even more sound design possibilities.  New features for performance and playability raise the bar again for soft synths.  Plus, Z3TA+ 2 is now (at last) available for PC & Mac.

Music Radar Best VST Synth PluginsMusicRadar recently updated their list of the 39 Best VST Plugin Synths in the World Today which ranks Z3TA+ 2 at the 13 spot among some formidable competition.

Should Z3TA+ 2 be #1?  We think so. Try Z3TA+ 2 for free today and decide for yourself!

Upgrade your music studio with Cakewalk and Roland gear

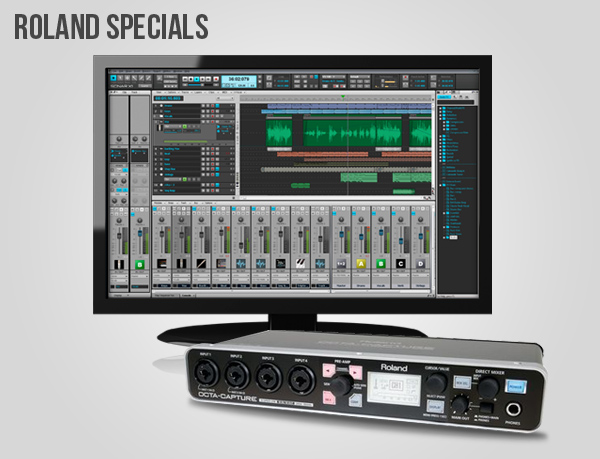
Roland Specials

There has never been a better time to build or upgrade your home music studio thanks to great offers from Roland US. As we head into the summer, Roland is offering unbelievable deals on some if it’s best selling products. Here’s a little recap of the special Roland-Cakewalk offers:

In addition, Roland is offering promotions on other hardware products, including special financing on all Roland and BOSS product.

Visit their promotions page for more information.

How Building Cost Effective Acoustic Treatment for the Music Studio Will Help Your Music Production; Part 3: Wall Panels

[Click on any picture for higher resolution] For the last couple of weeks I have been writing about how I’ve been building custom acoustic treatment panels for my new project studio which is running SONAR X1 Producer Expanded.  I started with the sound cloud over the mix position and then showed how I basically cut out all the corners of my room (a square room unfortunately for me) by building corner traps.  This week I’ll dive into probably the most important component; the wall panels.

The wall panels are really important for me for a few reasons.  (1.) They absorb the first sound reflection from the speakers so that the frequency waves are tamed down, and (2.) They absorb the sound in the room in general to control echo and reverberation.  I do a bit of professional moonlighting work on the side including songwriting/production for ESPN Sports Center as well as other commercial stuff, so it’s important for me to have a controlled environment to listen to my mixes and productions on SONAR so that what I deliver is the real-deal.  As I stated before, it’s pretty much impossible to create a perfect listening environment unless you are building a room from scratch (floating room, sound proofing inside the walls, etc…,) but it is possible to greatly improve your surroundings.  In my own opinion, I think the way to look at it is to figure out what it is you are trying to accomplish before you purchase or build anything.  I think some of the important questions to ask are:

*How much can I afford to put into the project?

*Is it important for the place to look professional?

*Will a vibed-out room make you or whoever is using the room feel more creative?

*What are the basic sonic trouble elements to the room?

*Will the room be used for mixing or recording?

*What genre of music will the room be used for (i.e.> Hip-hop with a lot of low end, Jazz, etc…) Continue reading “How Building Cost Effective Acoustic Treatment for the Music Studio Will Help Your Music Production; Part 3: Wall Panels”

Where does that pumping saw bass sound come from? Z3TA+

Guest Blogger: Sharooz of Sample Magic

Sharooz

Bio Information: Sharooz has proven himself as a talented sound designer, and provides sounds and patches for numerous companies including Cakewalk. His biggest record to date was ‘Get Off’ which was released more than 3 years ago on his own label ‘La Bombe.’ The record was played by some of the biggest DJ’s in the world such as Moby, Dada Life, Soulwax and Boys Noize, and reached no.2 on Beatport.

Sharooz: The question I’m almost always asked is ‘Where does the pumping saw bass sound come from and how do you made it so thick and fat?’

Check out Sharooz’s original mix ‘Get Off’ with the nasty bass line Continue reading “Where does that pumping saw bass sound come from? Z3TA+”

How Building Cost Effective Acoustic Treatment for the Music Studio Will Help Your Music Production; Part 2: Corner Traps

So maybe you have SONAR X1 Production Suite running on a killer computer, and now you might have a sound cloud over your mix position; what’s next?  Last week I exemplified how I built and installed a hanging sound cloud and this week I will go into detail how I built corner traps to help tame my unorthodox (square) production room.  Before reading this post, you may want to visit my article from last week which goes into some detail on room shapes.

My room, unfortunately for me is dead square.  This is about the worst case scenario so I had to do some research and talk to a lot of friends who are acoustic professionals such as Gavin Haverstick of Haverstick designs.  With my room being about 13.5’ x 13.5’ and 7.5’ ceilings, he has my mix position at 62” off the front wall.  So with my positioning about right, and a sound cloud overhead to take out the first ceiling reflections, the next thing to do was try to knock out the corners of the room where bass frequencies could become a big problem.

I decided to make custom corner traps based on my personal situation.  Once again, every room and everyone’s needs are different, so if you are on a tight budget, I think it’s best to first figure out what’s important to YOU.  For my situation, here were my goals for corner traps:

  • Cost effective
  • *Less square footage (I will discuss this below)
  • Aesthetically pleasing to the eye
  • Effective bass trapping
  • Light-weight

Continue reading “How Building Cost Effective Acoustic Treatment for the Music Studio Will Help Your Music Production; Part 2: Corner Traps”