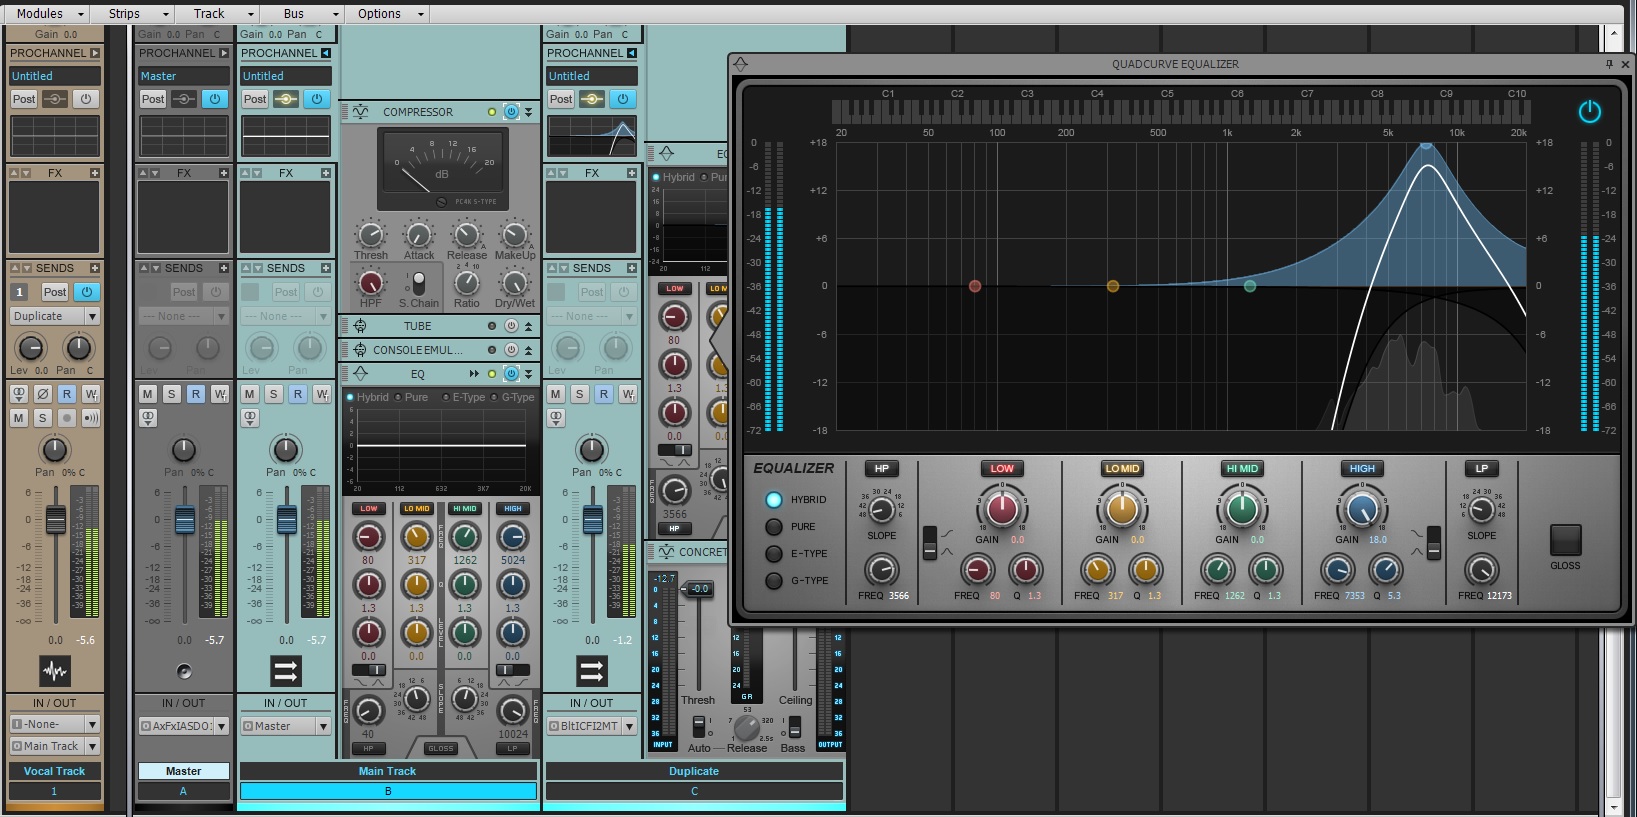
How A Small Studio in Wales is Making Big Waves Internationally Using the ProChannel and Console Emulation

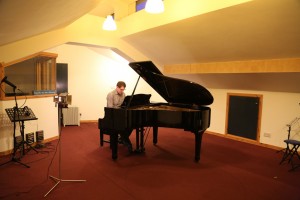
Since the release of SONAR X3, there have been more and more commercially viable SONAR studios popping up around the world.  One of the more interesting ones that we have found recently is nestled in a land known more for its castles and Celtic folklore rather than commercial music.  But nevertheless, there’s a little-engine-who-could called Shabbey Road Studios who are finding great success from London to New York City through their network of talented clients and talented staff.  Operated by producers-mixers-musicians-songwriters Al Steele, and Nigel Hart, Shabbey Road Studios is a full service studio just outside of Cardiff Wales.  Al, a native Australian, has been a multi-instrumentalist since the age of 8.  A natural career progression in the music industry brought him around the world at a young age with some very significant names such as the Billboard chart-ers Johnny and the Hurricanes, and Del Shannon who had the #1 Billboard hit song “Runaway” in 1961.  He has also appeared as a featured guitarist on many music placements in the Film and TV world which has added much credibility to his current role at Shabbey Road.  Al’s studio partner Nigel Hart is a Musical Director, Film and TV Composer, Songwriter and Arranger. He plays keyboards and sings, but also has a large back catalogue of instrumental compositions and songs.  Recently, Al and Shabbey Road Studio’ staff have been recording Dan and Laura Curtis who are best known for their album “Love on 42nd Street,” which was released in aid of the BBC Children in Need appeal.   Al was assisted throughout this project by Rob Sherwood, another multi-instrumentalist/engineer and X3 enthusiast.  Daniel and Laura Curtis are considered as one of the foremost ambassadors for the preservation of the music of the Great American Songbook in the United Kingdom.  The Great American Songbook offers a dazzling parade of American popular songs as seen and heard in some of the most beloved films and musicals ever made.

“Whether a project is large or small, our emphasis is always on melody and the big arrangements and massive mixes which are all there to support the song and vocalist.  Because of this we spend a long time on recording and then editing the ‘perfect’ vocal take.

The new Comping feature in Sonar X3 is simply amazing.  The ability to quickly audition and select your preferred take without having to painstakingly move to a master track is a massive time saver.  To just be able to slip the edit point back and forth cuts our editing time by about half! Continue reading “How A Small Studio in Wales is Making Big Waves Internationally Using the ProChannel and Console Emulation”

Understanding Virtual Instrument Routing in SONAR

by Dan Gonzalez

Are you new to SONAR? Well then this article is for you!

SONAR acts a bit differently than some of it’s competitors – especially when it comes to inserting, routing, and using virtual instruments. Let’s take a look at the way these work inside of SONAR:

1. You can insert a virtual instrument in a few different places within SONAR

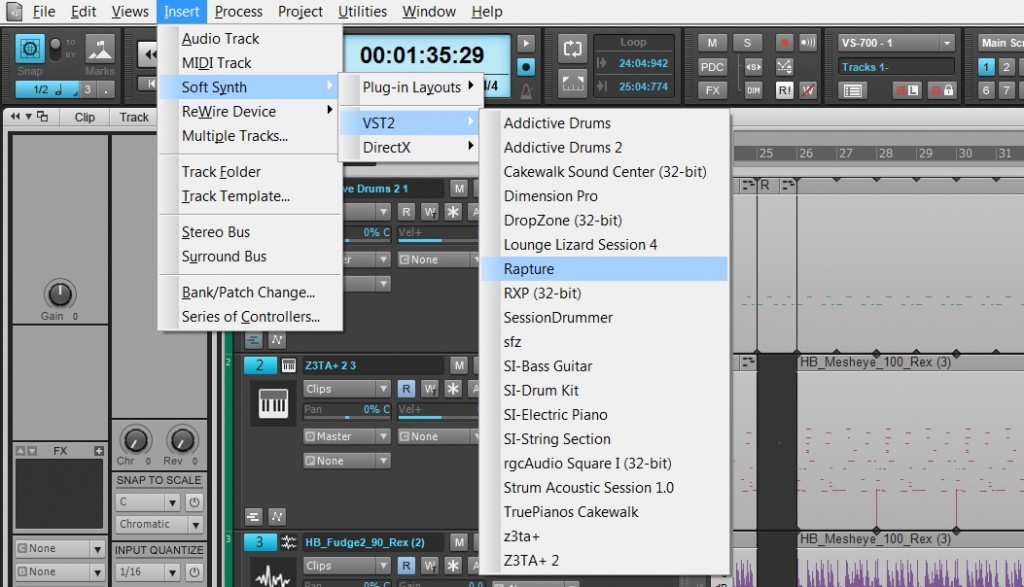
The first way is by selecting from the main menu along the top of SONAR: Insert > Soft Synth > (type of plugin) > (plugin)

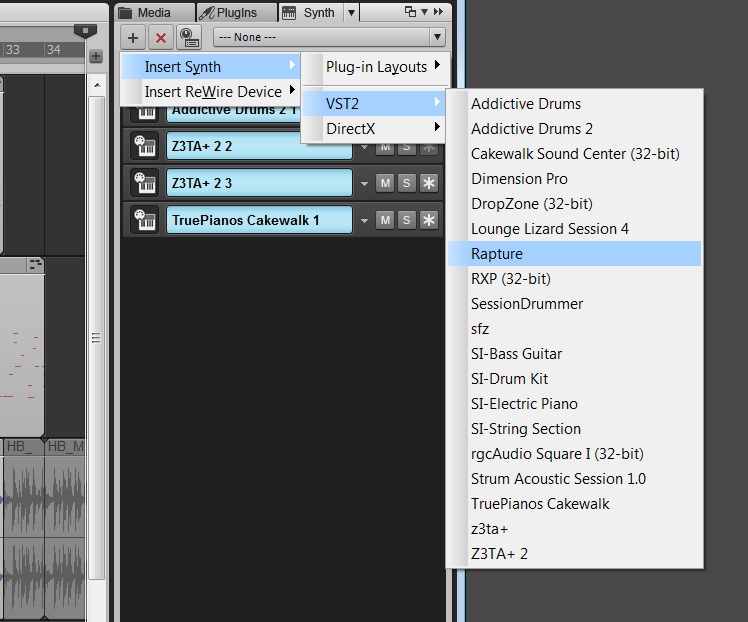
Another useful way is to use the Synth Rack and click on the “+” button. This will expose a similar list.

Lastly, one of the quickest and easiest ways Continue reading “Understanding Virtual Instrument Routing in SONAR”

Virtual Instruments: 5 Tips For The Z3TA+ Junkie

Here are some of our favorite Z3TA+ tips and videos from our archive:

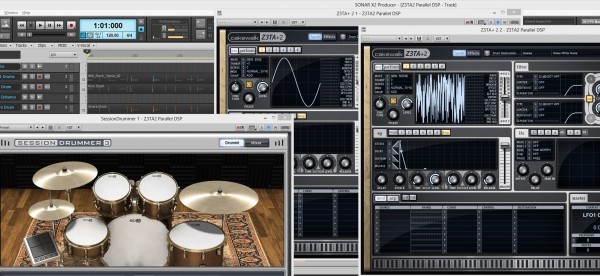
1. EDM Production – Enhance Your Drums with Z3TA+ 2

  • Insert two instances of Z3TA+ 2.
  • Copy your drum sequence to both Z3TA+ 2 tracks.
  • Isolate the Kick on one track and the Snare on the other.
  • Setup the first Z3TA+ 2 to generate a Sine Wave for the Kick.
  • Setup the second Z3TA+ 2 to generate White Noise for the Snare.
  • Adjust the Amplifier Envelope to match the duration of each hit.
  • Within Z3TA+ 2 add Reverb, Compression, and EQ.
  • Mix in under your existing Drum Loop.

2. How to Customize Z3tA+ 2’s Stock Arpeggios

Z3TA+ 2 comes packed with a massive pool of MIDI programs that power it’s internal Arpeggiator, but why stick to the stock programs when you can make your own?

Here’s how:

  • Open Z3TA+2 and activate the Arpeggiator Section
  • Right-Click on the sequence in the arpeggiator and make sure the following are checked
  • Auto Disable Pattern When Dragged to Host
  • Auto Fit Patterns to One Measure When Loaded
  • Load one of the Arpeggios from the Pattern menu
  • Drag and Drop the Arpeggios right into SONAR X2
  • Edit the MIDI Clip to your liking
  • Go to File > Save As
  • Select MIDI 0 in “Save as type”
  • Go to C:\Cakewalk Content\Z3TA+ 2\MIDI Arpeggios and Save it
  • Load it into Z3TA+2′s Arpeggiator by going to Pattern > Load MIDI File…

3. How to create a bass synth with Z3tA+ 2

Who doesn’t like bass? Especially synth bass. Z3TA+ 2 is the answer to all of your sound design needs especially when you are looking to improve your production in the low end. I’ve put together a short tutorial on how to make a simple bass synth inside of Z3TA+2. Once you understand how everything works together you’ll be able to really start to make this plugin work for you.

Picking the right Oscillators

Within Z3TA+2 the first section you need to start working with is the OSC section. First I’ve selected two different square waves for OSC 1 and 2. They were Vintage Square 1 and Vintage Square 2. When creating a bass synth you need to make sure that your patch will not break up in the low end so be sure not to drop the octaves on the individual oscillators too low. I typically set mine to -2 at the most. Once you get to a certain range the instrument will sound weak and lose it’s driving Bass Synth sound

[READ THE REST OF THE TIP HERE]

4. [VIDEO] Digital Sound Factory Z3TA+  Sound Design

5. [VIDEO] Mixing and Mastering a song using only the Z3TA+ effects engine in SONAR

The “Punch” Factor with Synthesizers

What exactly constitutes “punch”? Find out here

by Craig Anderton

We all know a punchy recorded sound when we hear it—but what exactly constitutes “punch”? It seems that perhaps punch is something that can not only be defined, but quantified.

This all started because years ago, I wondered why seemingly every musician agrees that the Minimoog has a punchy sound. Then, when I started playing a Peavey DPM3, several people commented that my bass patches had a punchy sound, “like a Minimoog.” Clearly, the technologies are totally different: one was analog, the other digital; one used voltage-controlled oscillators, the other sample playback. Yet to listeners, they both shared some common factor that was perceived as punchiness.

Analyzing a Minimoog bass line revealed something interesting: even with the sustain set to minimum, there was about 20-30 milliseconds where the sound stayed at maximum level before the decay began. There is no way to eliminate that short period of full volume sustain; it’s part of the Minimoog’s characteristic sound.

I then looked at the DPM3’s amplitude envelope and it exhibited the same characteristic—a 20-30 ms, maximum level period of sustain before the decay kicked in. Also, both instruments had virtually instantaneous attacks. Could this combination be the secret of punch?

For comparison, I then checked two synths that nobody considered punchy-sounding: an Oberheim OB-8, which is generally characterized as “warm” and/or “fat” but not punchy, and a Yamaha TG55. Both had fixed attack times, even with the attack control set to zero, that lasted a few milliseconds. I also recalled some experiments ex-Peter Gabriel keyboard player Larry Fast ran in the mid-70s, when he was curious how fast an attack had to be for a sound to be “punchy.” His research indicated that most listeners noticed a perceptible loss of punch with attack times as short as one or two milliseconds.

So it seems the secret of punch is that you need an extremely fast attack time, but you also need a bit of sustain time at maximum level. This sustain isn’t long enough to be perceived as sustain per se; it’s more of a psychoacoustic phenomenon.

Wondering if this same technique worked with other sounds, I took an unprocessed snare drum sound and tried to add punch by normalizing each cycle to the highest level possible for the first 20-30 milliseconds. Comparing the processed and unprocessed sounds left no doubt that the edited version had more punch.

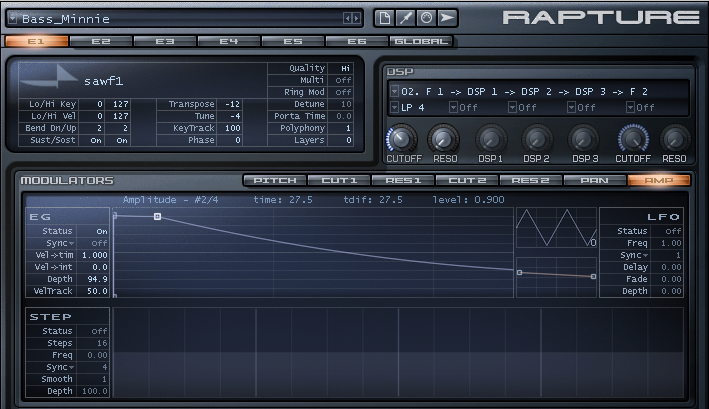
When I designed the Minimoog Expansion Pack for Rapture, I made sure that where appropriate, the envelopes had that characteristic Moog attack (Fig. 1). Note that the second node sustains the sound for 27.5 ms. Rapture’s tight attack time and ability to create “high-resolution” envelopes made it easy to add punch.

Fig. 1: Adding the “punch” factor to a Rapture Minimoog patch. Continue reading “The “Punch” Factor with Synthesizers”

Vocal Month: Extreme Vocals – Picking the Right Vocal Microphone Part III

Last but not least we engineered a session with Eric Alper, the lead vocalist for the Punk band “Knucklewagon” to see how these microphones performed under an extreme style of singing.

Screaming is common in Heavy Metal and Hardcore styles – both of which have a massive underground following throughout the world. If you’re into this style of music then you’ll understand that there is much value in understanding how the microphone you choose will later sit between the instrumentation of this type of music.

Listen intently on the way his vocals sit between the drums and heavy guitars. Keep in mind there is little to no processing on these vocals so that you can understand where the mic will naturally sit in the mix. For the most part, vocals in the extreme style tend to sit above the snare and close to the “crisp” sound of the guitars. It’s hard to reduce the harshness of this style of vocals with EQ – so pick a microphone that brings the aggression you need as well as a smooth dip in the 1K range.

Decisions, decisions…

As we stated in Part 2 of this series, it’s hard to shape your understanding of which microphone is the best due to the different styles that we’ve presented in this series. At this point you have to sit back and think about a few things.

  • What’s your price range?

  • Do you have a microphone that already does what you need to do?

  • Do you want 1 vocal microphone for everything?

  • Do you want options?

Think hard about these questions before making your purchase and try your own shootouts. Some places have trial periods that guarantee a date range of time that you can own the microphone, decide if you like it, and then return or exchange it. These are all great options when picking a microphone. Don’t let someone TELL you what you want. Figure it out for yourself and gather your own opinions.

Missed Part 1 & 2? Check them out here:

VOCAL MONTH: PICKING THE RIGHT VOCAL MICROPHONE PART I

VOCAL MONTH: BEATBOXING – PICKING THE RIGHT VOCAL MICROPHONE PART II

Want to learn more about SONAR X3? Check it out free for 30 Days.

Vocal Month: Picking the right Vocal Microphone Part I

Having a go-to microphone is always a great policy to have, but understanding the way specific microphones sound and perform is an even greater depth of knowledge every engineer or aspiring engineer should understand. To a trained ear – different microphones sound drastically different in character, response, and tone. The best way to start understanding these differences is easier thank you think. Start comparing microphones – and get nerdy about it!

Here’s our own Cakewalk microphone shootout displaying 5 different microphones on Ingrid Gerdes.

Continue reading “Vocal Month: Picking the right Vocal Microphone Part I”

How to use a vocal-double to enhance lead vocals

One of the toughest things about working with a lead vocal track is getting it to pop out, while allowing it to still sit in the track nicely in context with its surroundings [other tracks].  Every mixing engineer has her/his bag of tricks, but here are a few ideas to utilize a “vocal-double” which may help support and embellish the lead vocal track.  For this demonstration I am using the lead vocal track of NBC’s The Voice Season 1 winner Javier Colon.  Note that you can click on images to get a bigger perspective.

Continue reading “How to use a vocal-double to enhance lead vocals”

SONAR Production Tips – Building A ProChannel De-esser

Introduction

SONAR X3’s modular ProChannel allows users to take advantage of all the different aspects of a real mixing console. One great way of improving your vocal production is by using De-Essers to reduce the sibilant frequencies between 5-7kHz. The human mouth acts like a filter for words and sometimes certain words for certain singers can produce unwanted hissing sounds that get in the way of mixing. You can build your own De-Esser within the ProChannel by using the following steps.


When To Break The "Rules" Of Digital Mixing

Recently I was asked to create a song for a new short film that will be making the rounds on this year’s film festival circuit.  I got the creative brief [I had to write for a specific subject in the film] and got to work writing and recording everything myself in SONAR X3. Thankfully, SONAR X3 has pretty much everything you need to make a radio-ready track in the box; even if you are a #hack-of-all-trades like me. 😉  It was requested that this song have some grit to it, as well as some acoustic-oriented authenticity, so I grabbed my 5-Year Old’s harp out of his toy chest, my acoustic guitar, and got to work.  The only outboard gear used on this track were a Tascam UH-7000, an AT4033a mic, my Les Paul DC and Carlos Robelli bass.  I also played Dimension Pro organ through a controller.

THERE ARE NO MIXING RULES (KIND OF)

After writing the song on an acoustic and then tracking everything, it was time to mix.  I love mixing in the digital world because there really are no rules in terms of creativity.  Once you understand the basics of frequencies and how to put tracks together properly, you can really get creative with the Continue reading “When To Break The "Rules" Of Digital Mixing”

Mixing Tips: How to Use Reverb to Create Depth

Introduction

Mix engineers that have had their time behind a board can pick out the misuse of Reverb when they hear it. Just like with anything, applying the proper Reverb requires more time than just scrolling through the presets of the basic Hall, Room, and Plate algorithms.

Overview

Music tends to have a significant three-dimensional experience to it. This concept requires the understanding of width, height, and depth. The best way to understand this is to find a pair of large studio headphones and listen to some billboard topping hits that have dense and complex instrumentation. Grab a sheet of paper and draw two lines intersecting as well as one diagonally through the middle. Label them “Width”, “Height”, and “Depth”. Make a few copies of this sheet and as you listen to the music observe where the instruments sit in the mix. Mark the Toms, Snare, Kick, Vocals, Guitars, Keys, Backing Vocals, Bass, Strings etc. in their respective places on this XYZ plane. Once finished compare and contrast the different songs you listened to and you may notice how different each song turns out. Take one of your own mixes and do the same. You may learn something about your own techniques.

What does this little Continue reading “Mixing Tips: How to Use Reverb to Create Depth”