How Norman Matthew and Murder FM got their Recent Record Deal (Sony/RED)

Congratulations to SONAR user Norman Matthew and his band Murder FM for their first major-affiliated record released just last week.  Entitled Happily Neverafter, the 12 song full-length album was tracked mostly in SONAR over a period of time.  As many commercial records these days, this recording project started out as a demo and then as fate would have it, ended up in the hands of a label and a real-deal mixer (Famous/Sony Red and Beau Hill).

Murder FM have been on the fence about signing with different labels over the years since they debuted a video on http://www.revolvermag.com that shot out of nowhere.   In 2013, the track/video “We the Evil” took over the top spots surpassing major label artists next to Rob Zombie, and projected the band into the public eye as well as the industry eye.  The video alone had 150k views within a short time of it being released and is now up to 320k globally.
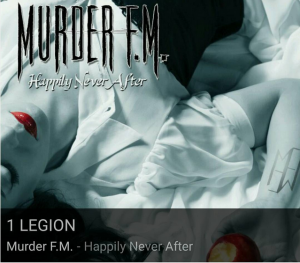
Finally, and recently, the band found the right label partner with Famous Records Global (Sony/Red) and the final touches were made which includes a death-defying remix of the focus-single-track by Tommy Lee of Motley Crue.  Interestingly enough, many of the tracks mixed by Beau Hill on the record were created by Norman in his SONAR studio stemming from demos he created over the years.

“SONAR allowed me to capture a lot of great moments where there was really no need to go back to the drawing board.”

Already sharing stages with bands such as Black Veil Brides, Orgy, Halestorm, Powerman 5000, Young Guns, Korn, The Used, The Birthday Massacre, Sick Puppies, Trapt, Rob Zombie, Deftones, Avatar, Five Finger Death Punch, and The Pretty Reckless to name just a few, they embark on touring in support of the new record for the rest of 2015.  As MFM supports their first official global release distributed by Sony/Red, the future is wide open and arena rock will live and breathe again in the fiery form of Murder FM!

For more information on Murder FM visit http://www.murderfmmusic.com

The all new SONAR comes in 3 different versions and can truly help you to create your own artist story.  Click here to try SONAR for free

Last week’s interview on 97.1 The Eagle/Dallas

We the Evil Official Video

Using Cakewalk Drum Replacer: The “Right” Way and The “Other” Way

The “Right” Way:

There’s more than one way to use Drum Replacer to trigger your drum sounds. Which of these you choose will depend on the material, as well as your preferred outcome and workflow. First, let’s take a look at some of the intended, more traditional uses of Drum Replacer.

A mixed drum track or loop

A fairly standard Drum Replacer use is to augment or altogether change the drum sounds on an already-mixed drum track. The examples below play an unprocessed SONAR drum loop, followed by the same loop reinforced by Drum Replacer.

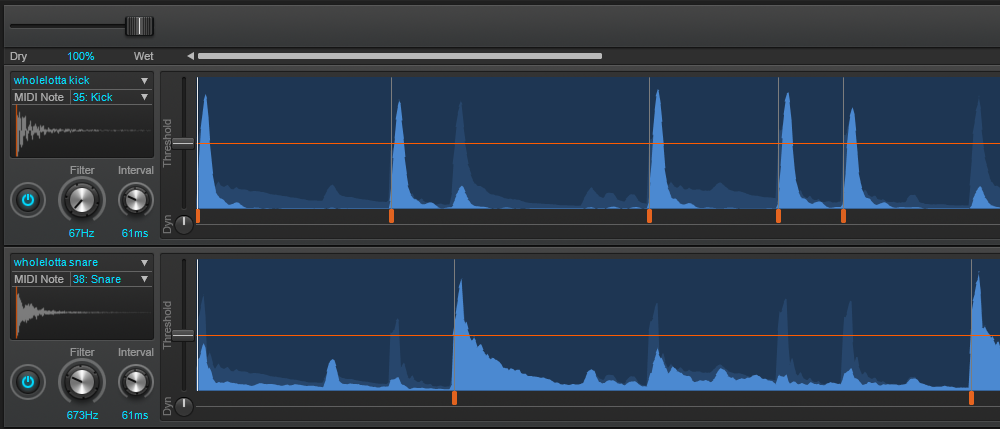
Filtered Drum ReplacerWith the built-in filter mechanism, it’s easy to isolate each piece of the drum kit and replace it individually. For this particular loop, focusing the filters to 67 Hz for the kick and 673 Hz for the snare ensured replacing the right sound. I wanted to soften this already-punchy loop by replacing the kick and snare sounds with something a little more “airy,” then blending these with the original. I chose the included WholeLotta Kick and WholeLotta Snare samples for their lighter, more pillowy qualities and blended them roughly 70/30 with the original drum track. Combined, they create a pleasantly complex, tight-yet-sustained sound.
Continue reading “Using Cakewalk Drum Replacer: The “Right” Way and The “Other” Way”

Why Musicians from all over the world are attending Gearfest

If you’ve ever driven through the mid-west, you know there’s not a lot happening in between the cities that you encounter during the ride.  That is, unless, you happen to be driving just north of Fort Wayne, IN during the early summer month of June.  In this case, you are sure to find your way to one of the fastest growing music events in the country – Gearfest!

Cakewalk had the privilege to take part in Gearfest again this year, and I was fortunate enough to make my first trip to what is quickly becoming known as a mini Namm in the mid-west. The event is put on by a great company called Sweetwater which is basically the end-all-be-all of anything you need for gear in the cyber world.  If you can’t find it in a store, or you simply just want more choices for purchasing, you can bet that you will find it at www.sweetwater.com.  Sweetwater is also known for having one of the most knowledgeable staffs in the industry, and if you just give them a call with a question you are sure to have an answer quickly by someone at their facility.

The first thing notable about Gearfest is the size of the event.  What started out  not to long ago as an idea to bring local people together for the community, has turned into a 10,000+ strong conference which now spans over 2 days and includes an interesting and unpretentious concoction of artists, industry professionals, music fans and gear-head-musicians from literally all over the globe.  The second thing to note is that it has its own vibe and culture very unique to itself.  Many music oriented conferences and/or festivals for that matter sometimes turn into promotional spectacles for those trying to gain an edge on their profile; Gearfest is the opposite. Continue reading “Why Musicians from all over the world are attending Gearfest”

Reader's Choice: Most Popular Drum Production articles in 2014

by Dan Gonzalez

Free Quick Kit Project Templates for SONAR X3 Users


Yes, we’re bringing back the freebie post from last December. Our Free Quick Kit Project Templates made a big splash with the community as one of our top posts over the last 12 months. These pre-mixed project templates load right from quick start menu in all three versions of SONAR X3 without any assembly required. Open a quick kit, drop in your sequence, and you’re ready to rock with great sounding drums. Now we’re opening it up to anyone who has Session Drummer 3 in their arsenal.  Download the free pack here.

9 Microphone Techniques for Recording a Snare Drum

Ever wanted to know how to mic up a snare drum? Well we wrote a comprehensive article about 9 different ways to do it. This article is brought to you by the community of Cakewalk readers that follow the blog and read it regularly. Check out the article here.

What’s New in Addictive Drums 2?

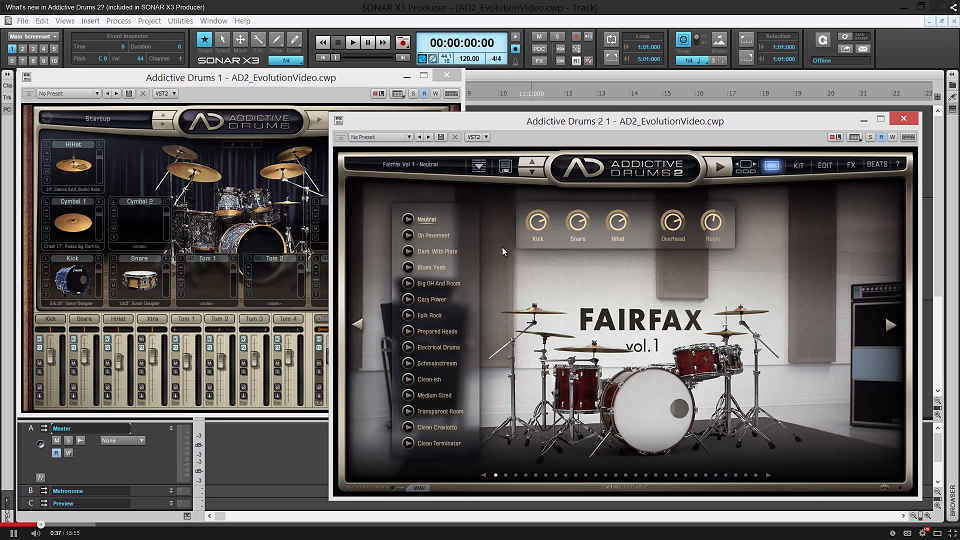
2014 brought us more than just content, it brought us Addictive Drums 2. Ever since we’ve posted our extensive video about XLN Audio’s new instrument we’ve heard nothing but great reviews. Here’s our most popular video chosen by the readers of The Cakewalk Blog. Check it out here.

Subtractive EQ Part 1: Snare Drum

Here’s one of our most popular posts this past year in case you missed it the first time around. There are a ton parts to this series, but the first part has seemed to win over the rest. Here’s a nice thick article about how to apply subtractive EQ to a snare drum. Check it out here.

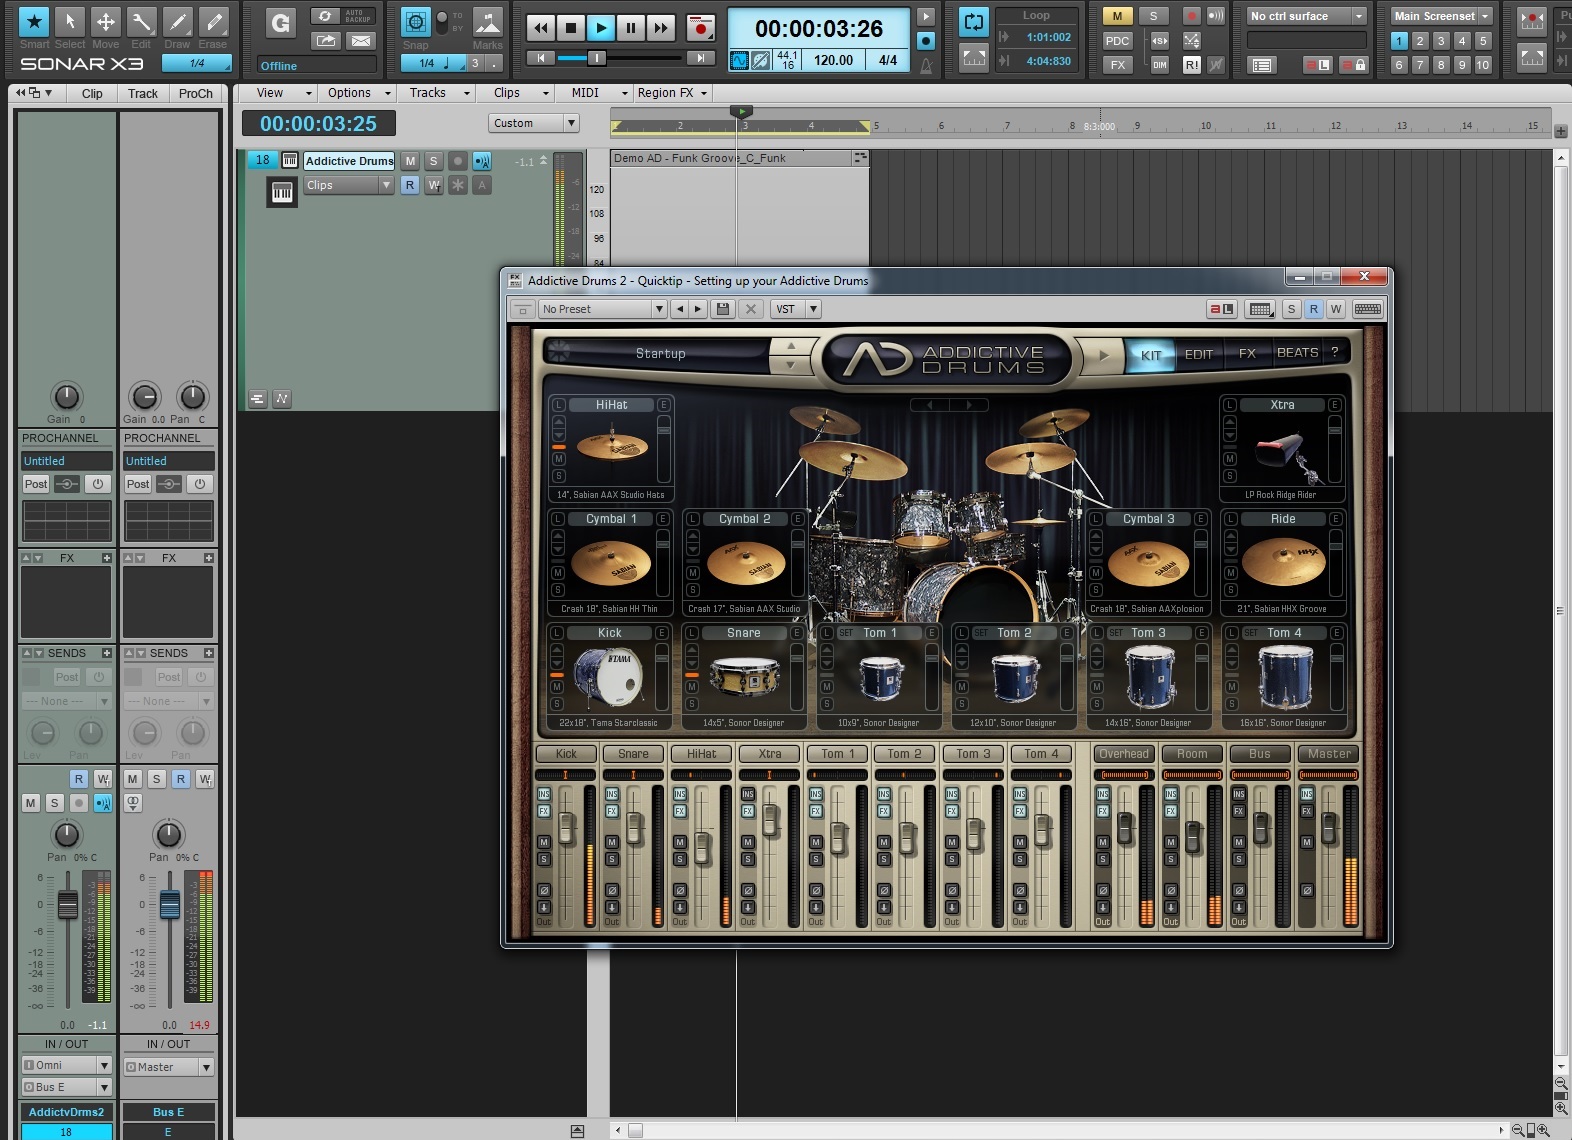
Setting up your Addictive Drums

Check out how you can easily setup Addictive Drums (1 & 2) to accommodate multiple different working environments within SONAR X3 Studio and Producer. This one of kind drum synth is the best of the best. Check out the article here.

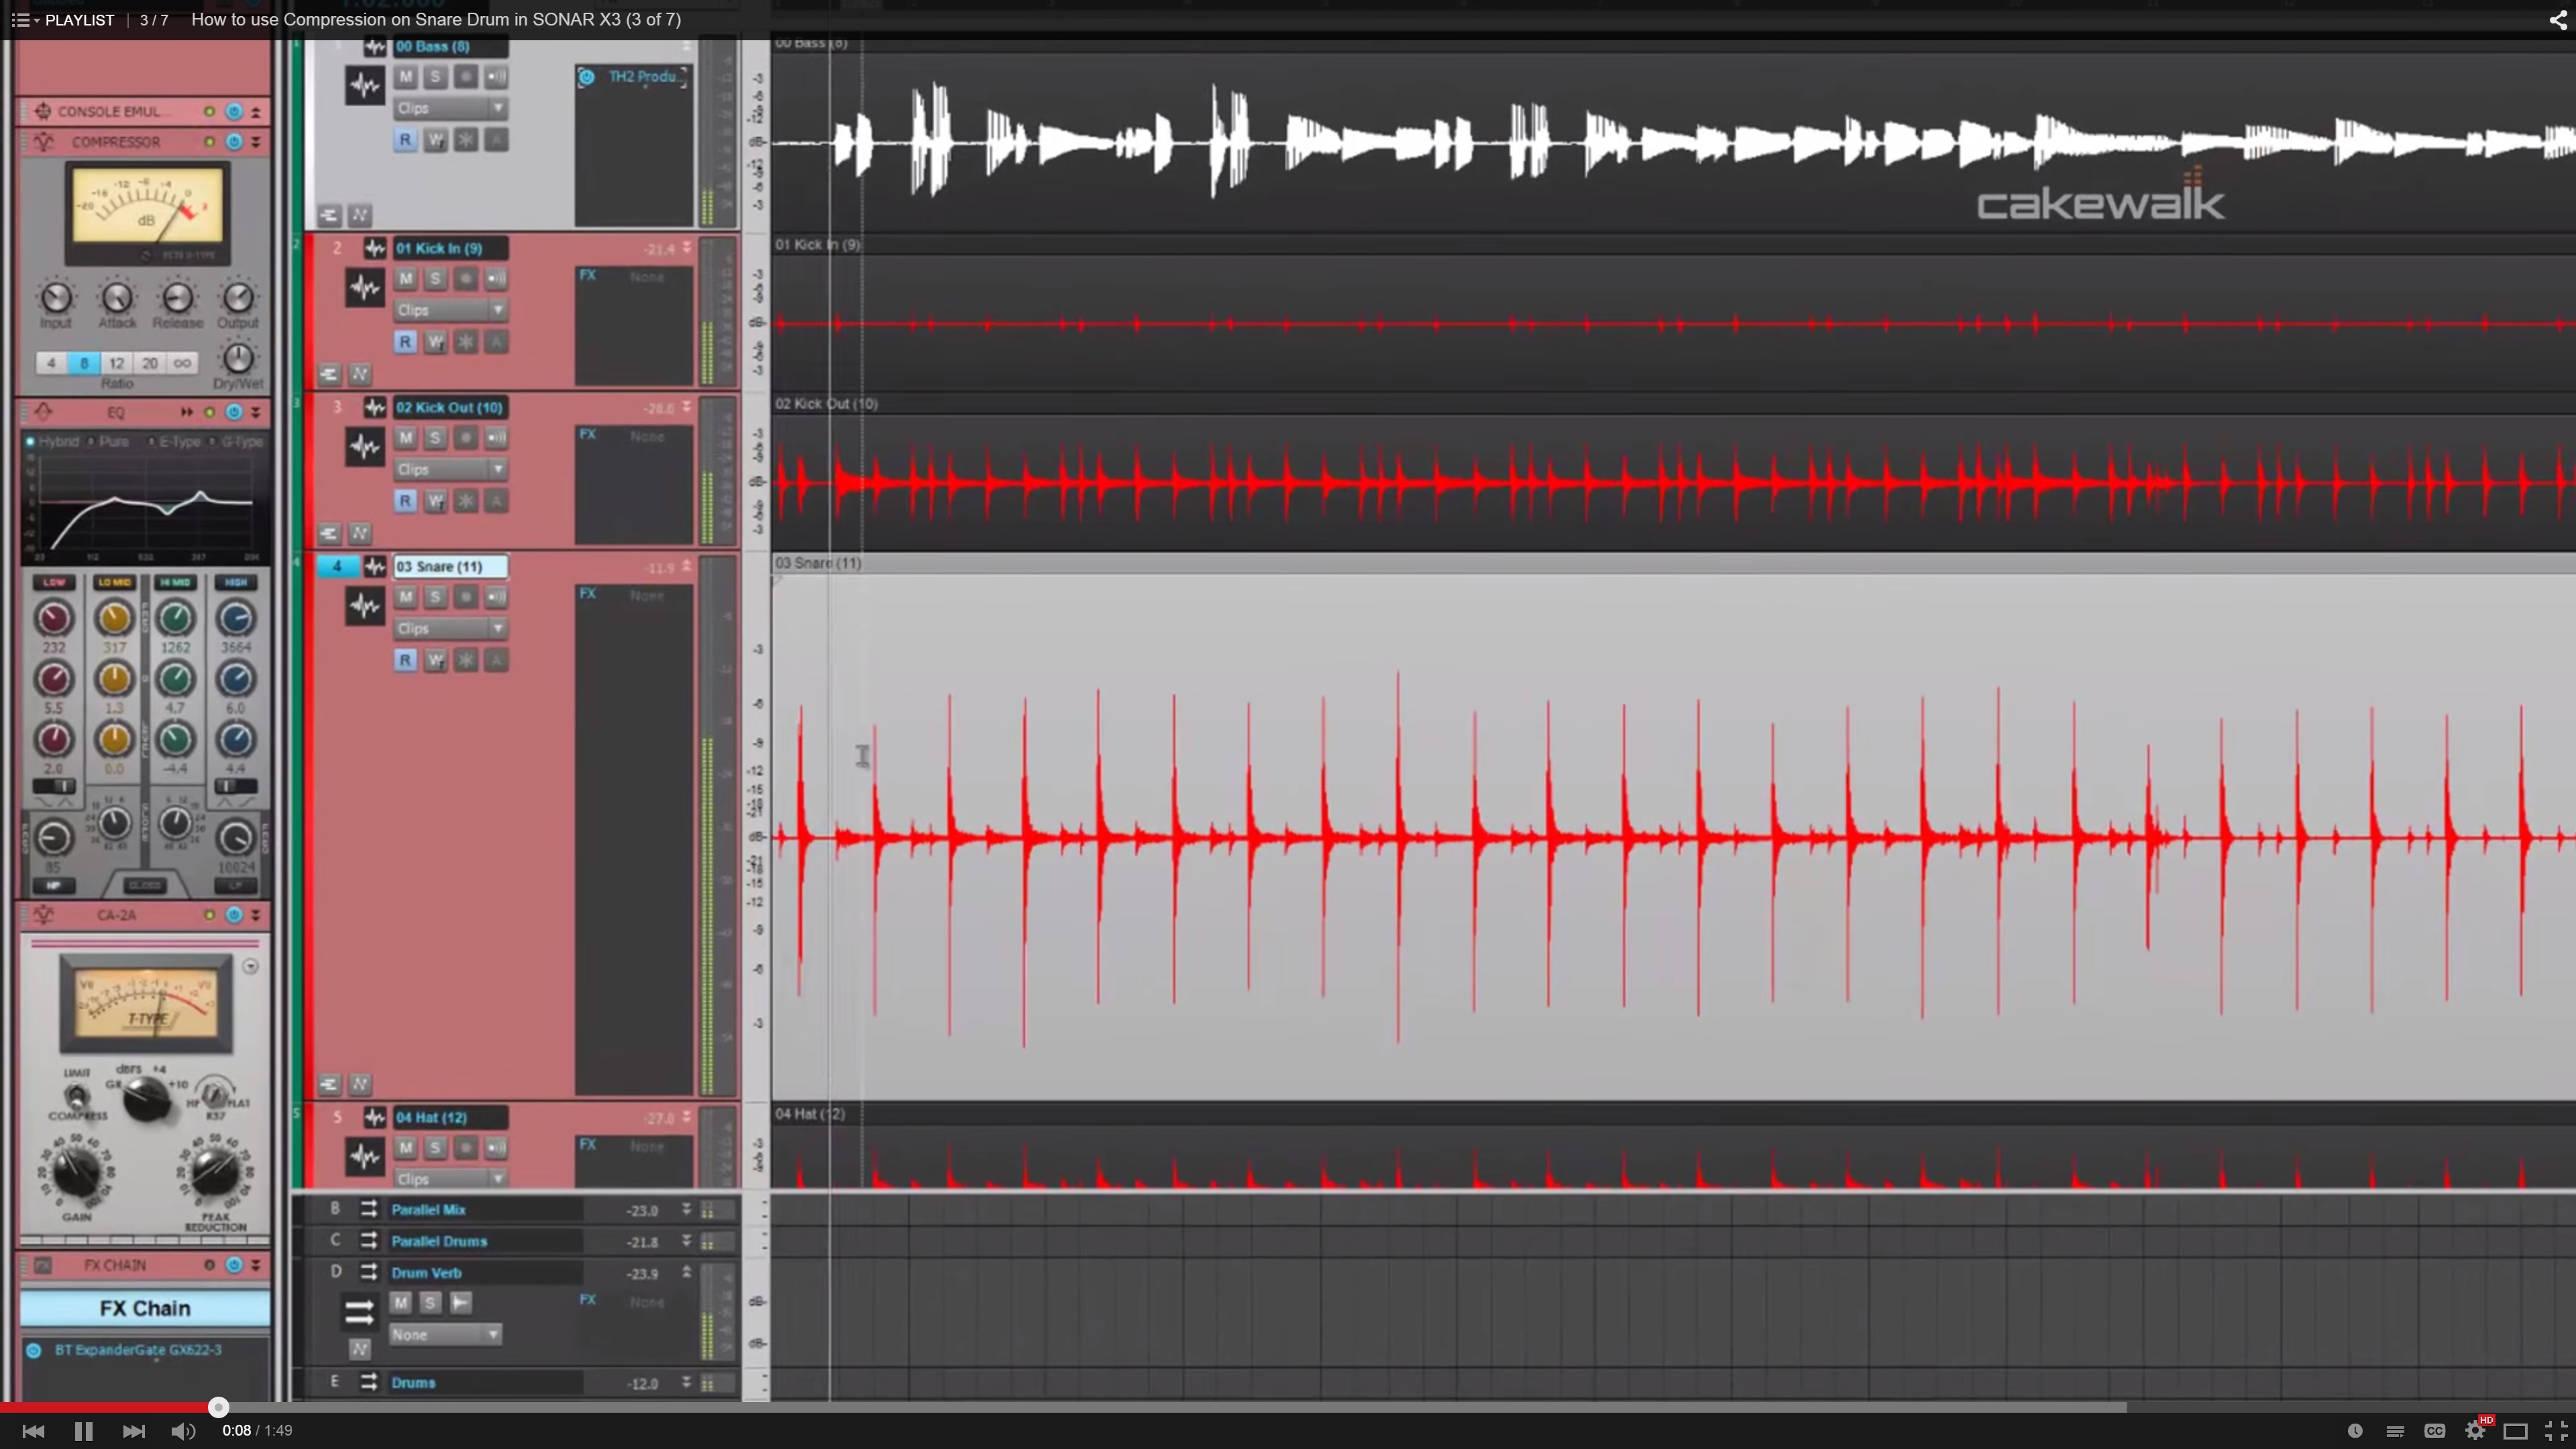
How to use Compression on Snare Drum in SONAR X3

Using compression is one of those tools that is tricky to understand if you’re not familiar with how the different audio signals in your mix. Check out our most viewed video from the extensive video series about using the CA-2A Leveling Amp on snare drum. Check out the video here.

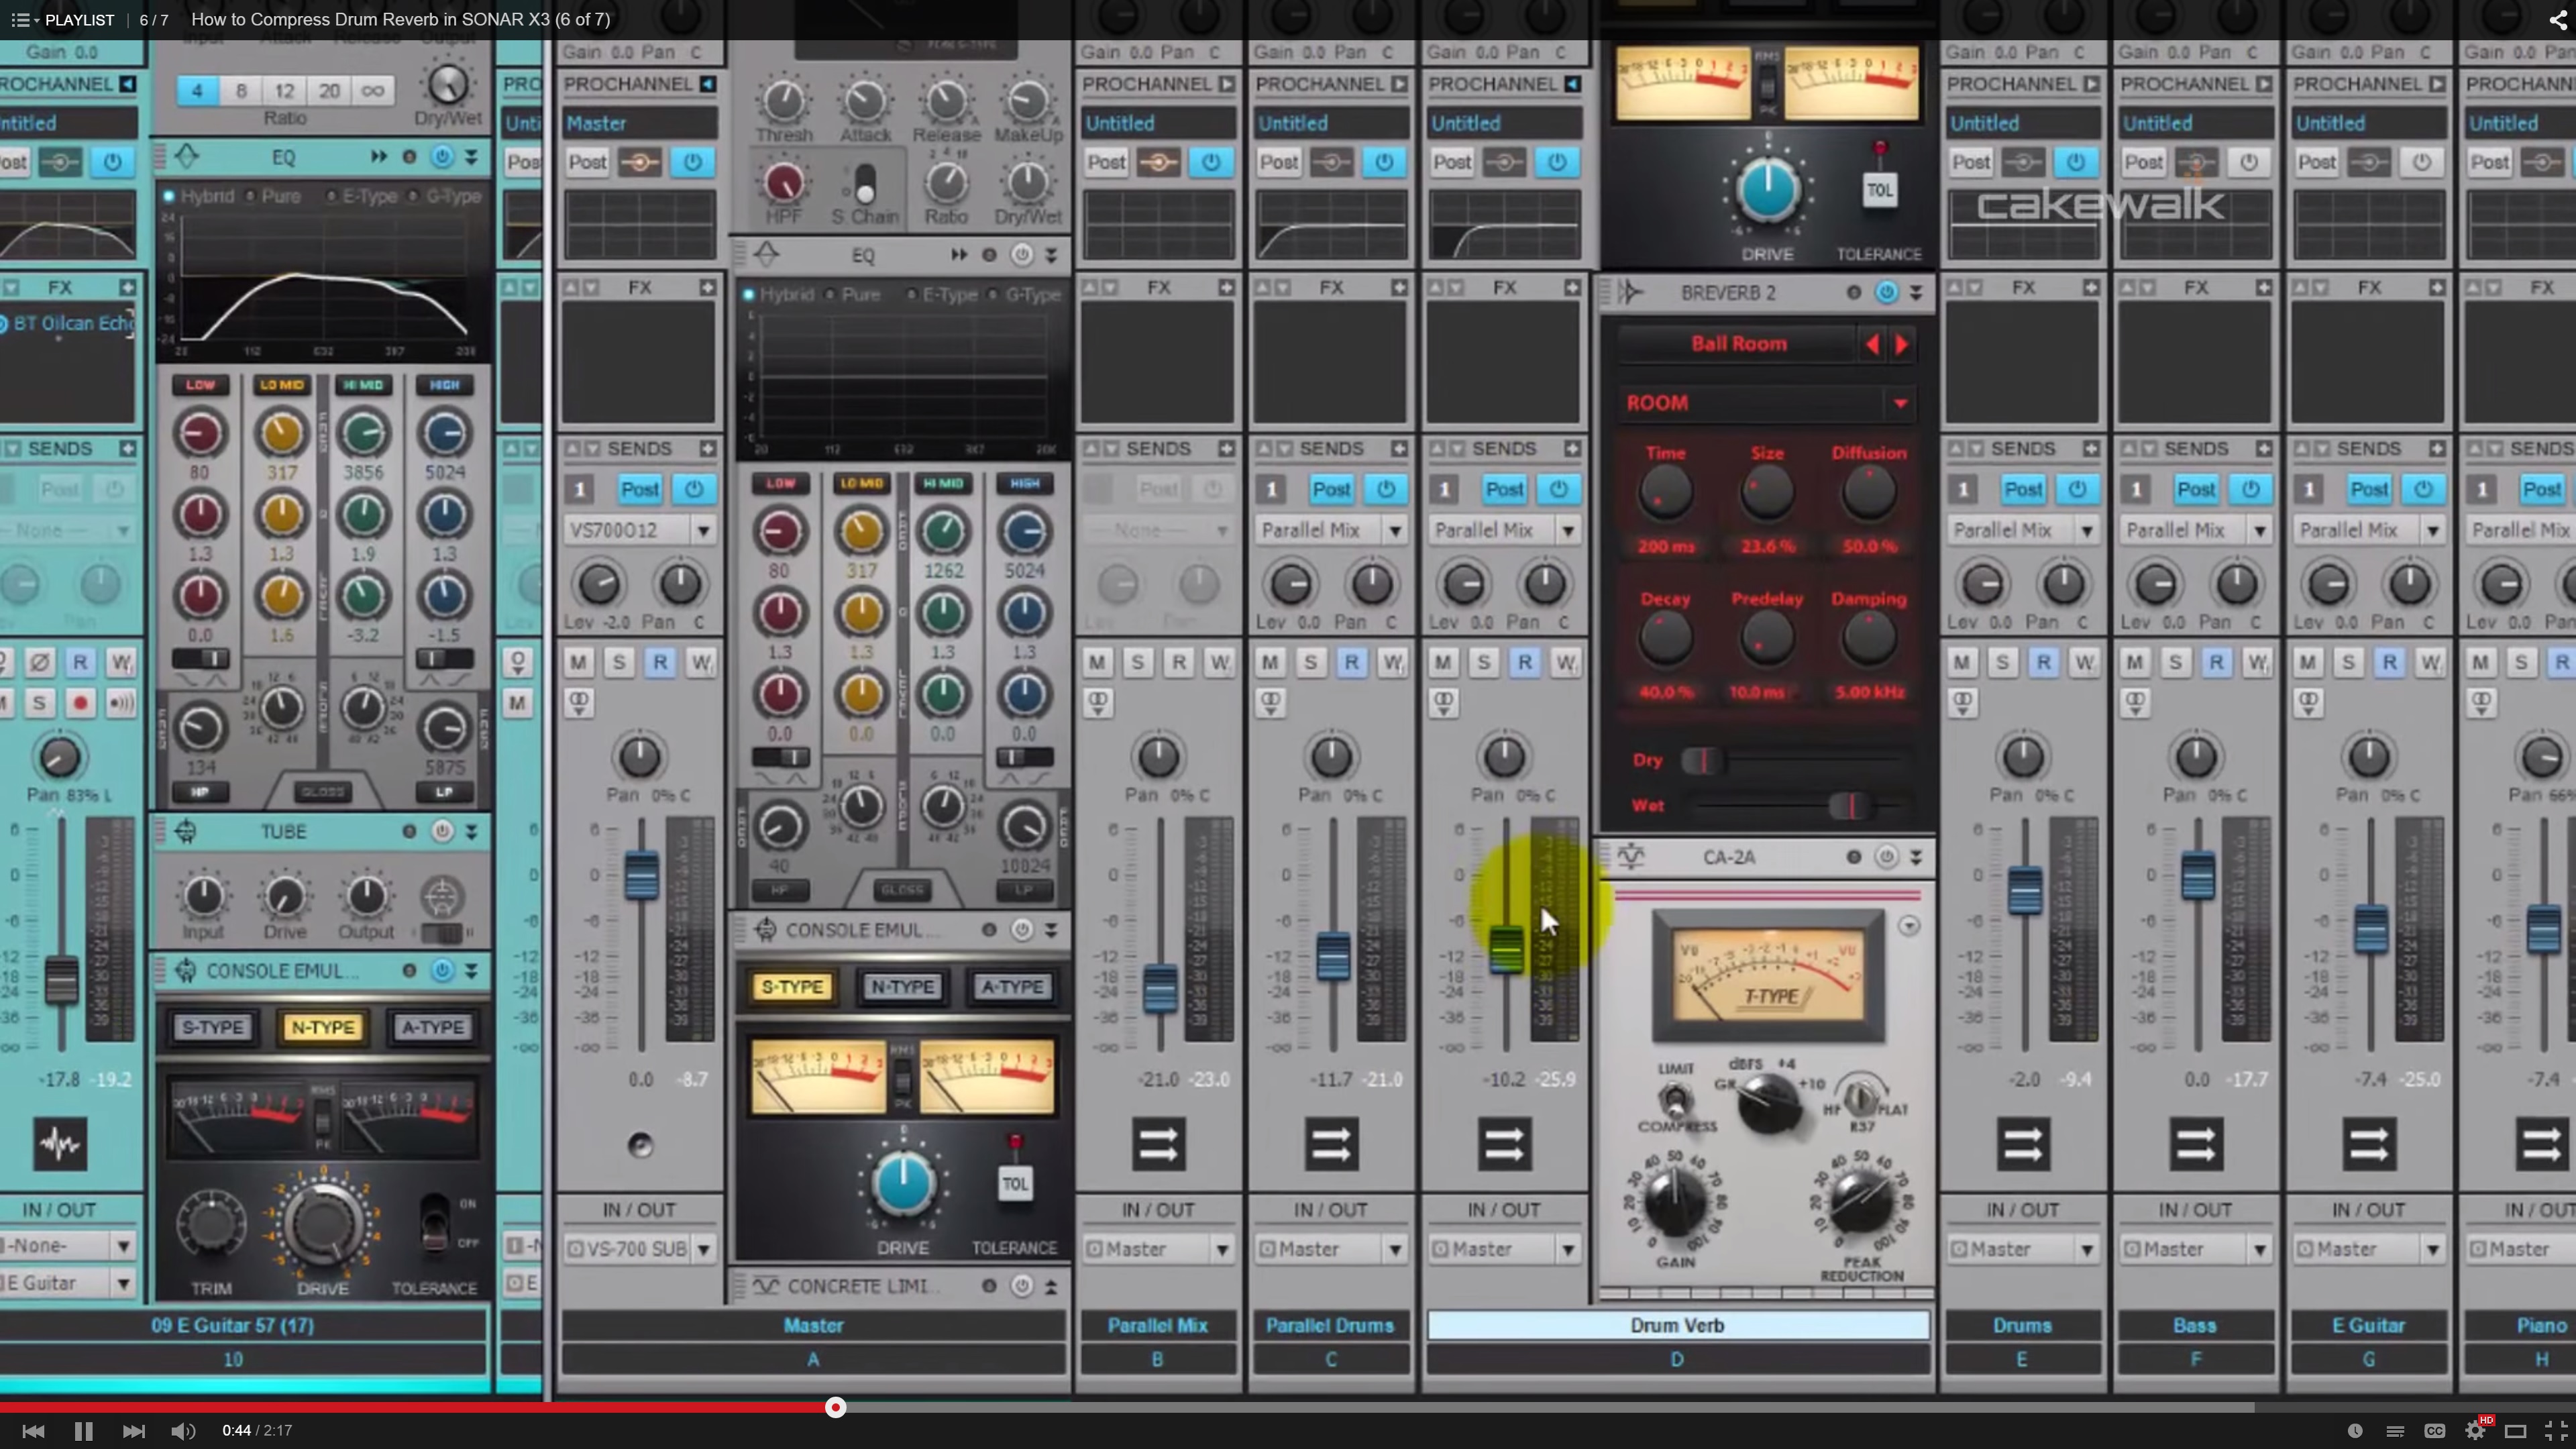
How to Compress Drum Reverb in SONAR X3

Another popular drum related video from the Compression video series is #6 where I give some tips on using compression on drum reverb. You can see the video here.

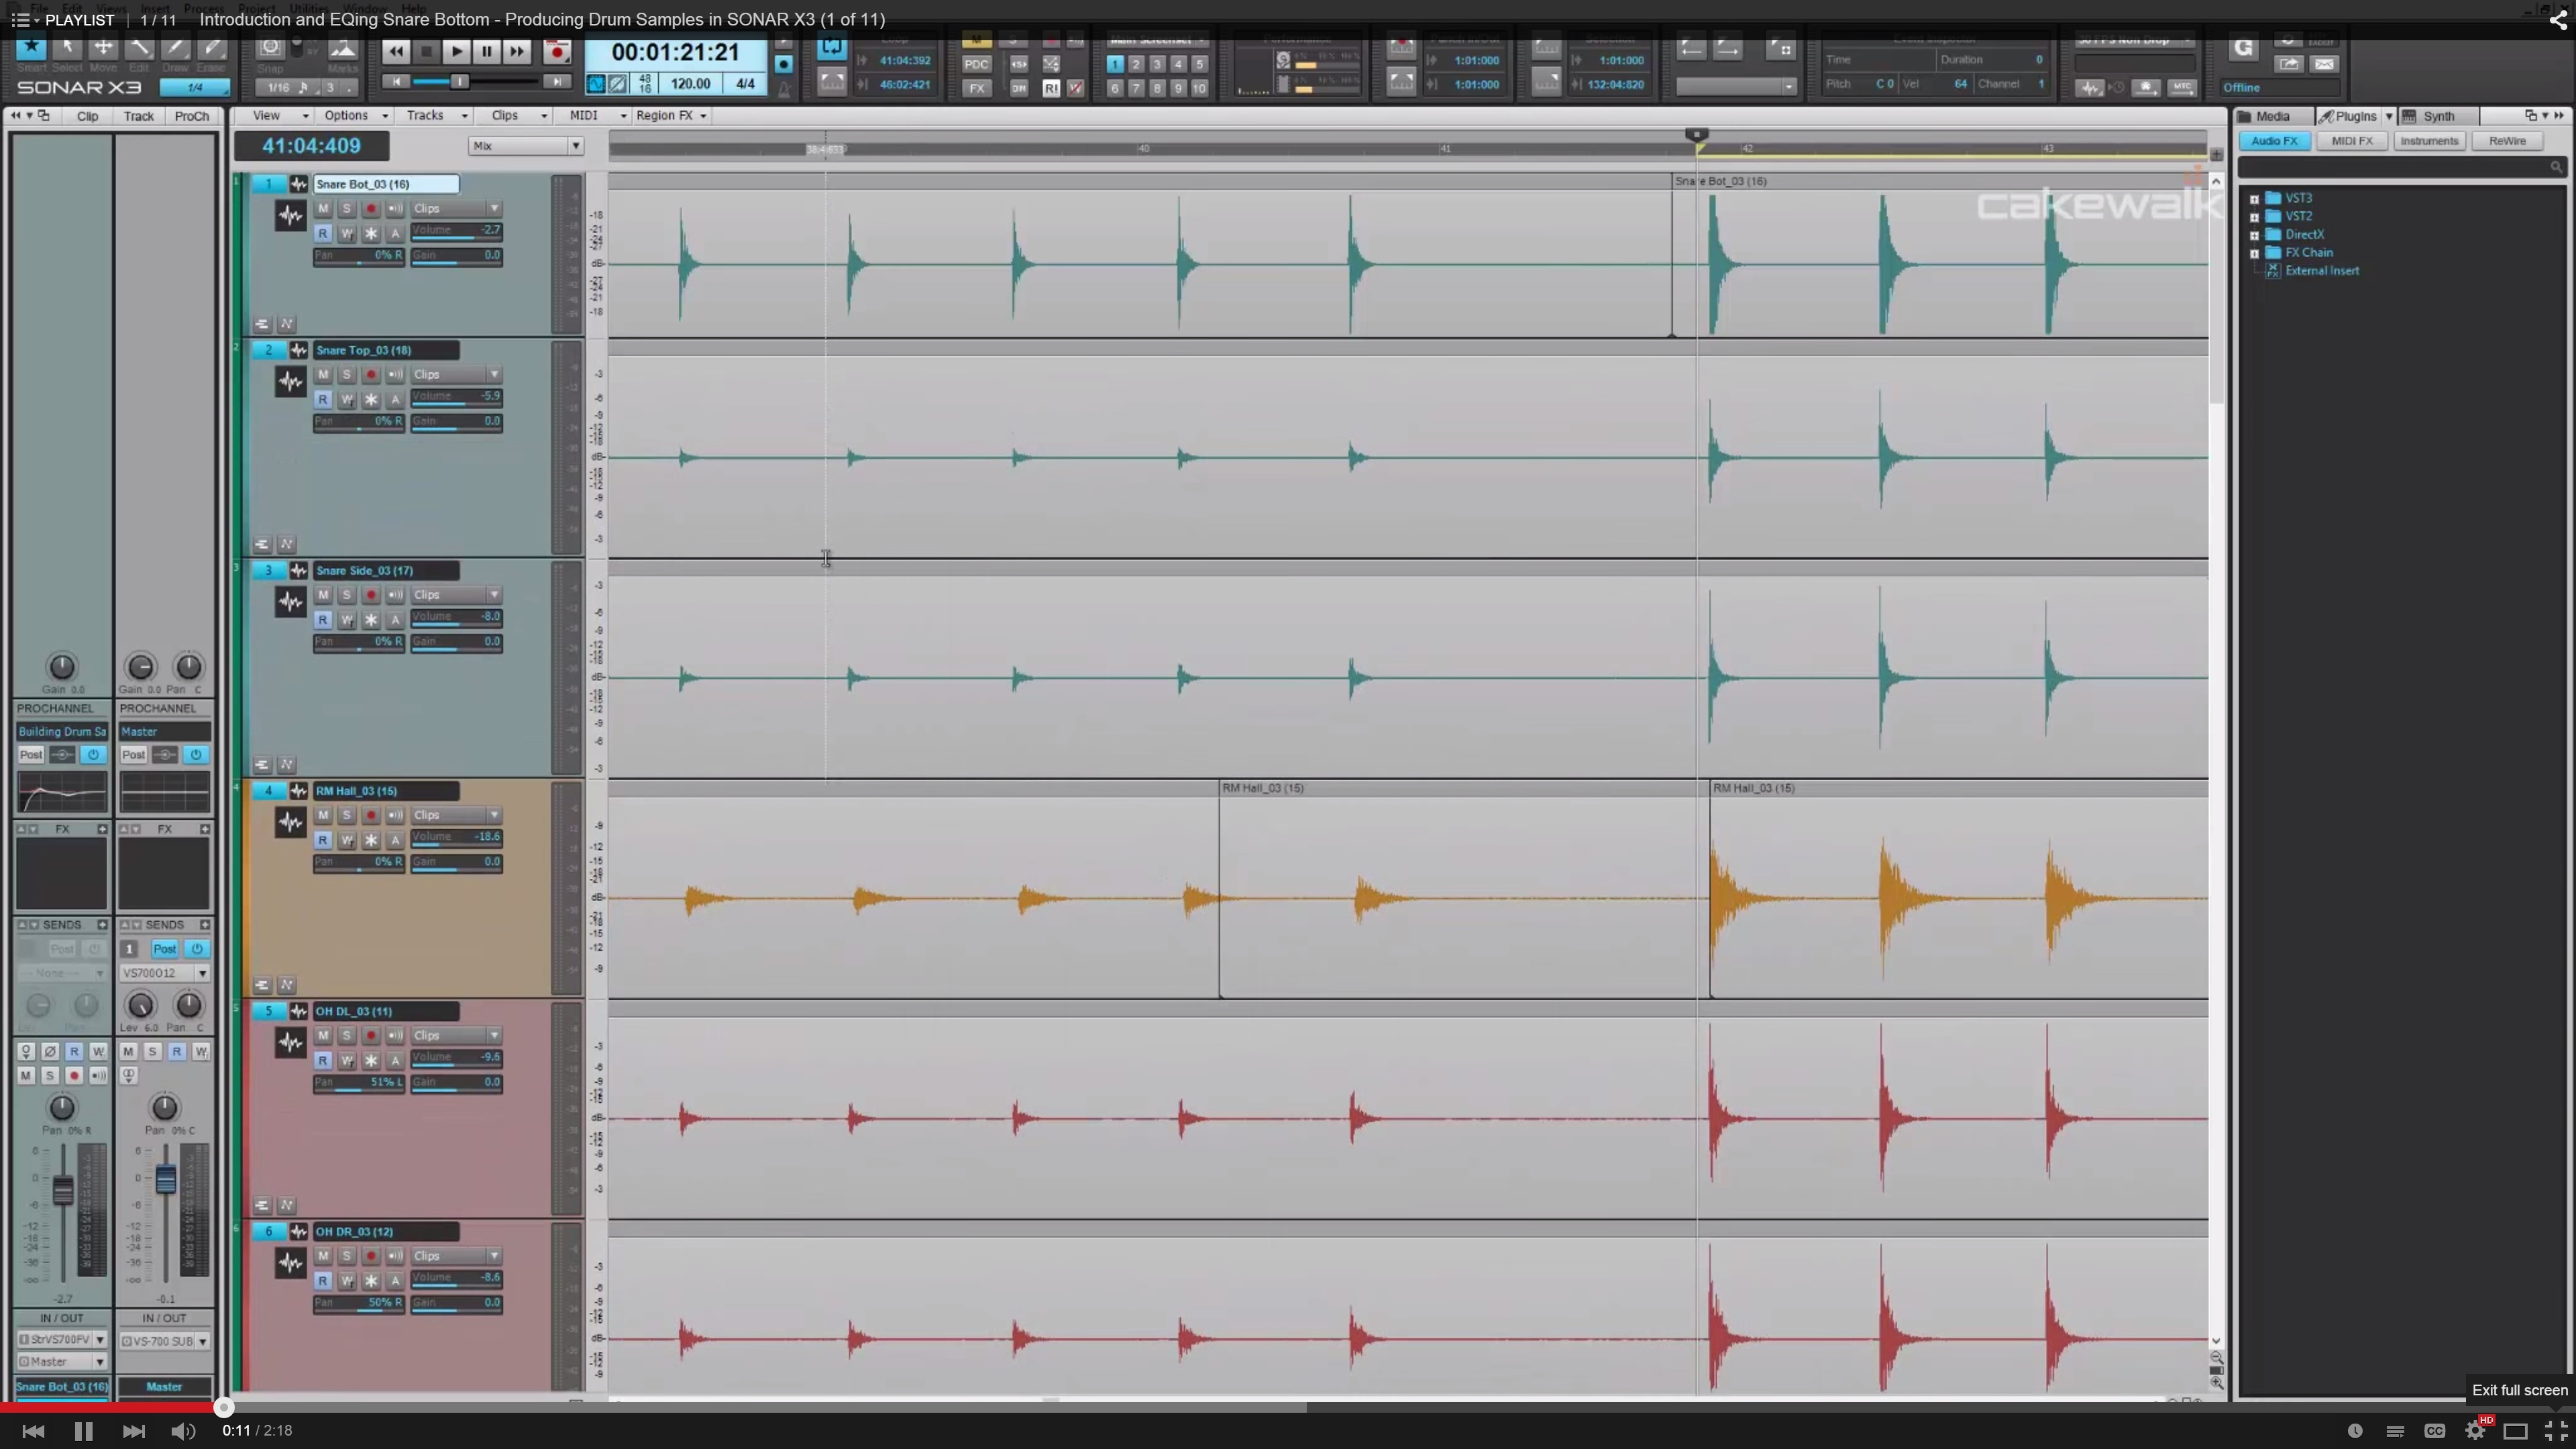
Producing Drum Samples in SONAR X3

Last but not least we’ve seen that our community has really enjoyed our Producing Drum Samples video series. This video series is available to watch here and guides you through some awesome ways to mix and EQ drum samples to your liking.

If you’re looking for more Drum Production tips check out the tag for this on our blog here.

How SONAR user Bobbi Tammaro won a SESAC award over many Major Label Artists

Respect and credibility

A few weeks ago SESAC announced their 2013 Jazz Award recipients, and SONAR X3 user Bobbi “Funkeeboy” Tommaro was one of the well-deserved artists on the list.  I have been fortunate to get to know Bobbi in the last few years on and off the SONAR playing-field, and the first word that comes to mind is “respect.”  These days considering the state of the music industry, the word respect has more meaning than ever and Bobbi has earned it from his music peers along with just about everyone else that hears his story.  Besides respect, he has earned much credibility in the Smooth Jazz world from being a repeat-offender on the Billboard charts as an independent artist.
Bobbi who is also PKA “Funkee Boy” has amassed an impressive amount of credits throughout his music career. At the young age of 15 he was already making a name for himself winning the Connecticut State Organ Championship and also opening for national acts such as Spyro Gyra.  As he progressed he scored numerous chart hits across multiple music genres, as well as, several top Billboard chart hits/Top 5 Smooth Jazz hits, and licensing deals on television networks such as ABC, FOX, NBC, CBS, SHOWTIME, VH1, etc.
Before making his own records his music has [and continues to in terms of residuals] appear on some of the most popular and well respected shows ever such as Beverly Hills 90210, General Hospital, All My Children, Sunset Beach, Ripley’s Believe It Or Not, Love Boat, One Life To Live, Young & The Restless, They Call Me Sirr, Soul Food.  Stepping out from behind the scenes as a songwriter/producer & into the forefront as a Smooth Jazz Artist, Bobbi’s track record progressed and continued to impress.

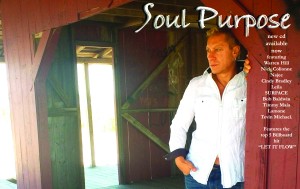
Most recently, starting off 2014 by releasing his 3rd CD “Soul Purpose”, the smooth jazz keyboardist/producer combined his talents with assembling a stellar line up of A-List recording artists. The newest award-winning record “Soul Purpose” features guest appearances from Warren Hill, Najee, Bob Baldwin, Cindy Bradley, Nick Colionne, LEILA, Surface, Lamone, Timmy Maia, Tevin Michael and more!!!
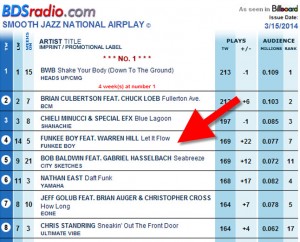
Chalk one up for the hard working jugglers. 

A few key elements set Bobbi apart from the pack that keeps him successful.  The obvious one is the raw talent of songwriting and performing his instrument, but if you go a few levels deeper, you will find a multi-instrumentalist, producer, mixing and mastering engineer.  Peeling back a few more layers exposes an organized machine who literally “does not need a label” to hit the Billboard Top 5 Smooth Jazz Chart.  In fact Bobbi has had many labels approach him and has respectfully declined any offers to do business.  Why?… because he has cracked the code and found a formula that works for himself as an independent artist competing in the major leagues.

It’s not easy

Hitting the Top 5 on any Billboard Chart is not an easy thing to do.  Besides the songs and production alone (which he does ALL in SONAR INCLUDING Mastering), Bobbi also has to oversee the efforts for Radio Promotion, Publicity, Social Media, Sales and Marketing.  If you ask me, this is a very rare skill-set to have as an artist considering just the time it takes alone to write and record a [great] full length record.  Bobbi does have help from his wife Leila who is also a very credible artist, and the two of them seem to have a great formula for getting the music out to the masses as if they were a Major Label.
Cakewalk:          It’s pretty amazing that you do so much to get your music out, can you describe the short-form version of a typical record release?

Bobbi Tammaro:            Sure, it’s hard to keep it short form because so much goes into it… So here goes Continue reading “How SONAR user Bobbi Tammaro won a SESAC award over many Major Label Artists”

DAW Best Practices: How to use metering in SONAR

[Originally posted as a daily tip on the SONAR forums and reposted for viewers here on the blog.]

The Overachieving Meters

by Craig Anderton

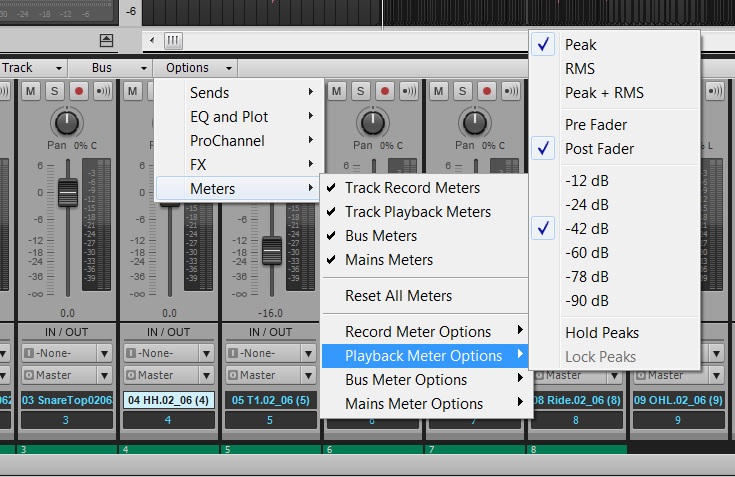
To change resolution for any audio meter, in any view, right-click on it and choose a range of 12, 24, 42, 60, 78, or 90 dB. Each meter can have its own range. With the Console view, I set the output bus meters to 12 dB to help gauge the approximate amount of loudness maximization that may be required. For example, if the meters make it to 0 but otherwise spend very little time in those upper 12 dB, then the track will probably need to be made “hotter” when mastering. For the Track View track meters, choosing the maximum resolution (90 dB) helps reveal if there’s noise at the lower range of an incoming signal.

Vertical or Horizontal Metering

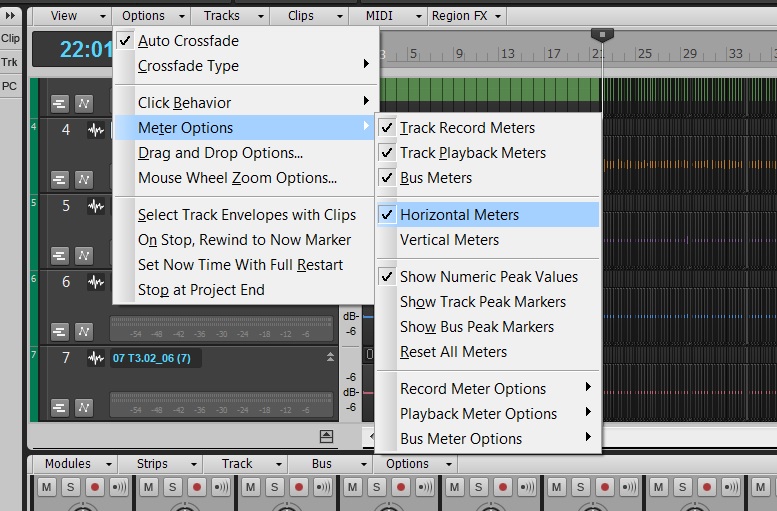
In Track View, the meters can be vertical or horizontal. Choose Options > Meter Options and select the desired option. When vertical, the meters behave more like activity/clipping indicators, because when you collapse the track to a short height, you basically see only activity and clipping. If you use the Console for mixing, this is a good choice because you can see more track parameters in the Tracks Pane, as the vertical meters don’t take up space along the bottom.

If you generally mix using the Track View rather than the Console, then you can extend the width of the Track Pane, enable horizontal metering, set them to a fairly wide playback range, and enjoy high-resolution metering. Also under Options > Meter Options, you can specify the Record, Playback, and Bus meter characteristics. Choose from Peak, RMS, or Peak+RMS (my favorite choice) response, whether playback meters are pre- or post-fader, and whether bus meters are pre-fader, post-fader, or pre-fader and post-FX.


These settings are independent from equivalent meter settings for the Console view. You can also choose whether peaks are held or locked (I recommend checking both), as well as show Peak Markers. These indicate the highest point in the track and can be extremely useful when mastering.

This kind of flexibility allows the Track and Console views to be far more than just two ways to view the same type of material. For example, the Console meters are probably better set to post-fader, so you can see at a glance which tracks are contributing the most amount of level. But in Track view, a pre-fader setting lets you monitor track activity so you can check whether a Track has signal, regardless of the fader position. The metering options are just one more reason why I tend to mix in Console view, but track and edit in Track View.

Want to check our SONAR? Try our 30-day free trial.

How Adventure Club is using SONAR X3 to stay on the EDM charts and ahead of the pack

There is an interesting movement happening in the music industry.  We have all seen it, and most are very opinionated about it…  The EDM Revolution.  Love it, like it, hate it – regardless, it’s here and thriving.  I recently had the good fortune to spend a few very interesting days with SONAR X3 users Adventure Club; one in LA, and one in NYC, and I can honestly say that I think these guys have figured out [some sort of] a new model of the “music industry.”

Truthfully speaking, I really was unsure about what our interaction would be.  I understand the EDM scene from afar and surely respect it, but I wasn’t sure what actually goes into the work behind the scenes of an EDM artist.  SONAR is used by Composers, Songwriters, and Producers of all genres, but when Cakewalk found out that Adventure Club, a heavyweight EDM act was using SONAR 8.5, we were pretty intrigued.  I had heard of the duo strictly from their online presence and charting activity, but I had never focused in on any of their productions.  Their popularity alone on social media told me there was something different and unique about this artist, and my assumptions were correct.

If you are not familiar with Adventure Club [“AC”] they are a Canadian Elecronic Dance Music duo, composed of Christian Srigley and Leighton James, and based out of Montreal, Quebec.  The duo formed while attending high school in Montreal as a hardcore pop-punk band, but later decided to move onto the more electronic sound of Electronic Dance Music (EDM) after simply getting bored with the pop-punk sound.  The first song to put the duo on the map was their remix of the song “Daisy” by the American alternative-rock band Brand New, which was put on The Hype Machine, an MP3 blog aggregator website.  After this track resonated deeply with EDM fans around the world, the duo was off to a solid start with a solid online fan base and foundation.  What separates this group from other EDM acts is that they both are accomplished musicians with a great knack for music production in general.  This translates into very solid tracks which they produce on their own in SONAR X3 Continue reading “How Adventure Club is using SONAR X3 to stay on the EDM charts and ahead of the pack”
How Cakewalk Pros use SONAR X3 for Songwriting

Songwriting is such an intricate art-form. Some approach it seriously, while others find their best work casually writing with others in a lighter atmosphere. There are a lot of moving parts, and in my opinion a lot of magic and unexplainable voodoo that go into a song that simply resonates with the general public for unexplainable reasons. Do you think Afroman thought his song “Because I Got High” would have over 45 million views on YouTube when he wrote it? https://www.youtube.com/watch?v=WeYsTmIzjkw

There are so many different and interesting ways to write songs, and SONAR is a DAW that literally becomes your writing partner. From inspiring drum grooves with Addictive Drums, to the ease of workflow with loops, to quickly shaping sounds to inspire a more creative path, SONAR is way more than your industry-standard “recording” software. It’s a place you go to when you want to creatively craft a masterpiece. We thought it would be interesting to hear from some day-in-day-out professionals who depend on SONAR for their livelihood.

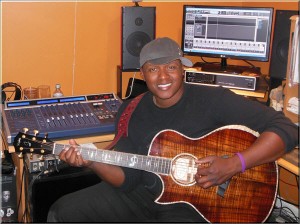
Javier Colon
Singer-songwriter
Major Label Recording Artist
International Touring Artist
Winner of Season 1 “NBC’s The Voice”

Cakewalk Artist Relations:     What is your main approach to songwriting?

I’m usually an acoustic guitar guy when it comes to songwriting but sometimes I’ll sit at the piano and get inspired and start writing. I’ve worked with a lot of producers and songwriters that build a track and then write to it – we’ve come up some great songs that way too.

Cakewalk Artist Relations:     How does SONAR help with the songwriting process?

Javier:     SONAR helps me tremendously when writing because it’s so flexible; you can change things in a session as quickly as you can change your mind – this really helps the songwriting process. When I write a song there is a constant process of elimination. I’ll think of a line, and I might like it for a minute, and then toss it out. There are also ideas that I absolutely know will make it into the song. I constantly record as I go so I don’t forget ideas that I really love – SONAR’s arranging workflow really keeps this process creative and easy for me in terms of songwriting.

Also, X3’s looping and comping functions really help with songwriting.  I record chord progression loops so I can come up with melody ideas in real time. Then I’ll go back and audition all the ideas easily to get a good idea of what melodies are better than others.  SONAR X3 has really been a great tool for songwriting for me.

Cakewalk Artist Relations:     What is one of the recent songwriting successes or projects you have had or really enjoyed? What was the workflow or songwriting process like for that?

Javier:     I recently wrote with a good friend of mine, Josh Kelley Continue reading “How Cakewalk Pros use SONAR X3 for Songwriting”

Recording Virtual Synthesizers: The Art of Imperfection

Synths can make perfect sounds…but is that always a perfect solution?

by Craig Anderton

Recording a virtual instrument is simple…you just insert it, hit a few keys, and mix it in with the other tracks. Right?

Well…no. Synthesizers are musical instruments, and you wouldn’t mic a drum set by taking the first mic you found and pointing it the general direction of the drummer, nor would you record an electric guitar by just plugging it into a mixing console. A little extra effort spent on avoiding an unnatural sound when mixing synths with acoustic instruments, improving expressiveness, tightening timing inconsistencies, and other issues can help you get the most out of your virtual instruments.

But first, remember that “rules” were made to be broken. There is no “right” or “wrong” way to record, only ways that satisfy you to a greater or lesser degree. Sometimes doing the exact opposite of what’s expected gives the best results. So take the following as suggestions, not rules, that may be just what the doctor ordered when you want to spice up an otherwise ordinary synth sound.

THE SYNTHESIZER’S SECRET IDENTITY

The paramount aspect of recording a synth is to define the desired results as completely as possible. Using synths to reinforce guitars on a heavy metal track is a completely different musical task from creating a all-synthesized 30-second spot. Sometimes you want synths to sound warm and organic, but if you’re doing techno, you’ll probably want a robot, machine-like vibe (with trance music, you might want to combine both possibilities).

So, analyze your synth’s “sonic signature”—is it bright, dark, gritty, clean, warm, metallic, or…? Whereas some people attach value judgements to these different characteristics, veteran synthesists understand that different synthesizers have different general sound qualities, and choose the right sound for the right application. For example, although Cakewalk’s Z3TA+ is highly versatile, to my ears its natural “character” is defined, present, and detailed.

Regarding sonic signatures, perhaps one of the reasons for a resurgence in analog synths sounds is digital recording. Analog synths tended to use low-pass filters that lacked the “edgy” sound of digital sound generation. Recording the darker analog sounds on analog tape sometimes resulted in a muddy sound; but when recording on digital, analog sounded comparatively sweet. Digital also captured all the little hisses, grunts, and burps that characterized analog synths. This is a case where the “imperfections” of analog and the “perfection” of digital recording complemented each other.

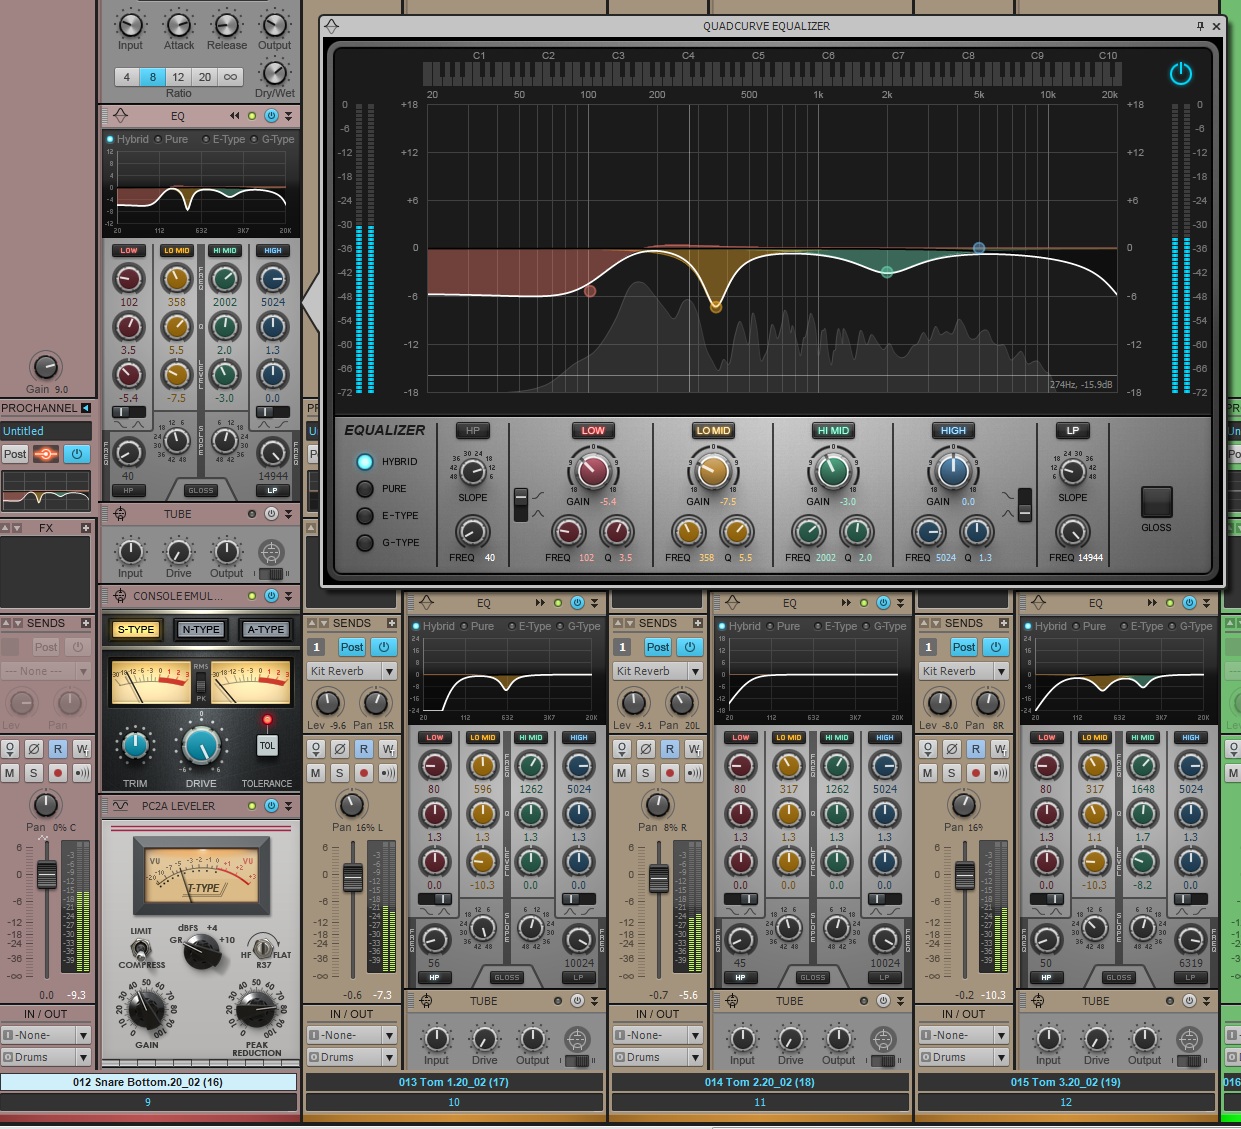
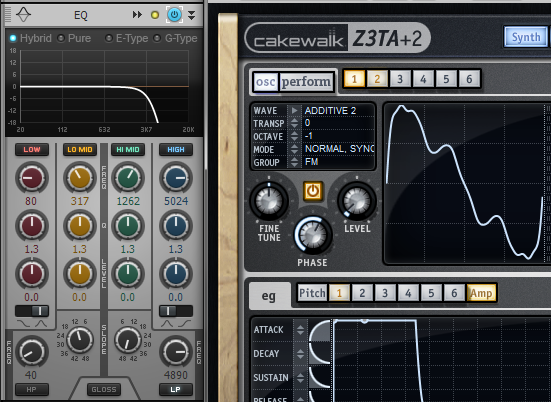
Another thought: look at guitars, voices, pianos, etc. on a spectrum analyzer, and you’ll note there is little natural high end. If you’re trying to blend a virtual instrument in with physical instruments, remember that a virtual synth has no problems obtaining a solid high end. Using the ProChannel’s LP filter set to 48dB/octave and lowering the frequency just a little bit can introduce the “imperfection” that matches the spectral characteristics of “real” acoustic and electric instruments more closely, so the synth seems to blend in better with the other tracks (Fig. 1).

Fig. 1: The ProChannel QuadCurve EQ’s lowpass filter can help digital synths sit better in tracks that use multiple physical or acoustic instruments. Continue reading “Recording Virtual Synthesizers: The Art of Imperfection”

5 Easy Ways to Improve Vocal Recordings in Your Home Studio

Building your home studio can be a tricky task – especially when you feel that the quality of the space that you record in barely contends with what the pro’s would use. Fear not, there are solutions for making your home studio (or to some: bedroom) a comfortable place to produce high-quality recordings. Here are 5 easy ways to improve your home studio’s vocal recordings.

1. Studio Headphones

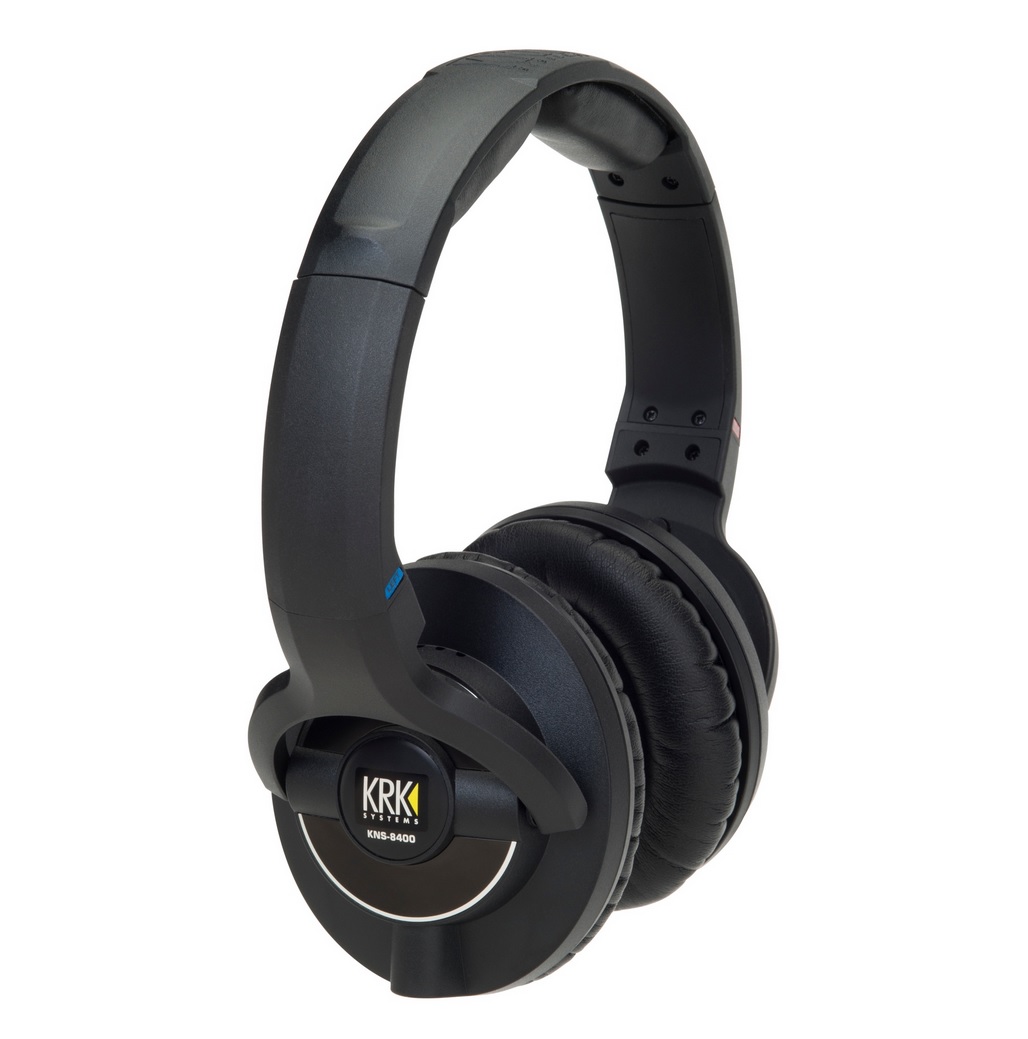
This goes without saying. Make sure you can supply your client(s) with a decent pair of headphones so that they can properly monitor the mix and record over backing tracks. Get at least 2 pairs in case the band’s producer or guitarist wants to follow along to the recording. You don’t need a pair of $400 headphones to get the client what they need to record.

2. Talk-back Functionality

Talk-back is a term used to describe a dedicated microphone that is activated when an engineer wants to speak to a performer in another room between takes. The talk-back microphone is typically routed directly into the headphone mix so that you can easily activate it and deactivate it without any real patching involved. Having this type of functionality in your home studio can improve the flow of the recording session and make the communication between you and the performer a seamless task.

3. Pop Filter/Vocal Shield


In the audio world there are different terms for just about everything. An important term to know is “plosive”. This is the sound a singer makes when they pronounce the letter “P”. This sound causes microphones to pop due to a high stream of controlled air that leaves the singer’s mouth. These pops are typically full of a low-end and can cause irregularities in the fidelity of the vocal track. Pop Filters and Vocal Shields can be used to break up that air and protect the quality of the signal so that your vocal is clean and even throughout.

4. Pre-amp

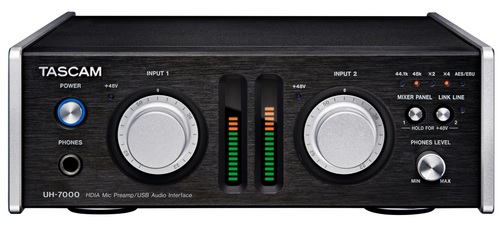
Nice pre-amps can come at a high cost, but if you’re only recording vocals at your home-studio then it’s worth the investment. Pro-sumer all-in-one devices are built to give the buyer as much bang for their buck as possible. This typically means cramming as many inputs and outputs into a signal 1U rack and charging barely anything for it. This is great until you realize that the Pre-amps are noisy and barely have any character. Do yourself a favor and try out a nice pre-amp to understand the difference in quality. If you can demo one out, then do it! Or better yet, nicely as a friend to borrow their nice gear. It will go a long way in the quality of your recordings.

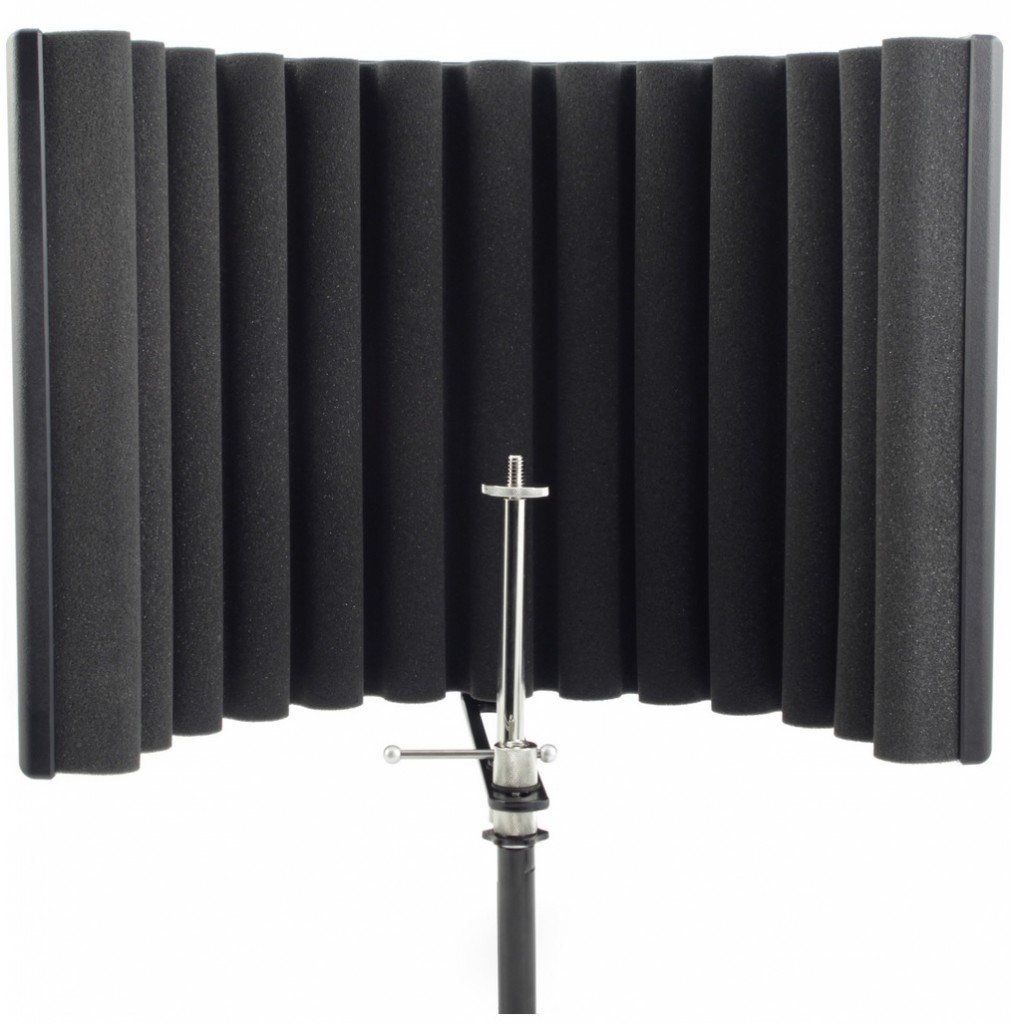
5. Portable Vocal Booth

The room in which you record in will be as much a part of the recording as the singers voice. This can work in your favor and can also work against you. If you’re recording in a room surrounded by untreated drywall then you may not receive the quality sound you expected. Untreated rooms reflect sound back and fourth and even back into the microphone. These sound artifacts can be detrimental to the sound and cause the vocal recording degrade in quality. A great way to help alleviate this from happening is to get yourself a portable vocal booth that will help isolate the singers voice from reflecting off neighboring walls and back into the microphone. These are inexpensive and can go a long way.