You won’t believe what these 10 people said about Cakewalk's Adaptive Limiter

The Adaptive Limiter is the latest addition to the included plugin lineup for SONAR Professional & Platinum. It is a professional brickwall peak limiter designed for both mixing and mastering. It features 4 different limiting “Character” types, Configurable Lookahead, Inter-sample Peak Detection, L.U.F.S. Loudness & K-Metering, as well MP3 codec preview, and real-time dithering.  It’s only been out for a few months now and we are already getting amazing feedback from customers.

Here’s what they are saying…

“The Adaptive Limiter has quite a few surprises in it, especially for such a simple, straight forward plugin. I like the nicely ordered presets, the “Match Input Loudness” feature for the bypass A/B switch, and the K / LUFS metering. And yes, the Dither / MP3 Encoding Preview is quite useful too! With the Adaptive Limiter, I can have it active on my master bus and still track new instruments, with no latency while playing.” – Lee Shapiro

“The Adaptive Limiter is possibly the best brickwall limiter in the business, big call I know, but after using various limiters over the course of 18 years…I was blown away when I got this.” – Benjamin Phillips

“The Adaptive Limiter is a fantastic tool, Great job Cakewalk! I tried it on several songs and tracks and was surprised by how good the Adapted Limiter works. Big thumb up!” – Holger Bremer

“I like the Adaptive Limiter a lot. It works good on both the master as well as buses and even tracks!” – Ken-Arve Nilsen

“The Adaptive Limiter is really great! I use it as the last limiter in my chain on the master bus… I think it may be one of the best brickwall limiter plugins I’ve heard, The LUFS metering is a really nice addition along with the input volume matching to hear the limiting before and after. It all really helps me create a great master!” – Hubert Torzewski

“I have found that Adaptive is extremely transparent!! It’s almost like it’s not even there…” – Sidney Goodroe

“Easily the best limiter interface I’ve seen yet. It also doesn’t hit the system too hard and as something included with a SONAR, well it is absolutely first rate.” – Jesse Stengel

“The Adaptive Limiter is soooo AWESOMELY INCREDIBLE. I love it! I love Sonar! It’s the best DAW on the planet!!” – Lana Slaughter

“I’m very happy with the Adaptive Limiter. Thank You Cakewalk! It certainly holds it’s own compared to the other 3rd party limiters I have.” – Kenny Wilson

“I am loving the Adaptive Limiter. I used it on a rock instrumental that I just finished recording and it sounds great and I prefer it now over Ozone. Great to have all these awesome stock plug in’s. I just recently moved to Sonar and find my mixes are sounding more pro. I am not having to use my purchased plug ins much as SONAR just delivers!” – Mark Stow

If you don’t already know the Adaptive Limiter, we made this video to help get you aquatinted. It is available by downloading the latest version of the Engineering Suite included with SONAR Professional & Platinum.

Enjoy!

The Miracle of Mid-Side EQ: Rock Your Mixes and Masters

by Craig Anderton

Sure, the LP EQ is a great linear-phase, stereo EQ. But it was designed for mid-side processing as well as conventional stereo, so let’s explore what mid-side processing is about, and why it’s so important.

LP EQ BASICS 

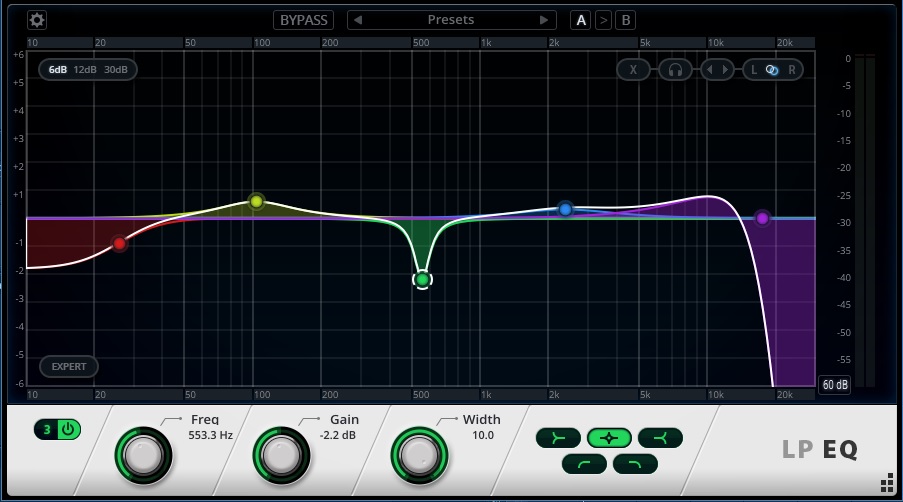
You can add up to 20 nodes, and each can have one of the following responses:

  • Low shelf
  • High shelf
  • High pass
  • Low pass
  • Peak boost/cut


The LP EQ allows up to 20 nodes
The LP EQ allows up to 20 nodes, which can choose from five responses.

However, there’s some intelligence when adding nodes; for example if you double-click to enter a node close to the highest possible frequency, the LP EQ will insert a lowpass filter. At a somewhat lower frequency, there’s a shelving response (although you can of course change these default responses to whatever you like). Drag nodes horizontally to change the frequency or up/down to vary amplitude; a right-click + drag on a node alters the width, as does using the mouse scroll wheel on a selected node.

You can ctrl+click, or draw a marquee around, multiple nodes to select them, but there’s an interesting twist. Suppose a node is set to boost, and another to cut. If you select both, then click on the one that boosts and drag it downward, the amount of boost will decrease. However the one that’s cut will start boosting. This complementary motion allows increasing or decreasing the overall emphasis easily; for example, if you think you went too far with the amount of EQ and want to pull it back, this reduces all aspects equally.

If all the selected nodes either boost or cut, then their amplitudes vary together.

These basics give a flavor of the features, but there’s much more—so click on the UI to give the LP EQ the focus, then press F1 to call up the comprehensive documentation.

MID-SIDE EQ PROCESSING

Mid-side processing encodes a stereo track into two separate components: the center becomes the “mid” component in the left channel, while the stereo track’s right and left elements become the “side” component in the right channel. You can then process these components individually, with automatic decoding back into stereo.

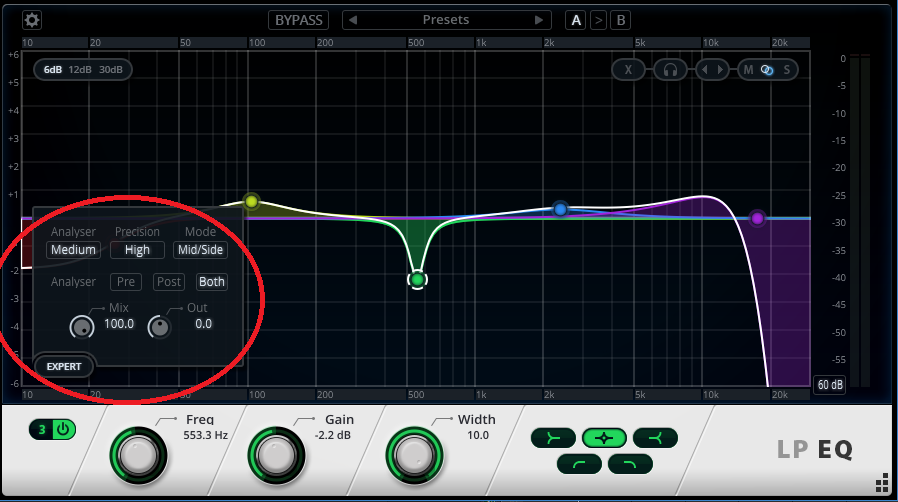
To get started with mid-side processing, click on the LP 64’s Expert button and under Mode, choose Mid/Side. For best results, set the precision to High. This results in the most latency but the highest accuracy, which is important because with mid-side processing, you don’t want any phase shift or sample misalignment—that will interfere with the decoded stereo imaging.

the LP EQ's Expert Mode access Mid-Side processing
The LP EQ’s Expert Mode is the key to doing mid-side processing with EQ. Also note the Mix control for parallel processing.

Processing can be independent for the mid and side components (as it is for the left and right channels in conventional stereo applications). You assign a node to the appropriate component by clicking on the node, and then clicking on M or S (toward the LP EQ’s upper right corner). Here are a few possible applications.

  • With mastering, you can get “inside the file” to do pseudo-remixing on a stereo track. One typical application is giving a slight boost to the higher-frequency side components to provide a bit more “air” and a wider stereo image.
  • If you’ve been seduced by vinyl’s comeback, remember that it’s crucial to center the bass and minimize bass excursions in the sides. With mid-side EQ processing, you can reduce the bass in the sides, and if needed, increase bass a bit in the center. Even if you’re not mastering for vinyl, taking this technique further can give a super-anchored, “center-channel” bass sound.
  • Drums with lots of room ambience can benefit from a bit of upper mids in the sides for extra definition, and a little bit of lower mids in the center to accent the kick.
  • If a synth bass has a wide image that “steps on” other instruments, you can bring down the bass in the sides.
  • For taming reverb, set a node to Mid, select the high pass curve, and slide it all the way to the right to take out essentially everything. Then you can shape the remaining reverb with the side EQ, while chasing the away from the center, where it can muddy the bass and kick.

THE VALUE OF THE MIX CONTROL 

But…how do you know whether you’re really making an improvement to the sound or not? The LP EQ includes a Mix control (accessed in the Expert section) so you can vary the mix from full EQ to no EQ. Yes, parallel processing for EQ…very handy, and even better, the Mix control can be automated (like virtually all other parameters, including display characteristics and bypass).

You can also switch quickly between two different EQ settings with the A/B comparison function.

Granted, there’s no shortage of EQ plug-ins, but the LP EQ truly brings something new to the party. If you’re not familiar what mid-side processing can do with EQ, there’s no better way to find out than with the LP EQ.

HOW The Duke Western USES SONAR TO CREATE MUSIC FOR DUCK DYNASTY (AND MORE)

Here at Cakewalk we are fortunate to have an external team of rocket scientists who help test out SONAR beta releases.  This team is dedicated, passionate and most of all appreciated by all of us internally here at the Cake shop.  Recently I received a general email from one of my esteemed colleagues mentioning that one of our trustworthy beta soldiers was jumping off the beta-battlefield in lieu of another SONAR related activity.  Huh?  This peaked my curiosity and I felt obliged to dig a bit deeper on the subject.  What could “another SONAR related activity” involve?  SONAR Olympics? SONAR CPU Racing? SONAR Academy?

Featured Music Placements on Discovery Channel, History Channel, CBS, Bravo Network

Continue reading “HOW The Duke Western USES SONAR TO CREATE MUSIC FOR DUCK DYNASTY (AND MORE)”

SONAR PLATINUM ADDS Ultra Analog SESSION 2 SYNTH IN 2016.03 UPDATE

As a fan of our bakers and all the great features coming out of the Rolling Updates, I absolutely love exploring all the new things SONAR brings every month.  As a big fan of Lounge Lizard, I was really excited to learn that we would be incorporating the Ultra Analog Session 2 (UAS2) instrument into SONAR this month.  So at this year’s Namm convention I made a point of meeting up with my buddy Marc over at Applied Acoustic Systems to learn more about the synth before trying it out.

“A fun synth to play around with,” Marc explained.  And once I got my hands on it I understood what he was talking about.  Being a bit underwater with time these days, I decided to put an hour (or so) cap on diving into the synth and writing a short piece of “whatever” inspired me while first hearing and manipulating the sounds; and making use of the features.  I challenged myself a bit by using ONLY instances of this synth combined with stock SONAR Producer ProChannel modules so I could get a good feel for its capabilities.  I also thought it would be a fun test since there are no stock drum or percussion patches in the synth.  Here is what I found:

  • Useful:  In my book, you can never have enough options when it comes to sounds.  I have synths where I only LOVE a few patches but you know what? – Those patches are worth every penny having the synth in my arsenal.  I found the UAS2 to have some really great sounding vintage patches.  With 7 banks of sounds there are a lot of tones that would come in handy and will work well in certain styles of music.  I found combining these sounds with ProChannel shaping to be a great combination for creating some unique sounds.
  • Diverse:  I like the fact that for a synth with a small footprint, it crosses a through a wide array of tones.  The 5 main tonal character traits are Arpeggio, Bass, Lead, Pad, Polysynth, along with a bonus of two banks from Richard and Sean Devine that come in handy for more options.  I like the fact that there’s not a ton of overwhelming stuff here—and what’s in the box is all great and diverse for different applications.
  • Cool features:  I personally love using arpeggiation effects.  Admittedly, I love them because I am a horrible keyboard player and they make me sound like I know what I am doing… kind of;) I sometimes use arpeggiation in a way that might be different than some users—I follow no rules of arpeggiation (is that even a word?)—I throw on tons of effects… I let my ears rule both my hands and find notes and things that just sound good to me.  I often use this effect on choruses while knocking out all low end to give a song an inconspicuous lift.  The “Arpeggio” on this keyboard is cool.  It’s simple and straight forward and allows the user to combine a bit of old-school arpeggio tactics along with many syncing options.
  • A Strong Simple Synth Engine:  For someone like me who is not a synth expert, this instrument is great.  The 3 sound generators (VCO, Filter and Amp) are simple enough to navigate for those who do not fully understand the complexities of creating synth patches.  In my opinion, 10 minutes of turning knobs with this instrument is enough time for anyone to come up with some great sounds.  For example, after putting a limiter on my master bus I noticed one of my staccato parts was cutting through in a way that sounded too intense compared to the kick.  Very easily was I able to identify the “Amp Attack” as the culprit, and by simply dialing that knob back a bit the sound became what it needed to be.
  • Onboard FX:  Similar to Z3TA+, this synth carries its own FX processing right inside the synth.  Although multiple FX are not possible in one patch, the good news is that AAS didn’t skimp on the quality of the engine.  I tested all FX (Chorus, Delay, Distortion, EQ, Flanger, Phaser, Reverb) with different patches and found the available parameters to be intuitive while rendering high-quality sounds.

5 Tools To Get "That Analog Sound" From SONAR

With the advent of digital audio, some feel a certain quality associated with the analog signal path has been lost. While that may have been true at one point, analog emulations have come a long way since first introduced. Let’s find out how to add that “analog sound” using some of SONAR’s plugins. (Note: Many of the following examples use features are exclusive to SONAR Platinum, so if you don’t already have this version, you can try a free demo by clicking here.)

#5 – ProChannel Tape Emulation

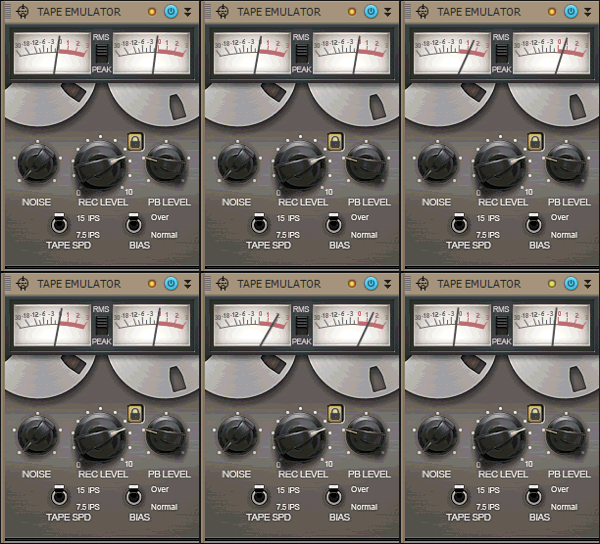
Tape Emulator Gif

Tape does some pretty magical things to audio, so SONAR Platinum includes tape emulation as a ProChannel module. Best  of all,  you can use it as much as you like without having to clean the heads!

Here’s how tape emulation enhances the sound:

  • Emulates the “head bump” of analog tape to enrich the low end, adding subtle warmth
  • Smooths response by slightly rolling off lowest lows and highest highs
  • Increases sustain by smoothing peaks
  • Saturates the signal in a non-linear, analog manner
  • Optionally introduces high-frequency hiss

For a basic application, insert the Tape Emulator in the Master Bus ProChannel. You’ll immediately hear a more cohesive mix. Increasing the REC LEVEL increases the overall saturation. The REC LEVEL knob, TAPE SPD switch, and BIAS switch all interact in unique ways, so try out different combinations to hear how they affect each other.

After hearing how the Tape Emulator affects your sound, try applying it to individual tracks (your drums will sound particularly fabulous). This will be a more subtle effect, adding a sense of depth to the overall mix.

Continue reading “5 Tools To Get "That Analog Sound" From SONAR”

How to get great guitar tones with Guitar Rig 4 LE in SONAR X1 Producer

As a lifelong guitarist and tone hound, I’ve had the pleasure of recording and playing on some of the world’s most cherished amplifiers. My sonic heaven is a set of glowing tubes spilling into a vintage Marshall 4×12 cabinet and projected out at mind numbing volume. But at 3am when I have an idea that just can’t wait and I don’t want to be arrested for disturbing the peace, I find my salvation in Native Instruments Guitar Rig 4 LE which is included in SONAR X1 Producer.

Armed with a guitar and a cable, your choice of great tones await within Guitar Rig 4 LE in just a few steps. From searing, tube style lead tones, thick and chunky metal to crystal clean majesty it’s all there! Continue reading “How to get great guitar tones with Guitar Rig 4 LE in SONAR X1 Producer”

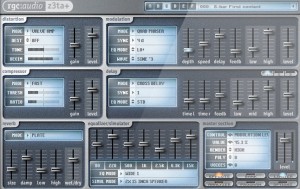
Mixing and Mastering a Song Using only the Z3TA+ Effects Engine in SONAR

One of the great aspects about SONAR X1 is that it’s a very diverse D.A.W.  There are so many different ways to create music and it’s great for people who like to experiment with sounds and develop unique sonic pallets.  One of the main reasons why many pro users choose SONAR is because there are a lot of veiled jewels and tools that help musicians to sculpt a unique and individualized sound.

Similar to the Beatscape Content articles that were posted, I decided to dive into another one of my favorite hidden treasures of SONAR of which some people may not be aware; the pristine and fat FX engine of Z3TA+ that can be used as a standard VST effects unit.

When I first started using SONAR I loved the fact that it came with so many great VST plugins.  It wasn’t until 6 months into using the program when someone pointed out to me that you could use the Z3TA+ synth as an actual VST effect anywhere you use regular plugins – on clips, in bins, on busses… etc.  After dragging Z3TA+ onto a track I was instantly surprised at what I heard. Continue reading “Mixing and Mastering a Song Using only the Z3TA+ Effects Engine in SONAR”