Vocal Month: Creating Vocal Harmonies with Melodyne Essential

Can’t quite hit the high or low notes? Melodyne usually can.

by Craig Anderton

If you don’t have a wide vocal range, you have to choose a vocal’s key very carefully—the low parts can’t go below your range, and if you’re going to hit the harmony notes, you have to pay attention to where the highest notes fall as well. Unfortunately the voice sometimes loses power when you start hitting your lower limits, but if you choose the best possible range for your lead vocal then you may have a hard time hitting the harmony’s high notes. What’s a singer to do?

My solution is to choose the optimum key for the lead vocal, then reach for Melodyne Essential to synthesize the harmonies. Most of the time I can hit the harmonies so I’ll sing them “for real” and bring in Melodyne as needed, but I’ve also found merit to using Melodyne to generate the harmony even if I can hit the notes—it gives a different character that works well in some musical contexts.

Creating Harmonies

Generating harmonies requires some manual effort, but it’s worth it.

1. Clone the lead vocal.

2. Create a Melodyne Region FX for the clone.

3. Solo the lead vocal and clone (Dim Solo can be useful for this application so you can hear the vocals in context).

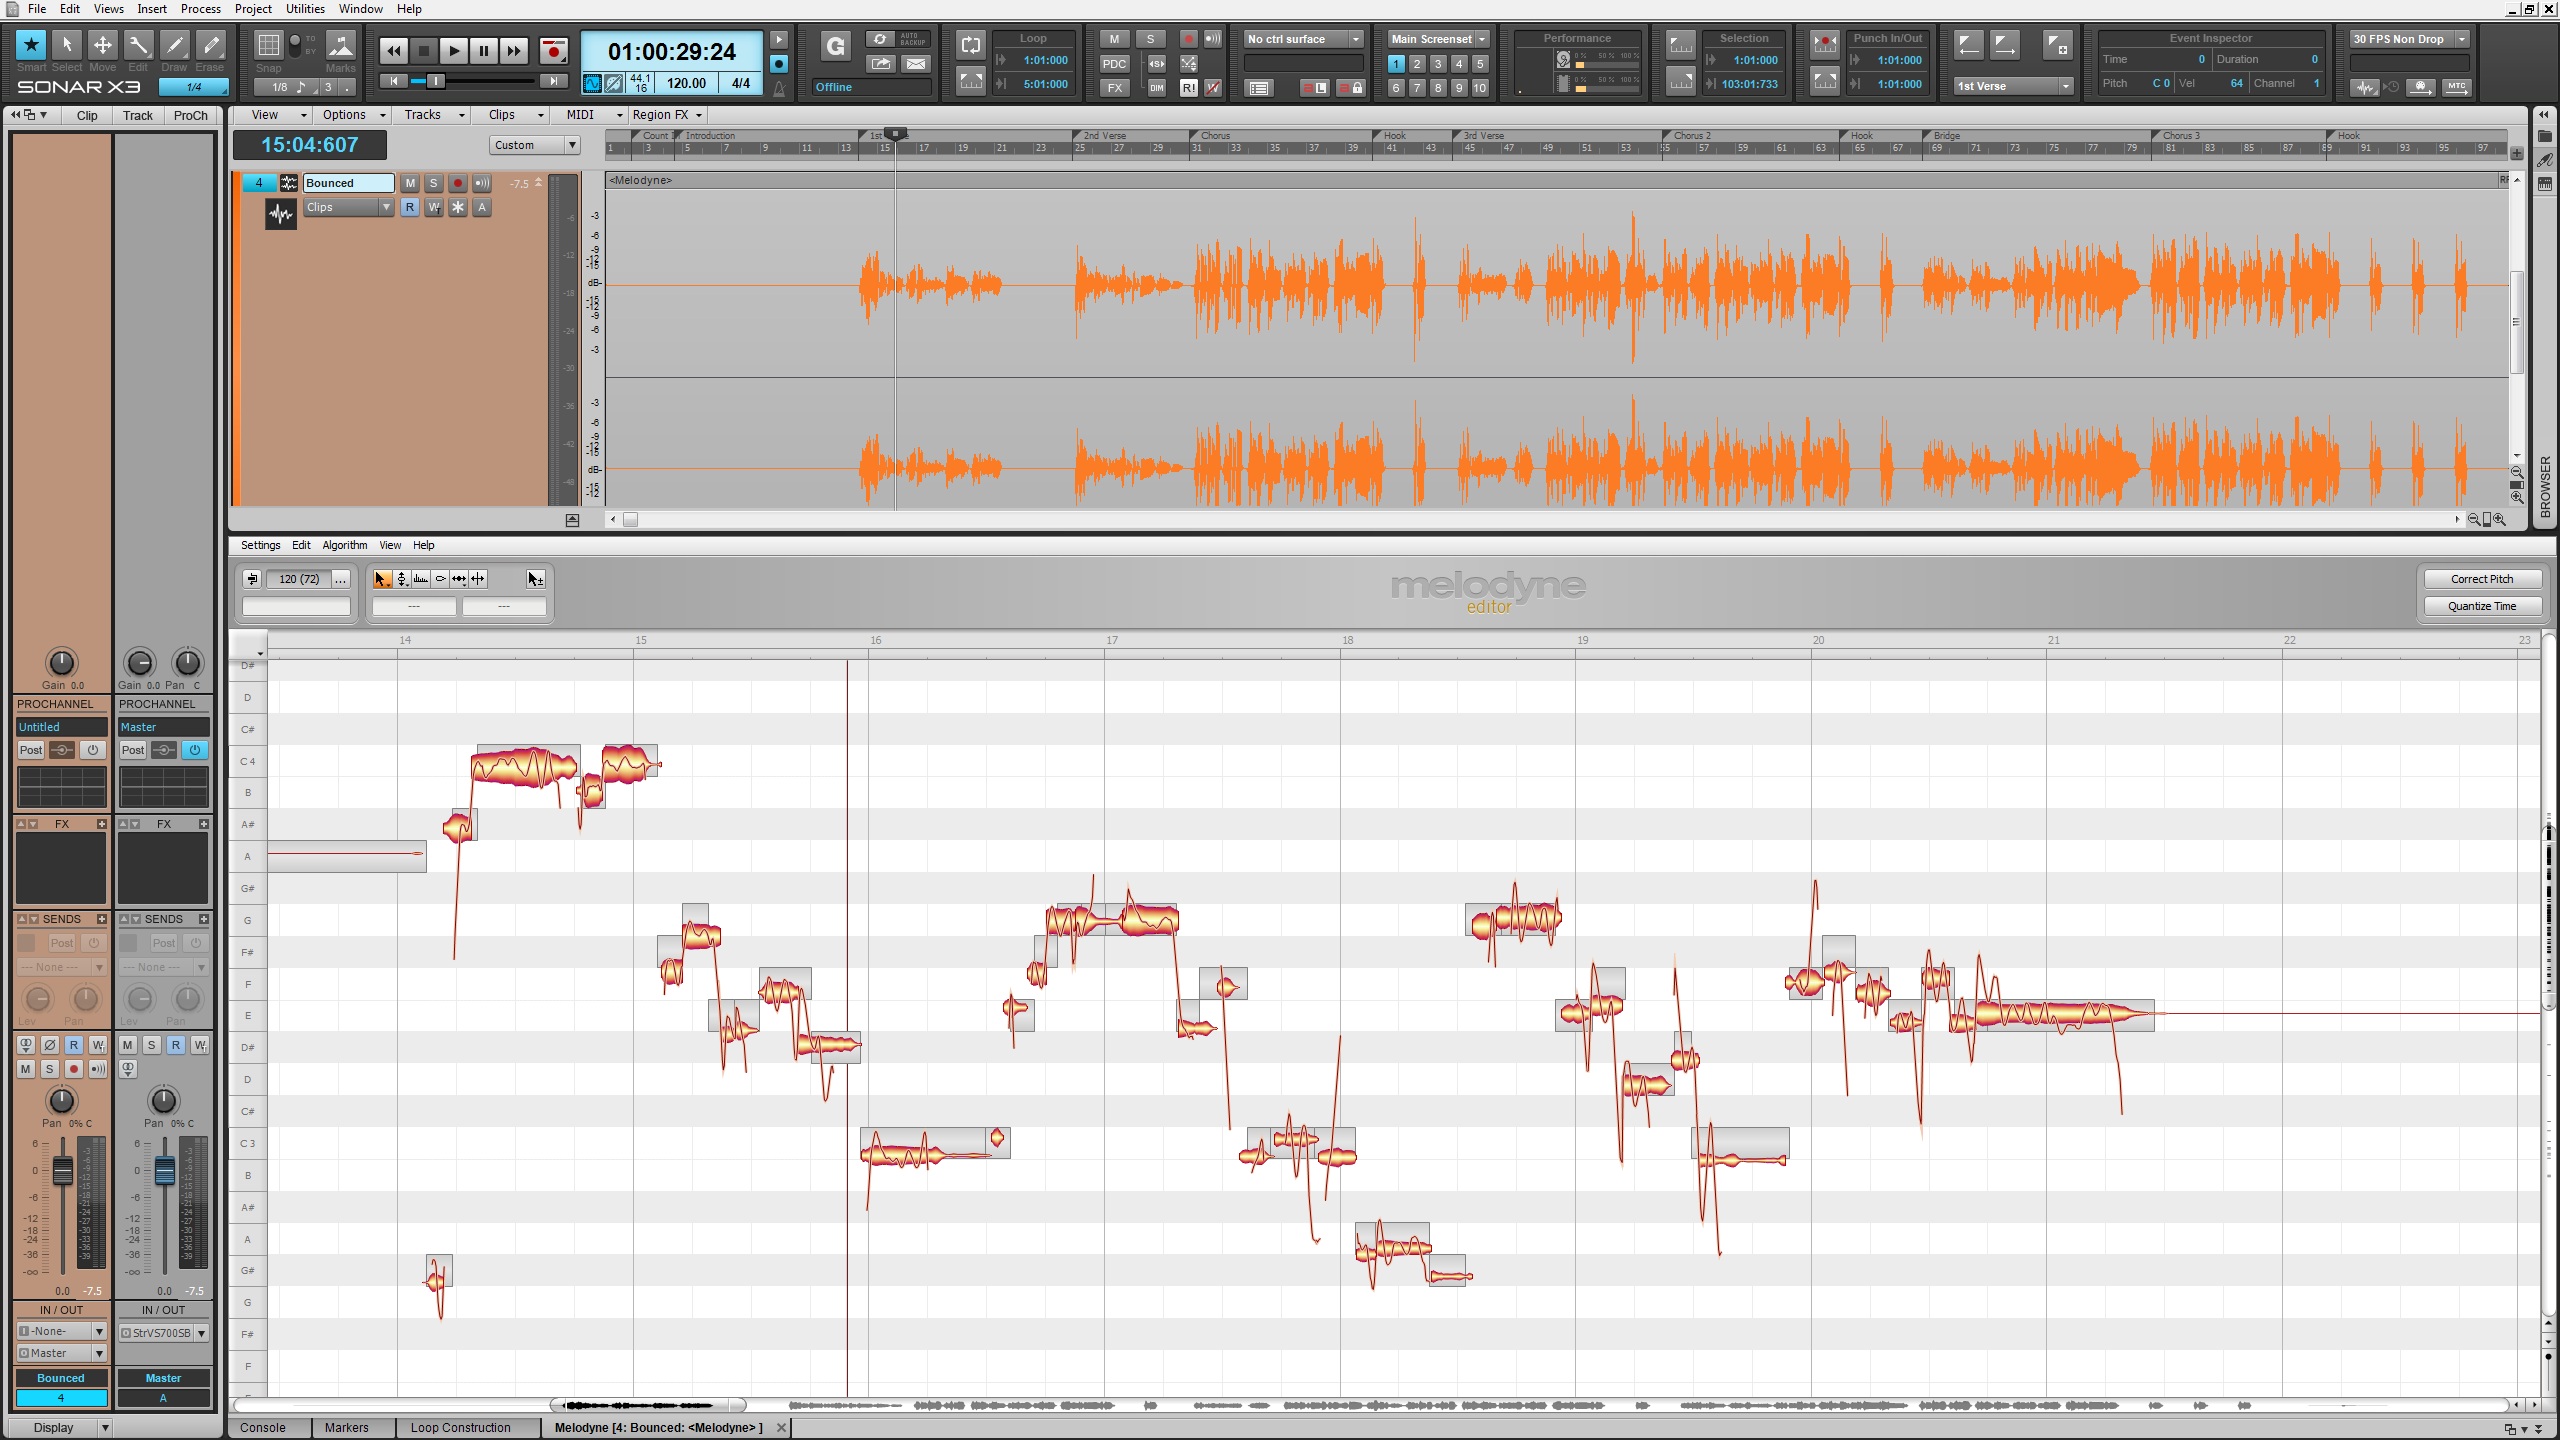
4. Start adjusting the clone’s blob pitches to create the harmony (Fig. 1).

Fig. 1: Thanks to a paint program’s transparent layers, colorization, and cut and paste, this shows the harmony line (blue) superimposed on the lead vocal.

Usually the easiest way to do this is by ear, but if you’re theory-minded, you can always apply those rules to determine which pitches to use for the harmonies.

Additional Tips

I highly recommend choosing Edit > Pitch Grid > No Snap and adjusting the harmony pitch by ear. Snapping doesn’t always produce the most musical results.

Also, check out my article Easy Automatic Double Tracking with Melodyne Essential, which describes how to add slight timing and pitch variations to do automatic double tracking. Applying the same technique to the harmony line prevents it from “shadowing” the lead vocal, and helps the harmony establish itself as an independent entity.

There’s a video on my YouTube channel that uses Melodyne Essential for creating both ADT and the harmony effects described in this article. In fact, there’s only one vocal track in the entire song; all the others were derived from it using Melodyne.

Finally, I demoed this technique during the video I did at Berklee College of Music last March. You can see the video here.

Happy harmonizing!

BETTER TOGETHER: TRY SONAR X3 AND MELODYNE FOR FREE!

Vocal Month: Easy Automatic Double Tracking (ADT) with Melodyne Essential

There’s a great ADT program lurking within Melodyne Essential

by Craig Anderton

So is Celemony’s ADT (Automatic Double Tracking) program any good? If you have Melodyne Essential, you can find out for yourself—because it’s the same program. Yes, hidden within SONAR X3‘s Melodyne Essential is a very cool ADT effect that’s extremely effective with vocals.

Introduction

Double-tracking is the process of singing a second vocal on top of a main vocal to “thicken” the overall sound. It’s impossible to sing a vocal exactly the same, so there will be slight timing and pitch differences that add interest and depth. Automatic Double Tracking produces this effect electronically, which can give more control over the double-tracked vocal. While there are dedicated plug-ins to give the ADT effect, Melodyne has all the tools needed to do this. I’d go so far as to say Melodyne can produce one of the best electronically generated ADT effects I’ve heard.

The Melodyne ADT effect works best with vocals where you haven’t already added extensive pitch or timing correction. As an aside, I never do a “wholesale” quantization of notes; to my ears, removing the “incorrect” pitch variations in a vocal actually create a less compelling performance. Instead, I manually correct only those notes that actually sound “wrong.” Even then, I don’t always quantize exactly to pitch. Music is about tension and release, and subconsciously, you’ll often sing a little flat or sharp (tension) and end up on pitch (release). Making all the pitches “perfect” removes this emotional component.

As an analogy, conside B. B. King’s guitar playing. He often bends a flatted 7th not quite up to pitch. By not resolving the note, instead of completing the phrase it leads you into the next one. Timing and pitch variations are an essential part of music, so don’t overdo the correction.

Setup

It’s easy to set up the ADT effect with Melodyne.

1. Clone the vocal to which you want to add the ADT effect.

2. Right-click on the cloned click and create a Melodyne Region FX.

3. Select all the notes in the vocal.

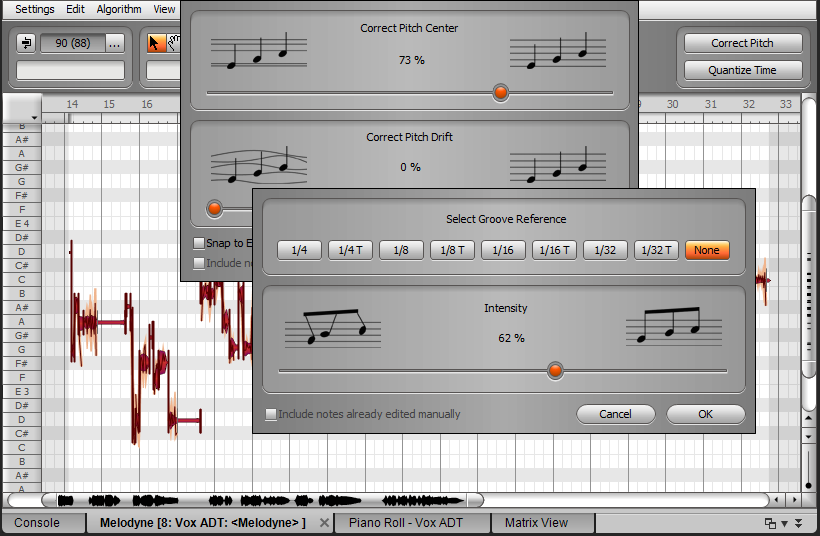
4. Turn up Correct Pitch Center to about 60% (Fig. 1).

Fig. 1: Correcting pitch and  timing subtly on a cloned vocal track can produce an automatic double-tracking effect.

5. Turn up Quantize Time Intensity to about 60% (Fig. 1).

6. Evaluate the ADT effect, and tweak the pitch and timing correction amounts as appropriate.

Generally you don’t want too much pitch or timing correction—just enough to be different from the main vocal.

Mixing ADT Vocals

When mixing, centering the two vocals tends to maximize the similarities to chorusing; the vocals sound somewhat more diffused, which works well for “gentler” material. Panning them slightly oppositely (about 30% right and 30% left) can give a more spacious sound in stereo.

With sparser mixes, centered panning often fits best while the somewhat spread sound helps the vocals have more presence in dense material, like hard rock with lots of distorted guitar. However, these aren’t “rules” as ultimately, the song itself will dictate which works best in the final mix.

Give this technique a try—I think you’ll be as surprised as I was about how effectively it provides an authentic, convincing ADT effect.

BETTER TOGETHER: TRY SONAR X3 AND MELODYNE FOR FREE!

SONAR X3 QUICKTIP: MAKE YOUR VOICE THICKER (STUDIO & PRODUCER)

When To Break The "Rules" Of Digital Mixing

Recently I was asked to create a song for a new short film that will be making the rounds on this year’s film festival circuit.  I got the creative brief [I had to write for a specific subject in the film] and got to work writing and recording everything myself in SONAR X3. Thankfully, SONAR X3 has pretty much everything you need to make a radio-ready track in the box; even if you are a #hack-of-all-trades like me. 😉  It was requested that this song have some grit to it, as well as some acoustic-oriented authenticity, so I grabbed my 5-Year Old’s harp out of his toy chest, my acoustic guitar, and got to work.  The only outboard gear used on this track were a Tascam UH-7000, an AT4033a mic, my Les Paul DC and Carlos Robelli bass.  I also played Dimension Pro organ through a controller.

THERE ARE NO MIXING RULES (KIND OF)

After writing the song on an acoustic and then tracking everything, it was time to mix.  I love mixing in the digital world because there really are no rules in terms of creativity.  Once you understand the basics of frequencies and how to put tracks together properly, you can really get creative with the Continue reading “When To Break The "Rules" Of Digital Mixing”

Better together: Try SONAR X3 and Melodyne For Free!

What could be better than Melodyne Essential included with every copy of SONAR X3 Studio & SONAR X3 Producer? Only full integration of Melodyne in SONAR through ARA technology.

The future is here folks! This means the best pitch correction, time stretching, and audio to MIDI conversion in the business are at your command in SONAR X3 Studio & Producer. Whether there’s a flat note in a vocal, or you want to adjust phrasing, Melodyne makes it a snap to polish your recordings.

By adding support for ARA technology (Audio Random Access), we were able to seamlessly integrate Melodyne Essential into SONAR’s Skylight interface. This means no waiting for data to transfer into the Editor. Simply click to open the audio clip and get to work. To convert audio to MIDI, simply drag and audio clip onto a MIDI track and Melodyne takes care of the rest. And if you are using any other version of Melodyne or plan to upgrade, you get to enjoy the same level of integration automatically.

Best of all, ARA integration is available in the SONAR X3 Free Trial!  Download the 30-day Melodyne Trial to experience both together and see Continue reading “Better together: Try SONAR X3 and Melodyne For Free!”

SONAR X3 Quicktip: Play Guitar, Convert it to Bass

There are times when you are in a bind and need to get a solid bass line down, but there is not bass player in site. Well, now in SONAR X3 you can easily record your bass parts on any instrument and convert it to a virtual bass instrument using the new ARA integration.

First let’s plugin the instrument of your choice. For me, the closest instrument was an acoustic guitar. I’ve been playing around with some chord changes recently and I need a solid walking bass line to jam along with. Unfortunately I don’t have a bass guitar close-by so I’m going record the bass line on the guitar Continue reading “SONAR X3 Quicktip: Play Guitar, Convert it to Bass”

Melodyne's DNA: Subtract or Isolate Instruments From an Audio File

Melodyne Editor’s Direct Note Access (DNA) technology allows you to analyze polyphonic audio data and produce a visual representation of it. With this technology you can essentially drop in any polyphonic audio, even full fledged productions. This kind of technology could be used to remove vocals from a track, isolate instrumentation from mixes, or analyze the arrangement across a staff. Regardless of it’s use, the amount of time you could spend geeking out over your favorite top 40 hits is infinite. Here I will briefly show you how to isolate or subject parts of instruments from a mix.

To do this,

  • In SONAR, right-click on your audio file and go to Region FX > Melodyne > Create Region FX.
  • Make sure that you have Polyphonic Mode enabled.
  • Let Melodyne analyze the audio file.

Once analyzed, Melodyne wil Continue reading “Melodyne's DNA: Subtract or Isolate Instruments From an Audio File”

Make Your Voice Sound Like Daft Punk with Melodyne Editor and SONAR X3 Producer

Certain effects have defined generations of music. The decade of the 80’s for example was a major era for reverb. In today’s pop music, the use of pitch correction software seems to be an effect that many artists and producers are utilizing creatively. Daft Punk has been using this effect for a number of years now, making them one of the first to bring this vocal style to the level of popularity it is today.

SONAR X3 & Melodyne

To create a Daft Punk inspired vocal effect Continue reading “Make Your Voice Sound Like Daft Punk with Melodyne Editor and SONAR X3 Producer”

SONAR X3 Quicktip – Hum a Melody and Convert it to MIDI with ARA

As a musician, inspiration can hit you on the train, during dinner, or even while you’re driving somewhere. Many musicians that I’ve worked with carry some sort of recorder around with them. I know sound designers who always have a device ready for taking samples, and guitarists that hum melodies to themselves when they feel they’ve come up with something original that they want to remember.

Given that we live in a very digitized world, it’s easy to hum and capture a melody, and then email it to yourself or import it later for inspection. SONAR X3’s ARA integration is a great tool for taking melodies and easily converting them to MIDI. Here’s a melody that I recorded off the top of my head by simply humming it to myself:

Continue reading “SONAR X3 Quicktip – Hum a Melody and Convert it to MIDI with ARA”

SONAR X3 Feature Spotlight: Melodyne Essential with ARA integration

Addictive Drums

One of the most talked about features in SONAR X3 has been the new ARA integration. Every version of SONAR X3 now includes ARA Integration which allows you to use Melodyne as if it were part of SONAR X3. In addition, SONAR X3 Studio and Producer also include Melodyne Essential (retail value $99).

While including Melodyne Essential is a huge upgrade in terms of pitch correction, it’s the ARA integration that really takes it over the top. The main benefit of ARA is that it allows SONAR to integrate with plug-ins that can edit and analyze audio, such as Melodyne. ARA greatly improves the workflow when using plugins like Melodyne that do MIDI analysis and pitch and timing correction. Compatible plug-ins can exchange information about the project’s timeline data, including audio clips, tempo, pitch, rhythm and much more, which allows them to behave as if the plug-in was part of SONAR.

In a recent article on CreateDigitalMusic.com, industry expert Peter Kirn stated the obvious: “there’s no other way to say this: Celemony’s Melodyne line of products is just better than any other offering out there.” Kirn later went on to proclaim, “Cakewalk has done more with the SDK for ARA than any other host so far.”

Read the ARA integration article on CreateDigitalMusic.com

Developer Notes: SONAR X3 ARA Integration

SONAR X3 Tip: Easy Audio to MIDI Conversion

SONAR X3 Tip: Make your vocal thicker with Melodyne

SONAR X3 Tip: Drum Replacement with ARA and Addictive Drums

Upgrade to SONAR X3 Producer (includes Melodyne Essential)

SONAR X3 Quicktip: Drum Replacement with ARA Integration and Addictive Drums (Producer)

Within SONAR X3 converting Audio to MIDI has never been easier thanks to our deep ARA integration. This opens up many doorways for users to convert their mono audio tracks to MIDI. One great use case for this is replacing drums or adding samples to your drum tracks to enhance their sound.

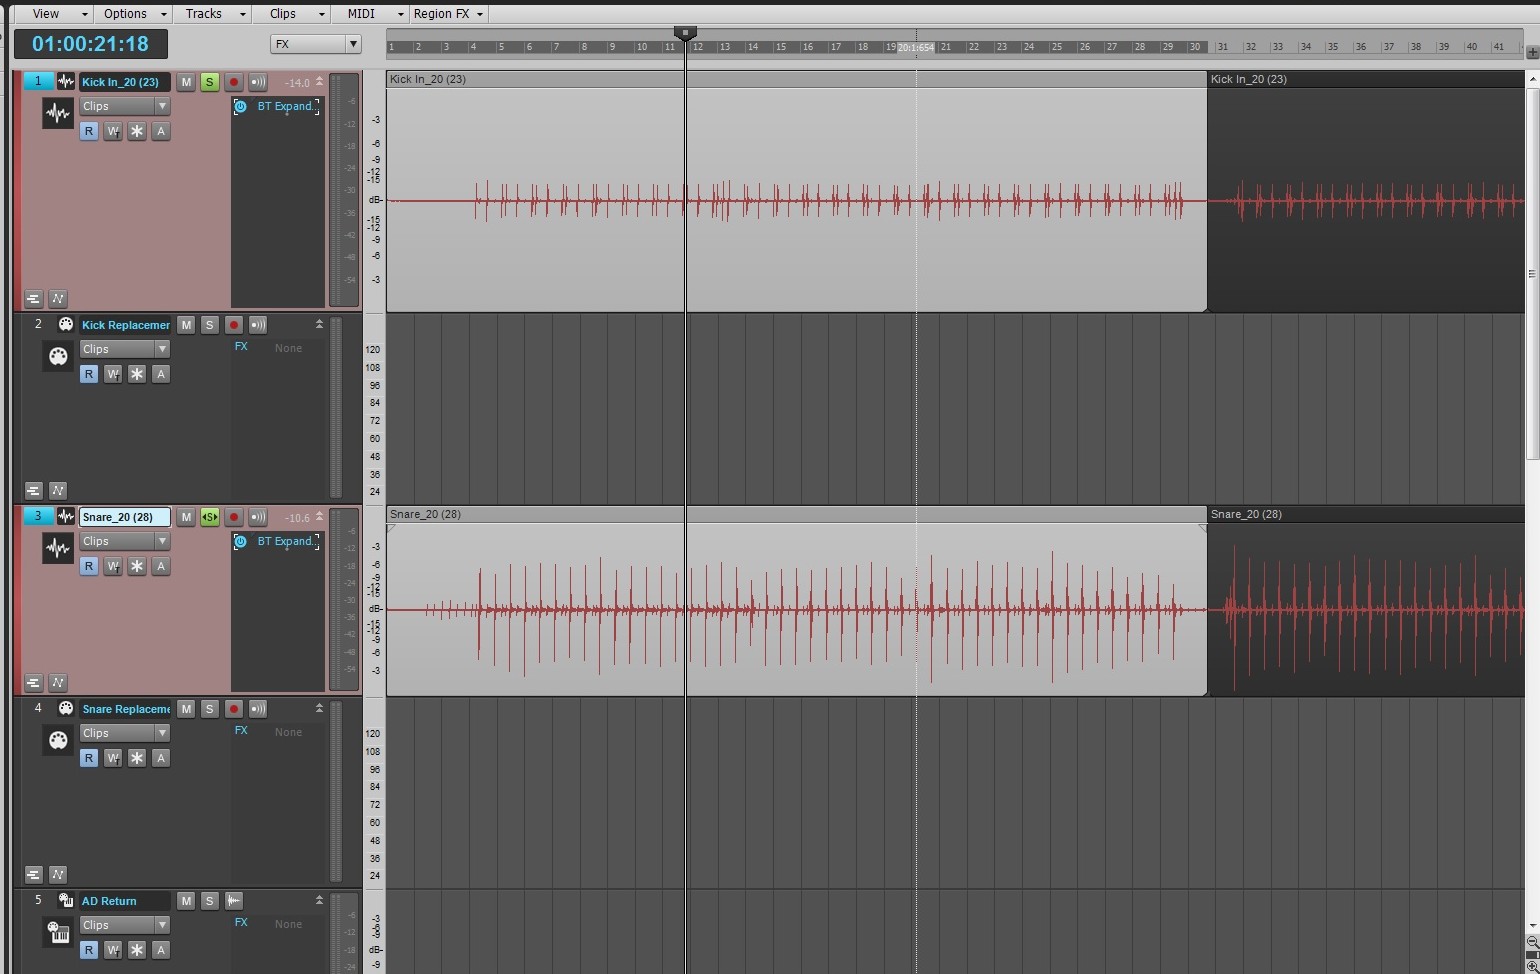
Within SONAR open up your Kick and Snare tracks.

Add a MIDI track below each audio track that you wish to replace.

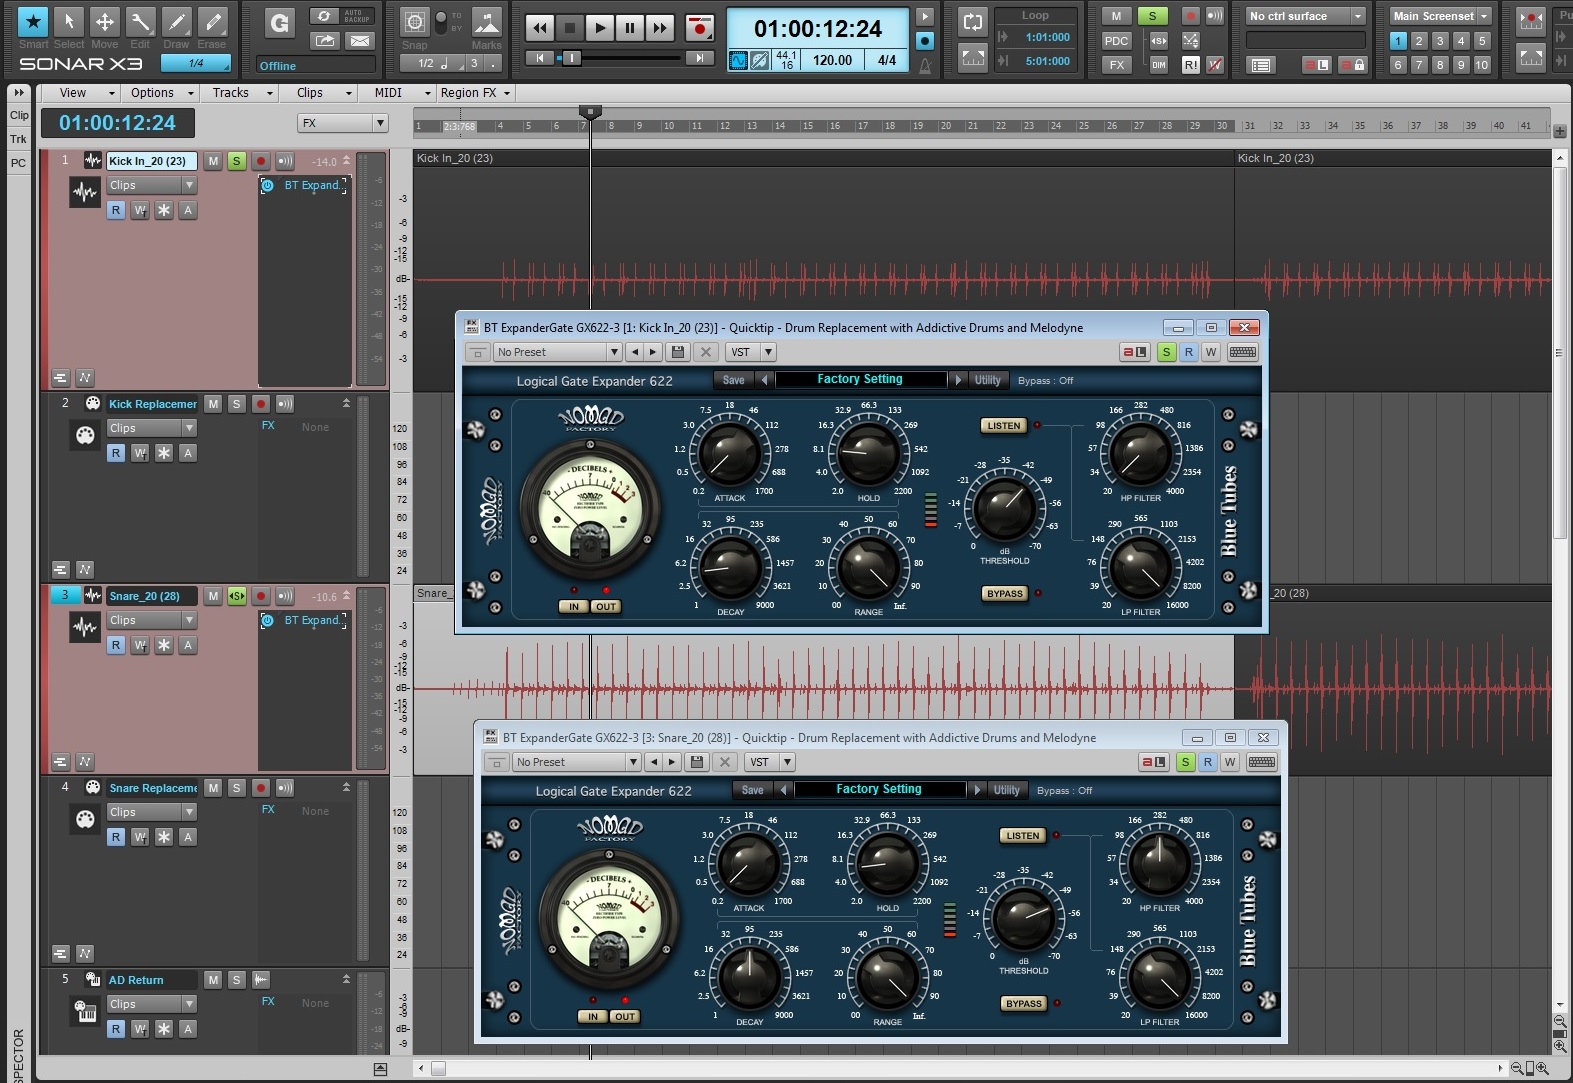
Add our new Logical Gate/Expander to both the Kick and Snare and adjust the effect so that instruments are heavily gated and sound like the following:

After this, Freeze both tracks.  This is going to render the Kick and Snare tracks with the gates embedded in the audio tracks.

Next, latency.  Let’s drop the latency to the lowest settings. Go to Edit > Preferences > Driver Settings and set your latency low. This will help with timing.

  • If you are using MME (32bit) set your latency closer to [Safe].
  • If you are using ASIO then select [ASIO Panel] and set your buffer size very low.

Drag and drop your kick and snare tracks to their associated MIDI track. Conversion will occur.

Next up, open the PRV and move your MIDI Clips to the drum you wish to use. You can highlight the entire row of MIDI clips by selecting their associated piano key and transpose them easily by going to Process > Transpose.

Once this is done insert Addictive Drums. Make sure to have the following ticked after selecting Insert > Soft Synth > Addictive Drums:

  • First Synth Audio Output
  • Synth Property Page
  • Recall Assignable Controls
  • Ask This Everytime

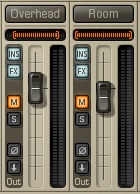
Mute the Room and OH microphones within Addictive Drums.  This reduces any additional ambiance.

Workflow Tip: It’s good practice to do this type of replacement section by section at first so that you can get an idea of how it works.

Mix these drums in behind your current mix.

Learn more about ARA Integration, Addictive Drums, and SONAR X3 Producer here.