Flat Response Amps vs. Conventional Guitar Amps

Many guitar players are discovering the advantages of the FRFR (Full Range, Flat Response) guitar amp compared to conventional amps. This isn’t to diss the traditional guitar amp; it’s great, and has its uses. But the FRFR option has some compelling advantages.

A guitar amp does more than make soft signals loud. The cabinet is basically a filter; open-back cabinets reduce bass, closed-back types give more bass, and the high-frequency response starts rolling off at around 5kHz. Also, the preamp and power amp affect the sound dramatically—or Spinal Tap would never have praised the virtues of turning up an amp to eleven.

Guitar amps are wonderful not because they’re precision devices like studio monitors, but because they’re about character. Adding a pedalboard and some cool effects creates a setup that has served us well for decades.

However, conventional guitar amps are generally limited to a particular “signature” sound. Plugging your guitar into a different amp or direct into a PA mixer gives a different sound. Tube amps have their own magic, but also, some drawbacks: Tubes get “soft” over time, wear out, and can become microphonic.

An FRFR amplification system is like a PA or studio monitoring system—clean and accurate. You get your “sound” before it hits the FRFR amp, either through a quality multieffects with amp/cab simulation, or a laptop running amp sim software. This means you’ll get the same sound whether you plug into an FRFR system, PA, or recording setup because your tone isn’t dependent on the specific way an amp colors your sound.

Read the full article by Craig Anderton

Subtractive EQ Part 5: When Should I Boost EQ?

Missed Part 1? Read it here.

When should I boost?
Some of you may read this and field this very question.  Boosting is something that you can do any time you want with any given instrument.  Obviously it is your own choice in the matter but if you find yourself constantly pulling your faders up and down because your master level is clipping then you may want to apply these EQ techniques to your workflow. In my world it is always a matter of reducing first and then boosting later.

Conclusion
Mixing is as much of an art as it is understanding the logical ways that instruments interact with one another. Continue reading “Subtractive EQ Part 5: When Should I Boost EQ?”

Subtractive EQ Part 4: Bass

Miss part 1? Read Subtractive EQ – Snare Drum.

Bass
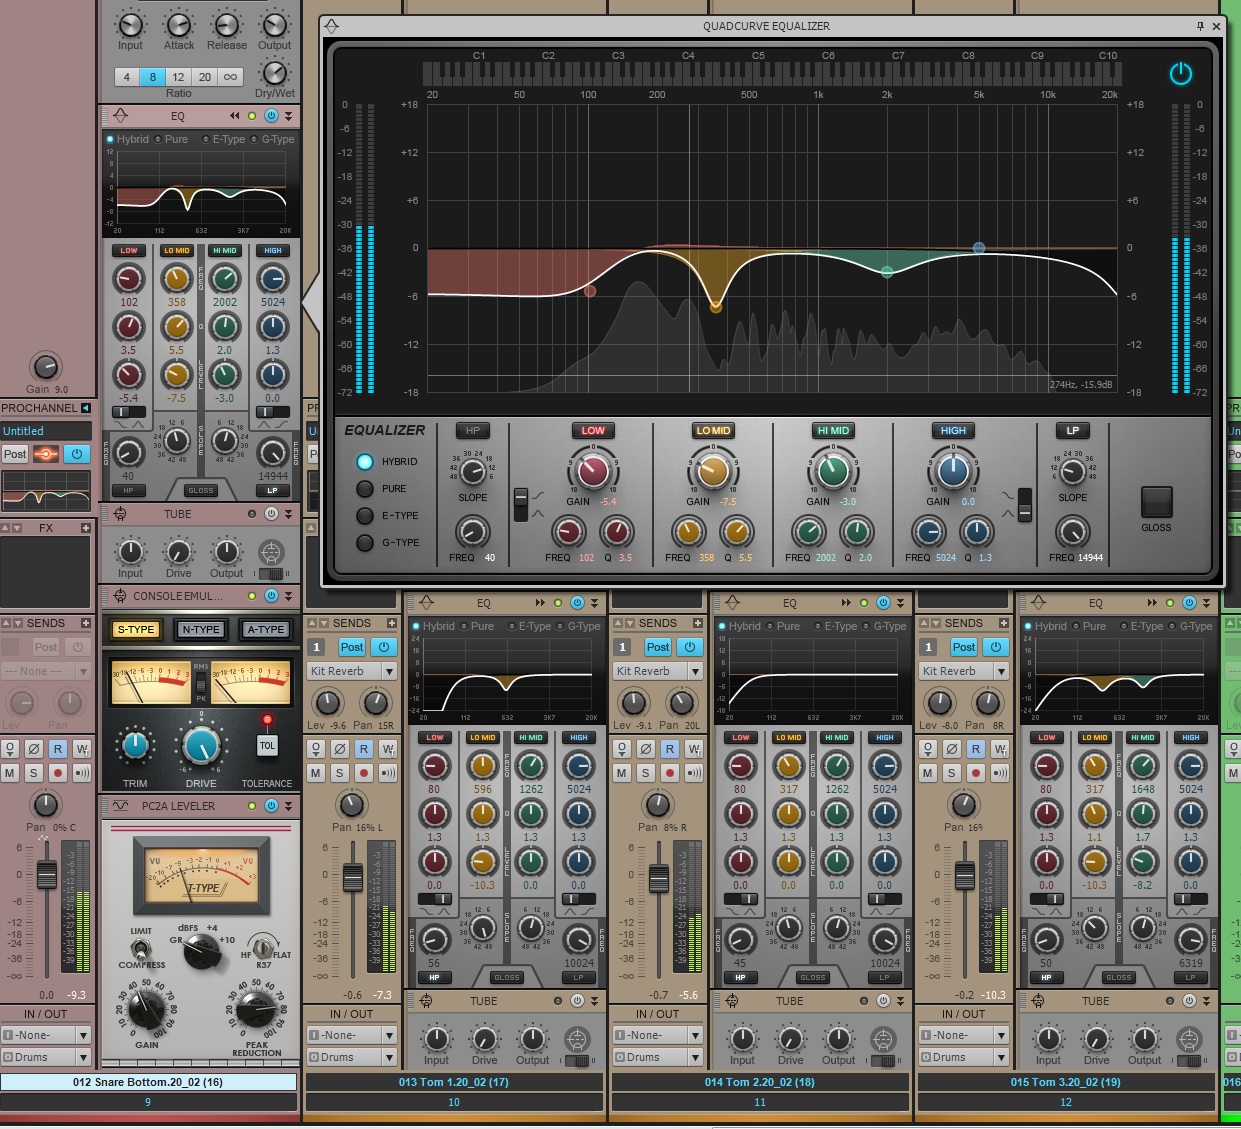
The bass in this track caters to fans of the early Metallica era.  Bassist Cliff Burton popularized this distorted sound on such tracks as (Anesthesia) Pulling Teeth.  It’s important to blend this type of bass tone into the bottom of the guitars.  In this mix the guitars and the bass become a single unit ebbing and flowing with one another at certain points through the song.

Understandably one can assume that there was much processing done to this track before it’s transfer into SONAR.  It’s important to capture the sound before you start mixing so that your mixing process is not a patch-job.

This tone is aggressive and piercing to the ear.  A significant way to know that this instrument needs attention is by the aural fatigue that you may experience while soloing this track and listening to it rather loudly for more than 10 seconds.  I aimed to adjust the bass track to fit like a glove under the mix by applying a HPF at 78Hz with a steep bandwidth setting.  The amount of bass here needs control. Using a compressor to control the sound would be redundant because of how much overdrive was applied to this track.  The overdrive has ultimately eliminated any trace of strong transients.

Lastly, there is another dip in the EQ around 2.2kHz.  This adjustment reduces some of the aforementioned piercing sound. Any harsh tones in this register will be too overbearing in the mix.

Subtractive EQ Part 3: Kick Drum

Miss part 1? Read Subtractive EQ – Snare Drum.

The Kick Drum
If the snare was the primary listening point for Rock music then the kick drum is the second most important. By working in the guitars in over the snare I was then met with the challenge of working in a solid kick drum sound. This kick drum was tracked using two different kick drum microphones, one deeper into the drum than the other. For reference, the first kick signal is called the “Kick-In” microphone and the second is the “Kick-Out” signal. (This is one example of the nomenclature used by many engineers to differentiate between the different microphones placed on a drum set)

Kick In

I started by blending the two signals Continue reading “Subtractive EQ Part 3: Kick Drum”

Free SONAR X3 Explained video with any SONAR X3 purchase – Ends March 31

SONAR X3 Explained

Go pro with SONAR X3 for as low as $49 – plus get a free video
Create music in any style with cutting-edge instruments, effects, and creative tools. Thanks to the award-winning Skylight user interface, SONAR X3 lets you move seamlessly in your production workspace, instantly going from recording to editing to mixing and back again. Produce flawless tracks with the 64-Bit Double Precision audio engine and upload polished mixes directly to YouTube and SoundCloud. Plus, SONAR X3 lets you do it all without limiting the number of tracks and plugins; all while supporting the latest technologies like VST3, multi-touch, and Gobbler cloud save.

PLUS GET A $40 VIDEO: When you purchase or upgrade to SONAR X3 from February 1st-March 31st you will also receive the Groove 3 SONAR X3 Explained video free ($40 value). Watch and learn as SONAR guru, Eli Krantzberg, takes you from beginning to end, showing how to unleash the true power of this fully featured, cutting edge DAW. The Groove 3 SONAR X3 Explained video will automatically be added to your order and available for immediate download.

Download SONAR X3 today
Upgrade for as low as $49

Subtractive EQ Part 2: Heavy Rhythm and Lead Guitars

Did you miss Part 1? Read Subtractive EQ for Snare Drum.

Guitars
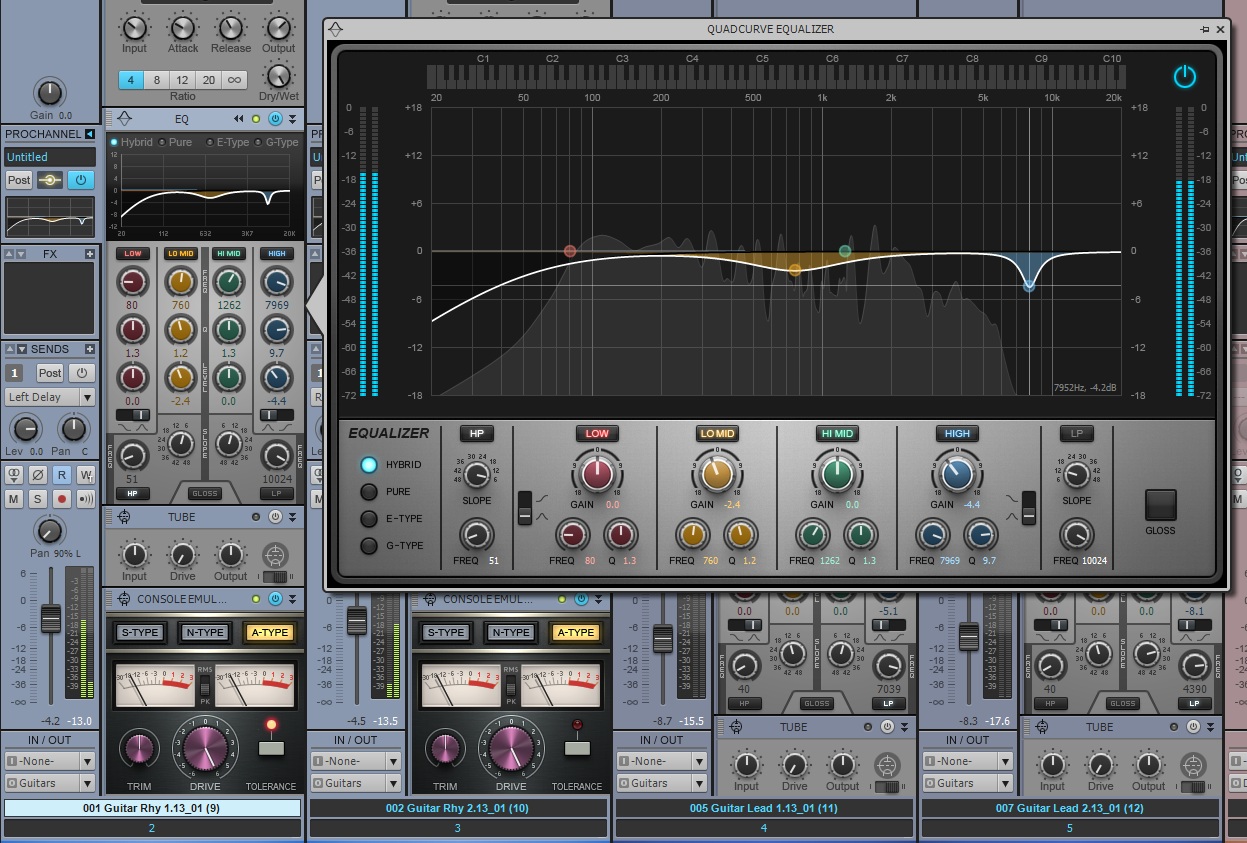
Your guitar tone can change significantly by carving out the correct frequencies and reducing those that introduce unwanted noise. Distorted electric guitars tend to occupy most of the mid-range based on their nature of their sound. This mix was tricky because the band is instrumental and their music relies heavily on the layering of multiple guitar tones.

Rhythm Guitar 1

Here I have chosen to attenuate the unwanted rumbling of the of the low end of the rhythm guitars using the supplied HPF. The bass guitar is rather guitar-like in this song therefore it is important to make room for that. The HPF for Guitar 1 was applied at 50Hz and similarly to Guitar 2 at 47Hz. Why not the exact same frequency you ask? Having the slightest Continue reading “Subtractive EQ Part 2: Heavy Rhythm and Lead Guitars”

Subtractive EQ Part 1: Snare Drum

Introduction
Equalization is one of the most powerful tools that an audio engineer can get their hands on. Live engineers, post-production engineers, and recording engineers all have their specific uses for it. It’s so powerful that some beginner engineers habitually reach for it without understanding what it can ultimately do to a mix.

Overview
Let’s resonate on the concept of volume momentarily. It is in our human nature to enjoy music at high volume levels. Concerts are a great examples of this. Outdoor festivals and the like tend to blast our eardrums with massive amounts of volume that we cannot experience in any other format. To most, increasing volume directly correlates to better sound. In a mix setting, dramatically boosting various frequencies can be a crutch for inexperienced mix engineers. By increasing the gain of a specified frequency band on an EQ one can subsequently add unwanted gain to the overall mix. Typically the problem that follows is a battle to keep your master fader from clipping and you all of sudden feel stuck in a gain-staging paradox. This can happen to best of us.

In Use
Apply subtractive EQ techniques to your instruments. Instead of boosting your favourite signals try limiting yourself to cutting. We can call this concept “carving”. Let’s take a look at a musical example. This series of articles will demonstrate some key elements of a typical Rock Mix.

Snare
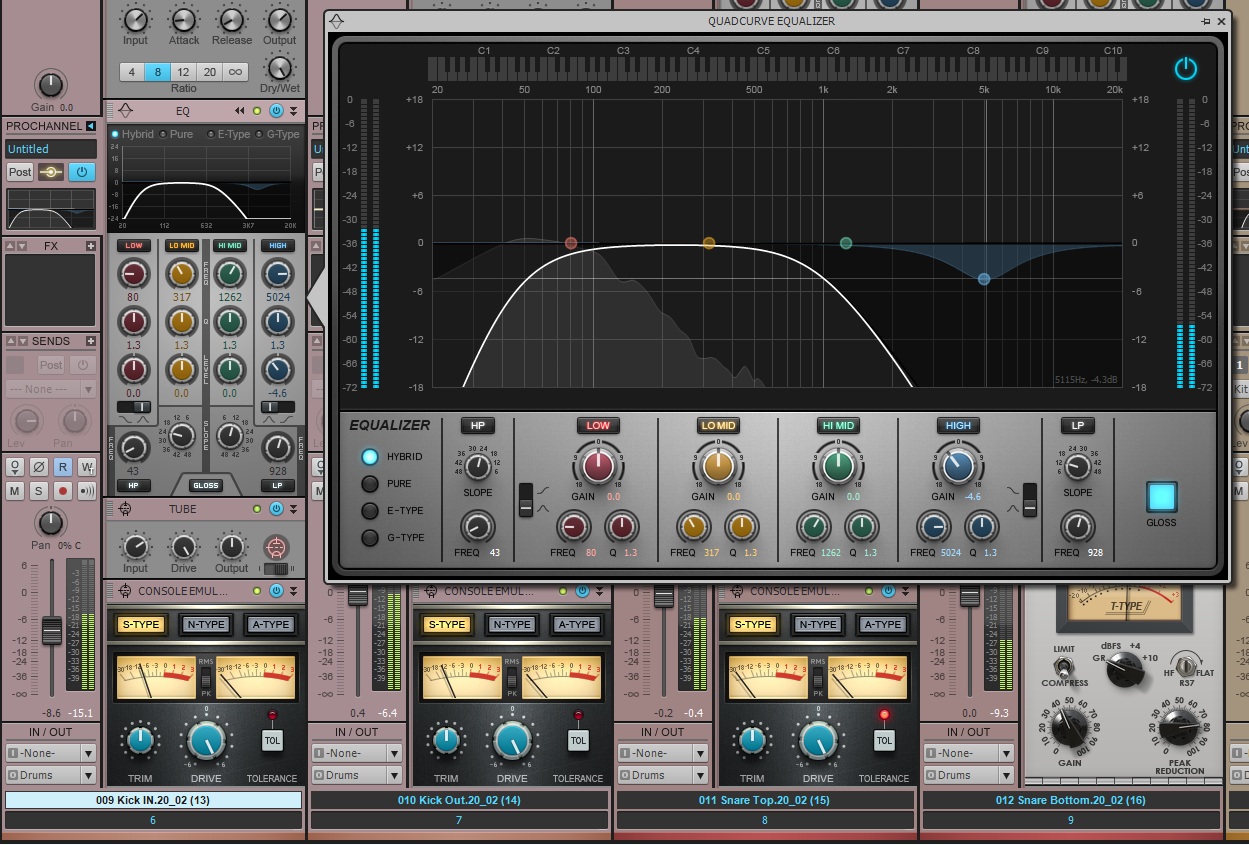
Generally the snare is the focal point of a typical rock oriented mix. I’ve started with all my faders down and raised the snare to a suitable level: 0dBu. This recording was tracked with two snare microphones. The bottom snare microphone captured the sizzle of the snare and the top microphone captured much of the attack.

Snare Bottom EQ

The first drawbacks I noticed when isolating the snare recordings Continue reading “Subtractive EQ Part 1: Snare Drum”

Blue Cat Audio Analysis Plugins – Worth A Closer Look

The highly flexible, unique Blue Cat Audio plugins are now available at the Cakewalk Store. Find out how these critically-acclaimed plugins make comparing your audio tracks to reference material and to each other a breeze and how nearly any component—peaks, RMS, crest factor, even isolated frequency bands—can become a key signal for advanced sidechaining.

Blue Cat’s Analysis Pack
At first glance, the plugins in the Blue Cat Analysis Pack seems fairly self-explanatory: Blue Cat’s DP Meter Pro is a digital peak meter, Blue Cat’s FreqAnalyst Multi and Blue Cat’s FreqAnalyst Pro are spectrum analyzers, Blue Cat’s Oscilloscope Multi renders waveforms and Blue Cat’s StereoScope Multi and Blue Cat’s StereoScope Pro are stereo image visualizers. Their included histograms, 3D and 2D spectrograms, envelope graphs, XY and different views may be no surprise, either. However, what their names do not make clear is their capability to generate control data from the dynamics and spectra of your audio. Use them with a dynamics processor to get nearly infinite sidechaining possibilities.

Blue Cat Analysis Pack
Image © Blue Cat Audio

You may be wondering what the difference Continue reading “Blue Cat Audio Analysis Plugins – Worth A Closer Look”