Subtractive EQ Part 5: When Should I Boost EQ?

Missed Part 1? Read it here.

When should I boost?
Some of you may read this and field this very question.  Boosting is something that you can do any time you want with any given instrument.  Obviously it is your own choice in the matter but if you find yourself constantly pulling your faders up and down because your master level is clipping then you may want to apply these EQ techniques to your workflow. In my world it is always a matter of reducing first and then boosting later.

Conclusion
Mixing is as much of an art as it is understanding the logical ways that instruments interact with one another. Continue reading “Subtractive EQ Part 5: When Should I Boost EQ?”

Subtractive EQ Part 4: Bass

Miss part 1? Read Subtractive EQ – Snare Drum.

Bass
The bass in this track caters to fans of the early Metallica era.  Bassist Cliff Burton popularized this distorted sound on such tracks as (Anesthesia) Pulling Teeth.  It’s important to blend this type of bass tone into the bottom of the guitars.  In this mix the guitars and the bass become a single unit ebbing and flowing with one another at certain points through the song.

Understandably one can assume that there was much processing done to this track before it’s transfer into SONAR.  It’s important to capture the sound before you start mixing so that your mixing process is not a patch-job.

This tone is aggressive and piercing to the ear.  A significant way to know that this instrument needs attention is by the aural fatigue that you may experience while soloing this track and listening to it rather loudly for more than 10 seconds.  I aimed to adjust the bass track to fit like a glove under the mix by applying a HPF at 78Hz with a steep bandwidth setting.  The amount of bass here needs control. Using a compressor to control the sound would be redundant because of how much overdrive was applied to this track.  The overdrive has ultimately eliminated any trace of strong transients.

Lastly, there is another dip in the EQ around 2.2kHz.  This adjustment reduces some of the aforementioned piercing sound. Any harsh tones in this register will be too overbearing in the mix.

Subtractive EQ Part 3: Kick Drum

Miss part 1? Read Subtractive EQ – Snare Drum.

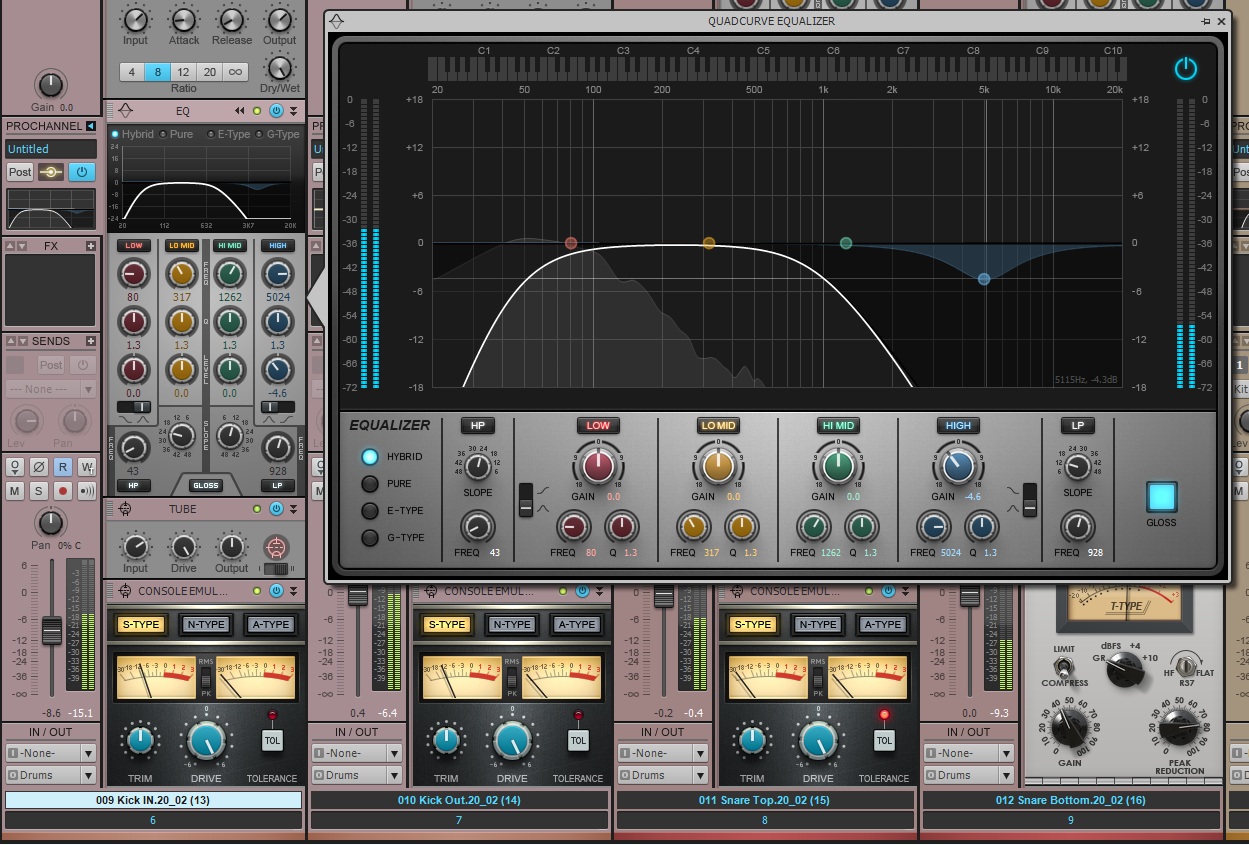
The Kick Drum
If the snare was the primary listening point for Rock music then the kick drum is the second most important. By working in the guitars in over the snare I was then met with the challenge of working in a solid kick drum sound. This kick drum was tracked using two different kick drum microphones, one deeper into the drum than the other. For reference, the first kick signal is called the “Kick-In” microphone and the second is the “Kick-Out” signal. (This is one example of the nomenclature used by many engineers to differentiate between the different microphones placed on a drum set)

Kick In

I started by blending the two signals Continue reading “Subtractive EQ Part 3: Kick Drum”

Subtractive EQ Part 2: Heavy Rhythm and Lead Guitars

Did you miss Part 1? Read Subtractive EQ for Snare Drum.

Guitars
Your guitar tone can change significantly by carving out the correct frequencies and reducing those that introduce unwanted noise. Distorted electric guitars tend to occupy most of the mid-range based on their nature of their sound. This mix was tricky because the band is instrumental and their music relies heavily on the layering of multiple guitar tones.

Rhythm Guitar 1

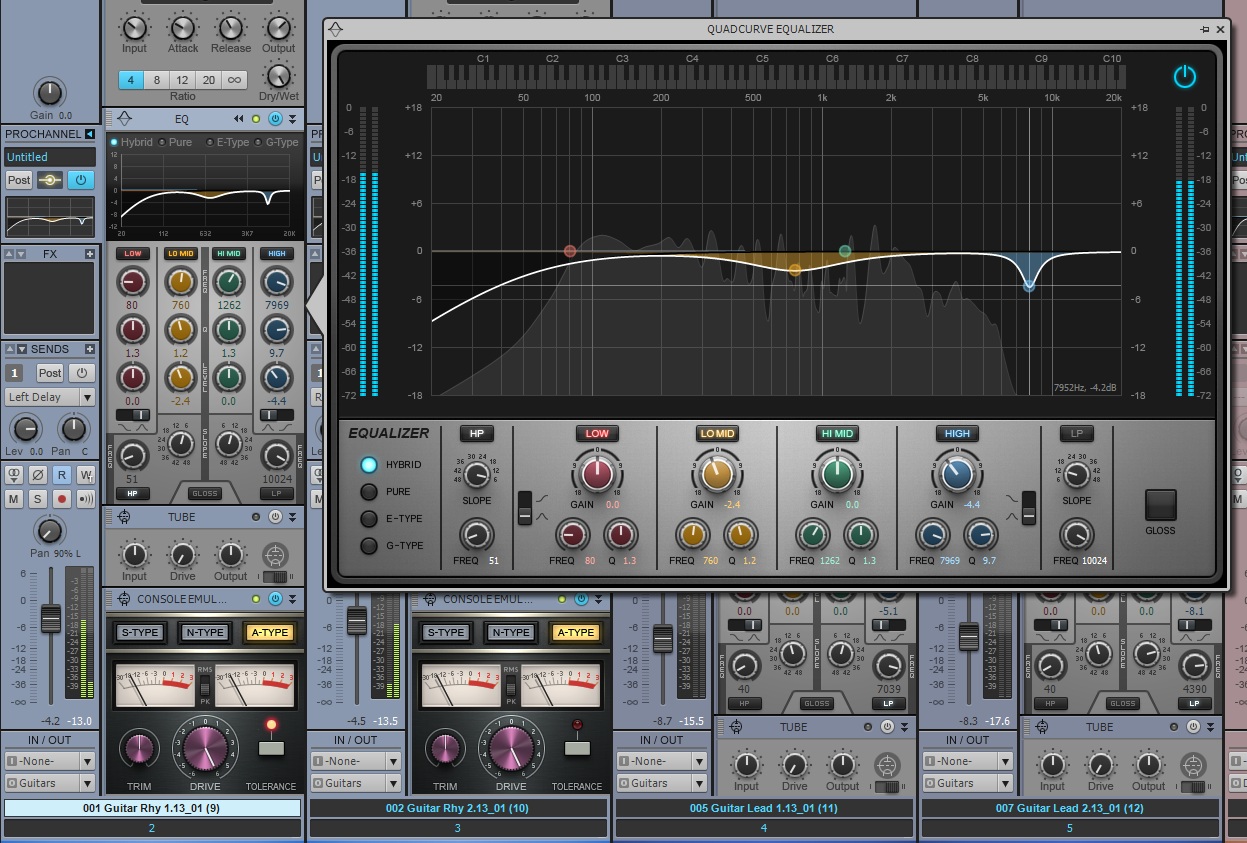
Here I have chosen to attenuate the unwanted rumbling of the of the low end of the rhythm guitars using the supplied HPF. The bass guitar is rather guitar-like in this song therefore it is important to make room for that. The HPF for Guitar 1 was applied at 50Hz and similarly to Guitar 2 at 47Hz. Why not the exact same frequency you ask? Having the slightest Continue reading “Subtractive EQ Part 2: Heavy Rhythm and Lead Guitars”

Subtractive EQ Part 1: Snare Drum

Introduction
Equalization is one of the most powerful tools that an audio engineer can get their hands on. Live engineers, post-production engineers, and recording engineers all have their specific uses for it. It’s so powerful that some beginner engineers habitually reach for it without understanding what it can ultimately do to a mix.

Overview
Let’s resonate on the concept of volume momentarily. It is in our human nature to enjoy music at high volume levels. Concerts are a great examples of this. Outdoor festivals and the like tend to blast our eardrums with massive amounts of volume that we cannot experience in any other format. To most, increasing volume directly correlates to better sound. In a mix setting, dramatically boosting various frequencies can be a crutch for inexperienced mix engineers. By increasing the gain of a specified frequency band on an EQ one can subsequently add unwanted gain to the overall mix. Typically the problem that follows is a battle to keep your master fader from clipping and you all of sudden feel stuck in a gain-staging paradox. This can happen to best of us.

In Use
Apply subtractive EQ techniques to your instruments. Instead of boosting your favourite signals try limiting yourself to cutting. We can call this concept “carving”. Let’s take a look at a musical example. This series of articles will demonstrate some key elements of a typical Rock Mix.

Snare
Generally the snare is the focal point of a typical rock oriented mix. I’ve started with all my faders down and raised the snare to a suitable level: 0dBu. This recording was tracked with two snare microphones. The bottom snare microphone captured the sizzle of the snare and the top microphone captured much of the attack.

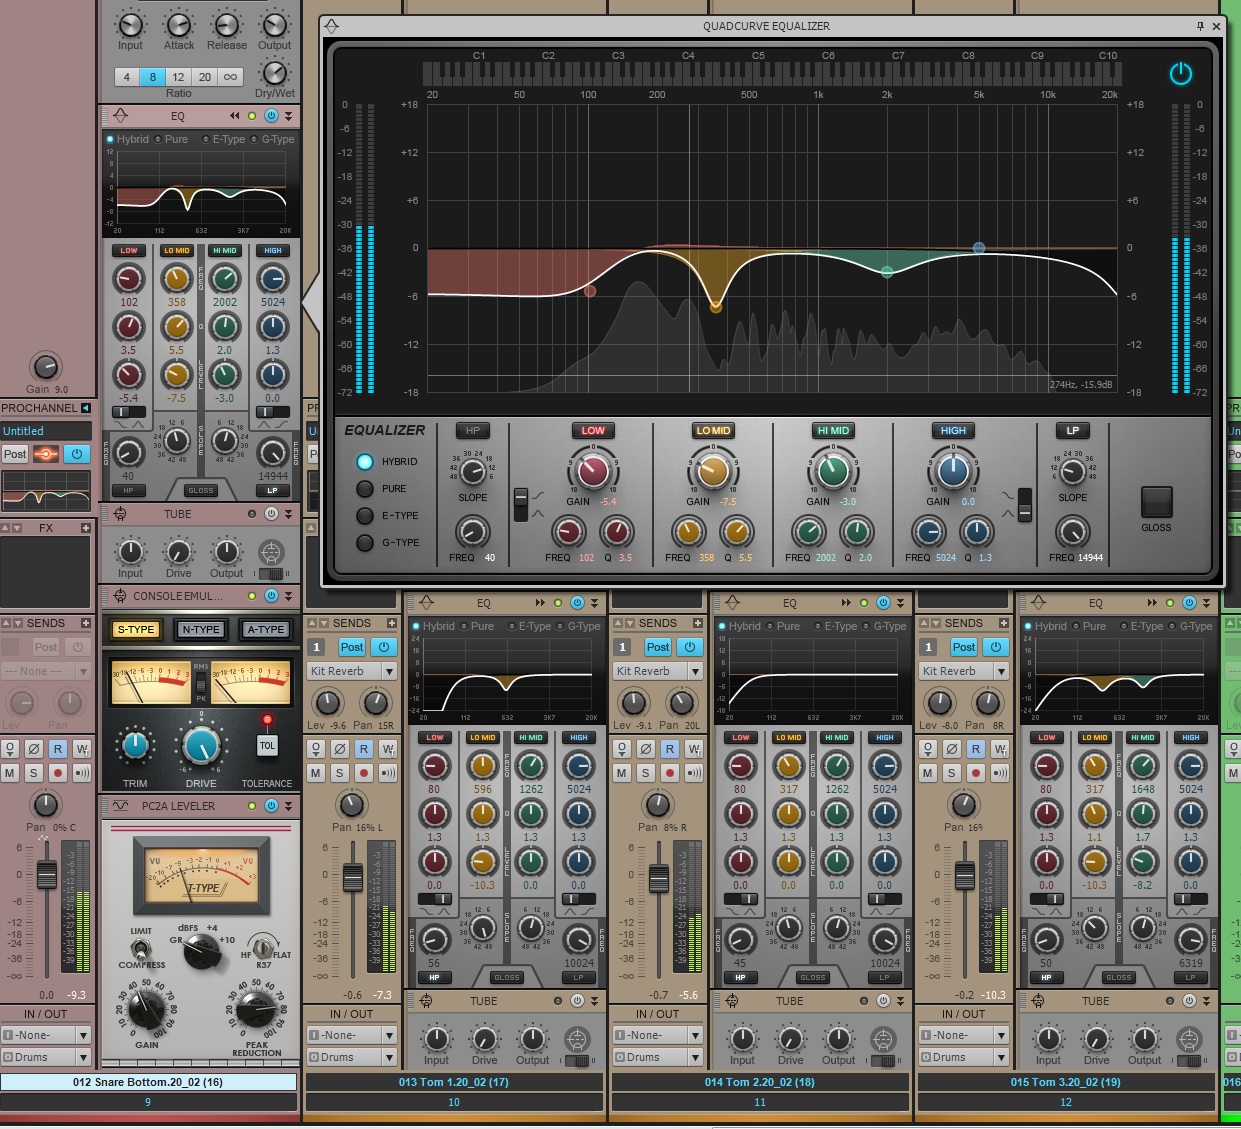
Snare Bottom EQ

The first drawbacks I noticed when isolating the snare recordings Continue reading “Subtractive EQ Part 1: Snare Drum”

A Holiday Miracle: 24 Hours To Write, Record, Produce, Mix A Commercial Track in SONAR X3

“Audio Production Jobs” come in all shapes and sizes these days;-)  Yes, the music industry in general has shrunken to an all-time low in terms of major label budget projects, but the flip side is that there are many nooks and crannies out there to stay creative while making money.  I think the key these days is getting into as many industry circles as possible, and then over-delivering.  If you’re handed a job for writing, mixing, producing or even recording, and you knock it out of the park the first time with low-no hassles to the client, you will certainly come to mind on the next round.  I would also be willing to bet that your name will be referred to other folks outside of that job’s “circle.”  You just never know to where things are going to lead.

Stemming from this theory, I have been fortunate enough to work on some pretty diverse projects ranging from title tracks for Pokémon DVD’s to Major Label artists and just about everything in between in one form or another.  For the work I do now, the one thing that gives me an edge using SONAR X3 Producer over other DAWs is the quickness of the workflow; which contributes to music creation diversity.  Sounds deep right? …well it kind of is.  Here’s a real-world example with italicized words in red representing why SONAR X3 features are crucial to me when facing tough audio jobs.

Just a few weeks ago I was contacted by NYC singer-songwriter Jodi Good’s music attorney Steven Beer on a Friday night to discuss an opportunity for a “Holiday Song” to be placed with a major publication [for Monday].  Now usually, “Holiday Songs” are recorded around August or September and we were already at the end of November, so I knew this was going to be a tough one to accomplish especially since the song had to be written, recorded and mixed fast.  The other strike against me was that this one was a bit out of my rock, and pop-rock comfort zones, but I knew the challenge would be a good experience on many different levels, so I decided to fire up the eggnog and go for it.  Plus I had the comfort of knowing that Jodi is a great songwriter especially in the lyric department, so it was “weekend on.”

Literally that night Jodi was sending me vocal-only words and melodies as text messages on my Samsung S4.  She doesn’t play an instrument and we didn’t have the benefit of time, so we had to start writing via virtual and digital means.  I instantly forwarded them via email to my HP Z400 main rig where I drag-and-dropped them into a session for reference where they automatically created audio tracks.  The next move was simply pulling them down to a midi track where Melodyne’s ARA technology kicked in instantly giving me the notes in Midi.  This helped me to figure out the best chord structures for the verses and pre-chorus and also allowed me to see where I could go writing the chorus melody.  After about a half hour on my trusty acoustic, I had the bones to send back to Jodi via text.

[I’m going out on a limb here for your laughing pleasure 😉 Here’s the actual writing file on my phone which is what I texted back to Jodi when we were writing the melody – so you can hear how the song started, and where it ended.] Continue reading “A Holiday Miracle: 24 Hours To Write, Record, Produce, Mix A Commercial Track in SONAR X3”

10 Reasons You Will Love The SONAR X Series

The SONAR X series was introduced to the world back in 2010. Since that time, we’ve continued to refine and improve SONAR. Customers upgrading from SONAR 8.5 and earlier are in for an amazing experience. Below we’ve put together the top ten reasons you will love the SONAR X series.

1. ProChannel

The ProChannel redefines the way you work with the Console View. Each audio track, instrument track, and bus comes with a complete modular strip of analog effects. Even the inspector allows the users to preview a selected track’s ProChannel strip right from the Track View. With the click of a button users can expand this analog mixing console and fully customize it by dragging around the modules, or loading up a ProChannel presets. Load up the Compressors, Tube Saturation, Reverb, Console Emulators, Tap Emulators, and the new QuadCurve EQ Zoom with Analyzer by simply right-clicking.

SONAR’s ProChannel lends itself to an immensely visual experience Continue reading “10 Reasons You Will Love The SONAR X Series”

6 Creative Ways to Use The VKFX Delay – Free with SONAR X3 Studio or Producer

SONAR X3 Producer’s ProChannel comes loaded with great effects for every channel like Compression, EQ, Saturation, and Reverb. Now, for a limited time, if you purchase SONAR X3 Studio or Producer before November 30th, 2013 you will also get Overloud’s incredible VKFX Delay ProChannel Module for free. Here is a description and some creative ways to utilize this wonderful new tool.

Overloud’s VKFX Delay Module is a rendition of a classic tape delay with an incredible set of parameters that virtually allows you to get just about any sound you please.

The Parameters

Feedback adjusts the amount of repetitions of the delayed signal. This has varying tonality as you increase or decrease it.

Tone adjusts the brightness of the delayed signal. Sometimes it’s important to taper off the high end of a signal so that it does not get in the way of itself. Bright acoustic strumming or picking could become engulfed by a series of shearing delays if your tone is not adjusted correctly.

Time is a crucial parameter on any delay unit. This determines the intervals of time between each delay repetition. When the time parameter is not synced to SONAR, the intervals of time range between 0.0 – 2.7 seconds.

When the sync button is enabled the VKFX Delay syncs to musical denominations ranging from 1/32t to 4 based around the tempo set within SONAR.

Mix controls how much of the delay effect makes it into the actual passing signal. Increasing this to 100% would produce the delayed effect only.

Lastly, the 8 different Modes within the VKFX Delay module control two sets of settings.

  • The panning scheme for each repetition
  • On what beat each repetition falls on

As seen in the figure, the first five different modes repeat within the mono spectrum and vary with each beat they fall on. Settings 6, 7, and 8 spread the repetitions from Left, Center, and Right making for an intense panning/delayed effect.

1. Chorus Effect Continue reading “6 Creative Ways to Use The VKFX Delay – Free with SONAR X3 Studio or Producer”

DEVELOPER NOTES – SONAR X3 QUADCURVE EQ (UI ENHANCEMENT)

Introduction

Since it first appeared in SONAR X1 Producer, the QuadCurve EQ has become my go to EQ. That’s saying something given the abundance of killer plugins in my collection (yes, like many of us, I own far too many plugins).

Maybe I’m just lazy, but I love the fact that it’s always there, ready to go on any track or bus at a moments notice. No need to wade through plugin menus – it’s already waiting patiently in the ProChannel.

And it’s no slouch either. There’s no trade-off for that convenience. The QuadCurve EQ is up there with the best of them.

But, as much as I love it, I admit I have, in the past, occasionally found myself reaching for one of the alternative plugins in my arsenal.

Why? The QuadCurve EQ user interface could be, well, a bit cramped. The small EQ plot is fine for quick adjustments, but not so great for fine-tuning. Metering is also important to me, which the QuadCurve EQ was lacking.

The good news? SONAR X3 Producer addresses these issues, and much more besides.

So what’s new?

See me!

First off, it’s easier on the eyes. The UI is cleaner, clearer, and you no longer need a magnifying glass to read the knob values!

Then there’s the EQ plot, or should that be “plots”? The small ProChannel plot is still there of course, and it’s as useful as ever, but now there’s a new secret weapon at your disposal…

…the QuadCurve EQ Zoom Window:

As you can see, it’s essentially a much larger EQ user interface which, among other benefits, provides a much finer degree of control.

I say ‘secret weapon’ because it may not be immediately obvious how to get to it Continue reading “DEVELOPER NOTES – SONAR X3 QUADCURVE EQ (UI ENHANCEMENT)”

EDM Production Tip: Ducking Synth Melodies using Sidechaining

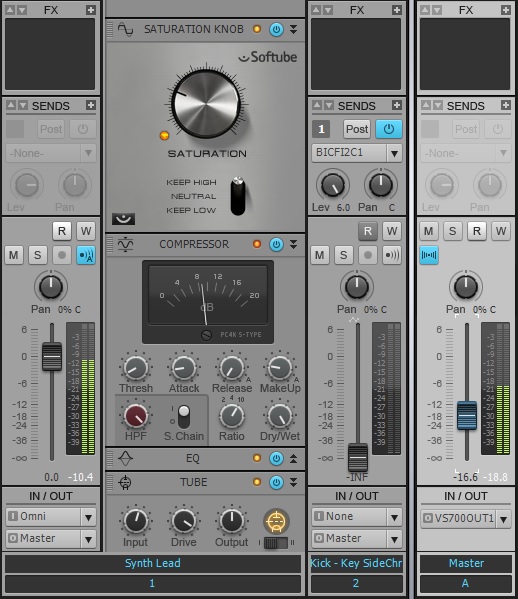
Ducking is a popular technique used in EDM music to apply percussive processing to pads, leads, and bass lines using side-chains on compressors. This technique is also used as a method for getting bass and drum passages to subtly fit together in mixes. In order to successfully apply ducking to your track you must have the following:

  • Compressor inserted on a pad or lead track with side-chain capabilities
  • Percussive source to key the side-chain

First, grab a kick drum sample and align it to the desirable rhythm you need.  Next, insert a compressor onto your synth lead or pad track.  Afterwards insert a send on the sampled kick drum track and set the send to “Pre-fader”. In SONAR, deselecting the [Post] button enables pre-fader sends.  Mute the kick drum sample and turn up the gain on the send.

Once you have the signal flow set, enable the Sidechain on the Compressor.  Now, every time the kick drum sample plays the Side-Chain will trigger the compressor and “Duck” the signal.  You can set the compressor using the Threshold, Attack, and Release settings to shape the kind of effect you want.

Try it yourself with the SONAR X2 Producer free 30-Day trial.