Using Cakewalk Drum Replacer: The “Right” Way and The “Other” Way

The “Right” Way:

There’s more than one way to use Drum Replacer to trigger your drum sounds. Which of these you choose will depend on the material, as well as your preferred outcome and workflow. First, let’s take a look at some of the intended, more traditional uses of Drum Replacer.

A mixed drum track or loop

A fairly standard Drum Replacer use is to augment or altogether change the drum sounds on an already-mixed drum track. The examples below play an unprocessed SONAR drum loop, followed by the same loop reinforced by Drum Replacer.

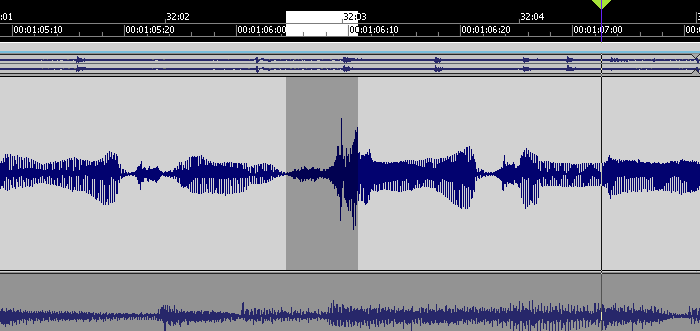
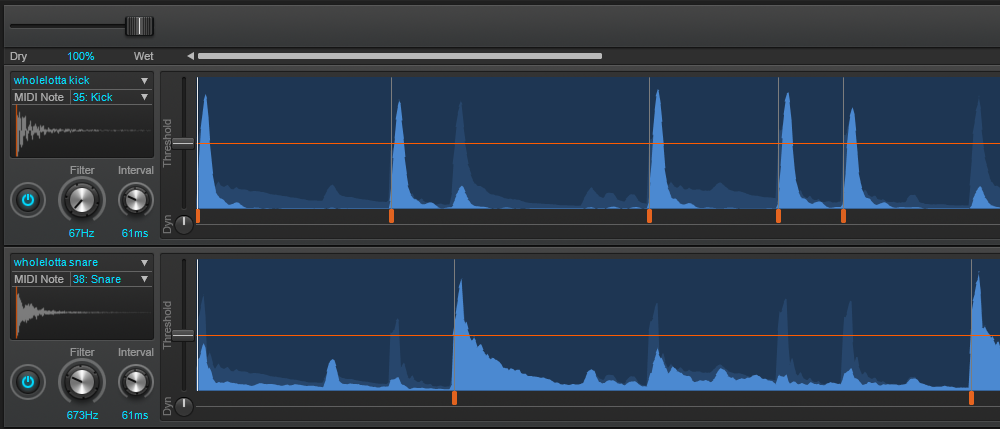
Filtered Drum ReplacerWith the built-in filter mechanism, it’s easy to isolate each piece of the drum kit and replace it individually. For this particular loop, focusing the filters to 67 Hz for the kick and 673 Hz for the snare ensured replacing the right sound. I wanted to soften this already-punchy loop by replacing the kick and snare sounds with something a little more “airy,” then blending these with the original. I chose the included WholeLotta Kick and WholeLotta Snare samples for their lighter, more pillowy qualities and blended them roughly 70/30 with the original drum track. Combined, they create a pleasantly complex, tight-yet-sustained sound.
Continue reading “Using Cakewalk Drum Replacer: The “Right” Way and The “Other” Way”

Speed Up Your Workflow With 5 (Rather Hidden) SONAR Features

SONAR has a LOT of features. So many, in fact, that it’s easy for some of them to fly right under the radar. The list below contains five of my favorite SONAR features that can really speed up your workflow!  Download the latest SONAR Free Demo and follow along.

#5 – Clip Coloring

Let’s say you’ve recorded a couple of guitar tracks, and the guitar player changed tone in certain parts of the song. You may want to identify these parts easily during the mixing process. Markers can work, but I typically use those to indicate sections and turning points in the song, and the tone change doesn’t always line up with arrangement changes. Instead, you can change the clip color in these sections to make the parts easier to find.

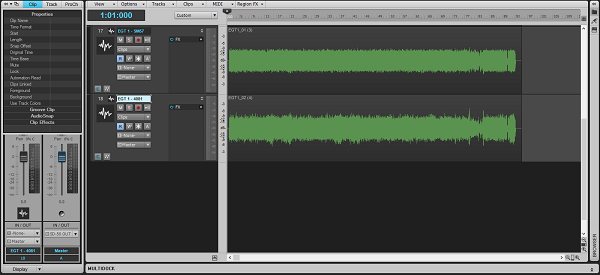
Here are the clips in their original state:
Clips Before Editing

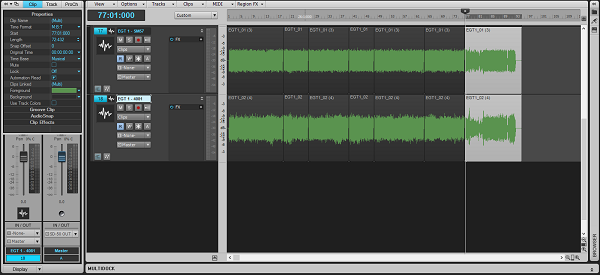
Make some splits where the pickup change happens:
Clips Have Been Split

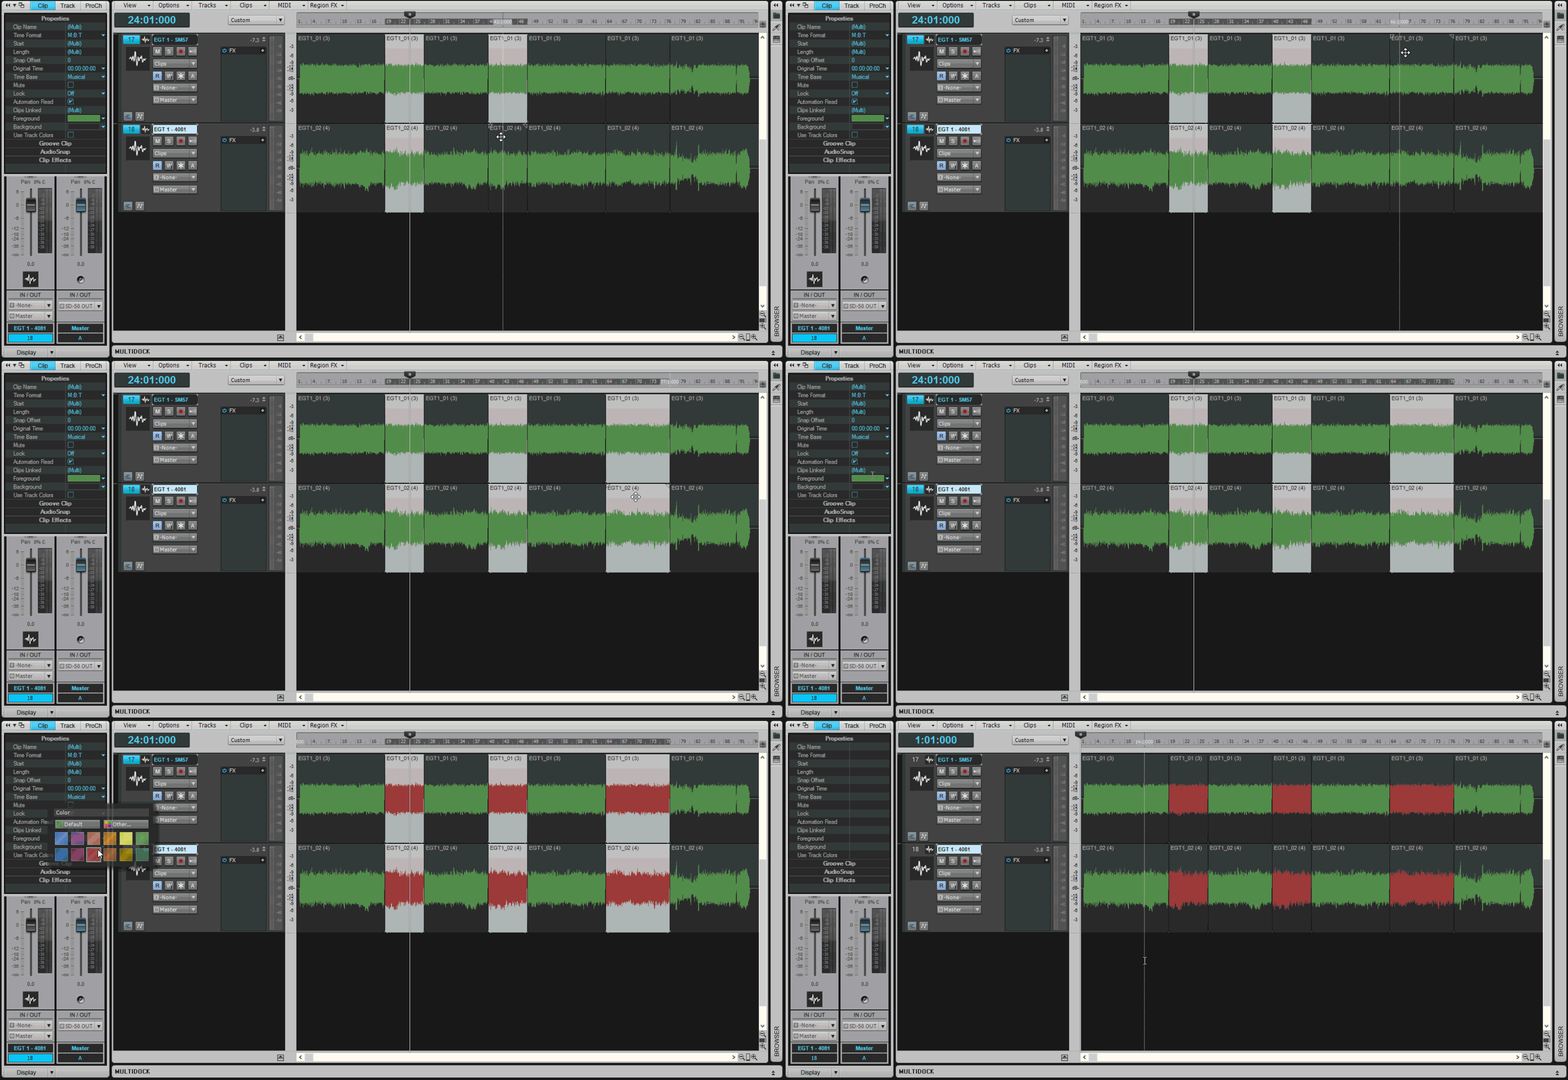
Now, select the parts with Shift+Click where the guitarist changes his tone, and using the Foreground selector in the Clip Inspector, color these red:
Clip Coloring GIF

You can now see all the sections where the guitar player used an alternate tone by the red waveform, which can come in very handy while mixing.

Continue reading “Speed Up Your Workflow With 5 (Rather Hidden) SONAR Features”

Cakewalk Participates at the New Music Seminar: June 22/23 NYC

Cakewalk and Gibson Brands will be participating in the New Music Seminar this week, so if you happen to be in NYC please make sure to stop in and say hello.  The New Music Seminar is one of the most prestigious music conferences in the United States, and is held annually each June in New York City.  It originally ran from 1980 – 1995 and was re-launched in 2009 with great reception by the music community. The conference features over 150 CEOs, Presidents, Executives, and leaders in the emerging music business along with over 100 artist performances. The mission of the New Music Seminar is to grow a sustainable and better music business to allow creators the best opportunity to succeed. The NMS strives to enable more artists to achieve success and encourages new levels of investment in music and artists.

Please join Cakewalk and Gibson Brands at New Music Seminar:

————————————————————

Monday June 22, 2015 7:00 pm – 9:00 pm
How to Train Your Computer to be a Songwriting Partner
Gibson Showroom
421 W 54th Studio 5
New York, NY 10019

Come join a private in-studio session at the Gibson Showroom [Cakewalk] Studio 5 NYC:  In a world of zeros and ones, where does the computer fit into traditional songwriting? Songwriter/producer, Mark Hudson, (“Living on the Edge,” Aerosmith – amongst other hits) and digital pioneer, Craig Anderton, along with producer/songwriter Jimmy R. Landry will interactively cover new approaches to songwriting for the modern-day musician.


Tuesday June 23, 2015 11:30 am – 12:30 pm
Leveraging The Relationship: Artist and Brand Alignment:
Gramercy Park Suite
Wyndham New Yorker Hotel
481 8th Ave, New York, NY 10001

With the shifting paradigm of the music industry and how artists engage with fans, the importance of relationship management is more imperative than ever. What’s the protocol for artists approaching companies and brands, and once that relationship is established how can it be leveraged for the benefit of both? This panel will dive into strategic plans for artists looking for endorsements and partnerships, while also dissecting past examples that have resulted in success.

Conductor: Jimmy Landry (Head of Artist and Public Relations, Gibson Brands)

Players: Perry Greenspan (Director of Strategy, Platinum Rye Entertainment), Elliot A. Resnick, Esq. (Attorney at Law, SAHWH, LLP), Aimee Berger (Founder/Partner Camplified/ItACampThing, Primary Wave Entertainment), Amaechi Uzoigwe (Manager, RUN THE JEWELS), Ryan Fitch (VP Sync Licensing & Brand Partnerships, MAC Presents)


Tuesday 2:30 pm – 2:45 pm  – NMS Intensive:

Grand Ballroom
Wyndham New Yorker Hotel
481 8th Ave, New York, NY 10001

Hi-Res Audio: So What?

Conductor: Craig Anderton (Executive Vice President, Evangelist, Gibson)

Mixing Vocals: Create Depth with a Digital Reverb

by Dan Gonzalez

Depth is a factor of every mix, just like Height and Width. This is a harder concept to grasp because there really is no “Depth” adjust on a mixer. In this article we’ll talk about how to create depth using the Sonitus Reverb.

Creating Depth using the Sonitus Reverb

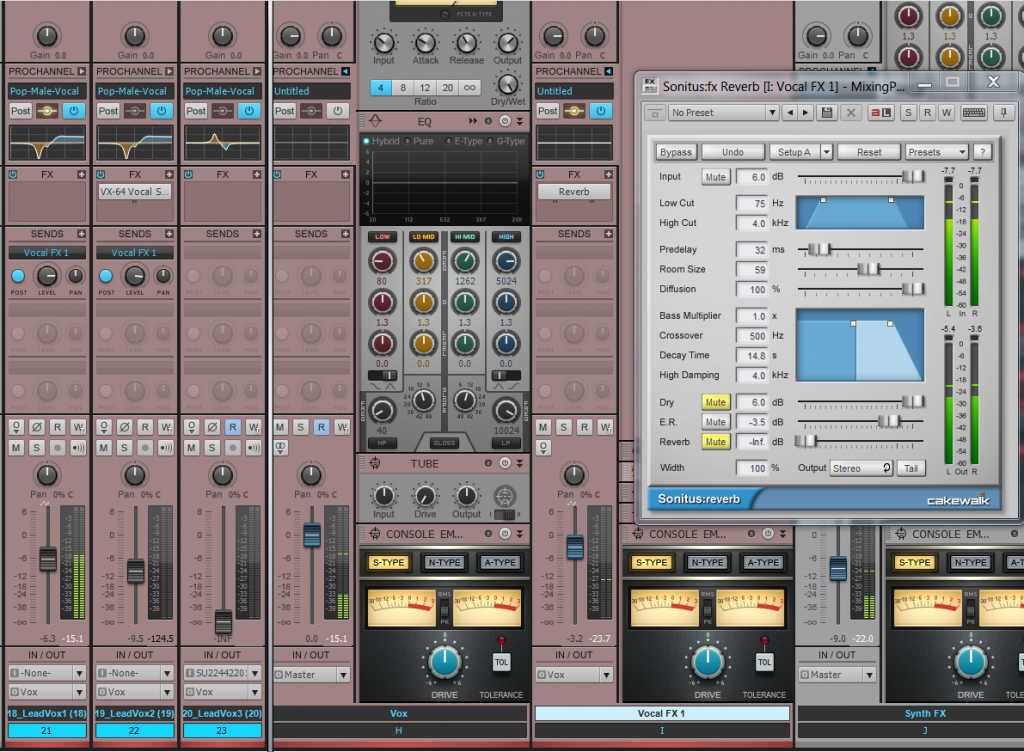
Digital reverbs are the proverbial swiss-army-knives of the mixing world. They are programmed in a way that emulates every part of a reverb. This includes the pre-delay, decay time, width, diffusion, early reflections etc. Since these emulate spaces like halls, plates, rooms, and other reverberant places – we can use them to create a room sound around our audio tracks for the purpose of creating depth. That’s a fancy way of saying that we can use reverb for depth. Here’s a vocal track that has no effects on it at all. It’s mixed into this track completely dry.

Continue reading “Mixing Vocals: Create Depth with a Digital Reverb”

Mixing Vocals: Easy Dynamic Vocal FX in SONAR

by Dan Gonzalez

A word on Vocal FX

Mixing vocals is a tricky process since it is the most prominent element in any song. Vocals can be processed a very specific way to achieve an effect of sorts – or they can be processed in subtle ways to fit nicely into an overall mix. Most of the time you’ll be dealing with the latter of the two so it’s important to figure out ways to enhance your vocals without overpowering the other instruments.

Critical attention to detail is what makes any track sound like a polished mix and to achieve this a lot of engineers approach each section, instrument, entrance, exit, etc. dynamically. Obviously one way to do this is by mixing with tons of automation, but there are other ways to setup your mix so that you don’t have to write loads of automation data.

Setting up a dynamic vocal effect

Let’s take a pretty dry vocal track and add a dynamic effect to it. Here’s an example of a verse that we can use.

Continue reading “Mixing Vocals: Easy Dynamic Vocal FX in SONAR”

Making The New York Impulse Pack for the SONAR "Braintree" Release

by Dan Gonzalez

Impulse responses (IRs) are small bursts of audio data that represent the frequency response of a real life space. By using convolution reverbs we can use them creatively in our productions to increase depth and ambience.


The concept

To accurately represent a real life space, you need to excite it with a frequency sweep or a loud sound rich in complex frequencies like a starter pistol or snare drum hit. For my IR samples in the New York Impulse Pack I used a sine sweep. The sine sweep is the easiest way to make sure you get an accurate representation of a space.

Once you capture that space, you must process it with a utility that shortens the
frequency sweep into a state that convolution reverbs can use. Typically this audio data is no more than a split second long.

I used this workflow to produce the Impulse Responses you’ll receive in our content for users that are a part of the Braintree Release for SONAR Platinum and SONAR Professional.

The equipment you’ll need, and what I used
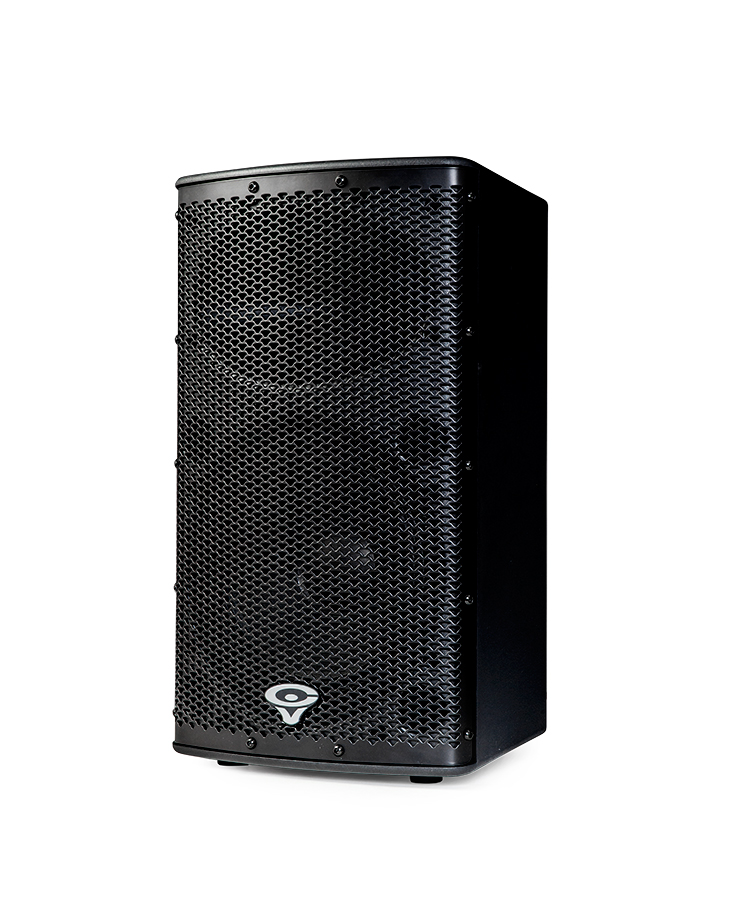
– Speaker, Studio Monitor, or Full Range Flat Response Speaker. I used a Cerwin Vega P1000.

The P1000X is a two-way, bi-amped, full-range bass-reflex speaker. It employs a 10-inch woofer and a high-frequency compression driver, powered by a custom Class-D amplifier. With a power rating of 1000 watts, the P1000X is one of the most powerful PA product in its class. A proprietary hemi-conical horn provides premium sound clarity over an even and wide coverage area. A built-in mixer with convenient I/O connections allows for simple and fast setup, while Enhanced EQ, VEGA BASS boost and High-Pass Filters enable exact tuning and exceptional performance for any application. The P1000X is a versatile product that can be used as a single speaker for small venues, set in pairs or installed with threaded hang points, and combined with the P1800SX Sub for a larger venue needing more coverage and SPL. Its compact size makes it ideal to operate as a floor monitor as well.”

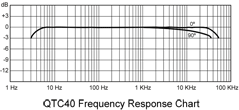
– Pair of microphones, the flatter response the better. I had the benefit of borrowing a pair of Earthworks QTC40s.

– The ability to create a sine sweep. I used this free utility and then bought the license for $40.

– An audio interface to simultaneously play the sine sweep and capture sound of the excited space. My RME UFX worked out wonderfully because it has very clean preamps and multiple inputs and outputs.

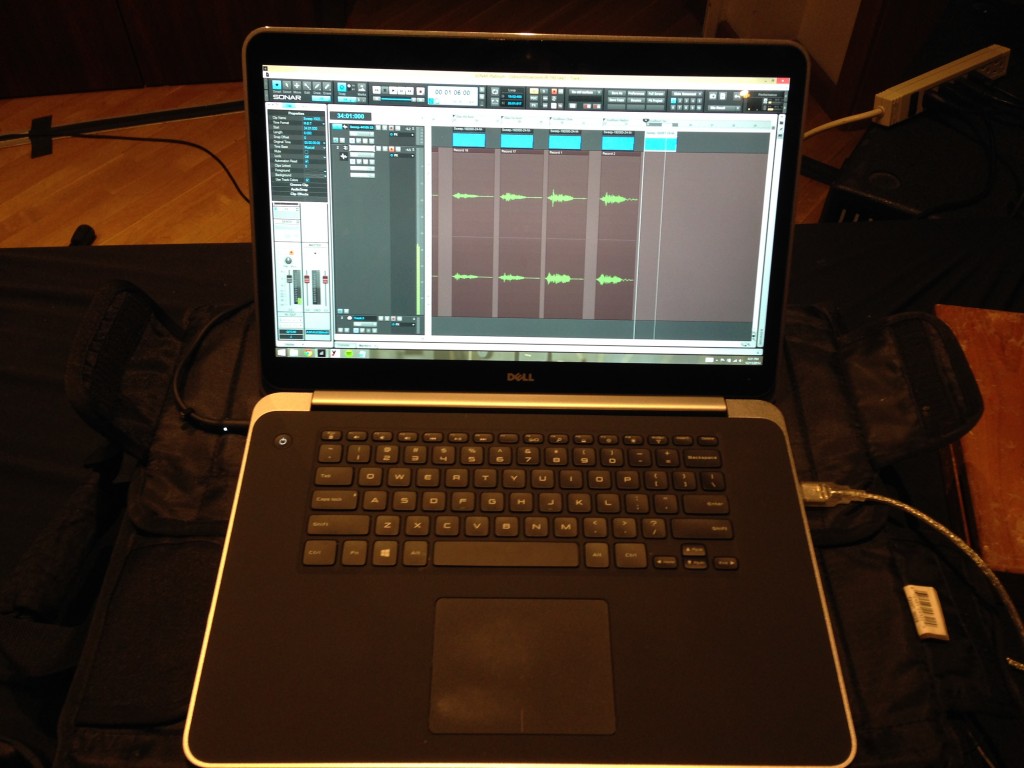
– Of course, SONAR Platinum

The Microphones

The Microphones I used are pretty high-end reference microphones that have a frequency range from 20Hz-40kHz. These are great because they represent the sound of the room without any color. Since we’re in the business of capturing the sound of room – they make a perfect companion for this type of project.

Setting up the spaces

I setup the microphones in a few initial spots to get an idea of how the space sounded. On my first try it was clear that the space was going to sound good no matter where I placed the microphones and the source speaker. Both spaces are not highly reverberant, they just have quality sounding early reflections – which makes them great for getting initial sounds of drums and vocals.

The goal was to capture the room in various positions. I setup the microphones in close stereo pairs, distant stereo pairs, and subsequently moved the source speaker around them to bounce the sine sweep off different walls. During the processing stage, I then split these stereo IRs out into mono signals so that users could have a choice between stereo or mono processing. For example, here’s a rough diagram of how I setup the microphones in the center with various speaker locations for one set of IRs.


The IRs themselves

To excite the space I created a sine sweep with Voxengo Deconvolver.

BE CAREFUL WHEN PLAYING THESE, THEY ARE LOUD

Once the signal played through the room it sounds like this:

Large Room IR Example

Not very exciting on first listen, but when you process the tracks and apply some instruments you start to understand their sound. Here is a drum passage without the impulse response:

Now, here’s the same drum passage with the ambience of one of the “Big Room” IRs that I captured. You can hear how it doesn’t necessarily add reverb, but more an ambience.

Lastly, here’s just the ambience:

Small Room IR Example

Here’s a synth passage without any IRs applied:

Here’s the same patch with one of the SmallRoom IRs applied:
Achieve More Professional Sounding Vocal Tracks With VocalSync

by Jimmy Landry

Things have obviously changed in music production over the years, but just recently a few technological advances have surfaced that are game-changers. One of these items includes the VocalSync technology inside the new SONAR Platinum. What exactly is VocalSync and why should you care? Here is one real-world practical example:

VocalSync is a tool that’s integrated directly inside of SONAR Platinum which gives anyone working with vocals 2 distinct benefits:

1. The ability to save a lot of time from manual editing
2. The sonic advantage of producing tight professional sounding multi-tracked vocals

It does this by “guiding” or conforming the information on one track to match another more fluently. The outcome of this is a much more professional production sound in the vocal tracks.

Let’s take a look at a real-world example: Recently, I had the good fortune to work with a great artist from Finland by the name of Peppina who has made a name for herself through Joseph Gordon-Levitt’s brainchild platform HitRecord. If I had to compare or categorize her music I would say it’s a modernized version of Dido sprinkled with some Sarah Bareilles and Ingrid Michaelson. With my producer hat on, I thought to myself that her vocals needed to be very large and wide on the tracks, but they also needed to sound authentic, realistic and intimate. To achieve this sound for the lead vocal, I used VocalSync to tighten 3 “takes” that would work together strategically in the stereo field. Continue reading “Achieve More Professional Sounding Vocal Tracks With VocalSync”

What's the deal with Addictive Drums 2 in the New SONAR?

by Dan Gonzalez

Addictive Drums 2 come to life in the brand new version of SONAR Platinum and SONAR Professional making for a massive introduction into the world of XLN Audio and all the awesome products that they develop.


As a SONAR X3 user, your standpoint may be “What’s the deal with Addictive Drums 2 and my upgrade?” Let’s see if we can clear that up in this article.

What comes with my purchase of SONAR Platinum?

SONAR comes in 3 flavors, and 2 of them come with Addictive Drums 2.

With SONAR Platinum you get the Addictive Drums 2 Producer Bundle. This comes with your choice of any 3 kits that are available for Addictive Drums 2.

You also get your pick of 3 MIDIpaks and 3 Kitpiece Paks from XLN Audio’s webshop. Just about every single genre of music is covered in the wide Continue reading “What's the deal with Addictive Drums 2 in the New SONAR?”

ProChannel Convolution Reverb with REmatrix Solo

by Dan Gonzalez

Convolution Reverb, now in the ProChannel

New to SONAR Professional and SONAR Platinum is the increasingly popular and imaginative REmatrix Solo. REmatrix Solo uses convolution to mimic real life halls, rooms, plates, and other reverberant spaces. In order to do this, engineers use something called a sine sweep or starter pistols to excite a real space like a church or bathroom. Typically you need to use a space that has a particularly natural short or long decay and does not have artifacts like flutter verbs or cancelling frequencies. You can even capture the sound of other reverb plugins and import that sound into REmatrix Solo.

This version is based off of a the full REmatrix plugin by Overloud. Currently, REmatrix Solo allows users to play a single IR but in the full version, you can play up to 5 IRs at once – allowing you to cross-pollinate your favorite reverbs into one lush space.

What’s the difference between Breverb and REmatrix Solo

Breverb and REmatrix Solo actually use different technology to create reverb. Breverb is based on a famous digital reverb found in almost every major recording studio. Breverb uses a dedicated or similar algorithm to recreate things like Early Reflections, Late Reflections, Pre-Delay, Decay, and other elements of a reverb. Breverb recreates a digital reverb whereas REmatrix uses the aforementioned convolution methods to convolve passing sounds with data from real life spaces. Breverb lets you tweak the elements of reverb and REmatrix creates a space around your sound.

Here’s a in depth look at the REmatrix Solo plugin brand new to SONAR Professional and SONAR Platinum.


Reader's Choice: Most Popular Vocal Production Articles in 2014

by Dan Gonzalez

Optimizing vocals with DSP

Craig Anderton brings you on a DSP-inspired journey through all the different ways in which you can get your vocals processed and finalized. Various topics involving the VX-64, EQ, Compression, Expansion, and much more. Check out the article here.

How to use a vocal double to enhance lead vocals

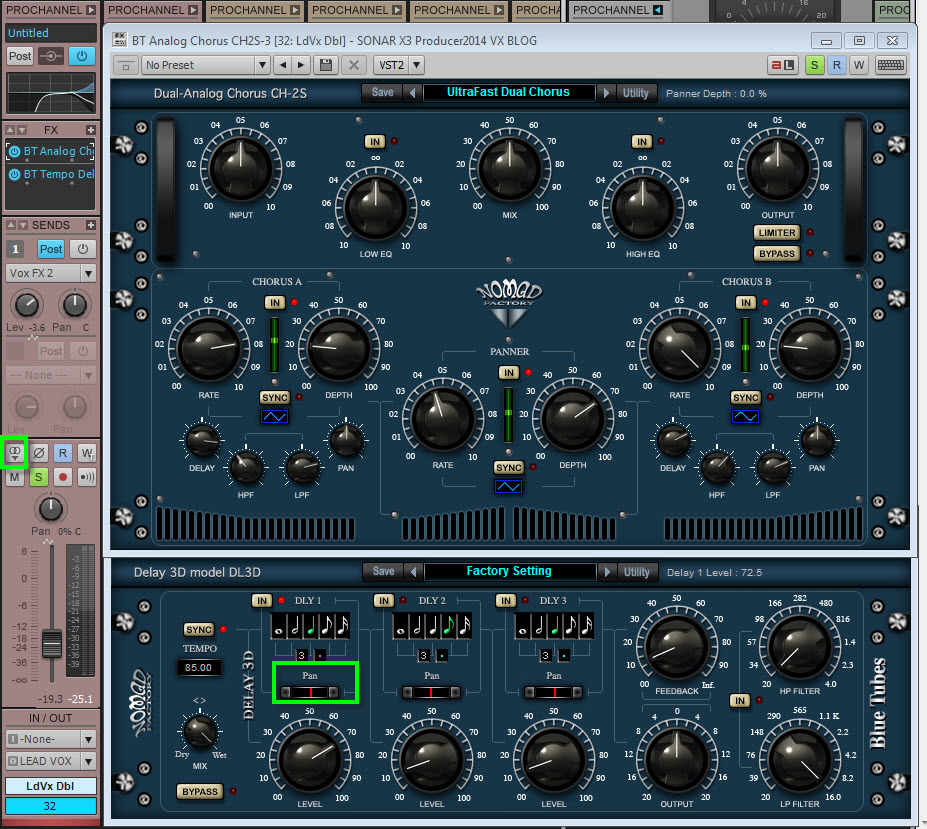
One of the toughest things about working with a lead vocal track is getting it to pop out, while allowing it to still sit in the track nicely in context with its surroundings [other tracks].  Every mixing engineer has her/his bag of tricks, but here are a few ideas to utilize a “vocal-double” which may help support and embellish the lead vocal track. Cakewalk guru Jimmy Landry shows you how he worked on the vocals for his Javier Colon demo track. Check out the article here.

Make your voice sound thicker (studio & producer)

Vocal production can lead to many different types of processing. Sometimes subtle enhancements to your vocals can make all the difference in the final mix. SONAR X3 Studio and Producer introduces Melodyne Essential as a fully integrated and pitch correction editor. This easy to use software allows users to access their Melodyne right from the Multi-Dock without needing to perform any special tricks within the software – including fattening up your vocals. Check out this highly-read article here.

Make your voice sound like Daft Punk with Melodyne Editor and SONAR X3 Producer

Certain effects have defined generations of music. The decade of the 80’s for example was a major era for reverb. In today’s pop music, the use of pitch correction software seems to be an effect that many artists and producers are utilizing creatively. Daft Punk has been using this effect for a number of years now, making them one of the first to bring this vocal style to the level of popularity it is today. Check out the article here.

Hum a melody and convert it to MIDI using ARA

As a musician, inspiration can hit you on the train, during dinner, or even while you’re driving somewhere. Many musicians carry some sort of recorder around with them. I know sound designers who always have a device ready for taking samples, and guitarists that hum melodies to themselves when they feel they’ve come up with something original that they want to remember. Now you can import your melodies right into SONAR and convert them to MIDI using the innovative ARA integration. Check out the articles here.