SONAR has a LOT of features. So many, in fact, that it’s easy for some of them to fly right under the radar. The list below contains five of my favorite SONAR features that can really speed up your workflow! Download the latest SONAR Free Demo and follow along.
#5 – Clip Coloring
Let’s say you’ve recorded a couple of guitar tracks, and the guitar player changed tone in certain parts of the song. You may want to identify these parts easily during the mixing process. Markers can work, but I typically use those to indicate sections and turning points in the song, and the tone change doesn’t always line up with arrangement changes. Instead, you can change the clip color in these sections to make the parts easier to find.
Here are the clips in their original state:
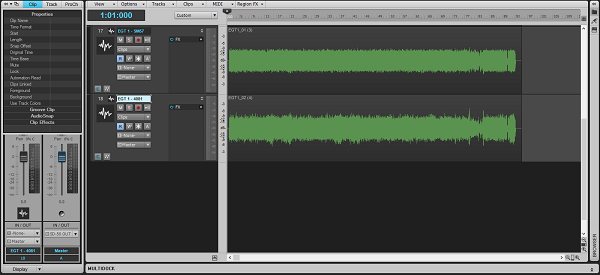
Make some splits where the pickup change happens:
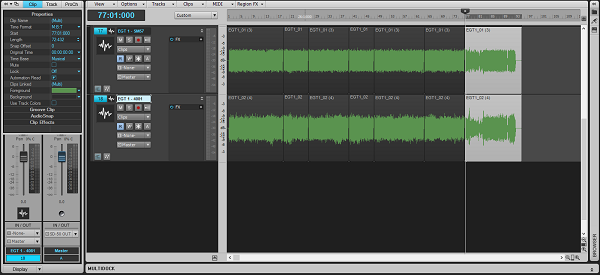
Now, select the parts with Shift+Click where the guitarist changes his tone, and using the Foreground selector in the Clip Inspector, color these red:
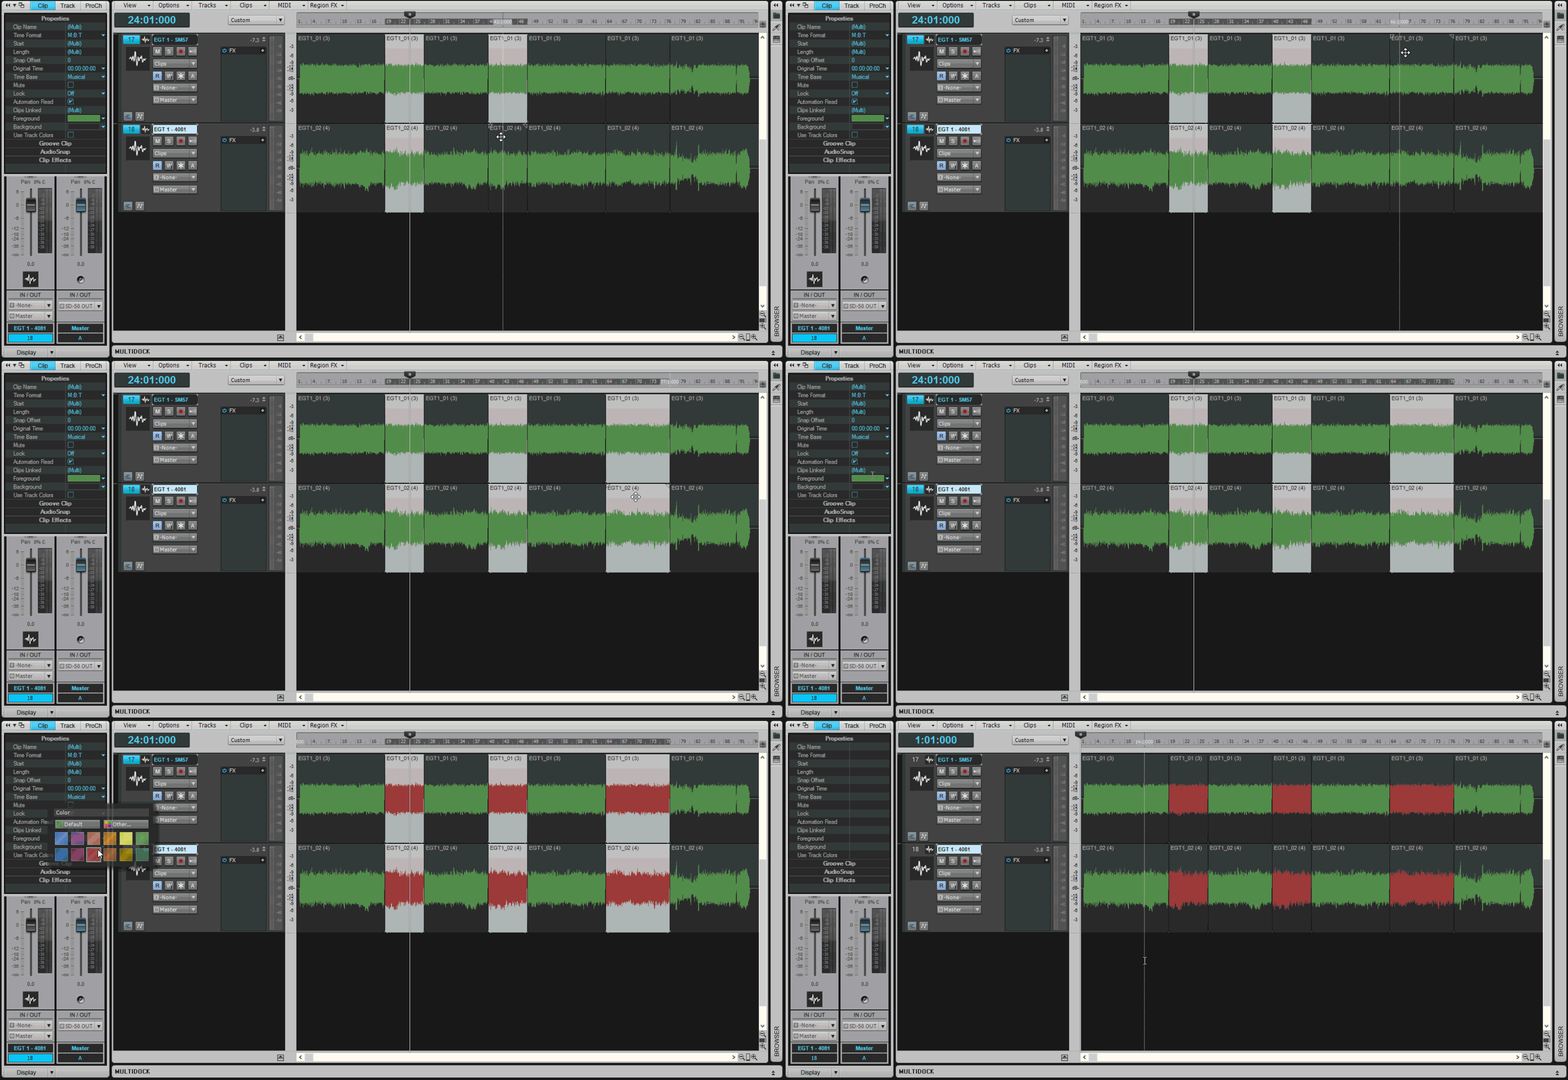
You can now see all the sections where the guitar player used an alternate tone by the red waveform, which can come in very handy while mixing.
#4 – The Navigator
This little gem often goes unnoticed, but it’s a fantastic feature for getting where you need to be in the Track View in a flash!
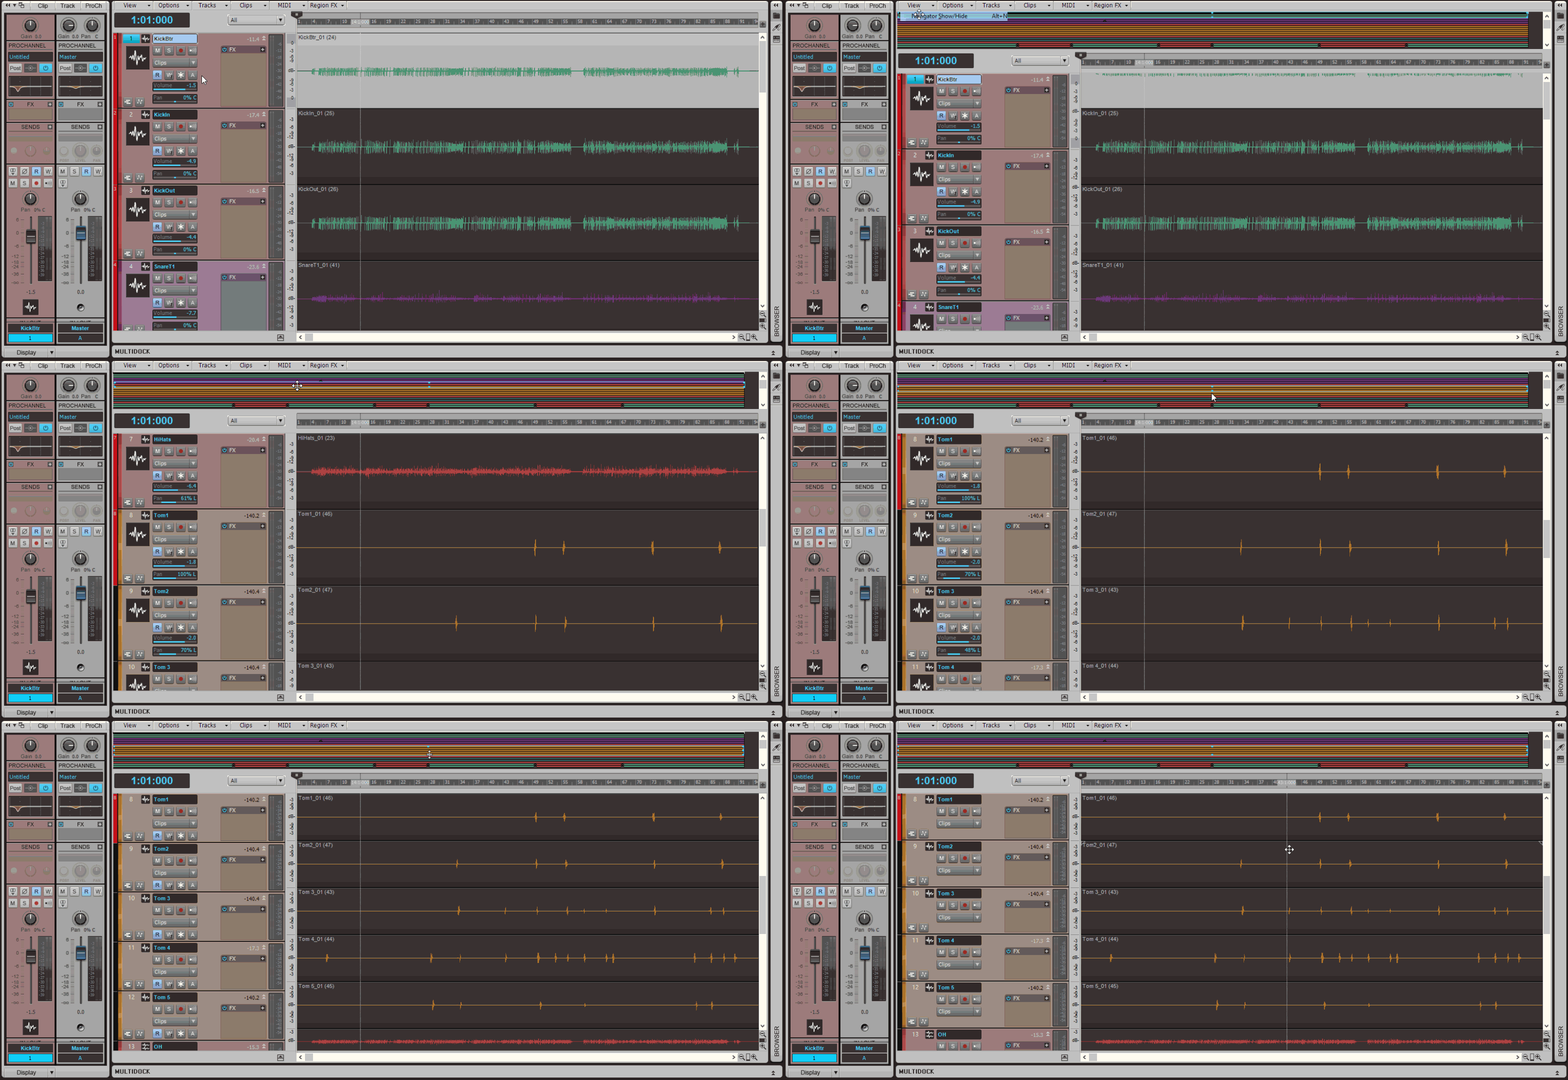
Suppose you’re in the drum-editing process, and you want to work on the toms a bit. Like many others, you color-code your projects to make life easier and in this case, you’ve chosen orange for your toms.
Open the Navigator with the View Menu (or Alt+N), then drag the window inside the Navigator down to the orange tracks to find the toms.
This drummer had five toms but maybe you can’t see them all. No problem! Simply adjust the bounds of the inner window to contain all the orange tracks, and now all five tom tracks fit perfectly in the track view.
Note the two rows of alternating Green-and-Red at the bottom of the Navigator…perhaps you recognize those from somewhere? (Hint: Scroll up… See how easy it can be to zoom to those parts?)
#3 – “Set Snap-To = Current”
I consider this feature something of a “Mix Recall Lite” — it’s ideal when you want to test quick changes on single channels. This happens quite frequently during mixes, and may not necessarily warrant an entire dedicated Mix Scene.
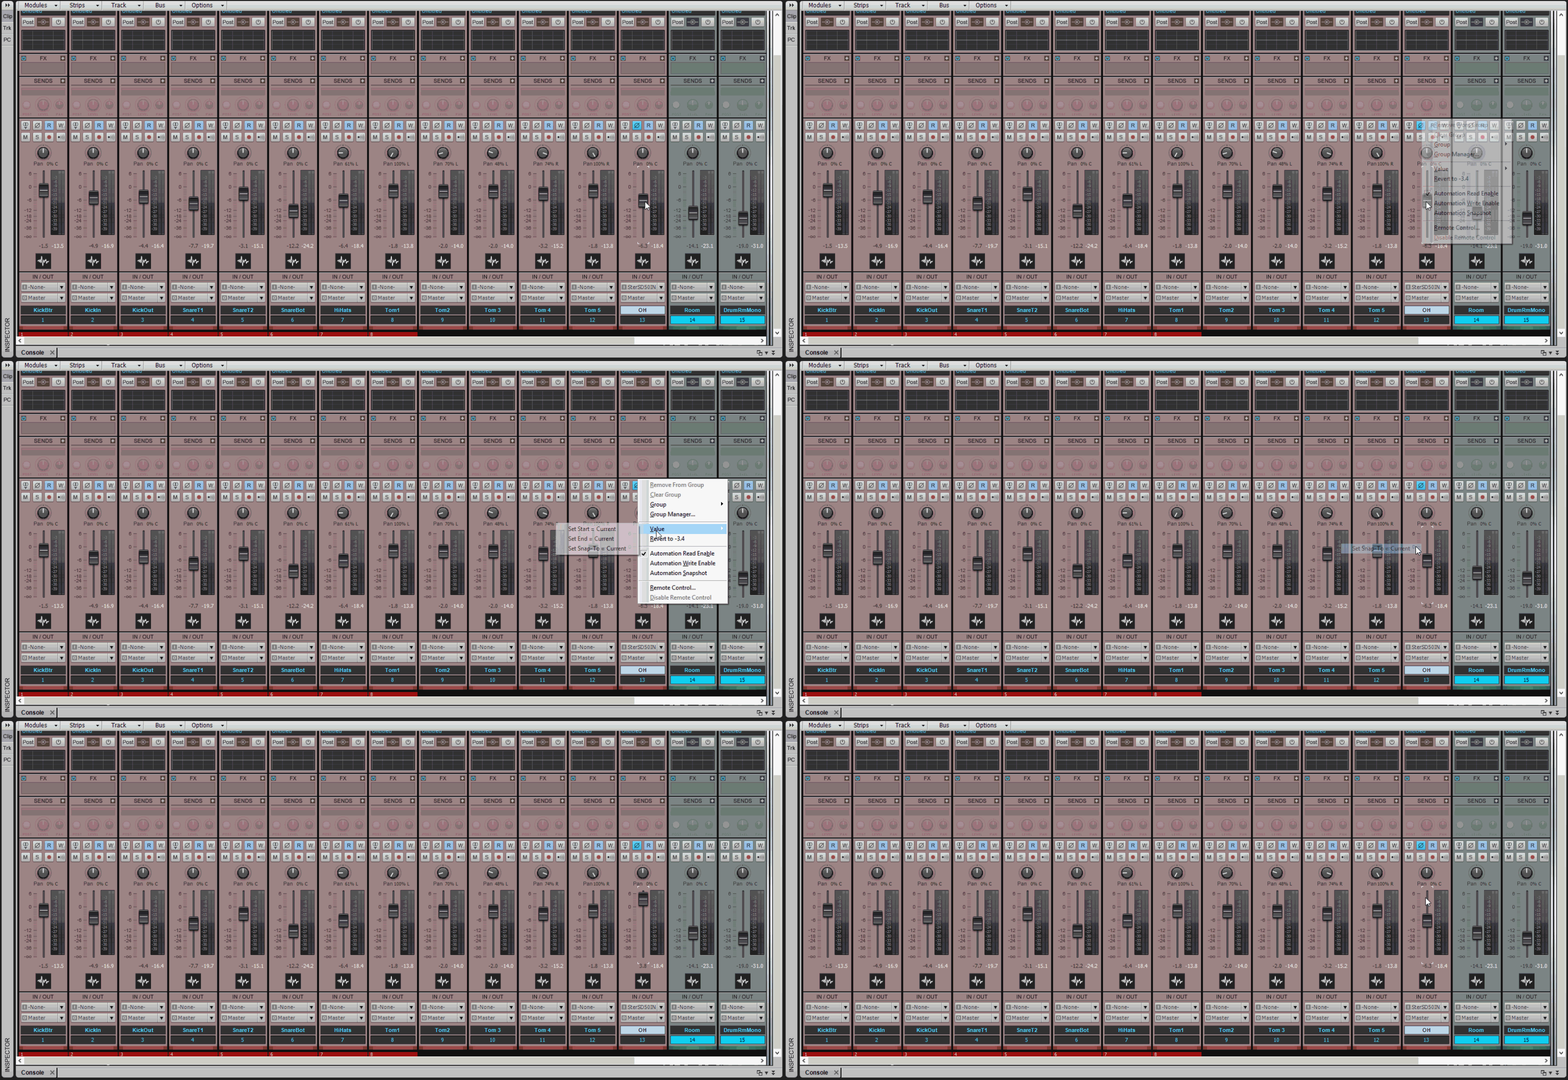
In the example below, you’re making a fader move to see if you like the drum mix more with a louder Overhead track. If you decide you don’t like it, you’ll want it to quickly return to its original level of -6.3 dB, so…
- While the fader is at -6.3 dB, right-click it. Then…
- Choose Value > Set Snap-To = Current.
- Now you can move the fader anywhere you like. When you double-click the fader again, instead of returning to -0- it will now return to its new Snap-To position.
But wait… there’s more! You can use this on more than just faders: pan settings, gain settings, and tons of parameters in your ProChannel modules too.
#2 – “Controls” Section of the FX Chain
I hereby challenge you to tell me this isn’t awesome and doesn’t speed up your workflow.
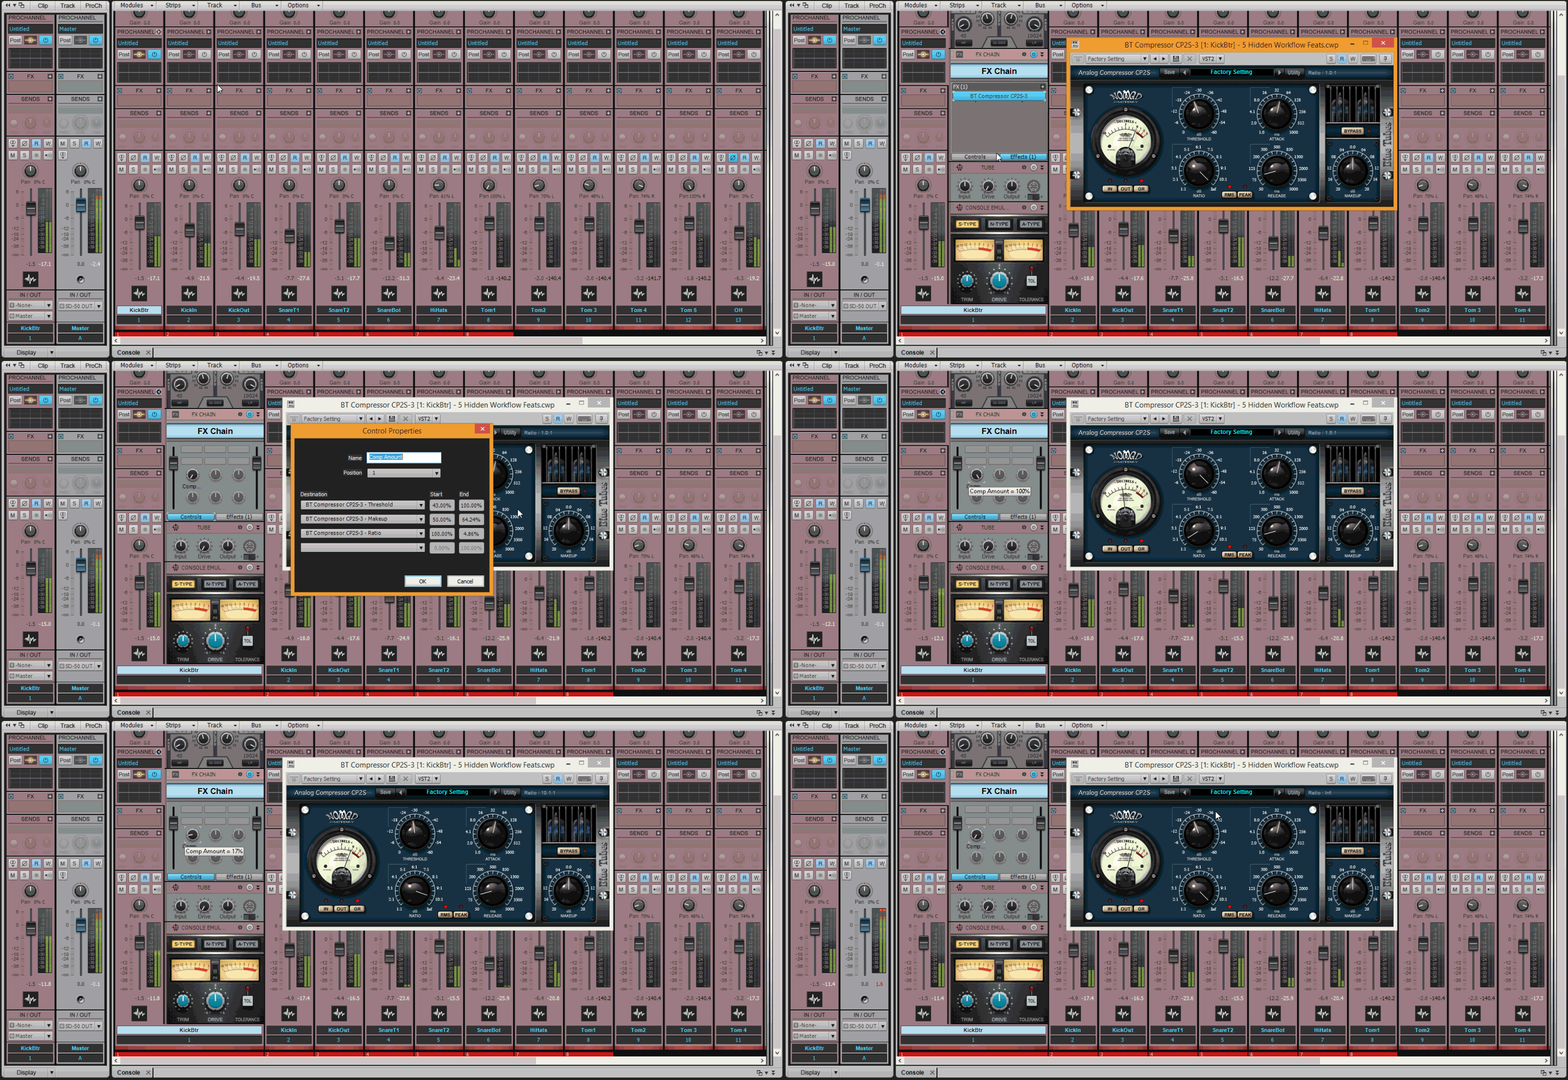
You can use the FX Chain ProChannel Module to control multiple parameters of any VST Plugin inserted in that FX Chain.
In the example below, I’m using the Blue Tubes BT CP2S-3 Analog Compressor to compress a kick drum. I’ve configured the first rotary in the Controls section of the FX Chain to adjust the compressor’s Threshold and Makeup Gain proportionally, and the Ratio inversely. This means, the harder the kick drum hits the compressor, the lower the compression ratio will be. As if that’s not amazing enough already, the real magic is that this creates automatic makeup gain since the output level will remain the same regardless of these settings. This lets you focus on the tone produced and dial it in quickly.
I usually place my FX Chains in the ProChannel, but this works identically when you have an FX Chain in your FX Rack. You can enter the Start and End values manually in the Edit Control window, or define your settings in the Plug-in window and use the Range menu to dictate these with far less guesswork. This functionality can also control one parameter of one plug-in, or many parameters of as many plug-ins as are inserted in the FX Chain module, so your possibilities here are pretty extensive.
#1 – The new “Custom” Control Bar module
Okay, I can’t stress enough how much I love and use this feature – it’s a DAW Swiss Army Knife with interchangeable parts! This was implemented with the Control Bar enhancements in the original release of SONAR Artist/Professional/Platinum, and it might be my absolute favorite feature to date.
Basically, you right-click a button in the Control Bar’s Custom module, and then you can assign that button to perform just about any SONAR Menu Item or Command.
Because the new Control Bar allows resizeable modules, you can have 3, 6, or 9 different commands stored in this one convenient container.
Here are the options I’ve chosen:
|
File | New |
Process | Quantize |
Window | Full Screen |
|
File | Save As… |
File | Export | Audio (Bounce) |
Fit Project (resize to see all) |
|
Insert | Multiple Tracks |
Bounce to Track(s) |
Bounce to Clip(s) |
Again, you can set these to pretty much whatever you want. That’s what makes this so great – you can customize it to fit your workflow.
Honorable Mention: The F Key
I know, I know… I said “5 things,” but I couldn’t write this article without including the beloved F key. I use this more than anything else, to the point where it has now become second-nature. The F key, when focused on Track View or Console View, resizes your tracks so that they better fit the window.
Track View:
Here’s a “Before” picture of a 16-track project. Notice the empty space beneath the 16th track that could be put to much better use: :
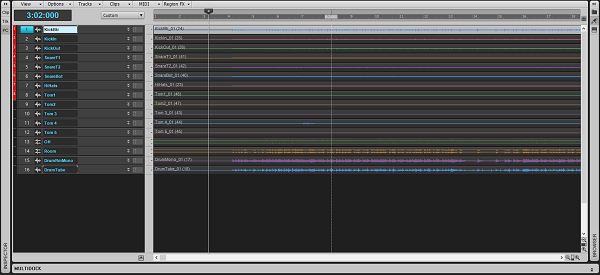
Now, when I press the F key, the 16 tracks conform to the available vertical height:
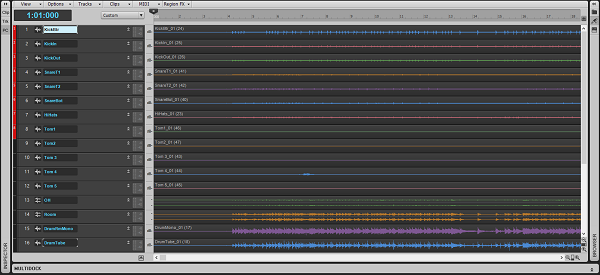
As an added bonus, you can also press Shift + F and fit the tracks vertically and horizontally. Now I can see all the audio in these tracks from the beginning of the project all the way to the end:

Console View:
This also works in Console view. Take the example below: I was doing some messing around in the Console and I ended up with some not-so-pretty overlap…
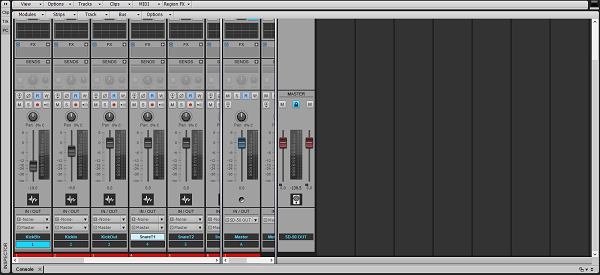
But then I pressed the F key and…
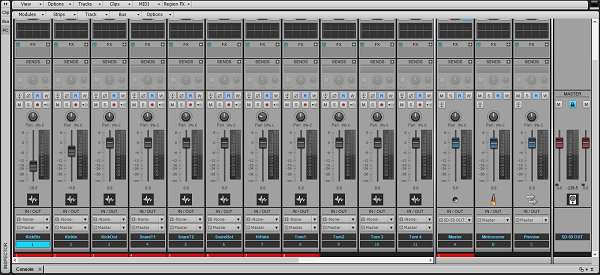
Track/Console View:
And what happens when you have both views open?
Before: I was doing some editing and had to resize a few tracks…
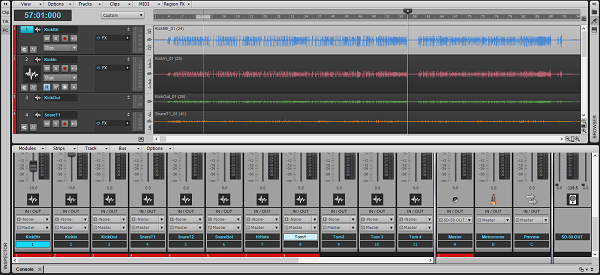
Now I want to get a cleaner view of them again. Press the F key, and…

So there you have it! My 5 (plus 1) favorite workflow-enhancing features of SONAR. Dig through the manual, play around with menu commands and keyboard shortcuts, try things just to see what will happen, and who knows, maybe you could introduce me to some hidden shortcuts!


