With the advent of digital audio, some feel a certain quality associated with the analog signal path has been lost. While that may have been true at one point, analog emulations have come a long way since first introduced. Let’s find out how to add that “analog sound” using some of SONAR’s plugins. (Note: Many of the following examples use features are exclusive to SONAR Platinum, so if you don’t already have this version, you can try a free demo by clicking here.)
#5 – ProChannel Tape Emulation
Tape does some pretty magical things to audio, so SONAR Platinum includes tape emulation as a ProChannel module. Best of all, you can use it as much as you like without having to clean the heads!
Here’s how tape emulation enhances the sound:
- Emulates the “head bump” of analog tape to enrich the low end, adding subtle warmth
- Smooths response by slightly rolling off lowest lows and highest highs
- Increases sustain by smoothing peaks
- Saturates the signal in a non-linear, analog manner
- Optionally introduces high-frequency hiss
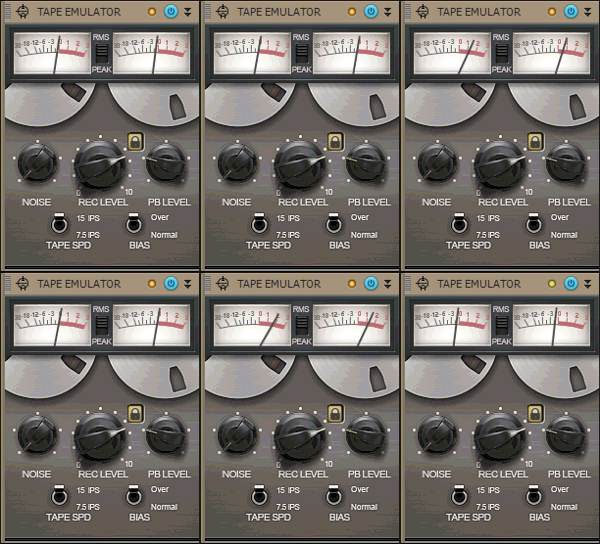
For a basic application, insert the Tape Emulator in the Master Bus ProChannel. You’ll immediately hear a more cohesive mix. Increasing the REC LEVEL increases the overall saturation. The REC LEVEL knob, TAPE SPD switch, and BIAS switch all interact in unique ways, so try out different combinations to hear how they affect each other.
After hearing how the Tape Emulator affects your sound, try applying it to individual tracks (your drums will sound particularly fabulous). This will be a more subtle effect, adding a sense of depth to the overall mix.
#4 – Tube Saturation/Saturation Knob
 One of the greatest contributors to the “analog sound” is harmonic distortion, sometimes referred to as “color.” Every piece of analog gear introduces some level of distortion that often adds a desirable quality. You can use these two saturation modules in subtle (or not-so-subtle) ways to bring some analog warmth, as well as “hard limiting,” to your mixes.
The Tube Saturation module has two modes. Type I is for basic overall application of Tube Saturation, while Type II keeps most of your high end unprocessed and intact.
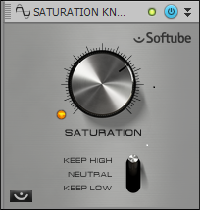
The Saturation Knob has a different “color” than Tube Saturation, and has three saturation characters: Keep High, Neutral, or Keep Low.
Of course, you could always try both in series – or parallel if you’re feeling particularly adventurous – for even more variations.
#3 – BlueTubes FX
The BlueTubes Bundle has loads of great effects, but three stand out as fantastic tools for adding analog character.
The Distortion Box:
 The Analog ValveDriver ADR-2S offers 8 different types of distortion, each with their own color. There’s also a filter circuit so that only the frequencies within the filters are distorted, and a noise gate so the effect is applied only to sounds that exceed a certain level. My favorite way to apply this effect is on a bus so that you can blend the distortion with the unaffected sound, but that’s just one example of many.
The Vintage Hardware Emulations
Nothing screams analog like vintage hardware. The FA-770 and EQP-2B are virtual models of a highly sought after vintage compressor and vintage equalizer, respectively. The responses of these plugins are quite faithful to the original hardware, and they even have a few extensions to the original functionality.
The FA-770 has all the features of its hardware predecessor: Continuously variable Input Gain and Threshold, a Fixed Ratio, and selectable Attack/Release settings. However, the plugin also introduces a Mode Selector, which offers twice as many Attack/Release, or “Time Constant” settings, compared to the original.
The EQP-2B also has all the same controls as its hardware ancestor: Low Frequency Selector, Boost and Cut; High Frequency Selector, Boost, Cut, and Q. But Nomad Factory went above and beyond here as well by making the Low- and High-Frequency selectors continuously variable, rather than fixed selections. They’ve also extended the low frequency range to 20-140Hz, vs 20-100Hz on the original hardware. To put a cherry on top, they’ve also added a bypassable limiter circuit so you don’t overload the output.
#2 – ProChannel Console Emulation
 Apply this to one track and you may not notice an immediate difference. However, applying to all your tracks and busses instantly turns SONAR into an analog console, complete with all the electronic variations and unique characteristics.
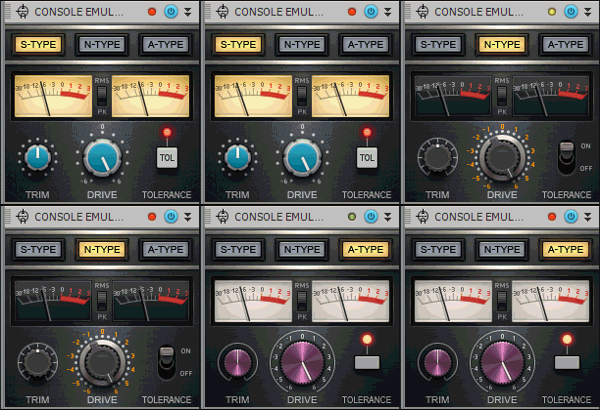
While the effect is often subtle with the Console Emulation, we know from a previous article that each console type applies a specific saturation curve to the processed signal. Actually it gets far more complicated than this (click here for more info), so let’s get to what matters and check out some examples. Note: please monitor these examples on a high-quality playback system to hear the effects of the different emulations.
Example 1 is a sample of a mixed drum track with no Console Emulation applied.
Example 2 is the same track with S-Type Console Emulation applied to all tracks and busses. Note the pronounced midrange presence, slightly wider stereo image, and gentler cymbal attacks.
Example 3 is the same track with N-Type Console Emulation applied to all tracks and busses. Note the beefy low end, even wider stereo image, and rich upper-midrange.
Example 4 is the same track with A-Type Console Emulation applied to all tracks and busses. Note the extended high end, tight low end, and cohesion of the overall balance.
#1 – Your Ears
 I had a professor in college who would always say, “It’s the ears, not the gears.” Of course you need certain gear to accomplish certain tasks, but his point is that only your ears can be the ultimate determining factor of whether or not you achieved a sonic goal.
A simple example: If you want something panned somewhere between left and center, don’t just set the panpot at 50% left and call it a day. Instead, close your eyes and move the pan knob in SONAR until it sounds appropriate.
Think about it. If you mix a song on an analog console, there’s probably a detent in the pan pot for Hard Left, Hard Right, and Center. Between that, you’re forced to rely on your ears to tell you when the sound is panned to the best in-between place in the stereo field–there’s no marking for exactly 50% left. You may find that a mix pops more when you pan one part to 37% left instead, regardless of what your eyes think. So use your ears. After all, when people listen to your mixes, they’ll be using their ears.
| You might also like… | |
|---|---|
 |
 |
| PARALLEL COMPRESSION: NOW EASIER THAN EVER | USING CAKEWALK DRUM REPLACER: THE “RIGHT” WAY AND THE “OTHER” WAY |


2 Replies to “5 Tools To Get "That Analog Sound" From SONAR”
Comments are closed.