6 Tips for Songwriters in SONAR

by Dan Gonzalez

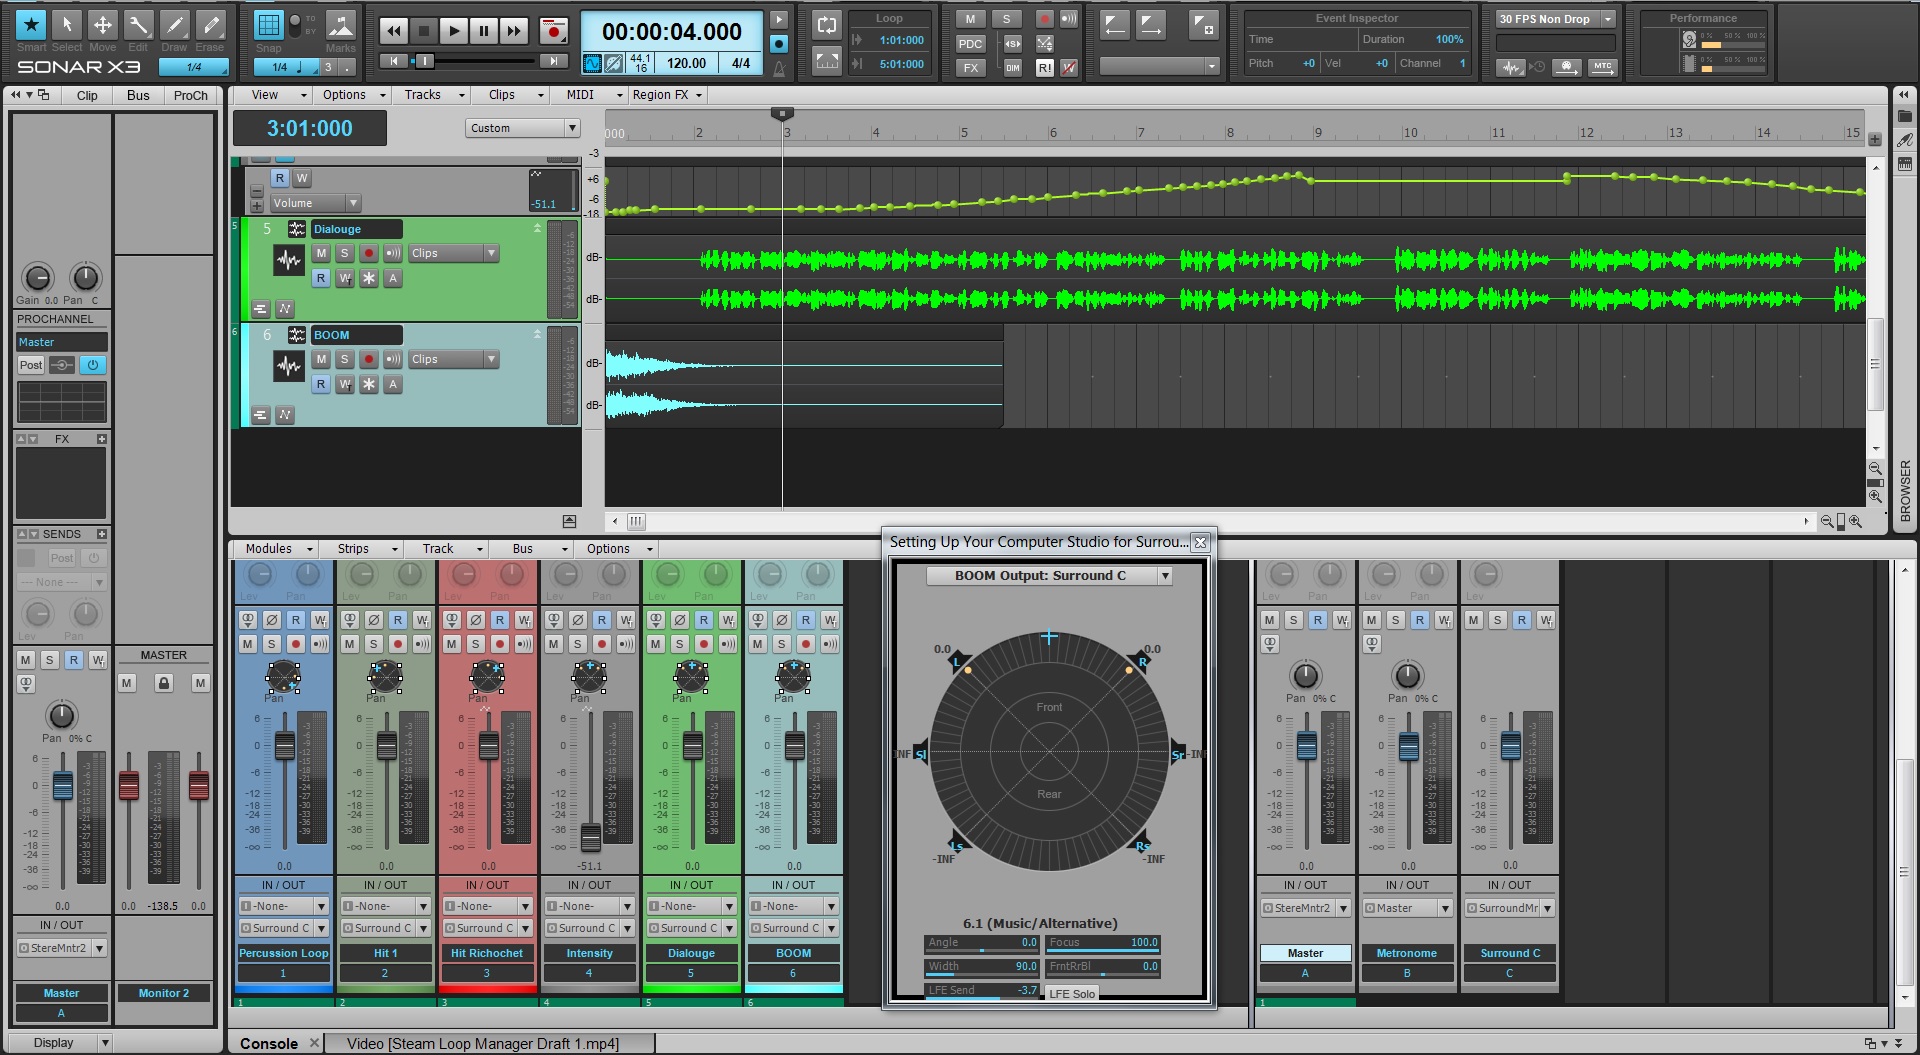
SONAR helps songwriters improve their creativity and workflow by offering tons of features that are engineered specifically for them. In this video we’ve outlined some of our favorite tools to that save you time while you’re developing your next musical idea.

 
Try SONAR X3 free for 30 Days.

Understanding Virtual Instrument Routing in SONAR

by Dan Gonzalez

Are you new to SONAR? Well then this article is for you!

SONAR acts a bit differently than some of it’s competitors – especially when it comes to inserting, routing, and using virtual instruments. Let’s take a look at the way these work inside of SONAR:

1. You can insert a virtual instrument in a few different places within SONAR

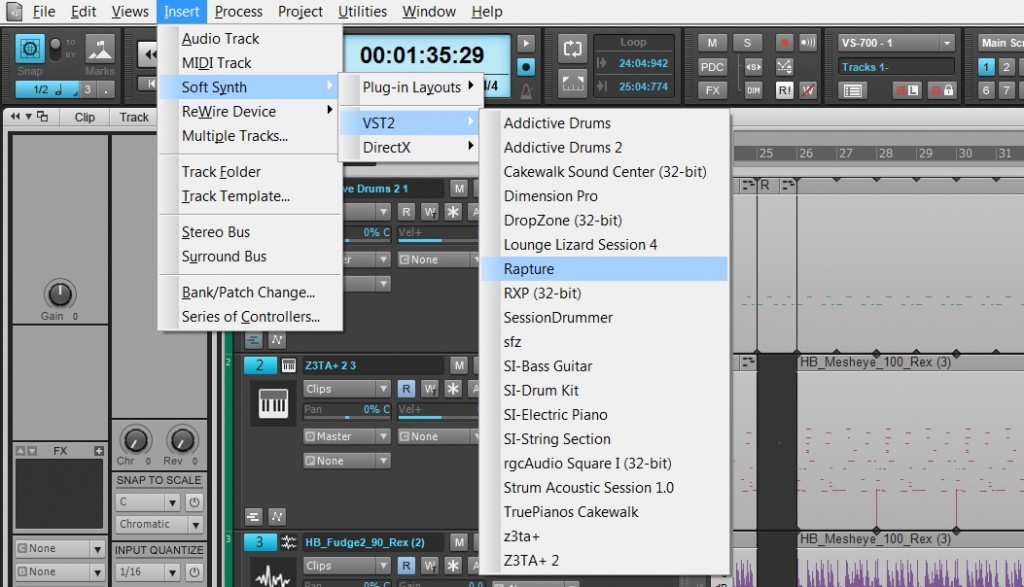
The first way is by selecting from the main menu along the top of SONAR: Insert > Soft Synth > (type of plugin) > (plugin)

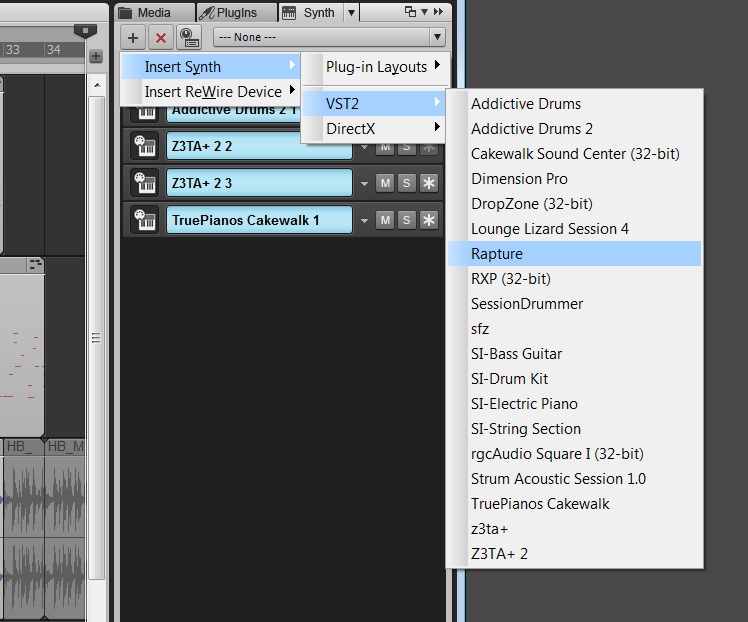
Another useful way is to use the Synth Rack and click on the “+” button. This will expose a similar list.

Lastly, one of the quickest and easiest ways Continue reading “Understanding Virtual Instrument Routing in SONAR”

Virtual Instruments: 5 Tips For The Z3TA+ Junkie

Here are some of our favorite Z3TA+ tips and videos from our archive:

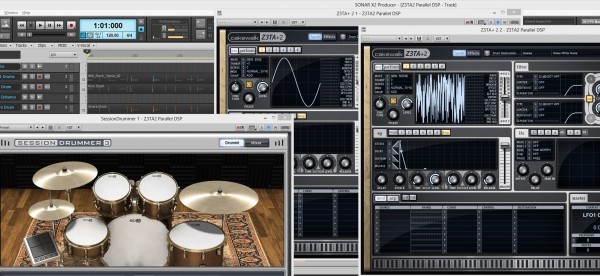
1. EDM Production – Enhance Your Drums with Z3TA+ 2

  • Insert two instances of Z3TA+ 2.
  • Copy your drum sequence to both Z3TA+ 2 tracks.
  • Isolate the Kick on one track and the Snare on the other.
  • Setup the first Z3TA+ 2 to generate a Sine Wave for the Kick.
  • Setup the second Z3TA+ 2 to generate White Noise for the Snare.
  • Adjust the Amplifier Envelope to match the duration of each hit.
  • Within Z3TA+ 2 add Reverb, Compression, and EQ.
  • Mix in under your existing Drum Loop.

2. How to Customize Z3tA+ 2’s Stock Arpeggios

Z3TA+ 2 comes packed with a massive pool of MIDI programs that power it’s internal Arpeggiator, but why stick to the stock programs when you can make your own?

Here’s how:

  • Open Z3TA+2 and activate the Arpeggiator Section
  • Right-Click on the sequence in the arpeggiator and make sure the following are checked
  • Auto Disable Pattern When Dragged to Host
  • Auto Fit Patterns to One Measure When Loaded
  • Load one of the Arpeggios from the Pattern menu
  • Drag and Drop the Arpeggios right into SONAR X2
  • Edit the MIDI Clip to your liking
  • Go to File > Save As
  • Select MIDI 0 in “Save as type”
  • Go to C:\Cakewalk Content\Z3TA+ 2\MIDI Arpeggios and Save it
  • Load it into Z3TA+2′s Arpeggiator by going to Pattern > Load MIDI File…

3. How to create a bass synth with Z3tA+ 2

Who doesn’t like bass? Especially synth bass. Z3TA+ 2 is the answer to all of your sound design needs especially when you are looking to improve your production in the low end. I’ve put together a short tutorial on how to make a simple bass synth inside of Z3TA+2. Once you understand how everything works together you’ll be able to really start to make this plugin work for you.

Picking the right Oscillators

Within Z3TA+2 the first section you need to start working with is the OSC section. First I’ve selected two different square waves for OSC 1 and 2. They were Vintage Square 1 and Vintage Square 2. When creating a bass synth you need to make sure that your patch will not break up in the low end so be sure not to drop the octaves on the individual oscillators too low. I typically set mine to -2 at the most. Once you get to a certain range the instrument will sound weak and lose it’s driving Bass Synth sound

[READ THE REST OF THE TIP HERE]

4. [VIDEO] Digital Sound Factory Z3TA+  Sound Design

5. [VIDEO] Mixing and Mastering a song using only the Z3TA+ effects engine in SONAR

Vocal Month: Picking the right Vocal Microphone Part I

Having a go-to microphone is always a great policy to have, but understanding the way specific microphones sound and perform is an even greater depth of knowledge every engineer or aspiring engineer should understand. To a trained ear – different microphones sound drastically different in character, response, and tone. The best way to start understanding these differences is easier thank you think. Start comparing microphones – and get nerdy about it!

Here’s our own Cakewalk microphone shootout displaying 5 different microphones on Ingrid Gerdes.

Continue reading “Vocal Month: Picking the right Vocal Microphone Part I”

Beatboxing – Watch What Happens to the Frequency Analyzer in SONAR X3

Within the Vocal world  there are all different styles of singing and beatboxing is one of the more complex and percussive styles that the human voice can produce. Typically there is a single frequency range that vocalists stay within but beatboxers span the entire frequency range to achieve the sounds that come from their mouth. Check out this video with a local Boston street performer as he shows us how it’s done:

Wanna try the QuadCurve EQ? Check out SONAR X3 30 Day Trial

5 Easy Ways to Improve Vocal Recordings in Your Home Studio

Building your home studio can be a tricky task – especially when you feel that the quality of the space that you record in barely contends with what the pro’s would use. Fear not, there are solutions for making your home studio (or to some: bedroom) a comfortable place to produce high-quality recordings. Here are 5 easy ways to improve your home studio’s vocal recordings.

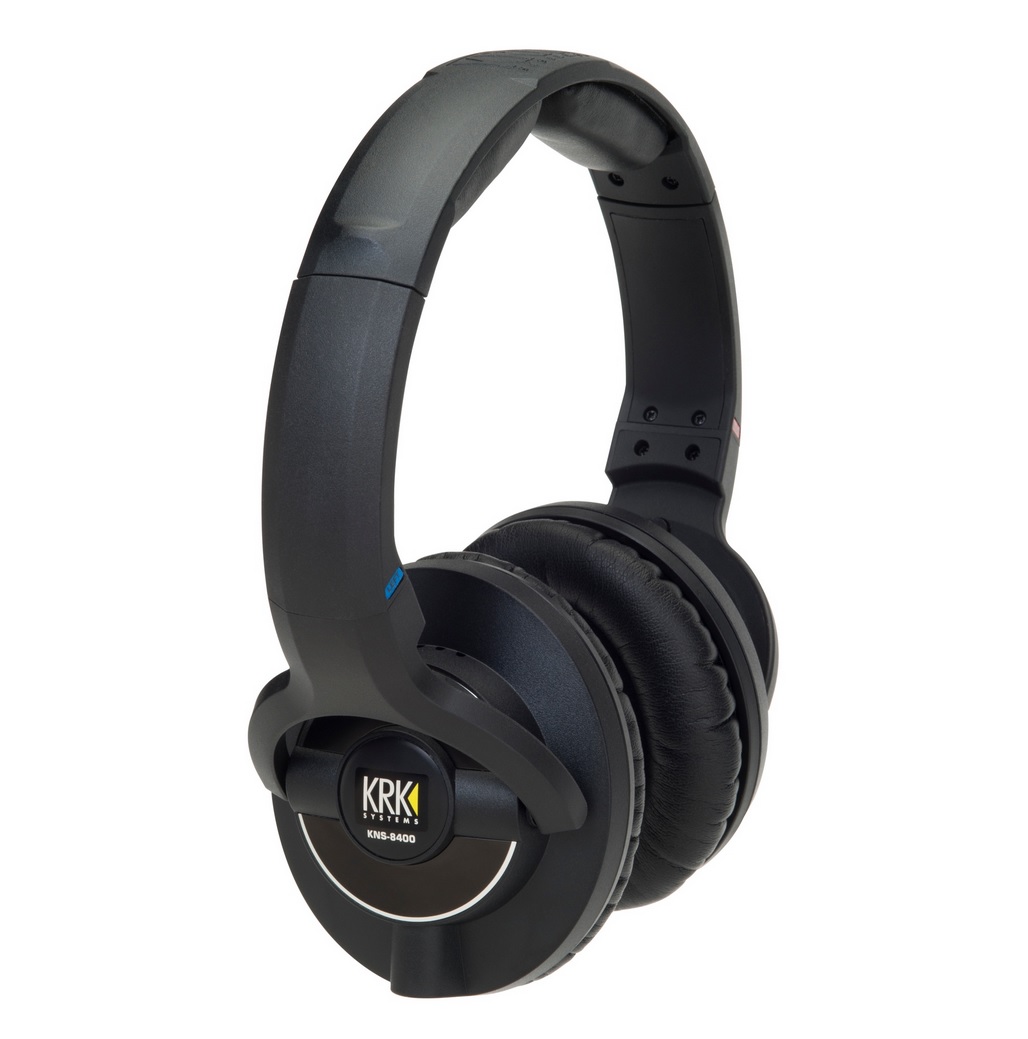
1. Studio Headphones

This goes without saying. Make sure you can supply your client(s) with a decent pair of headphones so that they can properly monitor the mix and record over backing tracks. Get at least 2 pairs in case the band’s producer or guitarist wants to follow along to the recording. You don’t need a pair of $400 headphones to get the client what they need to record.

2. Talk-back Functionality

Talk-back is a term used to describe a dedicated microphone that is activated when an engineer wants to speak to a performer in another room between takes. The talk-back microphone is typically routed directly into the headphone mix so that you can easily activate it and deactivate it without any real patching involved. Having this type of functionality in your home studio can improve the flow of the recording session and make the communication between you and the performer a seamless task.

3. Pop Filter/Vocal Shield


In the audio world there are different terms for just about everything. An important term to know is “plosive”. This is the sound a singer makes when they pronounce the letter “P”. This sound causes microphones to pop due to a high stream of controlled air that leaves the singer’s mouth. These pops are typically full of a low-end and can cause irregularities in the fidelity of the vocal track. Pop Filters and Vocal Shields can be used to break up that air and protect the quality of the signal so that your vocal is clean and even throughout.

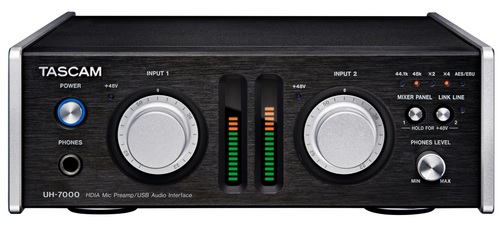
4. Pre-amp

Nice pre-amps can come at a high cost, but if you’re only recording vocals at your home-studio then it’s worth the investment. Pro-sumer all-in-one devices are built to give the buyer as much bang for their buck as possible. This typically means cramming as many inputs and outputs into a signal 1U rack and charging barely anything for it. This is great until you realize that the Pre-amps are noisy and barely have any character. Do yourself a favor and try out a nice pre-amp to understand the difference in quality. If you can demo one out, then do it! Or better yet, nicely as a friend to borrow their nice gear. It will go a long way in the quality of your recordings.

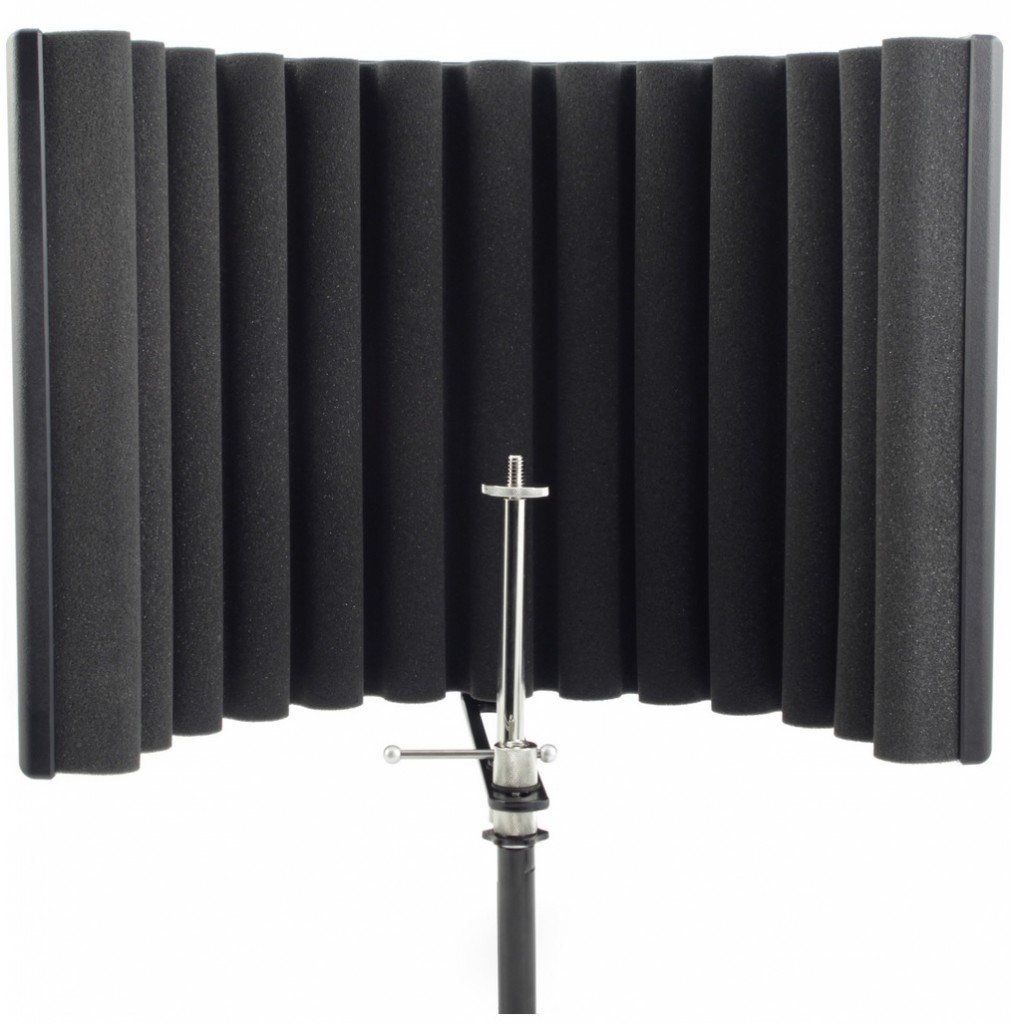
5. Portable Vocal Booth

The room in which you record in will be as much a part of the recording as the singers voice. This can work in your favor and can also work against you. If you’re recording in a room surrounded by untreated drywall then you may not receive the quality sound you expected. Untreated rooms reflect sound back and fourth and even back into the microphone. These sound artifacts can be detrimental to the sound and cause the vocal recording degrade in quality. A great way to help alleviate this from happening is to get yourself a portable vocal booth that will help isolate the singers voice from reflecting off neighboring walls and back into the microphone. These are inexpensive and can go a long way.


Mixing Video Series: How to use Compression with the CA2A in SONAR X3

Mixing with Compression is an essential part to shaping and creating a great sounding track. In this video series I take you through a track-by-track video that shows you how to use compression on various types of instruments in SONAR X3 with the CA-2A T-Type Leveling Amplifier. You can use compression to control levels, enhance dynamics, and much more. Subscribe to our YouTube Channel and check out this series today.


Try SONAR X3 Producer
Try the CA-2A T-Type Leveling Amplifier

Mixing with the Console Emulator

Mixing with the Console Emulator

Snake oil, or useful processor? Read on, and find out

by Craig Anderton

Console Emulator plug-ins are controversial. First, a lot of people are convinced they don’t really make a difference. Second, there’s the philosophical question of whether emulating a console is a good thing—after all, you’re emulating imperfections. And third, there’s the question of which console you want to emulate.

However, before you can judge whether a console emulator is going to be useful, you need to know how to use it correctly…so let’s investigate.

About Console Emulation

There are legitimate reasons why analog consoles can sound different compared to mixing “in the box,” and also, legitimate reasons why some might consider these differences desirable. Technically speaking, there are two main differences compared to digital summing.

First, analog circuitry has inherent non-linearities (or in less polite terms, distortion). As a signal goes through multiple analog stages, these non-linearities add up although the end result can still be extremely low-level. Because there are differences between the left and right channels, this tends to “widen” the image and create the appearance of a wider soundstage. If the distortion is relatively high, as can be the case with older consoles, distortion generates harmonics in the audio spectrum’s upper range. With increased highs, and given that highs are more directional, this can widen the sound even further.

Second, consoles often use audio transformers and it’s not an overstatement to say that transformers are some of the most complex signal processors ever introduced into a signal chain. What’s more, the transformer’s characteristics are dependent on the circuitry that surrounds it—such as the source impedance, capacitive loading, resistive loading, and the like. For example, the external circuitry may damp some of the “ringing” that occurs when passing square waves through audio transformers. Transformers also generate distortion (primarily odd-order) that’s highest at lower frequencies. While the effect of all of these variables is subtle, many people like the sonic characteristics transformers can impart to a signal. Overall, good transformer implementations provide a somewhat “fatter” low end, and can add “warmth.”

Inserting Cakewalk’s Console Emulator

As with any processor, there are no rules if you want to get creative—so take the following as personal preferences, not as “rules” that must be followed.

Prior to mixing, I’d recommend inserting a Console Emulator Channel plug-in (CEC for short) last in the ProChannel for every track, and a Console Emulator Bus plug-in (CEB for short) in the master bus. The easiest way to do this is with the Quick Grouping command: in the Console view, open a ProChannel in a non-selected track. Then while holding the Ctrl key, right-click within the ProChannel, select Insert Module, and choose Console Emulator Channel; this places the CEC last in every audio track. You’ll need to insert the CEB in the master bus manually, as Quick Group works only across similar track types.

To ensure that the CEC is last in the chain, place the ProChannel post-FX bin (right-click in a blank space or effect header in the ProChannel, then select Post FX Bin—see Fig. 1).
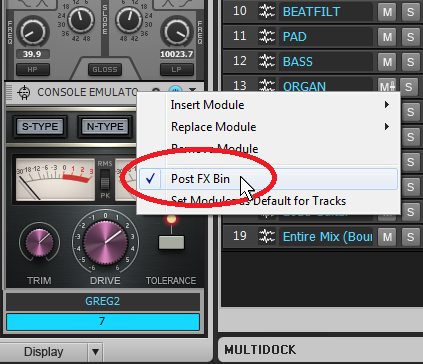
Fig. 1: Placing the ProChannel post-FX bin, and inserting the Console Emulator plug-in as the last effect in the ProChannel, guarantees that all effects in the track will go through the Console Emulator.

Continue reading “Mixing with the Console Emulator”

Mixing Tips: Ten Nasty Mixing Mistakes

Not happy with your mixes? One of these reasons might be why

By Craig Anderton

Mixing is tough enough as is, but avoiding the following mistakes just might help the process go a little more smoothly—and give you audibly better results.

1. Mixing in a lousy monitoring environment

If you mix in a room with horrible acoustics or use inaccurate speakers that do tricks like hype the bass, your mix is doomed. You may think it sounds fine, and it might, because you’re compensating for the monitoring deficiencies. But as soon as you get the mix outside of your environment, it will likely sound dreadful.

To solve this problem, strive to use speakers that emphasize accuracy. They may not flatter your music that much, but that’s the point: If your mix sounds great over accurate speakers, it will at least sound decent over other speakers.

Proper acoustic treatment is ideal, but may not be possible. IK Multimedia’s ARC can help with fixing your acoustics (normally I see little value in “room tuning,” but IK’s system is quite effective). Also consider buying a really good set of circumaural headphones, and use them as a reality check compared to your speakers. Just remember that headphones give a particular “flavor” of reality that accentuates ambience and stereo separation; their main use in this case is evaluating the amount of bass because room acoustics aren’t a factor. However if you use something like Beatz, that won’t help—you want headphones designed for monitoring, not consumers.

2. Too much reverb or too little ambience

Some people seem to think that adding lots of reverb will compensate for a problematic part. Actually, all it does is give you a problematic part with too much reverb. Mitigating factor: If you’re doing a 60s revival/tribute recording, then make sure you do use too much reverb if you want to be authentic.

On the other hand, an overly dry sound doesn’t do you any favors either. We usually hear music in an acoustic environment of some kind, so adding in audio like room mics on drums (Fig. 1) can create a much more realistic and satisfying mix.

Fig. 1: Take advantage of the room mic option in Addictive Drums to give a more “real” feel.

Note that with recorded drums that already have some ambience, you can often make the existing ambience more prominent by putting the drums through the Concrete Limiter. By reducing the peaks Continue reading “Mixing Tips: Ten Nasty Mixing Mistakes”