How Eliud “Liu” Ortiz used SONAR X3 for his recent Jennifer Hudson mix (RCA Records)

These days, some professional mixing and recording engineers are doing work for major labels completely missed the analogue age. Others are still mixing on consoles.  We have come to a point where there really is no “right” or “wrong” in terms of mixing.  Some tracks are mixed so perfectly that they are not signed off on by the label because they are lacking something “distinct” or “of a raw nature.”  Other times, indie songs are mixed by a band itself and find their way to the top, where at that point the label just has someone remix the single for mainstream radio. (For example compare the normal and radio mixes of Gotye “Somebody That I Used to Know.)

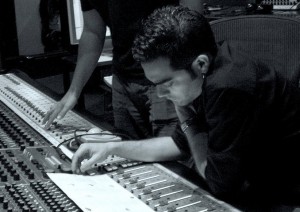
NYC based mixing and recording engineer Liu Ortiz has seen it from all sides of the music and business spectrum.  Starting out at such a young age of 16 as an engineer, his career has placed him with a perfect balance (at still a young age) with a ton of knowledge in both the digital and analogue worlds.  He has worked on tracks with and for artists such as Mary J. Blige, Pink, Luther Vandross, Christina Aguilera, and even RZA to name a few, and was quite a successful engineer at the Hit Factory in New York City.

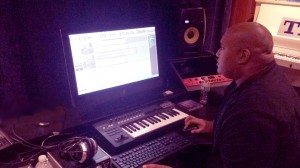
Coming from the world of Cubase and Pro Tools, and after hearing all the buzz about the full feature-set of SONAR X3, Liu decided to give SONAR X3 a whirl on a new track by Jennifer Hudson feat. R Kelley for RCA Records.  After mixing the track, he found himself gravitating towards the workflow so he continued the journey onto another project called The Summer Set; a very well established band from Scottsdale Arizona who are quickly making waves internationally.  I recently got a chance to visit with Liu at the new Cakewalk Room which is ironically enough in the old Hit Factory where he often worked.  Liu showed me some of his new mixes, showed me where his picture and plaques were on the wall, and even gave me a few interesting stories about some of the “good ole days” featuring Missy Elliot, Queen Latifah and Sean Puffy Combs [don’t worry Liu – I’ll never tell 😉

Cakewalk Artist Relations:           Since you grew up on analogue consoles, what are there big sonic differences you hear now that you mix “in the box”?

 Liu Ortiz:           Well in the beginning way back when DAWs first started, I noticed that no matter what I did as I progressed with more plugins and inserts of each channel, the mix coming out the box would progressively get thinner; especially with vocals. I couldn’t really do much to fix that problem until not too long ago where technology has progressed with DAWs and computers in general.  Now, I can pretty much faithfully emulate hardware with EQ’s and compressors of pretty much all the consoles I have worked on in the past.
Neve and SSL’s had such distinctive qualities about them similar in comparison to that of Strats and Les Pauls. Since I worked on both extensively, I remember all the little nuances that each series had. So when I am mixing I just try my best to EQ with those particular traits in mind since they were my personal favorites. Pretty much all DAWs now are inherently very neutral, so I can dial in whatever tone I want and don’t have to worry about the vocals or guitars becoming shrill. I really appreciate technology now and just concentrate on crafting the best mix possible.  I must add that it is pretty amazing to me that SONAR X3 has a Console Emulator built into every bus and every track – this blew me away Continue reading “How Eliud “Liu” Ortiz used SONAR X3 for his recent Jennifer Hudson mix (RCA Records)”

HOW UPGRADING TO SONAR X3 GAVE THESE PRO ARTISTS AN EDGE

Luigie Gonzalez
Location: Los Angeles, CA
Grammy nominated Producer, Songwriter, Mixer, Multi-Instrumentalist

“When I walk into sessions with my SONAR machine, I hear ‘what is THAT’ a lot from other producers and artists.  And then like clockwork, I hear a lot of ‘whoah’ and ‘wow’ when they see what I can do beyond their limitations.  I’ll never forget Jimmy Jam being blown away once in a studio when I started getting my sounds going in SONAR – that was a pretty cool feeling because he could see and hear what made my **** sound different from other producers on the scene at that time.”  

Since upgrading to SONAR X3, my favorite new feature is the Nomad plugin suite.

The Nomad Bundle that comes with X3  has been a go-to for me when boosting mid and high frequencies.   The mids are awesome and super-musical!  I also usually use them for HiHats to boost 8KHz – 16KHz without sounding to square-digital or harsh.   It just has a nice sizzling tone that sounds so different than any other plugin in my arsenal of VSTs.  When I mix I am very observant of the “stereo image,” and Nomad’s “Imager” is the trick to help make room for things.  Also, I use the Tempo Delay often because of its warmth and versatility.   I also, love the Tempo Delay’s parameter controllers – having 3 independent delay configurations is great to achieve the perfect delay tone in my mixes.  I can really get unique sounds with the delays and shape them to my heart’s content.

On the other hand, I cannot live without the Console Emulator (I believe this was new to X2 but it just never gets old)…  It just opens my mixes in such organic ways that have I become addicted to it!  I use the trident (A-type) mode for kicks, bass and everything with low end character because it adds great sub harmonics.  The SSL (S-Type) I use for snares, kicks and everything in between to achieve that pocket /punchy sound which warms up the top end frequencies without dulling the sound.  The Neve (A-Type) for Vocals, synths, guitars and everything that needs to sound frontal or cut through mix.  It helps my “center” in the mixes along with some nice mid-frequency response.

I always add a bit of drive (Console Emulator) to my buses to emulate the console circuitry saturation because it works without distorting anything too much – just enough to add more random harmonics and make the whole mix sound even more organic and full.  I think the Console Emulator is one of the best features to SONAR in a long time, and I’m very happy Cakewalk implemented it as part of the ProChannel.

Track coloring is also something I was waiting for some time.   It helps me keep organized especially when mixing 100 plus tracks sessions which is usually the case for me.  It’s so smart that the track colors respond to the bus colors, this way I stay even more organized by visually understanding my large mixes.

I really dig the QuadCurve ProChannel EQ as well.   It’s super-transparent and colorless on certain modes which plays an important part when carving very precise frequencies.   It’s kind of like the FabFilter but the fact that it’s part of the ProChannel makes it easier and faster to use.  It’s also dead-precise while still sounding amazingly clean!

~Luigie Gonzalez

DJ Spooky
Location: New York City and The Poles
Producer, Music/Song/Sound Creator, Author, Visionary

When you are as diverse of an artist as DJ Spooky you need some serious music-creation tools.  Take Of Water and Ice for example.  This album is the result of DJ Spooky’s art residency at the Metropolitan Museum of Art in NYC. Of Water and Ice is a composition for string quartet and video that evolved out of his large-scale multimedia work Sinfonia Antarctica: an exploration of the composition of ice and water, and our relationship to the vanishing environment of the arctic poles. DJ Spooky created The Book of Ice based on his travels to the poles. All of the electronic sounds are generated by interpretations of either algorithms that mirror the geometry in ice crystals or the math of climate change data.

“The biggest asset to me upgrading to SONAR X3 was the speed Continue reading “HOW UPGRADING TO SONAR X3 GAVE THESE PRO ARTISTS AN EDGE”

How Adventure Club is using SONAR X3 to stay on the EDM charts and ahead of the pack

There is an interesting movement happening in the music industry.  We have all seen it, and most are very opinionated about it…  The EDM Revolution.  Love it, like it, hate it – regardless, it’s here and thriving.  I recently had the good fortune to spend a few very interesting days with SONAR X3 users Adventure Club; one in LA, and one in NYC, and I can honestly say that I think these guys have figured out [some sort of] a new model of the “music industry.”

Truthfully speaking, I really was unsure about what our interaction would be.  I understand the EDM scene from afar and surely respect it, but I wasn’t sure what actually goes into the work behind the scenes of an EDM artist.  SONAR is used by Composers, Songwriters, and Producers of all genres, but when Cakewalk found out that Adventure Club, a heavyweight EDM act was using SONAR 8.5, we were pretty intrigued.  I had heard of the duo strictly from their online presence and charting activity, but I had never focused in on any of their productions.  Their popularity alone on social media told me there was something different and unique about this artist, and my assumptions were correct.

If you are not familiar with Adventure Club [“AC”] they are a Canadian Elecronic Dance Music duo, composed of Christian Srigley and Leighton James, and based out of Montreal, Quebec.  The duo formed while attending high school in Montreal as a hardcore pop-punk band, but later decided to move onto the more electronic sound of Electronic Dance Music (EDM) after simply getting bored with the pop-punk sound.  The first song to put the duo on the map was their remix of the song “Daisy” by the American alternative-rock band Brand New, which was put on The Hype Machine, an MP3 blog aggregator website.  After this track resonated deeply with EDM fans around the world, the duo was off to a solid start with a solid online fan base and foundation.  What separates this group from other EDM acts is that they both are accomplished musicians with a great knack for music production in general.  This translates into very solid tracks which they produce on their own in SONAR X3 Continue reading “How Adventure Club is using SONAR X3 to stay on the EDM charts and ahead of the pack”

Craig’s Five Fave Studio Hardware Accessories

By Craig Anderton

Granted, it was hard to narrow it down to five. But these goodies have stood out over the past year as being essentials for my own studio, and they can contribute much to any studio makeover.

Uninterruptible Power Supply


I first became aware of the power of the UPS with ADATs. My ADATs used to do weird things, but stopped doing weird things after I bought a UPS. My friends with ADATs who didn’t have a UPS experienced weird things. Anecdotal evidence? Sure. But the first time a UPS keeps your project alive when some idiot drunk driver slams into a power pole and you lose your electricity, or you live where lightning is a frequent visitor, you’ll be glad you paid attention to this article and got a UPS. Just make sure you find one with sufficient power for your super-duper multi-core wonder box (and your monitor)—a lot of UPS devices in office supply stores are for little old ladies who use Pentium 4 computers only on Sundays to cruise the internet for recipes.

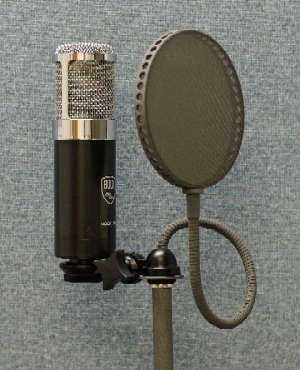
Pauly Superscreen Pop Filter

(Photo courtesy Las Vegas Pro Audio)

Yes, it’s expensive. Yes, it’s worth it. I do a lot of narration and close-mic my vocals Continue reading “Craig’s Five Fave Studio Hardware Accessories”

Virtual Instruments: 5 Tips For The Z3TA+ Junkie

Here are some of our favorite Z3TA+ tips and videos from our archive:

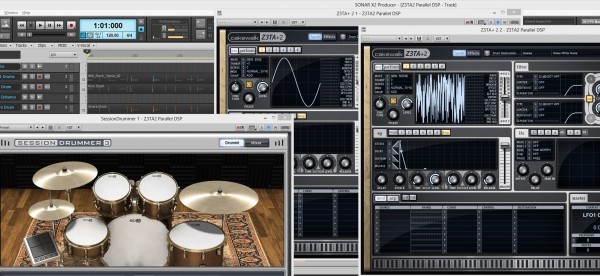
1. EDM Production – Enhance Your Drums with Z3TA+ 2

  • Insert two instances of Z3TA+ 2.
  • Copy your drum sequence to both Z3TA+ 2 tracks.
  • Isolate the Kick on one track and the Snare on the other.
  • Setup the first Z3TA+ 2 to generate a Sine Wave for the Kick.
  • Setup the second Z3TA+ 2 to generate White Noise for the Snare.
  • Adjust the Amplifier Envelope to match the duration of each hit.
  • Within Z3TA+ 2 add Reverb, Compression, and EQ.
  • Mix in under your existing Drum Loop.

2. How to Customize Z3tA+ 2’s Stock Arpeggios

Z3TA+ 2 comes packed with a massive pool of MIDI programs that power it’s internal Arpeggiator, but why stick to the stock programs when you can make your own?

Here’s how:

  • Open Z3TA+2 and activate the Arpeggiator Section
  • Right-Click on the sequence in the arpeggiator and make sure the following are checked
  • Auto Disable Pattern When Dragged to Host
  • Auto Fit Patterns to One Measure When Loaded
  • Load one of the Arpeggios from the Pattern menu
  • Drag and Drop the Arpeggios right into SONAR X2
  • Edit the MIDI Clip to your liking
  • Go to File > Save As
  • Select MIDI 0 in “Save as type”
  • Go to C:\Cakewalk Content\Z3TA+ 2\MIDI Arpeggios and Save it
  • Load it into Z3TA+2′s Arpeggiator by going to Pattern > Load MIDI File…

3. How to create a bass synth with Z3tA+ 2

Who doesn’t like bass? Especially synth bass. Z3TA+ 2 is the answer to all of your sound design needs especially when you are looking to improve your production in the low end. I’ve put together a short tutorial on how to make a simple bass synth inside of Z3TA+2. Once you understand how everything works together you’ll be able to really start to make this plugin work for you.

Picking the right Oscillators

Within Z3TA+2 the first section you need to start working with is the OSC section. First I’ve selected two different square waves for OSC 1 and 2. They were Vintage Square 1 and Vintage Square 2. When creating a bass synth you need to make sure that your patch will not break up in the low end so be sure not to drop the octaves on the individual oscillators too low. I typically set mine to -2 at the most. Once you get to a certain range the instrument will sound weak and lose it’s driving Bass Synth sound

[READ THE REST OF THE TIP HERE]

4. [VIDEO] Digital Sound Factory Z3TA+  Sound Design

5. [VIDEO] Mixing and Mastering a song using only the Z3TA+ effects engine in SONAR

When To Break The "Rules" Of Digital Mixing

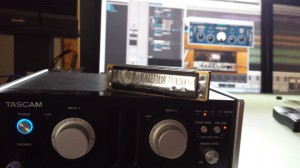
Recently I was asked to create a song for a new short film that will be making the rounds on this year’s film festival circuit.  I got the creative brief [I had to write for a specific subject in the film] and got to work writing and recording everything myself in SONAR X3. Thankfully, SONAR X3 has pretty much everything you need to make a radio-ready track in the box; even if you are a #hack-of-all-trades like me. 😉  It was requested that this song have some grit to it, as well as some acoustic-oriented authenticity, so I grabbed my 5-Year Old’s harp out of his toy chest, my acoustic guitar, and got to work.  The only outboard gear used on this track were a Tascam UH-7000, an AT4033a mic, my Les Paul DC and Carlos Robelli bass.  I also played Dimension Pro organ through a controller.

THERE ARE NO MIXING RULES (KIND OF)

After writing the song on an acoustic and then tracking everything, it was time to mix.  I love mixing in the digital world because there really are no rules in terms of creativity.  Once you understand the basics of frequencies and how to put tracks together properly, you can really get creative with the Continue reading “When To Break The "Rules" Of Digital Mixing”

How to EQ: Carving Out The Right Sound For Your Mix

Sometimes EQ is more about “sonic sculpture” than anything else

by Craig Anderton

One of the most important aspects of mixing is using EQ to “carve out” a specific frequency range for instruments so they don’t conflict with each other. If instruments have their own sonic space, it’s easier to hear each instrument’s unique contribution, which increases the mix’s clarity.

Dan Gonzalez did a great series for the Cakewalk blog on subtractive EQ, and how cutting frequencies can help create a better a mix; this is more of a complementary article about how I carved out EQ for various instruments in a cover version of the song “Black Market Daydreams” (by UK songwriter Mark Longworth). All the displays are set for +/-6dB.

Choirs: Using a low-shelf response to cut starting at the midrange gives the choir more brightness and “air.” This way it sort of floats over the mix. The same approach works well for ethereal pads, and lets you mix them a little lower to make space for other sounds. Also note that I couldn’t resist throwing a little Gloss in there…

Try the QuadCurve EQ in the SONAR X3 Producer Free Trial

Guitar power chord: Enabling the high pass and low pass filters creates a broad bandpass in the midrange area where there’s not a lot of energy Continue reading “How to EQ: Carving Out The Right Sound For Your Mix”

“Object-Oriented” Clip Mixing in SONAR

When you need to get really detailed, object-oriented mixing is a convenient solution

by Craig Anderton

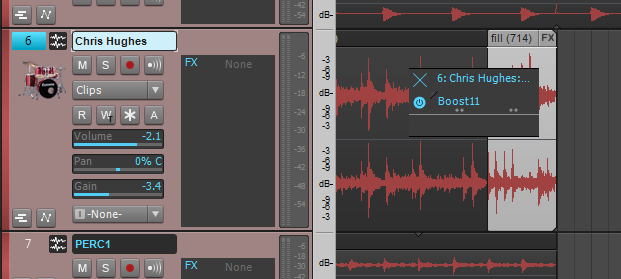
Many times when mixing, you’ll want to apply an effect or volume change to a small, specific section. Clip Automation makes it easy to handle Gain or Pan changes, but you can also work with effects by isolating specific “objects” in a track, then processing them individually. This is different from the usual method of applying effects to an entire track, but can come in really handy for detailed work. Also note that object-oriented effects processing works with any type of clip—audio, MIDI, or groove.

Here’s a step-by-step example of how to apply object-oriented mixing by adding maximization to one drum fill to make it really stand out. Download SONAR X3 to give this a try.

1. To isolate the object from a selected track, alt-click with the Smart tool at the beginning of the section you want to isolate, or place the Now time at this point and type “S.” Do the same at the end of the section.

2. Right-click on the object, and select “Open Clip Effects Bin” from the context menu (keyboard shortcut: Alt+K).

3. An effects bin opens up that’s similar to the standard track effects bin.

4. Right-click on a blank part of the effects bin, choose Audio FX from the context menu, then drill down to find the effect you want.

5. The effect will now appear in the bin. Like a standard effects bin, the small “power symbol” circle (blue for enabled, gray for disabled) appears to the effect’s left. To insert more effects Continue reading ““Object-Oriented” Clip Mixing in SONAR”

Mixing Tips: Know Your Signal Flow in SONAR

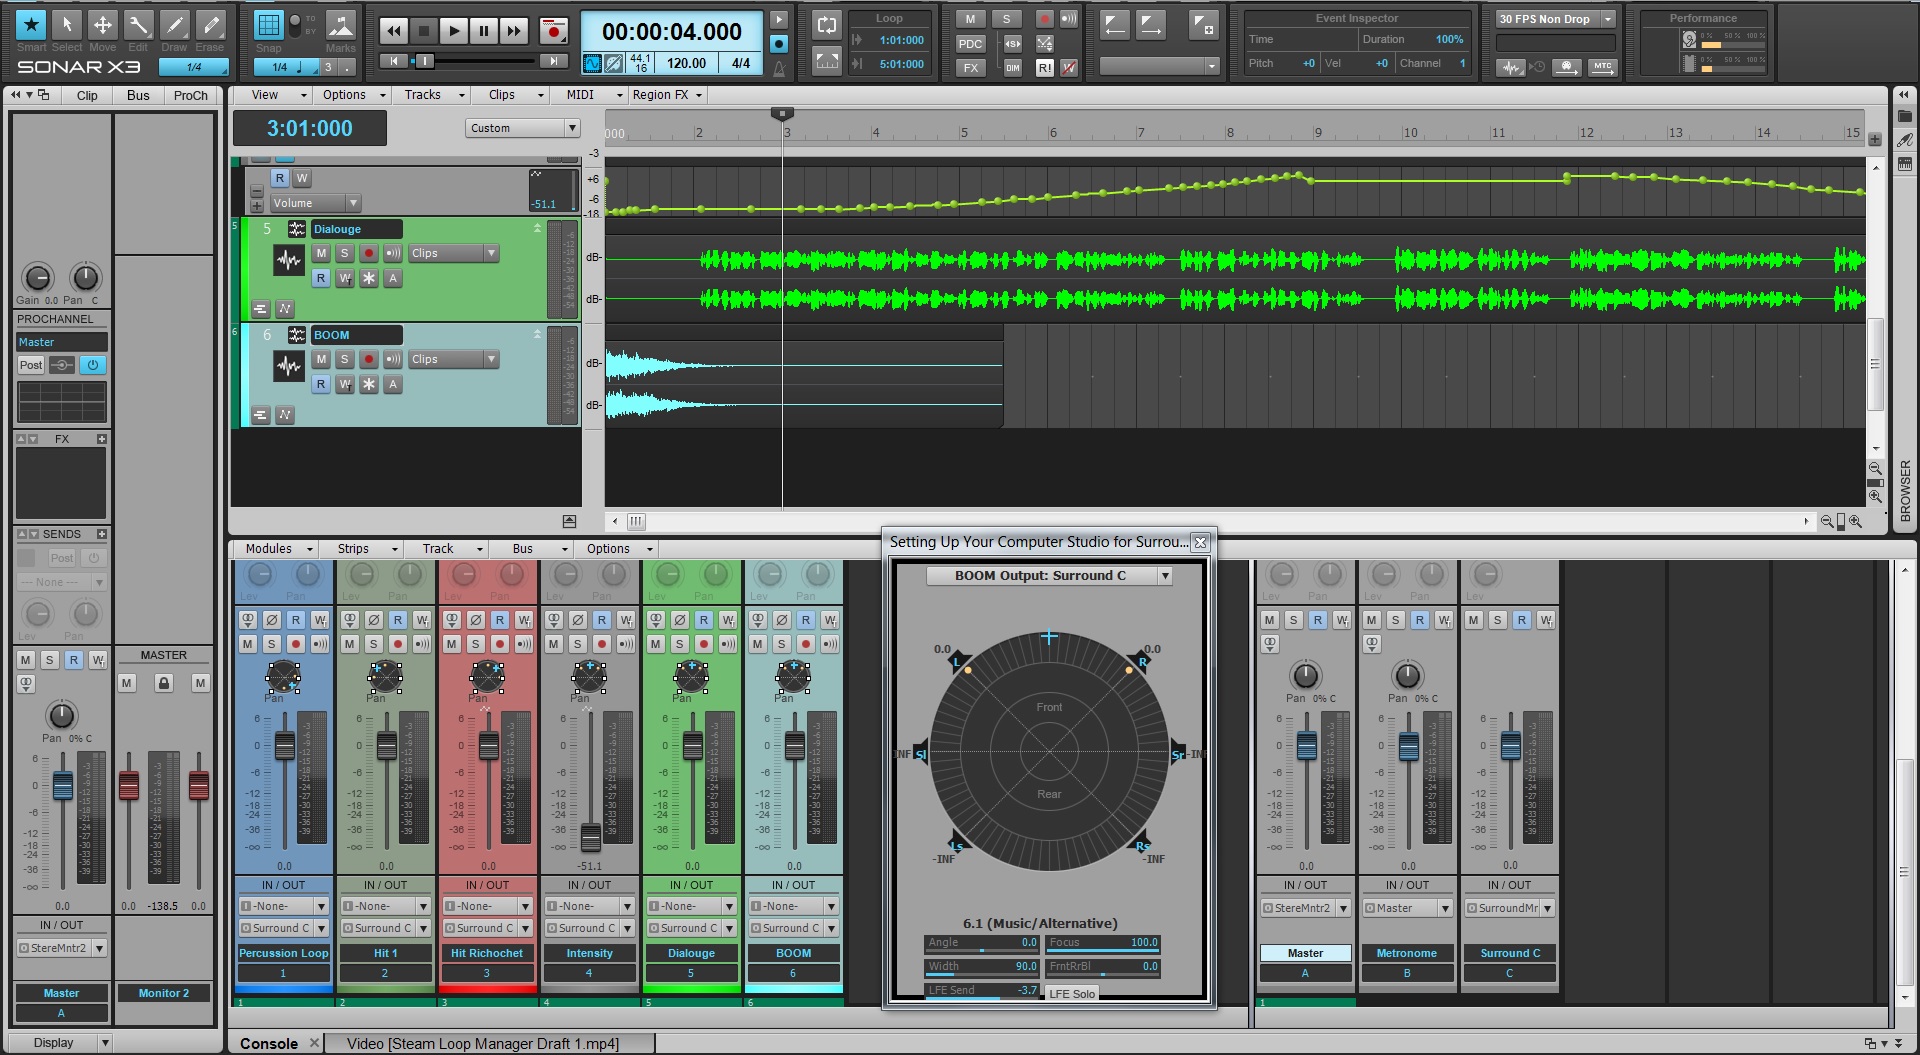
Signal Flow is an important concept to understand, and it may be easier to think about when presented with a diagram of how audio is passes through SONAR.

Inputs and Outputs – Easier than you think!

The first concept to understand is the relationship between Inputs and Outputs. There isn’t anything complex about the subject unless you over-think it.  It is the underlying theme to just about anything within your Digital Audio Workstation. Always remember the following:

  • Outputs: Always feed Inputs
  • Inputs: Always fed by Outputs

Sometimes Outputs can be named “Outs or Sends” and sometimes Inputs are labelled “Ins or Returns.” If you’re a guitar player then you can associate this concept with the FX Loop that exists on the back of your amp. You use this to Send audio to your effects pedals and then back to your Amp’s Return.

First, let’s start where audio starts. Typically it begins with an instrument or audio file:

Upon opening SONAR many users will head straight to their Media Browser and Continue reading “Mixing Tips: Know Your Signal Flow in SONAR”