Basics: Five Questions About Using Stompboxes with SONAR

by Craig Anderton

Plug-in signal processors are a great feature of computer-based recording programs like SONAR, but you may have some favorite stompboxes with no plug-in equivalents—like that cool fuzz pedal you love, or the ancient analog delay you scored on eBay. Fortunately, with just a little bit of effort you can make SONAR think external hardware effects are actually plug-ins.

1. What do I need to interface stompboxes with SONAR? You’ll need a low-latency audio interface with an unusd analog output and unused analog input (or two of each for stereo effects), and cords to patch these audio interface connections to the stompbox. We’ll use the TASCAM US-4×4 interface because it has extra I/O and low latency, but the same principles apply to other audio interfaces.

2. How do I hook up the effect and the interface? SONAR’s External Insert plug-in inserts in an FX bin, and diverts the signal to the assigned audio interface output. You patch the audio interface output to a hardware effect’s input, then patch the hardware effect’s output to the assigned audio interface input. This input returns to the External Effect plug-in, and continues on its way through the mixer. For this example, we’ll assume a stompbox with a mono input and stereo output.

3. What are correct settings for the External Insert plug-in parameters? When you insert the External Insert into the FX bin, a window appears that provides all the controls needed to set up the external hardware.

  • Send. This section’s drop-down menu assigns the send output to the audio interface. In this example, the send feeds the US-4×4’s output 3. Patch this audio interface output to your effect’s input. (Note that if an output is already assigned, it won’t appear in the drop-down menu.)
  • Output level control. The level coming out of the computer will be much higher than what most stompboxes want, so in this example the output level control is cutting the signal down by about -12 dB to avoid overloading the effect.
  • Return. Assign this section’s drop-down menu to the audio interface input through which the stompbox signal returns (in this example, the US-4×4’s stereo inputs 3 and 4). Patch the hardware effect output(s) to this input or inputs.
  • Return level control. Because the stompbox will usually have a low-level output, this slider brings the gain back up for compatibility with the rest of the system. In this example, the slider shows about +10 dB of gain. (Note: You can invert the signal phase in the Return section if needed.)

4. Is it necessary to compensate for the delay caused Continue reading “Basics: Five Questions About Using Stompboxes with SONAR”

Multi-Track Drum Editing – Identifying & Splitting Drum Hits

You need to start with a great performance

Before you begin to edit drum stems you have to make sure that you are working with tracks that were recorded close to a click. They need to be consistent. Tightening up the performance is something that is very invasive and requires a lot of time. If the drummer can’t put in the time to learn the parts then you should wait until they are ready to record their parts properly. Having this knowledge will make your life easier and should be something you think about during the preproduction stages of any record.


A note about the editing process.

The purpose of this type of editing is to identify the strong hits of the drum beat, split them into tiny parts, and then crop and align those small parts. The splits will depend on which part of the drum falls on each down beat.

In this tutorial Kicks happen every 1/4 note, snares every 2nd and 4th beat, and high hats on every 1/8th note. This happens for about 20 measures with various fills here and there and then it switches to a different pattern. We’ll move in measure by measure increments so that we don’t bite off more than we can chew at first.

Engage the metronome so that you can hear the pulse.  This will help you check your work as you edit. Download the project files here (if you didn’t download them from our previous post)  to get started:

Multi-Track Drum Editing Tutorial

Multi-track drum editing requires you to listen intently to the audio you’re editing. I recommend using headphones for this tutorial so that you can hear subtle edits. Erroneous edits are most exposed in the overheads, high hat, and cymbal frequencies so we’ll need to solo those as well as the kick and snare track while we work through this project.

As we work through the session the high hat and ride will need to be solo’d due to the spot mics that were placed on these. Everything else will follow suit with your editing.

You can also adjust your Track Height in the Track View by dragging the borders of the Continue reading “Multi-Track Drum Editing – Identifying & Splitting Drum Hits”

Multi-Track Drum Editing – DLC and Basic Tools

The need for perfect drum production is at an all time high.

In today’s world there is a huge need for all types of drum production. Everything from VST instruments to advanced drum replacement software has been growing in popularity. For the most part, records that require the tracking of live drums always have some sort of drum editing applied. This process is meticulous, long, and can be frustrating if you have never done this much in depth editing before.

Downloadable Content:

Let’s start by getting you the files you need to follow along with this tutorial.

Multi-Track Drum Editing Tutorial

Once downloaded, they should open just fine inside of SONAR X3.

Understanding the basics.

Before diving in, let’s take a look at some essential tools that we’ll be using for major drum editing. These tools may be basic to some, but are definitely the right functions we’ll need in SONAR to edit down these drums.

Creating selection groups

The first step in editing multi-track drums is making selection groups. Once created, these clips will be synced to one another for batch editing tasks – like multi-track editing. During the course of this tutorial we’ll be relying heavily on splitting clips – grouping will make this faster and more efficient.

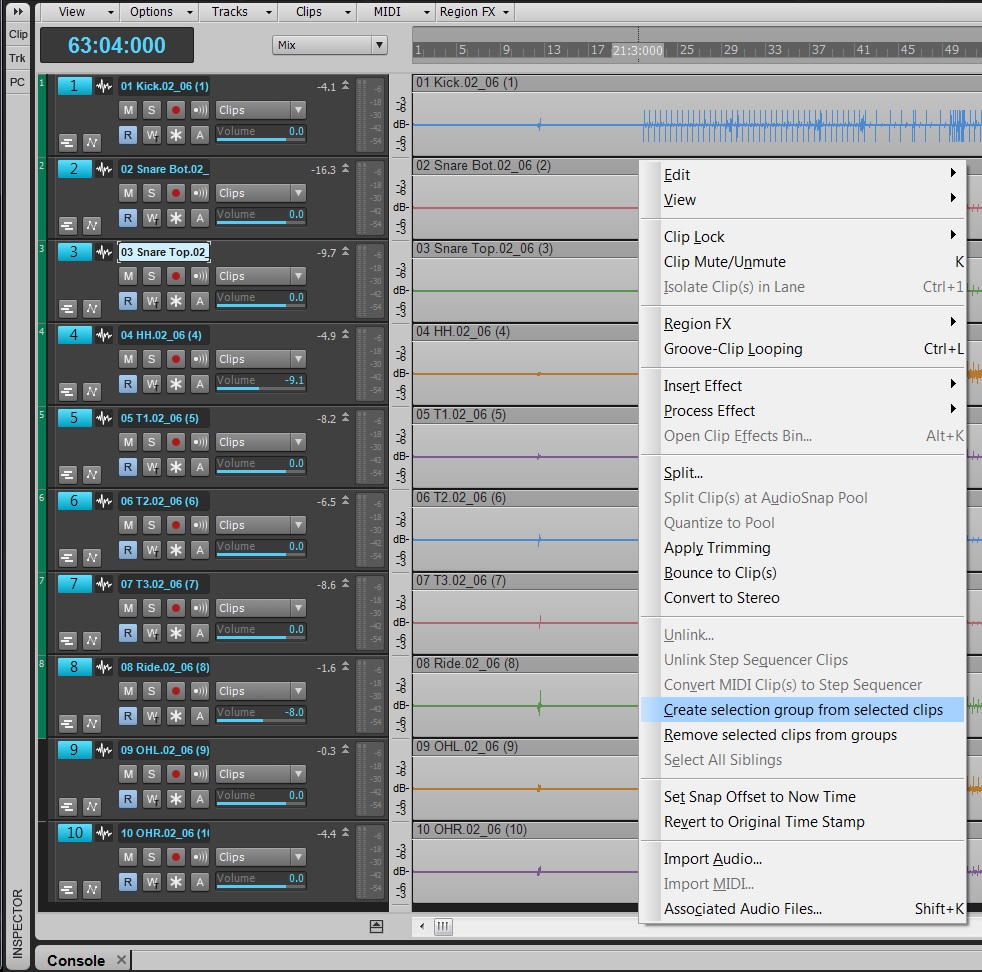
To create these, choose CTRL+A within the Track View and then right-click on your clips. Near the bottom of the menu there will be an option that says Create Selection Group from selected clips. Select this and a number will appear in the header of your clips indicating that your clips are all in a group now.

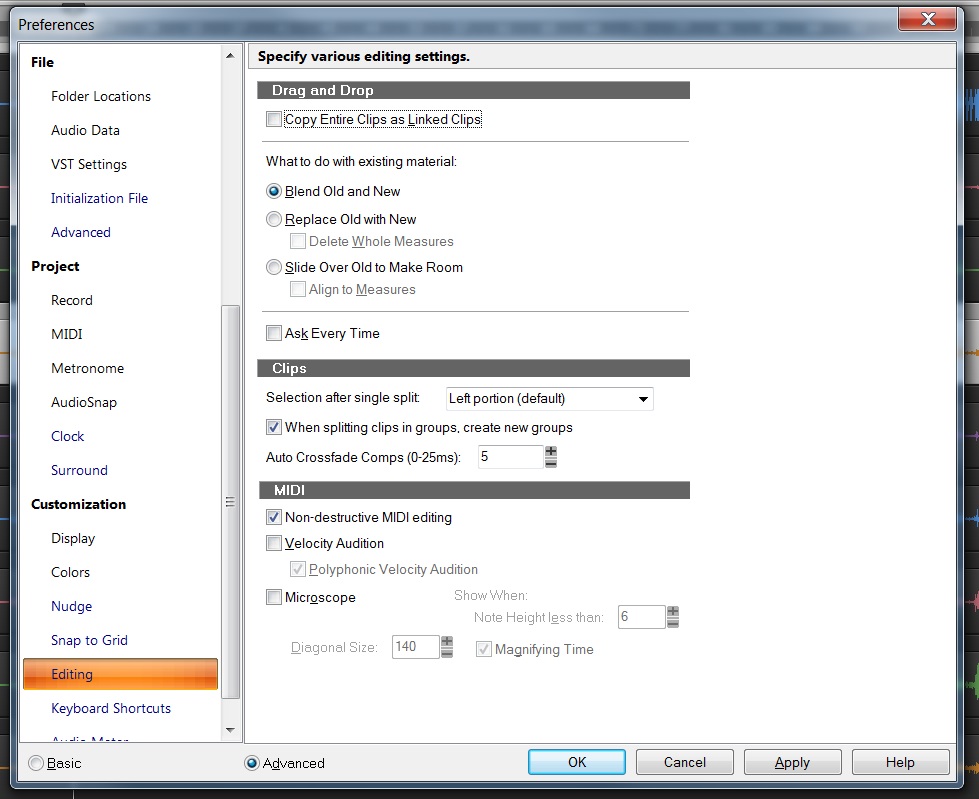
As we work through the song the different Split edits will cause the group number to increase. This indicates that a new group has been made. You can change whether or not this occurs within the Preferences here:


Tab to Transients

Tabbing to transients locates strong transients and moves Continue reading “Multi-Track Drum Editing – DLC and Basic Tools”

Basics: Five Questions about Audio Specs

By Craig Anderton 

Specifications don’t have to be the domain of geeks—they’re not that hard to understand, and can guide you when choosing audio gear. Let’s look at five important specs, and provide a real-world context by referencing them to TASCAM’s new US-2×2 and US-4×4 audio interfaces. 

First, we need to understand the decibel (dB). This is a unit of measurement for audio levels (like an inch or meter is a unit of measurement for length). A 1 dB change is approximately the smallest audio level difference a human can hear. A dB spec can also have a – or + sign. For example, a signal with a level of -20 dB sounds softer than one with a level of -10 dB, but both are softer than one with a level of +2 dB. 

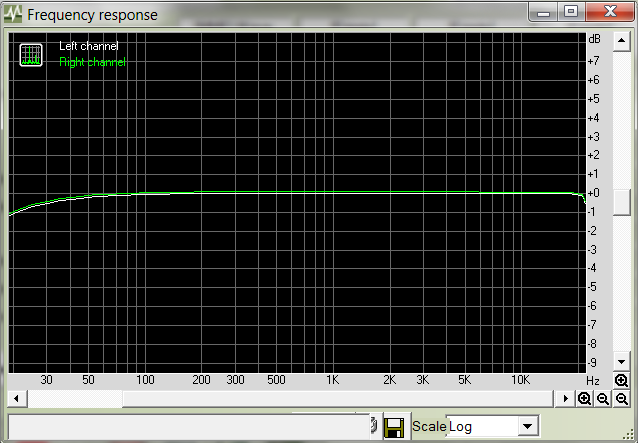
1. What’s frequency response? Ideally, audio gear designed for maximum accuracy should reproduce all audible frequencies equally—bass shouldn’t be louder than treble, or vice-versa. A frequency response graph measures what happens if you feed test frequencies with the same level into a device’s input, then measure the output to see if there are any variations. You want a response that’s flat (even) from 20 Hz to 20 kHz, because that’s the audible range for humans with good hearing. Here’s the frequency response graph for TASCAM’s US-2×2 interface (in all examples, the US-4×4 has the same specs).

This shows the response is essentially “flat” from 50 Hz to 20 kHz, and down 1 dB at 20 Hz. Response typically goes down even further below 20 Hz; this is deliberate, because there’s no need to reproduce signals we can’t really hear. The bottom line is this graph shows that the interface reproduces everything from the lowest note on a bass guitar to a cymbal’s high frequencies equally well. 

2. What’s Signal-to-Noise Ratio? All electronic circuits generate Continue reading “Basics: Five Questions about Audio Specs”

Basics: Five Questions about Latency and Computer Recording

Get the lowdown on low latency, and what it means to you

By Craig Anderton 

Recording with computers has brought incredible power to musicians at amazing prices. However, there are some compromises—such as latency. Let’s find out what causes it, how it affects you, and how to minimize it.  

1. What is latency? When recording, a computer is often busy doing other tasks and may ignore the incoming audio for short amounts of time. This can result in audio dropouts, clicks, excessive distortion, and sometimes program crashes. To compensate, recording software like SONAR dedicates some memory (called a sample buffer) to store incoming audio temporarily—sort of like an “audio savings account.” If needed, your recording program can make a “withdrawal” from the buffer to keep the audio stream flowing. 

Latency is “geek speak” for the delay that occurs between when you play or sing a note, and what you hear when you monitor your playing through your computer’s output. Latency has three main causes: 

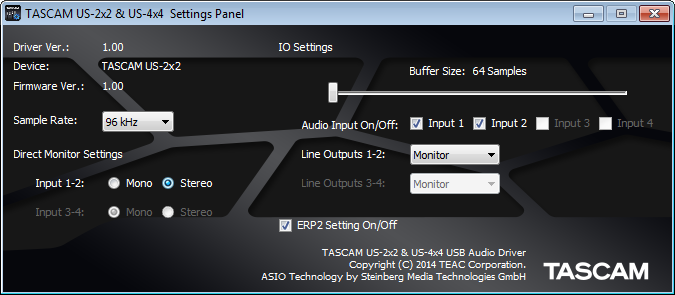
  • The sample buffer. For example, storing 5 milliseconds (abbreviated ms, which equals 1/1000th of a second) of audio adds 5 ms of latency (Fig. 1). Most buffers sizes are specified in samples, although some specify this in ms. 

 Fig. 1: The control panel for TASCAM’s US-2×2 and US-4×4 audio interfaces is showing that the sample buffer is set to 64 samples. 
  • Other hardware. Converting analog signals into digital and back again takes some time. Also, the USB port that connects to your interface has additional buffers. These involve the audio interface that connects to your computer and converts audio signals into digital signals your computer can understand (and vice-versa—it also converts computer data back into audio).
  • Delays within the recording software itself. A full explanation would require another article, but in short, this usually involves inserting certain types of processors within your recording software. 

2. Why does latency matter? Continue reading “Basics: Five Questions about Latency and Computer Recording”

Choosing the right compressor in SONAR X3 (Producer & Studio)

What is Compression?

Compression is a massively useful tool for pro audio applications. As a simultaneous corrective and creative utility suitable for both tonal shaping and controlling levels,  a compressor is one of the most important pieces of gear in your sonic toolbox.

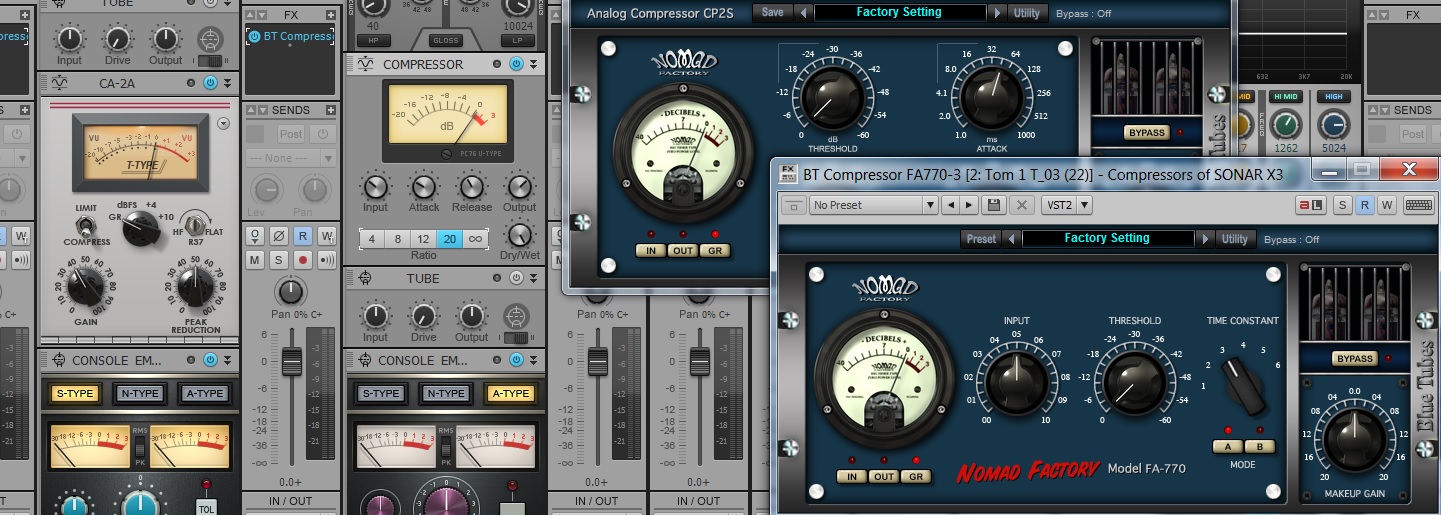
Instead of explaining the history and value of knowing all the different types of compressors that exist, we’re just going to dive in and show you how to get results. Once you understand this you’ll be able to grasp the larger picture of compression and the many different circuits and types. SONAR X3 Studio & Producer come packed with quite a few different types of compressors, so let’s open them up and take a look.

PC76 U-Type

Modeled after one of the most classic leveling amplifiers in history, the PC76 U-Type is a go-to compressor for Continue reading “Choosing the right compressor in SONAR X3 (Producer & Studio)”

The Sound of Console Emulation in SONAR X3

The age of hybrid studios

The day has come where digital audio has caught up to the analog trends of the pre-xyz age. Hybrid (digital/analog) home-studios are more common and the need for more analog flavored plugins is a must. Cakewalk has harnessed these trends in some of the latest software additions to the X-series with their track by track Console Emulation ProChannel plugin.

At a glance

Simplicity is one of the key ingredients in the world of plugin interfaces and the Console Emulator is no stranger to that. It’s an easy tool to use, just turn up the Drive! Each algorithm has the same 3 parameters for locking in the sound, Drive, Tolerance, and Trim. Each version of the plugin reflects the circuitry of 3 classic large format console from the past 30 years. Every board has it’s own sound because each circuit is completely different than the other.

Let’s take a closer listen 

For most part, Console Emulation is about subtle character. If you apply subtle changes to your entire mix it will collectively sound different. One track may not sound all that different in the final mix, but if you apply this effect to the entirety of your session, well then you’ll probably start to hear some differences. These DSP algorithms are tuned Continue reading “The Sound of Console Emulation in SONAR X3”

6 Mindblowing reasons to get SONAR X3 Producer

1. SONAR has redefined mixing in the box.

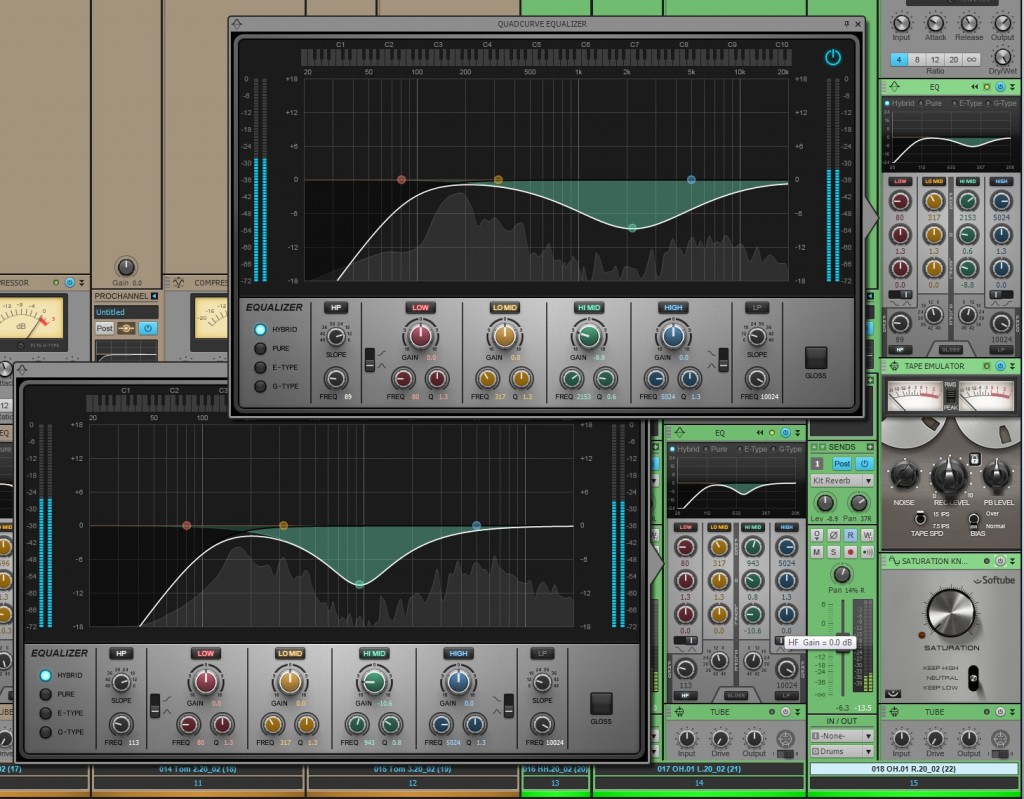
The ProChannel redefines the way you work with the Console View. Each audio track, instrument track, and bus comes with a complete modular strip of analog effects. Even the inspector allows the users to preview a selected track’s ProChannel strip right from the Track View. With the click of a button users can expand this analog mixing console and fully customize it by dragging around the modules, or loading up a ProChannel presets. Load up the Compressors, Tube Saturation, Reverb, Console Emulators, Tap Emulators, and the new QuadCurve EQ Zoom with Analyzer by simply right-clicking. SONAR’s ProChannel lends itself to an immensely visual experienceand to enhance this feature a step further Cakewalk introduced the fly-out panel for the Quad Curve EQ (SONAR X3 Producer Exclusive). Adding this allows users to see and modify their audio signals in real-time across a spectrum analyzer.

2. The best pitch correction software that exists is fully integrated.

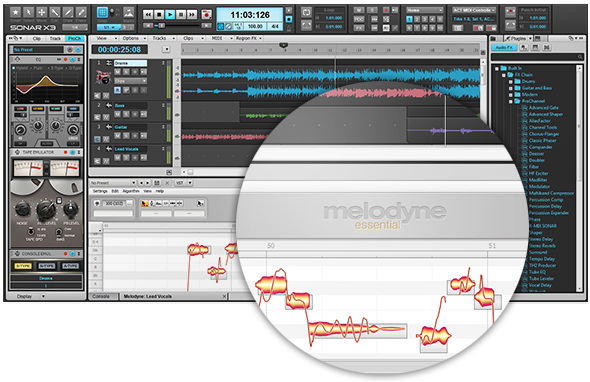
ARA technology is Celemony’s way of allowing DAW’s to host the functions of any audio edit capable plugin. ARA Integration means that Melodyne can now run as a fully integrated feature within SONAR X3. Yes, you read that correctly, SONAR X3 can now run the world’s best pitch correction as a native component and SONAR X3 Studio & Producer now include Melodyne Essential.

Melodyne interacts with the new Region FX clips in SONAR – allowing users to highlight any mono audio clip and apply Melodyne pitch correction. ARA’s high quality time stretching replaces the older time stretching capabilities run by AudioSnap and SONAR X3 has the ability to convert Audio to MIDI by simply dragging and dropping audio to a MIDI track. This deeply integrated technology makes SONAR perfect solution for complex pitch correction!

3. Floating windows get in the way, so SONAR solved that problem.

If you’re looking to purge your workflow of a cryptic DAW with an unsettling interface that is not conducive to a creative environment then you should really check out what SONAR’s been doing since the X-series overhaul. We’ve pretty much ended the floating window interface to bring users a more efficient musical experience. Our Smart Tools HUD can be accessed anywhere in the interface. Our main track view houses several different workflows that are a single click or shortcut away. Screen-sets lets you save window configurations and swap between them using your numerical keys. The list goes on and on and we’re continuing to make it better with more intuitive features.

4. It takes minutes to create something awesome.

There are programs that exist only to record and edit, and then there is SONAR – which is the major contender for the entire creative experience. Every part of SONAR’s MIDI and virtual instrument implementation allows users drag in, route, and start composing within seconds.

You can save your favorite instrument and track routing as track templates and load them into other projects without any hesitation. Complex routing tasks like a multi-track setup for Addictive Drums requires no thinking – just doing. Our synth rack stays separate from the Track View and Console view so that your processing plugins stay separate from your synthesis plugins. Organization, clarity, and not a second wasted, that’s why SONAR stays on top.

5. We don’t bundle useless plugins with SONAR.

In fact, we bundle some of the best software in the industry with SONAR. We’ve already covered the fact that Melodyne Essential comes with the product – but that doesn’t even scratch the surface. 

The Nomad Factory Blue Tubes bundle ships with SONAR X3 and contains as many dynamic, time-based, and eq-based plugins that you could ever need. We have astounding instruments from AAS: Strum Acoustic SONAR, and Lounge Lizard SONAR. Lastly, Addictive Drums – which will make you want to fire your drummer and spark your MIDI programming addiction. It doesn’t stop there, check out the full list of effects and get yourself on board with the future of the DAWs.

6. You’re not limited to a Track Count or Plugin Count.

There’s always that moment when you realize that your DAW has hit a brick wall with the amount of plugins or tracks that it can handle at once. SONAR doesn’t have that problem, in fact it goes above and beyond to give you the best 64-bit architecture, unlimited tracks, buses, and effects that money can buy. We even have surround sound support! No need to constantly submix your tracks or work in parts because you don’t have thousands of dollars to drop on a “pro-system”. Even at our $99 value we’ve taken out track and effects limitations and still retain flagship features like ARA and VST3.

Upgrade to SONAR X3 Producer today!

Still not convinced? Check out SONAR free for 30-days.

SONAR Tips: How to Easily Sync Your DAW to Audio

Introduction

Have you ever recorded a song that isn’t set to any type of tempo? Or maybe you have just have to make a click track for your songs? Well SONAR can certainly help that in that department. One of the great things about SONAR is it’s flexibility across different types of workflows. In this particular situation there is a nifty tool hidden in one of the menus that helps get your tempos mapped out in your DAW. Think of it like syncing your DAW and your audio files.

Out of time? Put it in time.

Let’s a take a perfectly good song like the following sound example:

This is a great song, but it was tracked to an independent Continue reading “SONAR Tips: How to Easily Sync Your DAW to Audio”

DAW Best Practices: How to use metering in SONAR

[Originally posted as a daily tip on the SONAR forums and reposted for viewers here on the blog.]

The Overachieving Meters

by Craig Anderton

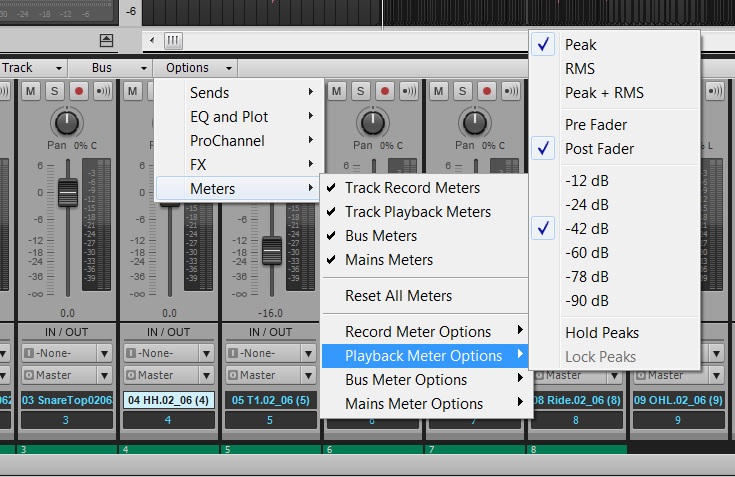
To change resolution for any audio meter, in any view, right-click on it and choose a range of 12, 24, 42, 60, 78, or 90 dB. Each meter can have its own range. With the Console view, I set the output bus meters to 12 dB to help gauge the approximate amount of loudness maximization that may be required. For example, if the meters make it to 0 but otherwise spend very little time in those upper 12 dB, then the track will probably need to be made “hotter” when mastering. For the Track View track meters, choosing the maximum resolution (90 dB) helps reveal if there’s noise at the lower range of an incoming signal.

Vertical or Horizontal Metering

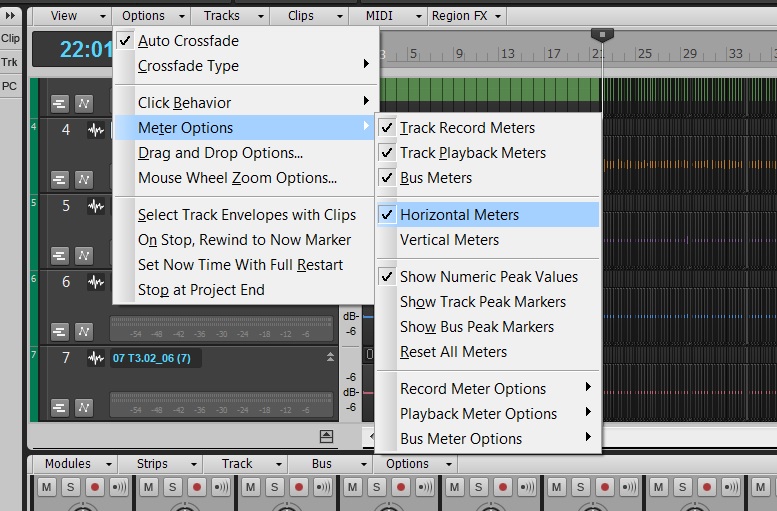
In Track View, the meters can be vertical or horizontal. Choose Options > Meter Options and select the desired option. When vertical, the meters behave more like activity/clipping indicators, because when you collapse the track to a short height, you basically see only activity and clipping. If you use the Console for mixing, this is a good choice because you can see more track parameters in the Tracks Pane, as the vertical meters don’t take up space along the bottom.

If you generally mix using the Track View rather than the Console, then you can extend the width of the Track Pane, enable horizontal metering, set them to a fairly wide playback range, and enjoy high-resolution metering. Also under Options > Meter Options, you can specify the Record, Playback, and Bus meter characteristics. Choose from Peak, RMS, or Peak+RMS (my favorite choice) response, whether playback meters are pre- or post-fader, and whether bus meters are pre-fader, post-fader, or pre-fader and post-FX.


These settings are independent from equivalent meter settings for the Console view. You can also choose whether peaks are held or locked (I recommend checking both), as well as show Peak Markers. These indicate the highest point in the track and can be extremely useful when mastering.

This kind of flexibility allows the Track and Console views to be far more than just two ways to view the same type of material. For example, the Console meters are probably better set to post-fader, so you can see at a glance which tracks are contributing the most amount of level. But in Track view, a pre-fader setting lets you monitor track activity so you can check whether a Track has signal, regardless of the fader position. The metering options are just one more reason why I tend to mix in Console view, but track and edit in Track View.

Want to check our SONAR? Try our 30-day free trial.