With so many different reverb options available, it can sometimes be hard to know where to begin. This series will focus on helping you make your reverb decisions more efficiently by identifying the function of every component, one at a time.
Sounds | Controls | Tips & Tricks
The Sounds
In convolution reverb, microphones capture the sound of an environment’s response to a full spectrum of frequencies, known as an Impulse Response (IR). Then, the resulting .wav file is introduced back into a convolution plugin – in this case ReMatrix Solo. The plugin plays the incoming audio, say your drum track, “through” the IR. This type of reverb is great for adding realistic ambience to dry sounding tracks.
Depending on the shape and material of the walls, ceiling, floor, and furniture in the sampled environment, different frequencies may be absorbed or reflected faster or slower than others. This is what gives any reverb its own characteristic sound. For example, a concert hall with hard, dense walls and plastic seats will have a much longer decay in high-frequency content than a living room with relatively soft wooden walls and a cushioned couch.
ReMatrix Solo recognizes 5 different categories of IRs: Hall, Room, Plate, Early, and Special. Let’s take a look at the characteristics of each of these.
Hall
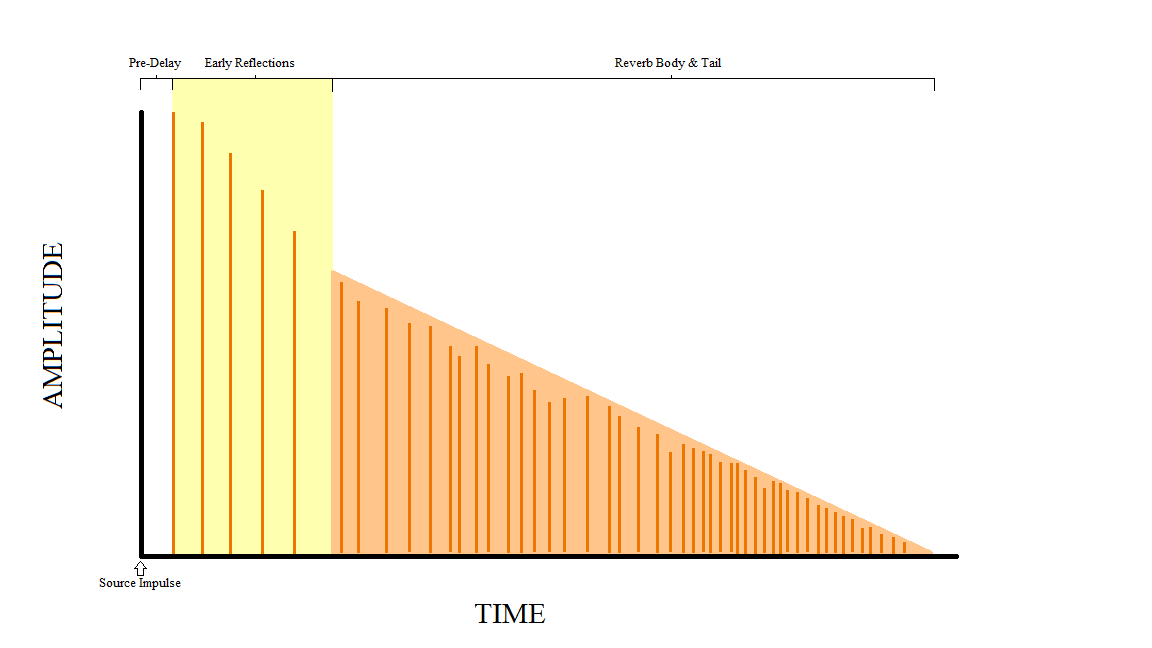
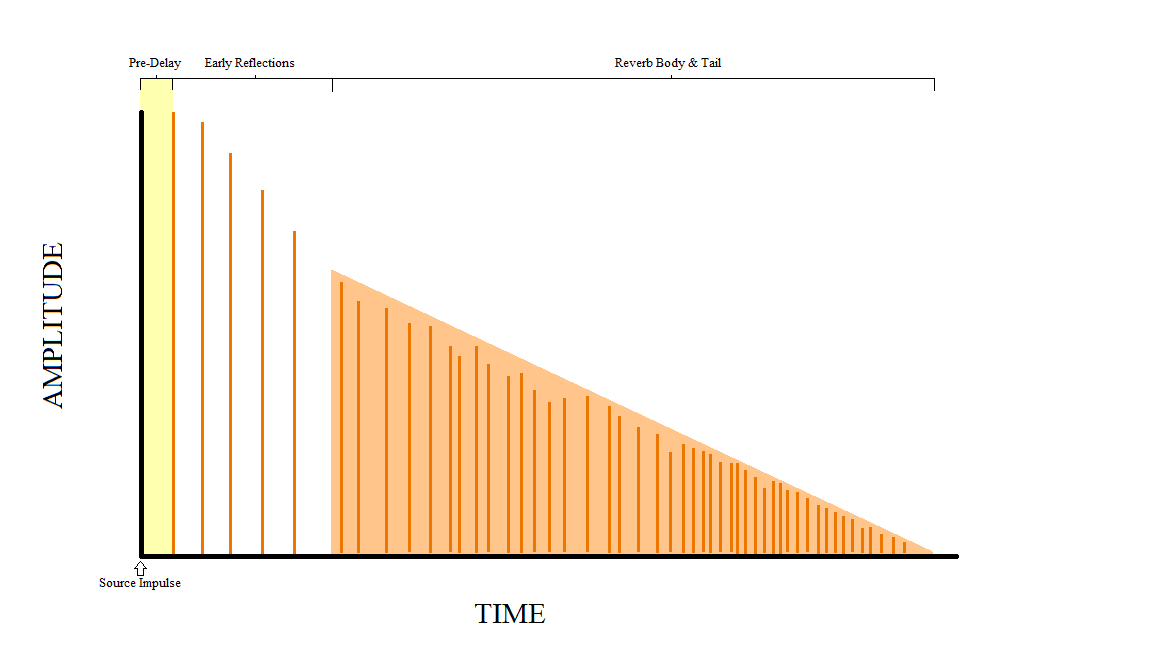
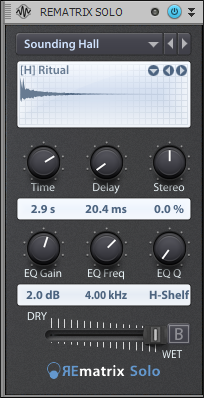 The first thing you’re likely to notice about Hall reverbs is that they’re usually longer than other types–about 2 seconds or more. This is because halls are rather large spaces with lots of room for sound to bounce around. Like great prose or a fine wine, reverb has a beginning, middle, and end. For reverb, we’ll refer to these as “Early Reflections,” “Body,” and “Decay (or Tail).” Common Hall reverb characteristics include an audible array of early reflections (more on this later), a dense, sustained body, and a smooth, often dark decay.
Here are some sonic examples of applications of Hall Reverb:
- If you listen carefully, you’ll notice the snare’s attack is quite present in the reverb itself.
- The guitar in this example loses some presence due to the heavy wash of conflicting frequencies.
- In the vocals, most of the consonants are lost to the diffusion, resulting in a reverb body consisting mostly of vowel sounds.
Room
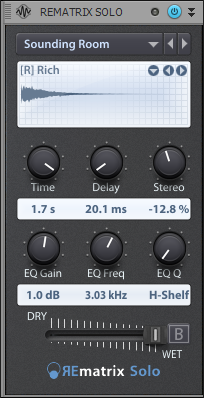 Room reverb times are much shorter than halls, due mostly to their smaller size. These will normally range between about a half-a-second to a few seconds. Rooms are often a bit “darker” sounding than most halls, since the size and materials are prone to more high-frequency absorption. However, any variations in size and material are going to have a large impact on the resulting reverberations, so you can expect much variation from one Room sound to the next. One may have almost no early reflections, a smooth body and quick decay, while another might have a booming attack, and thick body that slowly fades away.
Here are the same tracks as above, but with some Room reverb applied:
- The snare sound gains a presence boost from the stronger midrange information of this reverb.
- The guitar fits nicely with this reverb due to the dense and diffuse body.
- Notice how the vocal reverb now sounds like each word smears together, rather than just the vowel sounds in the hall example.
Plate
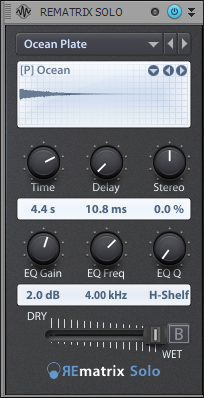 A plate reverb is a mechanical device that vibrates in response to an audio signal being passed through it. It has transducers that send and receive the signal, and a damping pad to adjust the length of the reverb. These reverbs are often a half-second to a few seconds in length, and have almost no early reflections, but a substantial body and gentle decay. Because of this, it’s not uncommon to see large amounts of predelay added to this reverb type.
Once again, the same tracks as above, but with Plate reverb applied:
- This reverb is quite bright. The snare gains a lush high end that otherwise is rather lacking
- You’ll notice that the guitar sounds a bit harsh running through this particular plate sound.
- The vocals have a bit of an “airy lift” to them, but sibilant sounds (S’s and T’s, for example) might need to be carved out with an EQ to avoid a similar harshness to the guitars.
Early
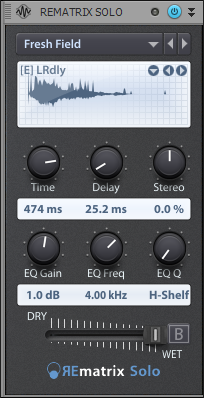 This one is sort of unique to ReMatrix. Nearly every type of reverb has early reflections, but this particular category isolates them as their own entity. Early reflections, as shown in the diagram below, are the sounds that you hear most immediately after the direct signal, usually within the first 60-80ms. For that reason, they have an almost imperceptible body and decay. Don’t let the short time fool you, though; these reverbs can introduce very unique and desirable sonic characters to any sound.
Here are some examples of early reflections applied to our drum, guitar, and vocal tracks:
Short and sweet, Early Reflections are fantastic for bringing a sound to the forefront while still maintaining a sense of depth and “live-ness.”
Special
 This is where all the outliers are found. These IRs include reverse reverbs, modulated sounds, and more. The modulated sounds are typically .wav files that have been modified in some way with another effect like an automated filter, a delay, some kind of pan effect, or just about anything else. Since there are no real rules to this IR type, there’s not much explaining to do here, so let’s jump right into some examples.
- The snare, high in transient information, also yields an interesting result with the panning echoes.
- The busy guitar covers up much of the effect, and you’re just as well reaching for a more suitable reverb program
- The vocals play quite nicely through it, sounding like a high-feedback slapback delay with some sort of weird FM filtering.
- This type of reverb may not fit so well in every mix you do, and the effect may not always be apparent, but it can bring a bit of spice to an otherwise dull part.
The Controls
Time
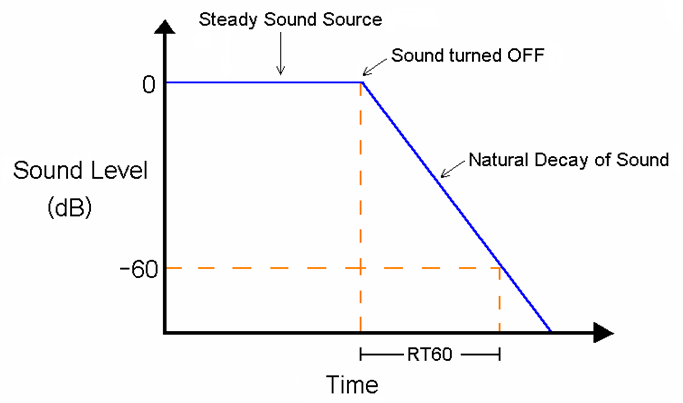
 This is the length of the reverb. Whenever you see a time control on a reverb, it is measured in RT60, or amount of time it takes for the reverb to be 60dB lower than its original level. Note that when you load a preset or IR in ReMatrix Solo, this setting adjusts to the IR’s original intended RT60 time. Be careful when making adjustments to this as it can sometimes make the reverb sound “chopped” or produce undesired artifacts.
Delay
 This is the Pre-Delay, or amount of time before the reverb signal is produced. For example, if your song is 120bpm and you want an eighth note’s worth of time between the dry snare hit and the wet reverb signal, you would set this value to 250ms. This is useful for when your original signal starts to sound oversaturated by the reverb. Providing a bit of time between the original signal and the reverb signal gives a sense of distance and depth.
Helpful Hint: 1 ms of pre-delay is equal to about 1 foot of distance from the source.
Stereo
 This knob controls the stereo width of the reverb. A value of 0% will be “mostly” mono. A value of 100% provides an extremely wide stereo image, and dipping into negative values results in an extremely collapsed reverb sound. Try a variety of settings–this parameter has an incredible ability to create a very realistic and controlled sense of space for your reverb.
EQ Gain
 This is, quite simply, the amount of gain applied at the EQ Freq setting. This applies only to the reverb return signal itself, so adding a high shelf to the snare reverb does not add the high shelf to the snare, just the snare’s reverb.
EQ Freq
 If you would like to apply a band of EQ to your reverb signal, this is the place to do it. This setting will determine the center frequency of your EQ adjustment. This is useful when you want to modify the coloration of the reverb, or to help it fit more neatly into your mix.
EQ Q
 As with any Q setting, this is the width of the EQ band you’re applying to your EQ signal.
— Hi-Shelf affects frequencies at and above the EQ Freq setting
— LPF (Low-Pass Filter) cuts all frequencies below the EQ Freq setting
— Numbers indicate a Band Pass filter — your standard bell-curve EQ. A smaller number creates a wider bell curve, and a larger number creates a very narrow curve.
Dry/Wet
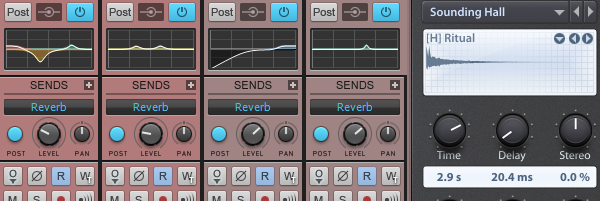
![]() This is the blend of original, unprocessed signal and “wet,” processed reverb signal. A common workflow would be to create a send on the track to which you wish to apply reverb. Set up the send to go to an aux track, and add the ReMatrix ProChannel module to the Aux Track. Set the Dry/Wet slider to 100% wet. Now, your original track is still totally dry, and the aux track is only the reverb signal. To blend, simply adjust the send level from the original track. More send level = more reverb.
This is the blend of original, unprocessed signal and “wet,” processed reverb signal. A common workflow would be to create a send on the track to which you wish to apply reverb. Set up the send to go to an aux track, and add the ReMatrix ProChannel module to the Aux Track. Set the Dry/Wet slider to 100% wet. Now, your original track is still totally dry, and the aux track is only the reverb signal. To blend, simply adjust the send level from the original track. More send level = more reverb.
Tips & Tricks:
- Play around with settings and presets to get the most out of your reverb plugins! The sound examples demonstrated one of many different configurations for each reverb type.
- Be conservative — too much reverb can leave your mix sounding distant and oversaturated.
- Be judicious — in most cases, it’s not a good idea to apply reverb to every track.
- Send, not Insert. 9 times out of 10, you’ll have a better experience with separate source and reverb tracks. See the Dry/Wet section for more info.
- Use “just enough” reverb: Solo your source and reverb tracks, and bring up the send level until the reverb is audible. Then, bring it back down 1 dB or so and move on.
- Use your EQ. The built-in EQ on ReMatrix is great for adding color or carving out some space, but don’t be afraid to add another EQ to your reverb track to tailor it further to fit your mix.
- Play with dynamics. Applying Compression, Gating, and Side-Chaining to reverb tracks can result in some really useful and interesting effects.
- Pan your return. A guitar panned left with its reverb panned right can increase the apparent space the instrument occupies
- Not all reverbs will work for your track. It’s well worth the time investment to find the one that best suits your production.
- Don’t write off the harsher sounds. You may notice some IRs sound “better” than others, but the ones that sound “bad” when soloed tend to stand out better in a dense mix.
- It doesn’t need to be realistic for it to be pleasant. It’s okay to have your vocals in a hall, your snare in a dark room, your toms running through a plate, and your kazoo in a bright room.
- Automate the send. Reverb doesn’t have to be on all the time. Automate the send to apply reverb only to certain words, licks, or sections to add motion and excitement to your mix.
You can try REmatrix Solo for yourself in SONAR Professional and SONAR Platinum.
| You might also like… | |
|---|---|
 |
 |
| 15-COMPRESSOR SHOOTOUT: LEAD VOCALS |
MIXING VOCALS: EASY DYNAMIC VOCAL FX IN SONAR |







 In-demand LA Producer Luigie “Lugo” Gonzalez is in the trenches on a daily basis depending on SONAR to deliver radio-ready masters to major labels. As an advocate of this year’s Rolling Updates, and especially the new Universal Routing Technology [URT] in SONAR, Luigie told us how he is initially using URT:
 CW Artist Relations: How are you using Patch Points and Aux Tracks?