6 Mindblowing reasons to get SONAR X3 Producer

1. SONAR has redefined mixing in the box.
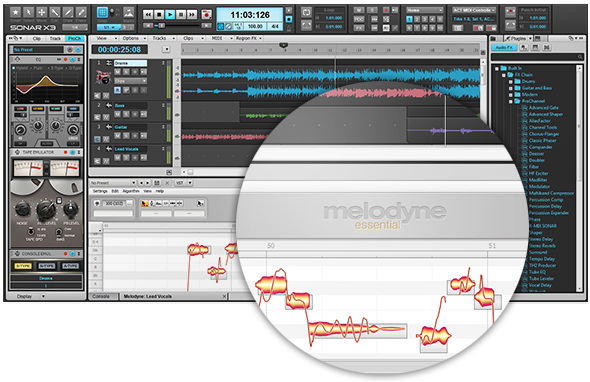
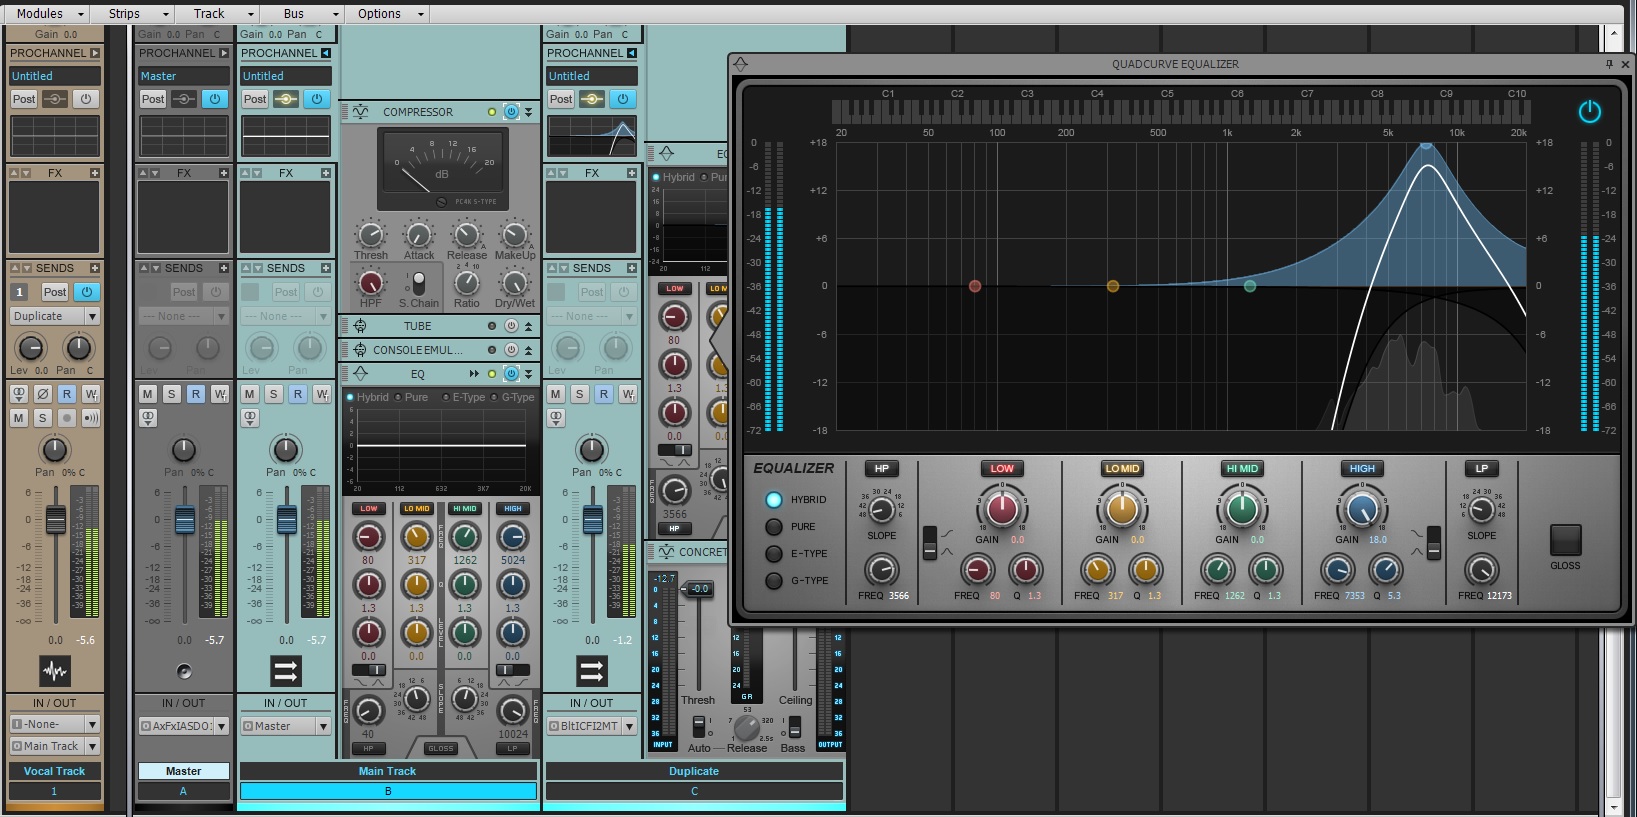
The ProChannel redefines the way you work with the Console View. Each audio track, instrument track, and bus comes with a complete modular strip of analog effects. Even the inspector allows the users to preview a selected track’s ProChannel strip right from the Track View. With the click of a button users can expand this analog mixing console and fully customize it by dragging around the modules, or loading up a ProChannel presets. Load up the Compressors, Tube Saturation, Reverb, Console Emulators, Tap Emulators, and the new QuadCurve EQ Zoom with Analyzer by simply right-clicking. SONAR’s ProChannel lends itself to an immensely visual experienceand to enhance this feature a step further Cakewalk introduced the fly-out panel for the Quad Curve EQ (SONAR X3 Producer Exclusive). Adding this allows users to see and modify their audio signals in real-time across a spectrum analyzer.

2. The best pitch correction software that exists is fully integrated.

ARA technology is Celemony’s way of allowing DAW’s to host the functions of any audio edit capable plugin. ARA Integration means that Melodyne can now run as a fully integrated feature within SONAR X3. Yes, you read that correctly, SONAR X3 can now run the world’s best pitch correction as a native component and SONAR X3 Studio & Producer now include Melodyne Essential.

Melodyne interacts with the new Region FX clips in SONAR – allowing users to highlight any mono audio clip and apply Melodyne pitch correction. ARA’s high quality time stretching replaces the older time stretching capabilities run by AudioSnap and SONAR X3 has the ability to convert Audio to MIDI by simply dragging and dropping audio to a MIDI track. This deeply integrated technology makes SONAR perfect solution for complex pitch correction!

3. Floating windows get in the way, so SONAR solved that problem.

If you’re looking to purge your workflow of a cryptic DAW with an unsettling interface that is not conducive to a creative environment then you should really check out what SONAR’s been doing since the X-series overhaul. We’ve pretty much ended the floating window interface to bring users a more efficient musical experience. Our Smart Tools HUD can be accessed anywhere in the interface. Our main track view houses several different workflows that are a single click or shortcut away. Screen-sets lets you save window configurations and swap between them using your numerical keys. The list goes on and on and we’re continuing to make it better with more intuitive features.

4. It takes minutes to create something awesome.

There are programs that exist only to record and edit, and then there is SONAR – which is the major contender for the entire creative experience. Every part of SONAR’s MIDI and virtual instrument implementation allows users drag in, route, and start composing within seconds.

You can save your favorite instrument and track routing as track templates and load them into other projects without any hesitation. Complex routing tasks like a multi-track setup for Addictive Drums requires no thinking – just doing. Our synth rack stays separate from the Track View and Console view so that your processing plugins stay separate from your synthesis plugins. Organization, clarity, and not a second wasted, that’s why SONAR stays on top.

5. We don’t bundle useless plugins with SONAR.

In fact, we bundle some of the best software in the industry with SONAR. We’ve already covered the fact that Melodyne Essential comes with the product – but that doesn’t even scratch the surface. 
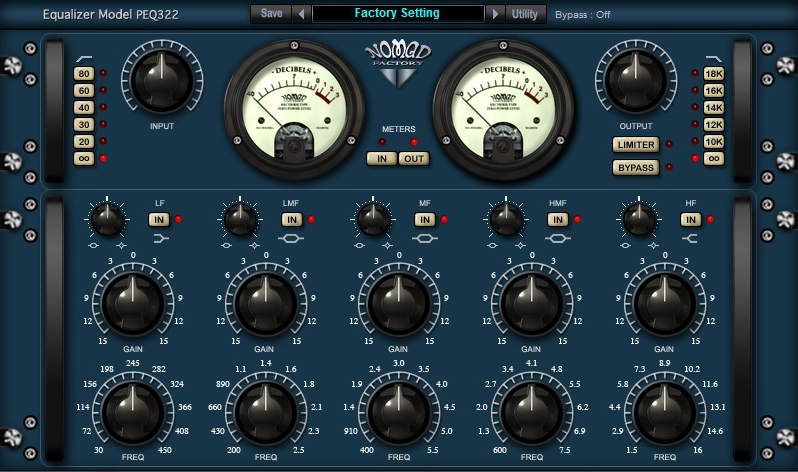
The Nomad Factory Blue Tubes bundle ships with SONAR X3 and contains as many dynamic, time-based, and eq-based plugins that you could ever need. We have astounding instruments from AAS: Strum Acoustic SONAR, and Lounge Lizard SONAR. Lastly, Addictive Drums – which will make you want to fire your drummer and spark your MIDI programming addiction. It doesn’t stop there, check out the full list of effects and get yourself on board with the future of the DAWs.

6. You’re not limited to a Track Count or Plugin Count.

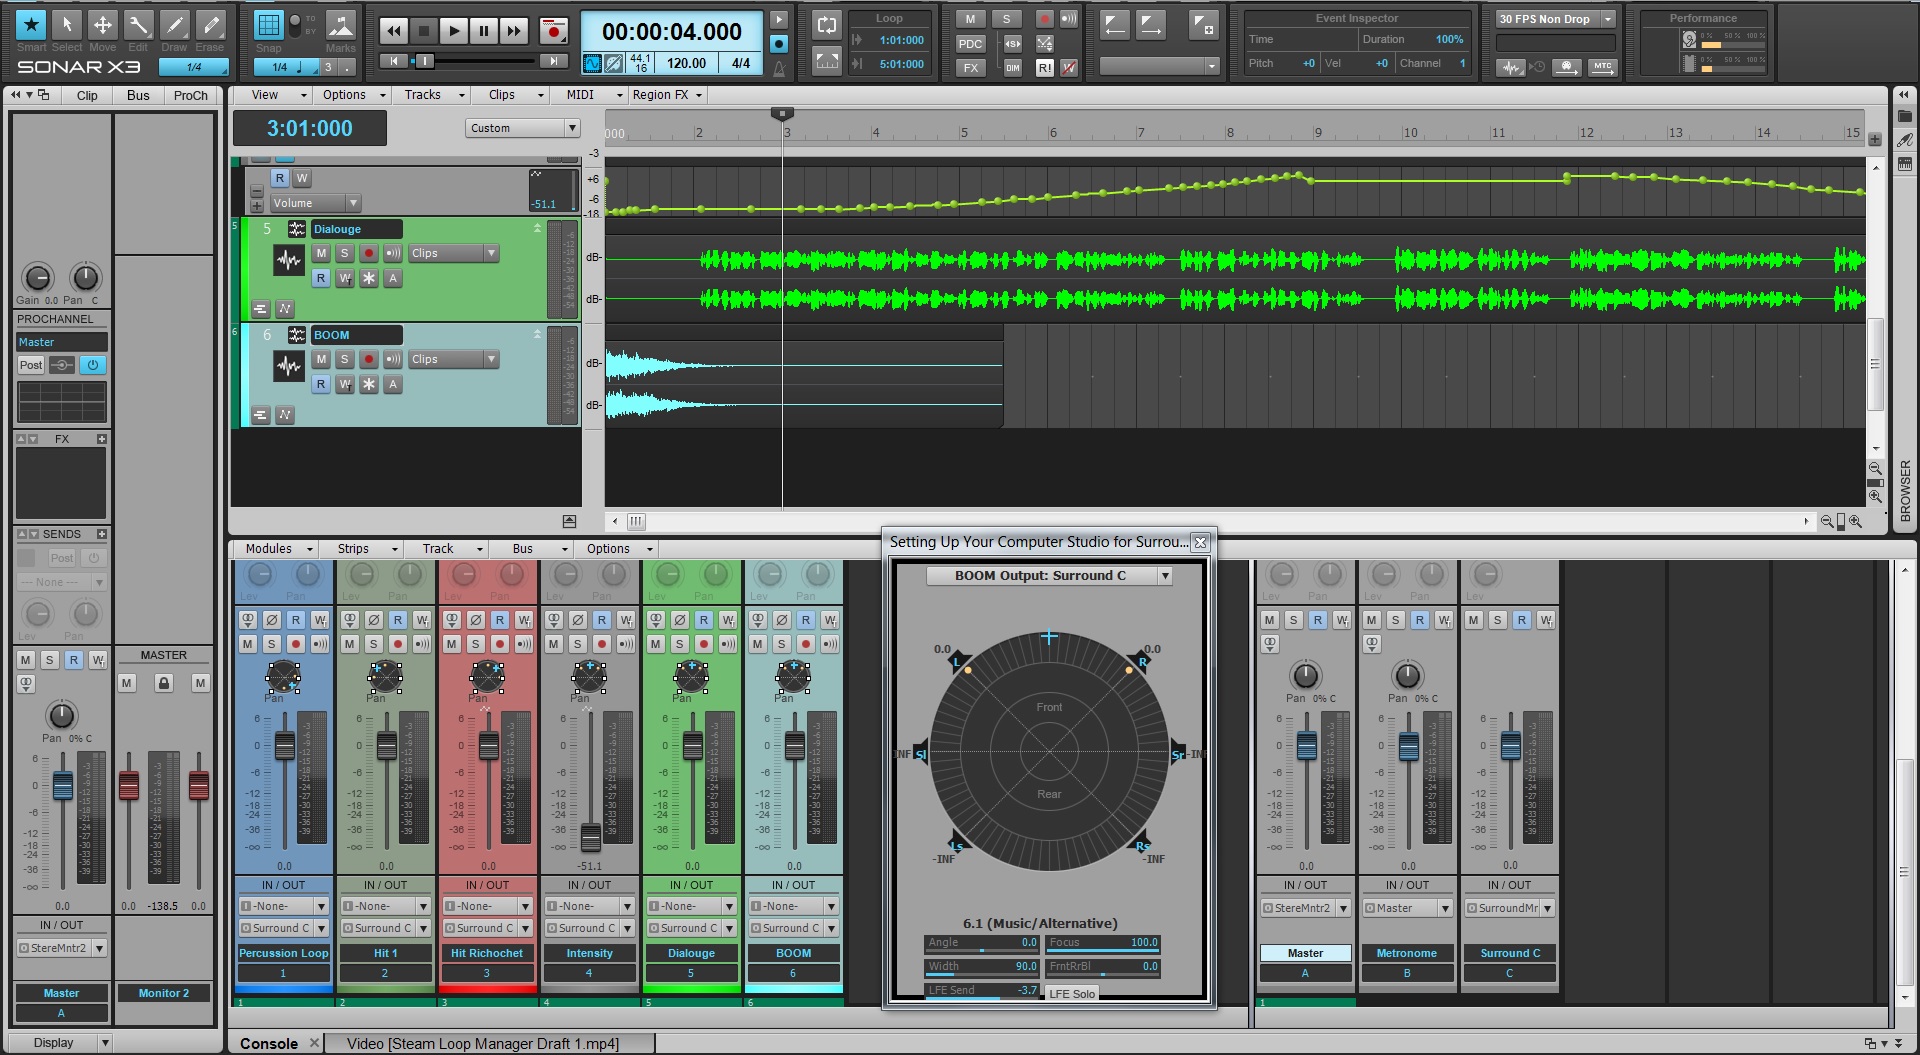
There’s always that moment when you realize that your DAW has hit a brick wall with the amount of plugins or tracks that it can handle at once. SONAR doesn’t have that problem, in fact it goes above and beyond to give you the best 64-bit architecture, unlimited tracks, buses, and effects that money can buy. We even have surround sound support! No need to constantly submix your tracks or work in parts because you don’t have thousands of dollars to drop on a “pro-system”. Even at our $99 value we’ve taken out track and effects limitations and still retain flagship features like ARA and VST3.

Upgrade to SONAR X3 Producer today!

Still not convinced? Check out SONAR free for 30-days.

DAW Best Practices: How to use metering in SONAR

[Originally posted as a daily tip on the SONAR forums and reposted for viewers here on the blog.]

The Overachieving Meters

by Craig Anderton

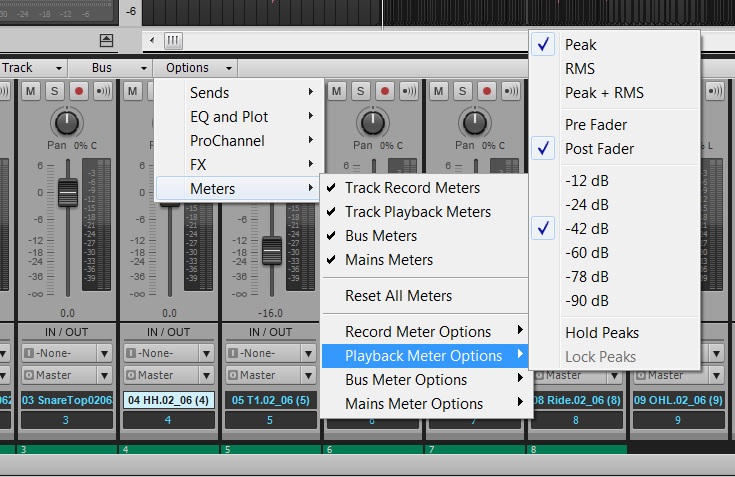
To change resolution for any audio meter, in any view, right-click on it and choose a range of 12, 24, 42, 60, 78, or 90 dB. Each meter can have its own range. With the Console view, I set the output bus meters to 12 dB to help gauge the approximate amount of loudness maximization that may be required. For example, if the meters make it to 0 but otherwise spend very little time in those upper 12 dB, then the track will probably need to be made “hotter” when mastering. For the Track View track meters, choosing the maximum resolution (90 dB) helps reveal if there’s noise at the lower range of an incoming signal.

Vertical or Horizontal Metering

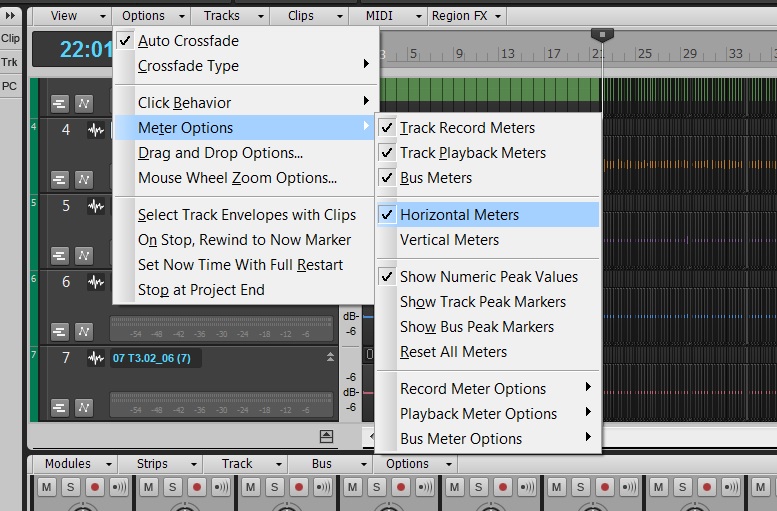
In Track View, the meters can be vertical or horizontal. Choose Options > Meter Options and select the desired option. When vertical, the meters behave more like activity/clipping indicators, because when you collapse the track to a short height, you basically see only activity and clipping. If you use the Console for mixing, this is a good choice because you can see more track parameters in the Tracks Pane, as the vertical meters don’t take up space along the bottom.

If you generally mix using the Track View rather than the Console, then you can extend the width of the Track Pane, enable horizontal metering, set them to a fairly wide playback range, and enjoy high-resolution metering. Also under Options > Meter Options, you can specify the Record, Playback, and Bus meter characteristics. Choose from Peak, RMS, or Peak+RMS (my favorite choice) response, whether playback meters are pre- or post-fader, and whether bus meters are pre-fader, post-fader, or pre-fader and post-FX.


These settings are independent from equivalent meter settings for the Console view. You can also choose whether peaks are held or locked (I recommend checking both), as well as show Peak Markers. These indicate the highest point in the track and can be extremely useful when mastering.

This kind of flexibility allows the Track and Console views to be far more than just two ways to view the same type of material. For example, the Console meters are probably better set to post-fader, so you can see at a glance which tracks are contributing the most amount of level. But in Track view, a pre-fader setting lets you monitor track activity so you can check whether a Track has signal, regardless of the fader position. The metering options are just one more reason why I tend to mix in Console view, but track and edit in Track View.

Want to check our SONAR? Try our 30-day free trial.

7 Steps to Cleaning Up Your "ACT" with Hardware

by Craig Anderton

ACT (Active Controller Technology; in SONAR) is a powerful protocol, and its complexity can be sufficiently daunting that some people never take advantage of it. However, one of the rarely-considered advantages of a powerful protocol is that it’s often powerful enough to be used in a more basic way. So if you’ve wanted to take advantage of ACT without having to reach for the aspirin, you’re in the right place.

The conventional approach to ACT is using templates that let you apply hands-on control to various instruments and effects. This usually implies having a dedicated controller, spending some time setting up assignments and creating templates, and so on. However, you can also treat ACT more like a “controller scratch pad” that’s easy, efficient, and works with just about any MIDI controller. It’s the ideal solution for when you simply want some hands-on control without having to venture very far into left-brain territory.

Step 1: Choose Your Controller

One of my favorite ACT controllers is Native Instruments’ discontinued Kore 2 controller. The industrial design is first-class, it’s built solidly, and there’s enough functionality for what we need. Another advantage is that when NI stopped supporting Kore, the eBay prices took a major tumble. Although the examples in this article are based on Kore, please note that the same principles apply to virtually any MIDI controller.

Step 2: Grab Your Software

Many controllers have dedicated drivers, so if needed, make sure you have the latest. NI still offers the 32/64-bit Kore 2 Controller Driver 3.0.0 and the latest NI Controller Editor, which you can download for free from their site. Follow the instructions when installing, or you’ll wonder why the controller doesn’t work.

(Note: With the Kore 2 controller, you may first be greeted with an unusable bright red display. No worries: Hit Kore 2’s F2 button, navigate to Set, hit Enter, and use the navigation buttons and data wheel to control the Contrast and Backlight parameter values.)

The Controller Editor for NI’s Kore lets you specify various characteristics of the Kore 2 controller. In this picture, a button is being assigned to output a trigger when pushed down.

Various controllers may have options—such as assigning buttons to a latch, toggle, or trigger mode. Many of them have editors; Kore 2’s is somewhat more sophisticated than many others, but again, the principles are the same. In the case of Kore you open the Editor, select Kore Controller 2 from the drop-down menu, and use the Edit button in the Templates tab to choose New. This creates a general purpose MIDI control template. (While you’re at it, I recommend assigning the eight main buttons associated with the pots to Trigger, and action on Down. For a shift button, assign the monitor [speaker icon] button to Gate, again with action on down. Go to the file menu, and save the configuration as “Sonar ACT.ncc.”)

Step 3: Set Up SONAR

Your controller communicates with SONAR via MIDI, so go to the Continue reading “7 Steps to Cleaning Up Your "ACT" with Hardware”

AD2: Pitch Envelopes and much more than just drum samples

by Dan Gonzalez

Yes, that’s right. You may think that Addictive Drums is just a simple sample player but it’s actually an impressive tool for sound design. XLN Audio has the program set so that you can only use the sounds they publish. BUT, the engine that processes these sounds is so powerful that you can virtually get any sound you could ever need from the drums they supply.

Next time you are in Addictive Drums check out the Edit section within this program and brace yourself. There are tons Continue reading “AD2: Pitch Envelopes and much more than just drum samples”

Virtual Instruments: 5 Tips For The Z3TA+ Junkie

Here are some of our favorite Z3TA+ tips and videos from our archive:

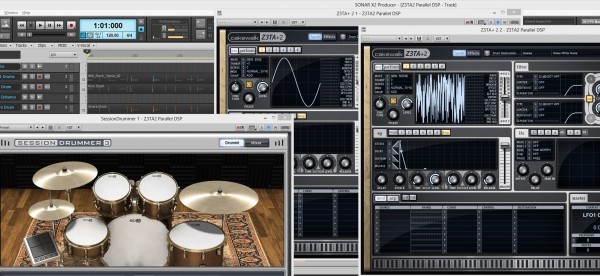
1. EDM Production – Enhance Your Drums with Z3TA+ 2

  • Insert two instances of Z3TA+ 2.
  • Copy your drum sequence to both Z3TA+ 2 tracks.
  • Isolate the Kick on one track and the Snare on the other.
  • Setup the first Z3TA+ 2 to generate a Sine Wave for the Kick.
  • Setup the second Z3TA+ 2 to generate White Noise for the Snare.
  • Adjust the Amplifier Envelope to match the duration of each hit.
  • Within Z3TA+ 2 add Reverb, Compression, and EQ.
  • Mix in under your existing Drum Loop.

2. How to Customize Z3tA+ 2’s Stock Arpeggios

Z3TA+ 2 comes packed with a massive pool of MIDI programs that power it’s internal Arpeggiator, but why stick to the stock programs when you can make your own?

Here’s how:

  • Open Z3TA+2 and activate the Arpeggiator Section
  • Right-Click on the sequence in the arpeggiator and make sure the following are checked
  • Auto Disable Pattern When Dragged to Host
  • Auto Fit Patterns to One Measure When Loaded
  • Load one of the Arpeggios from the Pattern menu
  • Drag and Drop the Arpeggios right into SONAR X2
  • Edit the MIDI Clip to your liking
  • Go to File > Save As
  • Select MIDI 0 in “Save as type”
  • Go to C:\Cakewalk Content\Z3TA+ 2\MIDI Arpeggios and Save it
  • Load it into Z3TA+2′s Arpeggiator by going to Pattern > Load MIDI File…

3. How to create a bass synth with Z3tA+ 2

Who doesn’t like bass? Especially synth bass. Z3TA+ 2 is the answer to all of your sound design needs especially when you are looking to improve your production in the low end. I’ve put together a short tutorial on how to make a simple bass synth inside of Z3TA+2. Once you understand how everything works together you’ll be able to really start to make this plugin work for you.

Picking the right Oscillators

Within Z3TA+2 the first section you need to start working with is the OSC section. First I’ve selected two different square waves for OSC 1 and 2. They were Vintage Square 1 and Vintage Square 2. When creating a bass synth you need to make sure that your patch will not break up in the low end so be sure not to drop the octaves on the individual oscillators too low. I typically set mine to -2 at the most. Once you get to a certain range the instrument will sound weak and lose it’s driving Bass Synth sound

[READ THE REST OF THE TIP HERE]

4. [VIDEO] Digital Sound Factory Z3TA+  Sound Design

5. [VIDEO] Mixing and Mastering a song using only the Z3TA+ effects engine in SONAR

How to use a vocal-double to enhance lead vocals

One of the toughest things about working with a lead vocal track is getting it to pop out, while allowing it to still sit in the track nicely in context with its surroundings [other tracks].  Every mixing engineer has her/his bag of tricks, but here are a few ideas to utilize a “vocal-double” which may help support and embellish the lead vocal track.  For this demonstration I am using the lead vocal track of NBC’s The Voice Season 1 winner Javier Colon.  Note that you can click on images to get a bigger perspective.

Continue reading “How to use a vocal-double to enhance lead vocals”

Vocal Month: Creating Vocal Harmonies with Melodyne Essential

Can’t quite hit the high or low notes? Melodyne usually can.

by Craig Anderton

If you don’t have a wide vocal range, you have to choose a vocal’s key very carefully—the low parts can’t go below your range, and if you’re going to hit the harmony notes, you have to pay attention to where the highest notes fall as well. Unfortunately the voice sometimes loses power when you start hitting your lower limits, but if you choose the best possible range for your lead vocal then you may have a hard time hitting the harmony’s high notes. What’s a singer to do?

My solution is to choose the optimum key for the lead vocal, then reach for Melodyne Essential to synthesize the harmonies. Most of the time I can hit the harmonies so I’ll sing them “for real” and bring in Melodyne as needed, but I’ve also found merit to using Melodyne to generate the harmony even if I can hit the notes—it gives a different character that works well in some musical contexts.

Creating Harmonies

Generating harmonies requires some manual effort, but it’s worth it.

1. Clone the lead vocal.

2. Create a Melodyne Region FX for the clone.

3. Solo the lead vocal and clone (Dim Solo can be useful for this application so you can hear the vocals in context).

4. Start adjusting the clone’s blob pitches to create the harmony (Fig. 1).

Fig. 1: Thanks to a paint program’s transparent layers, colorization, and cut and paste, this shows the harmony line (blue) superimposed on the lead vocal.

Usually the easiest way to do this is by ear, but if you’re theory-minded, you can always apply those rules to determine which pitches to use for the harmonies.

Additional Tips

I highly recommend choosing Edit > Pitch Grid > No Snap and adjusting the harmony pitch by ear. Snapping doesn’t always produce the most musical results.

Also, check out my article Easy Automatic Double Tracking with Melodyne Essential, which describes how to add slight timing and pitch variations to do automatic double tracking. Applying the same technique to the harmony line prevents it from “shadowing” the lead vocal, and helps the harmony establish itself as an independent entity.

There’s a video on my YouTube channel that uses Melodyne Essential for creating both ADT and the harmony effects described in this article. In fact, there’s only one vocal track in the entire song; all the others were derived from it using Melodyne.

Finally, I demoed this technique during the video I did at Berklee College of Music last March. You can see the video here.

Happy harmonizing!

BETTER TOGETHER: TRY SONAR X3 AND MELODYNE FOR FREE!

Vocal Month: Easy Automatic Double Tracking (ADT) with Melodyne Essential

There’s a great ADT program lurking within Melodyne Essential

by Craig Anderton

So is Celemony’s ADT (Automatic Double Tracking) program any good? If you have Melodyne Essential, you can find out for yourself—because it’s the same program. Yes, hidden within SONAR X3‘s Melodyne Essential is a very cool ADT effect that’s extremely effective with vocals.

Introduction

Double-tracking is the process of singing a second vocal on top of a main vocal to “thicken” the overall sound. It’s impossible to sing a vocal exactly the same, so there will be slight timing and pitch differences that add interest and depth. Automatic Double Tracking produces this effect electronically, which can give more control over the double-tracked vocal. While there are dedicated plug-ins to give the ADT effect, Melodyne has all the tools needed to do this. I’d go so far as to say Melodyne can produce one of the best electronically generated ADT effects I’ve heard.

The Melodyne ADT effect works best with vocals where you haven’t already added extensive pitch or timing correction. As an aside, I never do a “wholesale” quantization of notes; to my ears, removing the “incorrect” pitch variations in a vocal actually create a less compelling performance. Instead, I manually correct only those notes that actually sound “wrong.” Even then, I don’t always quantize exactly to pitch. Music is about tension and release, and subconsciously, you’ll often sing a little flat or sharp (tension) and end up on pitch (release). Making all the pitches “perfect” removes this emotional component.

As an analogy, conside B. B. King’s guitar playing. He often bends a flatted 7th not quite up to pitch. By not resolving the note, instead of completing the phrase it leads you into the next one. Timing and pitch variations are an essential part of music, so don’t overdo the correction.

Setup

It’s easy to set up the ADT effect with Melodyne.

1. Clone the vocal to which you want to add the ADT effect.

2. Right-click on the cloned click and create a Melodyne Region FX.

3. Select all the notes in the vocal.

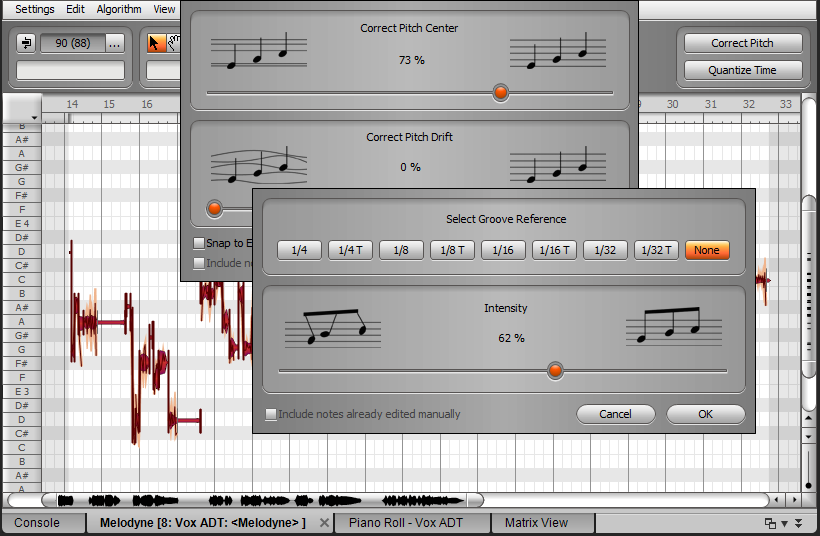
4. Turn up Correct Pitch Center to about 60% (Fig. 1).

Fig. 1: Correcting pitch and  timing subtly on a cloned vocal track can produce an automatic double-tracking effect.

5. Turn up Quantize Time Intensity to about 60% (Fig. 1).

6. Evaluate the ADT effect, and tweak the pitch and timing correction amounts as appropriate.

Generally you don’t want too much pitch or timing correction—just enough to be different from the main vocal.

Mixing ADT Vocals

When mixing, centering the two vocals tends to maximize the similarities to chorusing; the vocals sound somewhat more diffused, which works well for “gentler” material. Panning them slightly oppositely (about 30% right and 30% left) can give a more spacious sound in stereo.

With sparser mixes, centered panning often fits best while the somewhat spread sound helps the vocals have more presence in dense material, like hard rock with lots of distorted guitar. However, these aren’t “rules” as ultimately, the song itself will dictate which works best in the final mix.

Give this technique a try—I think you’ll be as surprised as I was about how effectively it provides an authentic, convincing ADT effect.

BETTER TOGETHER: TRY SONAR X3 AND MELODYNE FOR FREE!

SONAR X3 QUICKTIP: MAKE YOUR VOICE THICKER (STUDIO & PRODUCER)

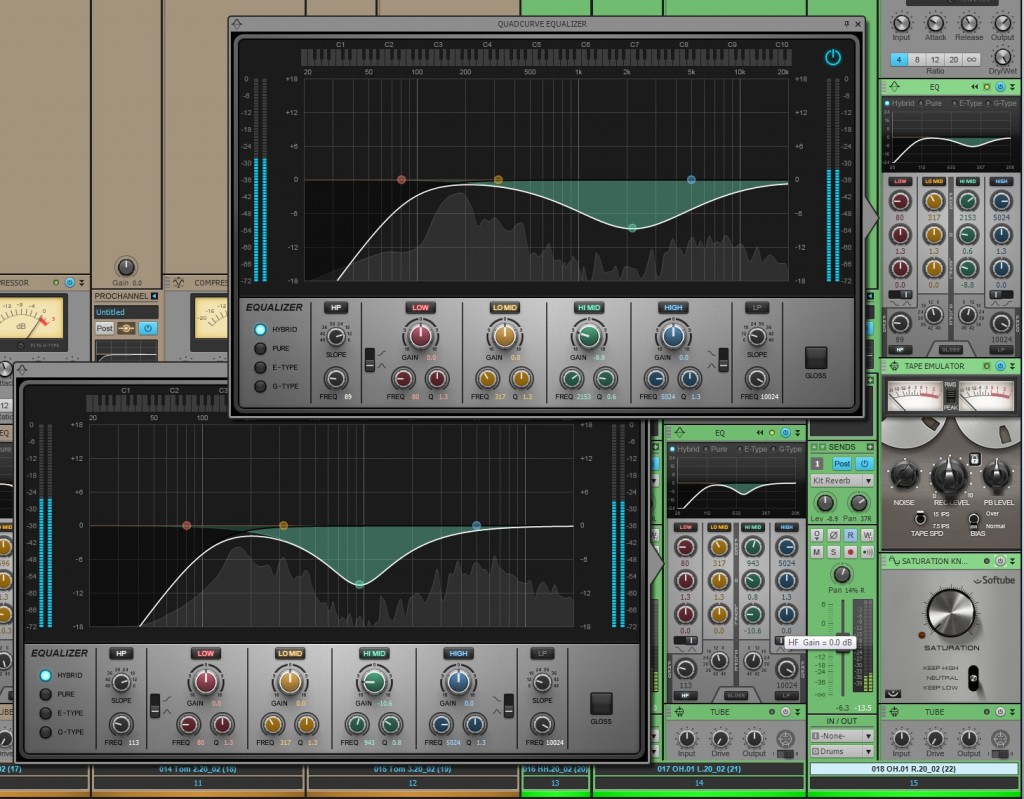
SONAR Production Tips – Building A ProChannel De-esser

Introduction

SONAR X3’s modular ProChannel allows users to take advantage of all the different aspects of a real mixing console. One great way of improving your vocal production is by using De-Essers to reduce the sibilant frequencies between 5-7kHz. The human mouth acts like a filter for words and sometimes certain words for certain singers can produce unwanted hissing sounds that get in the way of mixing. You can build your own De-Esser within the ProChannel by using the following steps.