Vocal Month: Beatboxing – Picking the Right Vocal Microphone Part II

To continue on our quest of choosing the right vocal microphone we tracked another style of vocals to help understand the caliber of the microphones for the shootout. Gene Shinozaki is a local Boston resident that performs on the streets and in the in the studio. You can subscribe to his page here. Here’s the beatboxing mic shootout that we did with him in less than 1 minute:

Interestingly enough, recording a beatboxer is a pretty useful way of understanding the true range of a microphone without having too much setup involved. Beatboxers use all different types of techniques to warp and skew their mouth in ways that span a wide frequency spectrum. Producers like Timbaland and the like will even use this on their tracks to enhance them.

A Beatboxing Perspective

Let’s look at the set of microphones from a beatboxer’s perspective now that we understand how they sound on a female vocalist. Continue reading “Vocal Month: Beatboxing – Picking the Right Vocal Microphone Part II”

Vocal Month: Picking the right Vocal Microphone Part I

Having a go-to microphone is always a great policy to have, but understanding the way specific microphones sound and perform is an even greater depth of knowledge every engineer or aspiring engineer should understand. To a trained ear – different microphones sound drastically different in character, response, and tone. The best way to start understanding these differences is easier thank you think. Start comparing microphones – and get nerdy about it!

Here’s our own Cakewalk microphone shootout displaying 5 different microphones on Ingrid Gerdes.

Continue reading “Vocal Month: Picking the right Vocal Microphone Part I”

Beatboxing – Watch What Happens to the Frequency Analyzer in SONAR X3

Within the Vocal world  there are all different styles of singing and beatboxing is one of the more complex and percussive styles that the human voice can produce. Typically there is a single frequency range that vocalists stay within but beatboxers span the entire frequency range to achieve the sounds that come from their mouth. Check out this video with a local Boston street performer as he shows us how it’s done:

Wanna try the QuadCurve EQ? Check out SONAR X3 30 Day Trial

Highlights from April: Tips to Help You "Mix it Right"

Cakewalk presents “Mix it Right” month
We have been busy this month creating new resources to help you craft better mixes. Check out all the tips, tricks, and video from experts like Craig Anderton, Dan Gonzalez, and Jimmy Landry who have all worked professionally in studios and bring decades of mixing knowledge to the table (and console)
.

EQ: Carving Out The Right Sound For Your Mix
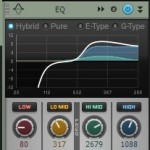
One of the most important aspects of mixing is using EQ to “carve out” a specific frequency range for instruments so they don’t conflict with each other. If instruments have their own sonic space, it’s easier to hear each instrument’s unique contribution, which increases the mix’s clarity. Learn more

When To Break The “Rules” Of Digital Mixing
Sometimes you need a mix to have a certain sound and the so-called rules of digital mixing go out the window. Recently Cakewalk’s Jimmy Landry was hired to produce a song with some “grit” and “acoustic-oriented authenticity,” so he grabbed his 5-Year Old’s harp out of a toy chest, his acoustic guitar, and got to work in SONAR X3. Learn more

“Object-Oriented” Clip Mixing in SONAR
When you need to get really detailed, object-oriented mixing is a convenient solution. Craig Anderton explains how to approach this in SONAR. Learn more

How to Use Reverb to Create Depth
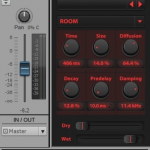
Applying the proper Reverb requires more time than just scrolling through the presets of the basic Hall, Room, and Plate algorithms. Cakewalk’s Dan Gonzalez covers the dos-and-don’ts of Reverb for guitars, vocals, drums, and more. Learn more

Video: How to Use Compression
Mixing with Compression is an essential part to shaping and creating a great sounding track. In this video series Dan Gonzalez shows you how to use compression on various types of instruments in SONAR X3 with the CA-2A T-Type Leveling Amplifier. Learn more Continue reading “Highlights from April: Tips to Help You "Mix it Right"”

“Object-Oriented” Clip Mixing in SONAR

When you need to get really detailed, object-oriented mixing is a convenient solution

by Craig Anderton

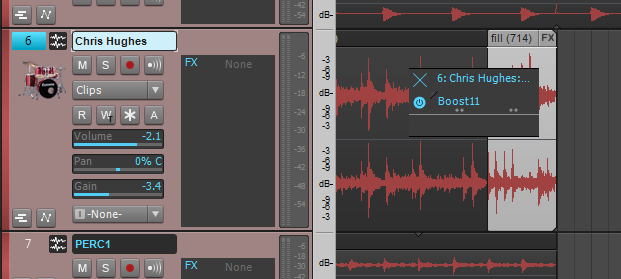
Many times when mixing, you’ll want to apply an effect or volume change to a small, specific section. Clip Automation makes it easy to handle Gain or Pan changes, but you can also work with effects by isolating specific “objects” in a track, then processing them individually. This is different from the usual method of applying effects to an entire track, but can come in really handy for detailed work. Also note that object-oriented effects processing works with any type of clip—audio, MIDI, or groove.

Here’s a step-by-step example of how to apply object-oriented mixing by adding maximization to one drum fill to make it really stand out. Download SONAR X3 to give this a try.

1. To isolate the object from a selected track, alt-click with the Smart tool at the beginning of the section you want to isolate, or place the Now time at this point and type “S.” Do the same at the end of the section.

2. Right-click on the object, and select “Open Clip Effects Bin” from the context menu (keyboard shortcut: Alt+K).

3. An effects bin opens up that’s similar to the standard track effects bin.

4. Right-click on a blank part of the effects bin, choose Audio FX from the context menu, then drill down to find the effect you want.

5. The effect will now appear in the bin. Like a standard effects bin, the small “power symbol” circle (blue for enabled, gray for disabled) appears to the effect’s left. To insert more effects Continue reading ““Object-Oriented” Clip Mixing in SONAR”

Mixing Tips: Know Your Signal Flow in SONAR

Signal Flow is an important concept to understand, and it may be easier to think about when presented with a diagram of how audio is passes through SONAR.

Inputs and Outputs – Easier than you think!

The first concept to understand is the relationship between Inputs and Outputs. There isn’t anything complex about the subject unless you over-think it.  It is the underlying theme to just about anything within your Digital Audio Workstation. Always remember the following:

  • Outputs: Always feed Inputs
  • Inputs: Always fed by Outputs

Sometimes Outputs can be named “Outs or Sends” and sometimes Inputs are labelled “Ins or Returns.” If you’re a guitar player then you can associate this concept with the FX Loop that exists on the back of your amp. You use this to Send audio to your effects pedals and then back to your Amp’s Return.

First, let’s start where audio starts. Typically it begins with an instrument or audio file:

Upon opening SONAR many users will head straight to their Media Browser and Continue reading “Mixing Tips: Know Your Signal Flow in SONAR”

SONAR X3: Producing Drum Samples (Video Series)

In the midst of recording a whole record it’s always a good idea to take some samples of the drum set so that you can replace and reinforce the drums later on in mixing. Here is an 11-part video series that shows you how to apply some basic EQ, Compression, and Editing techniques to get your drum samples to sound pro within SONAR X3.