Take Control of Your Mix with Mix Recall

Mix Recall is a powerful way to organize mixes within a project—Whether you want to have a mix without vocals or a version of the song using a different processing chain on the drums—Mix Recall is the perfect solution for these types of situations, but it can do more than that. Say you are handed a project from someone else using SONAR or you got a new plug-in you want to try out using a previously recorded song, Mix Recall can help you handle this as well by getting your project reset back to a neutral position.

Adding the Mix Recall Module

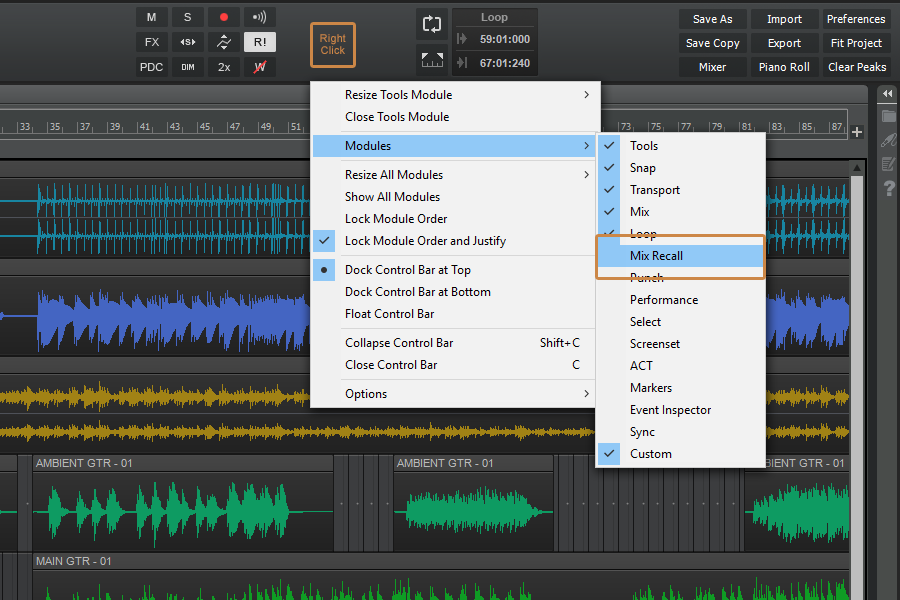
Check that you have the Mix Recall module available in the Control Bar. You can add it to the Control Bar if it’s not already there by right-clicking in a blank space and adding it from the menu.

Creating a Mix Scene

Start by creating a new Mix Scene with the current project setting using the [Save As New Scene] button.  This will allow us to make a change and then come back to the original point to see the difference.

Make a change to the mix by adjusting the volume on a couple of tracks or muting a track previously un-muted.

Click the [Save As New Scene] button on the Mix Recall module again to save these changes into another mix scene. Give this mix a unique name and save it. Now you can reload your previous mix and see the changes reverted back to where we started. Selecting the second mix scene with bring us back to the present state of the mix. You can also use the [Recall Previous Scene] button to toggle back and forth between 2 mix scenes or simply go back to the last mix scene you were at.

Resetting a Mix

Using a project you want to reset, click the drop down arrow on the Mix Recall module and select “Reset Mix…” from the menu. This will remove all automation envelopes, plug-ins, and reset the ProChannel back to the default modules along with any controls in SONAR.

That’s It! Now you can get back to working on your mix instead of trying to manage multiple saved versions of the same song or trying to manually remove each plug-in or automation envelope.

Advanced Techniques

  • Create a save point as you begin your mix once you have basic levels and panning so you can always go back and hear your project from the start.
  • Create save points within your mix to go back and see how it has progressed.
  • Save several iterations of a mix and bounce each when sending it to a client or friend. Here are some common iterations to save as Mix Scenes.
    • Vocal Up Mix (Plus 1-3dB)
    • Vocal Down Mix (Minus 1-3db)
    • No Vocals
    • Radio Edit Mix
  • Time box your mix by only giving yourself an allotted amount of time and dividing that up over what you need to do.  Save each stage as a Mix Scene to go back and look at your progress and how you did at each stage.

Mix Recall is available in SONAR Artist, Professional and Platinum

Creating Your Own Guitar Tone with TH3 in SONAR

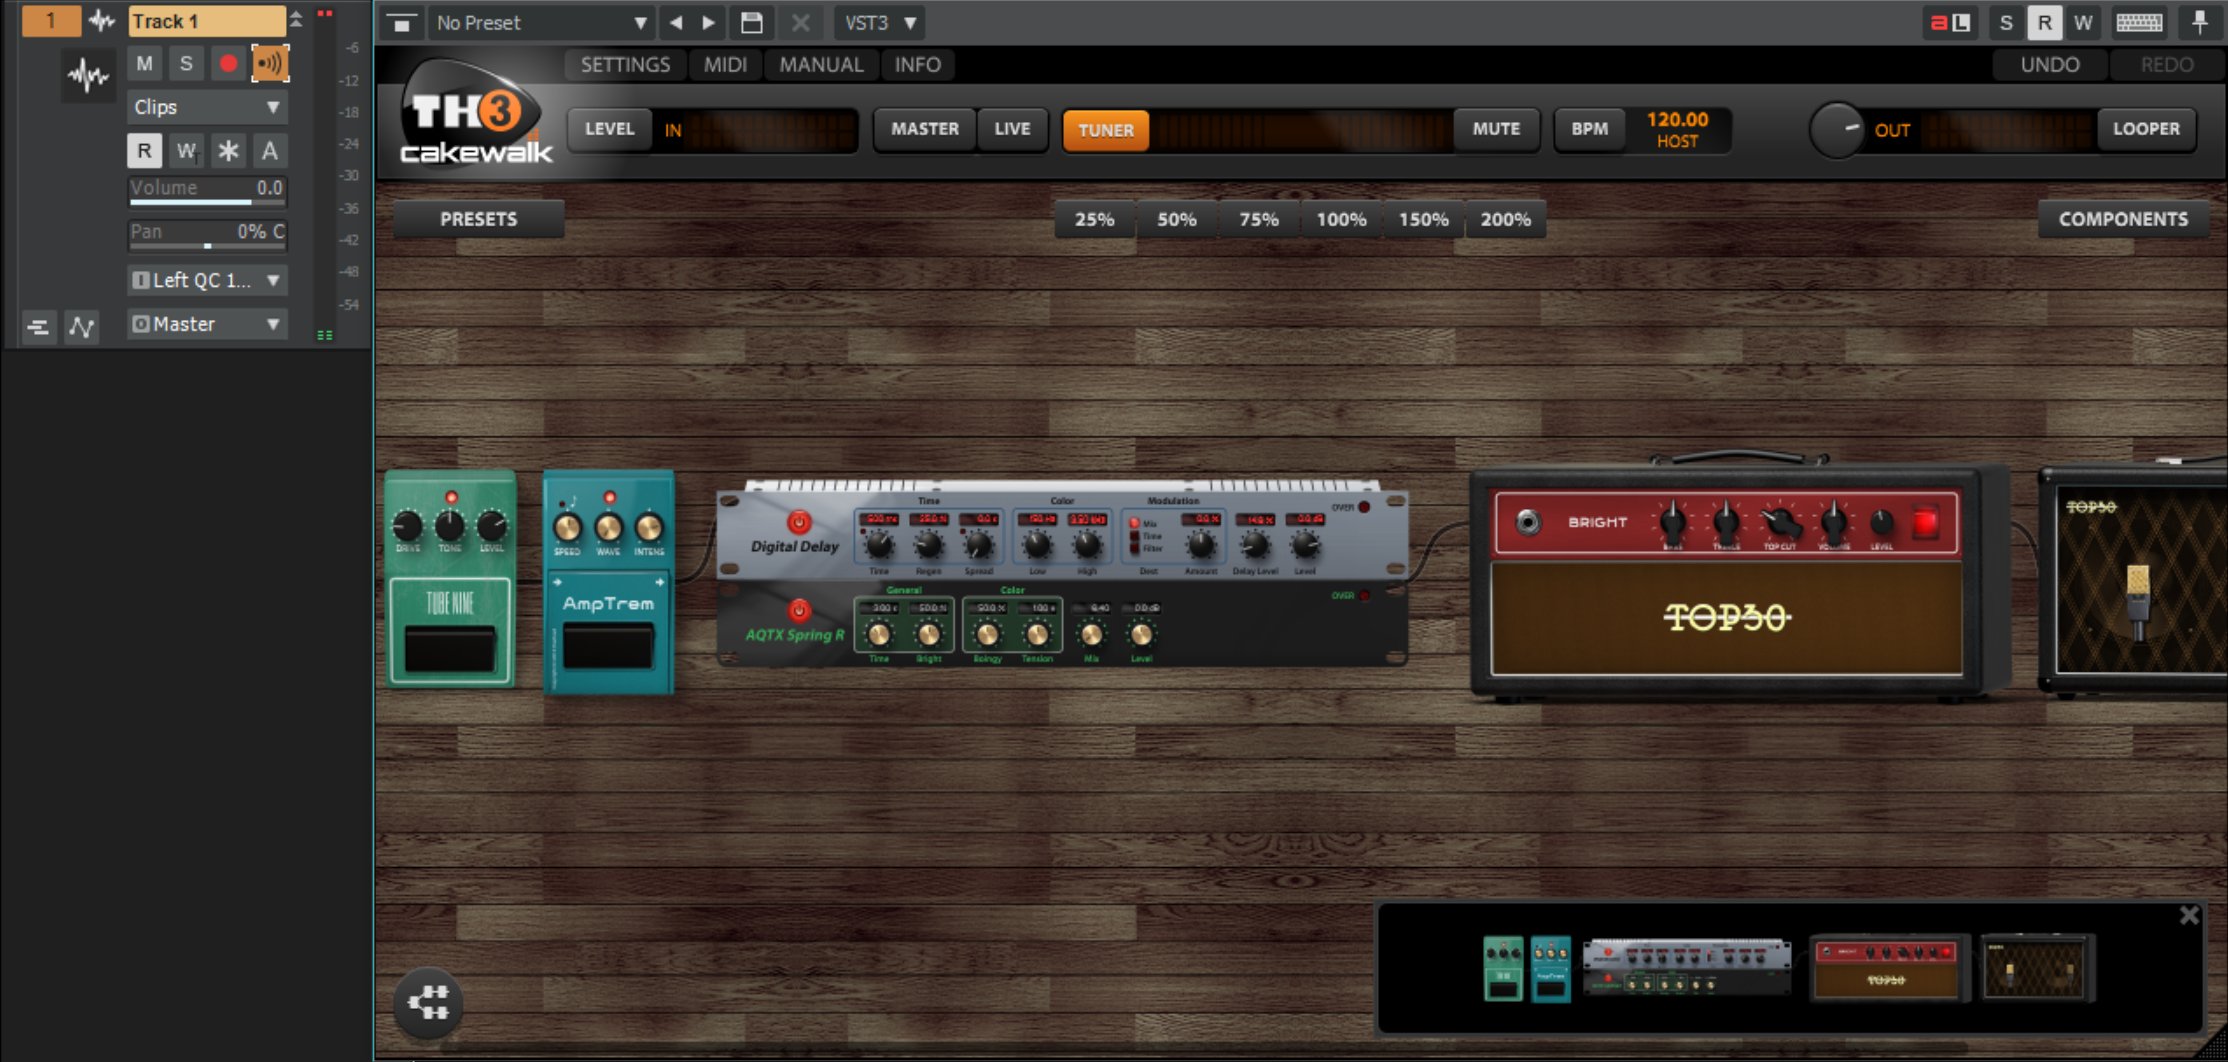
TH3 Cakewalk edition allows for anybody with SONAR to have access to amazing guitar tones. It comes with loads of amps, cabinets, effects and even allows for changing the position of the mic. If you want to do stereo processing of effects to create a stereo delays or parallel processing by mixing two amps together, you can do that as well.

Where to start?

Insert TH3 on to your guitar track and make sure you are using the correct input and have the Input Echo button enabled to hear what is plugged into that input.

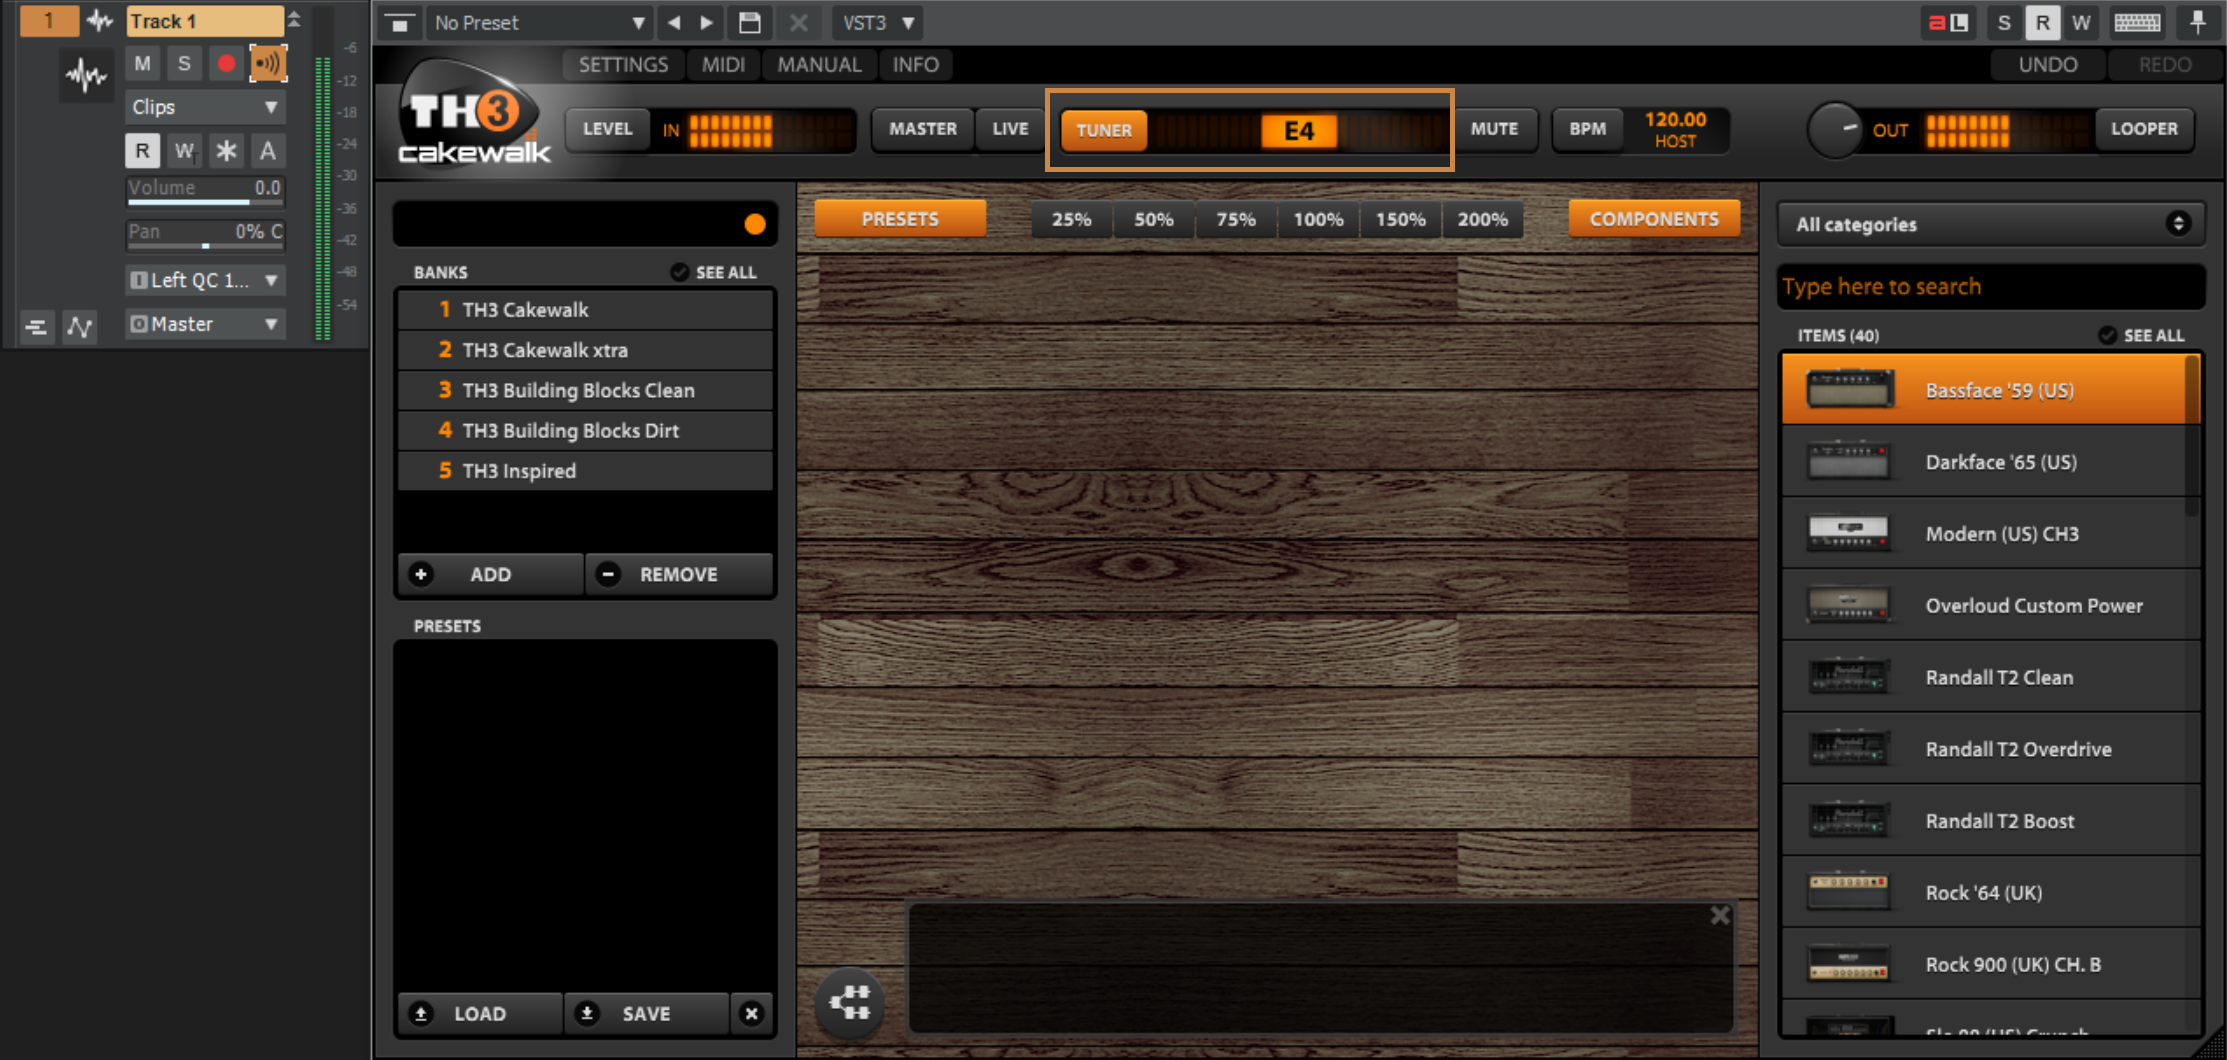
A good place to start after inserting TH3 on to your guitar track is to check your level into the plug-in and the tuning of your guitar.

Check your level:

Strum a big chord on your guitar to see how much signal is coming into the plug-in. There should be a healthy amount of signal coming in and no clipping in the red.

Tuning:

Play each string and adjust until you see the tuning pin is in the center for each string.

Auditioning Amps

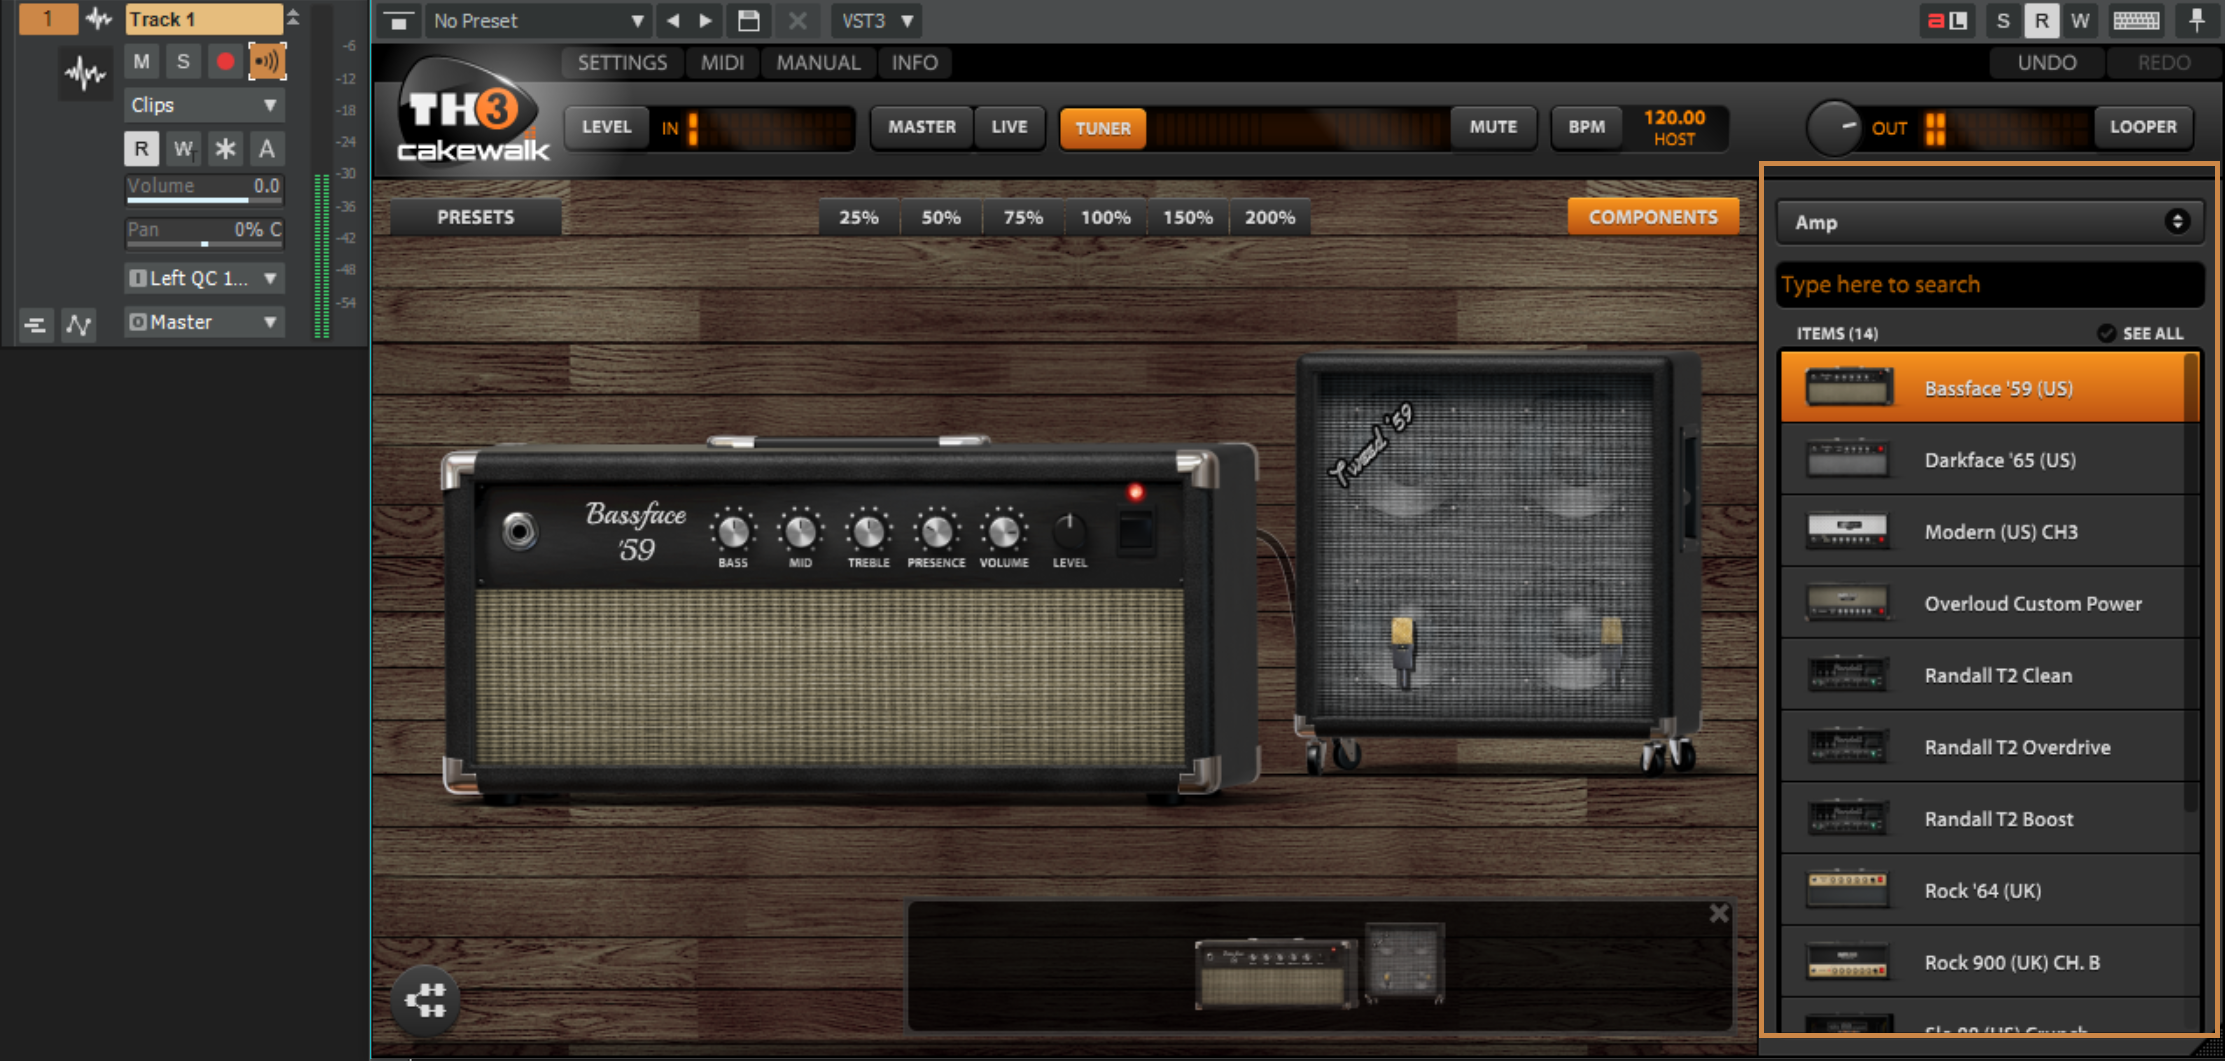
Open the [Components] section on the right if it is not already open and select the amps category from the list. Once you have that selected, you can then drag in the first amp at the top. You’ll be asked if you want to insert a matching cab, click [YES PLEASE!].

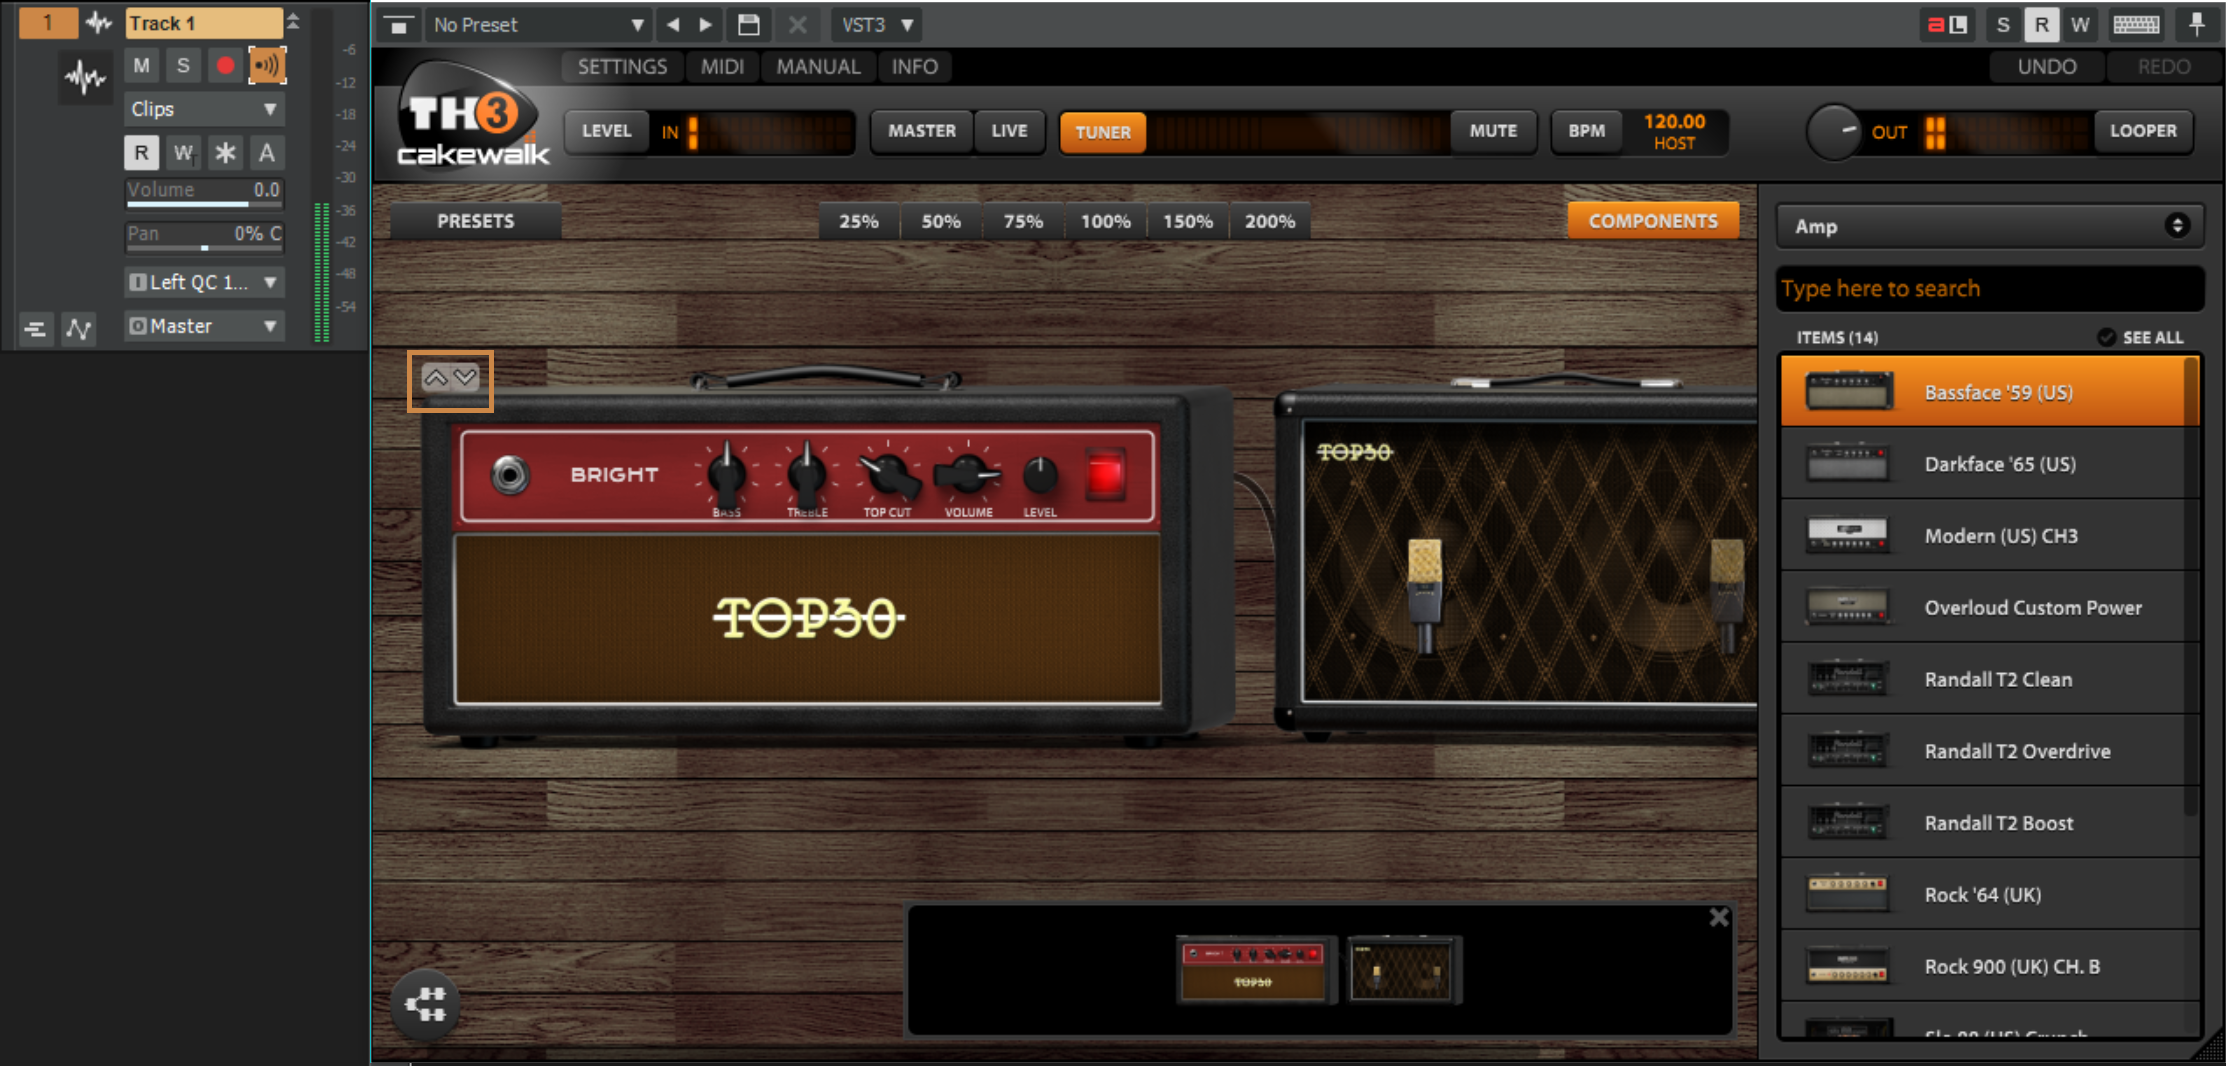
Give it a try! To audition other amps and cabs click the up and down arrows on the top left corner of the amp head or cab. Depending on what you are going for this is where you’ll want to pick out an amp that has some of the characters you are going for.

Here is a list of the included amps in TH3 Cakewalk along with the units they are modeled after.

  • Bassface ’59 – Modeled after the ’59 Fender Bassman
  • Darkface ’65 – Modeled after the ’65 Fender Twin
  • Modern – Modeled after the Mesa Boogie Dual Rectifier
  • Overloud Custom Power – Overloud Custom amp
  • Randall T2 – Official model of the Randall T2 head
  • Rock ’64 – Modeled after the Marshall JTM45
  • Rock 900 – Modeled after the Marshall JCM900
  • Slo 88 – Modeled after the Soldano x88r
  • THD Univalve – Official model of the THD Univalve Single- Ended Class A amplifier
  • Top30 – Modeled after the Vox AC30
  • Tweed Deluxe – Modeled after the Fender Tweed Deluxe
  • Bass SuperTube VR – Modeled after the Ampeg SVT-VR

Spice It Up Now

I’m going for a pretty classic tone that is mostly clean with a little bit of grit on it. I picked out the Top30 type head with a matching cab and will add an overdrive going into the amp. Go to the Components section again and select overdrive category. Drag in the TUBE NINE over before the amp. Dial in a some gain to taste using the “Drive” control and give it a whirl.

There are many other effects included with the TH3 Cakewalk edition, here is a compete list of everything you get.

  • TUBE NINE Overdrive
  • FatMuff Fuzz
  • FUZZRACE Fuzz
  • CHR-2 Chorus
  • Digital Delay
  • RSS Compressor
  • ANALOG FLANGER
  • Rich Flanger
  • 9-0′ Phaser
  • AQTX Spring Reverb
  • AmpTrem Tremelo
  • Auto-Wah
  • cry maybe Wah
  • Gate Expander
  • Volume

Mastering Space

Using spacial type effects like reverb and delay are critical in getting many of the classic guitar tones from the past. Here are some good rules to live by when getting started using reverb, delays and other spacey effects.

  1. Use modulation type effects like Chorus, Phasers, and Flangers toward the middle of your chain after distortions & overdrives.
  2. Use Delays after the Modulation type effects.
  3. Place reverbs at the end of your chain.

TH3 Cakewalk edition is included in SONAR Home Studio, Artist, Professional, and Platinum.

Building Your Own Professional Sound Panels – 5 Years Later

[Links to building the sound panels below]

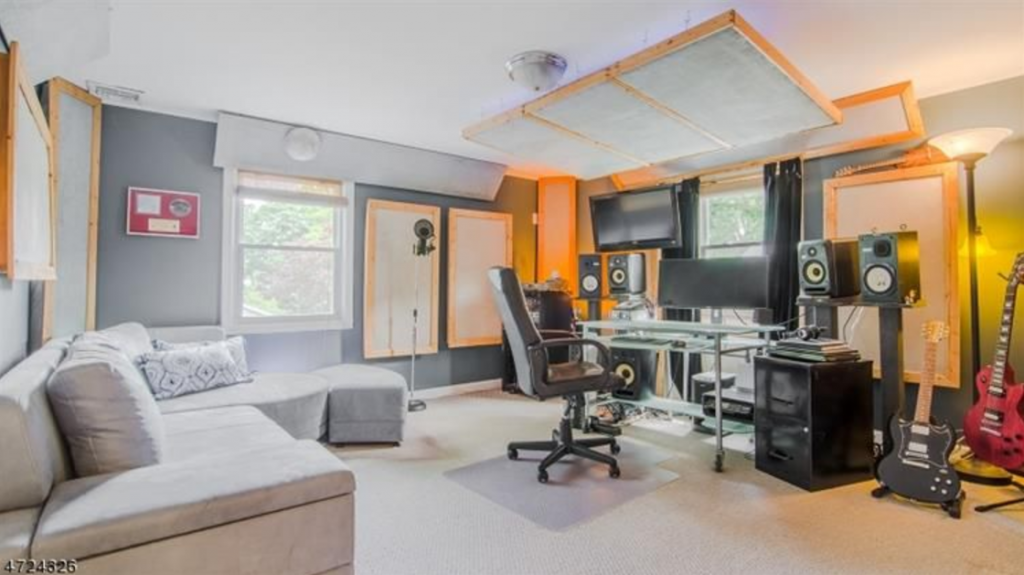
Time flies when you’re having fun the old cliché saying goes.  For me, five years ago, I was in the trenches for a good week going down a rabbit hole not knowing exactly where I would end up.  I’m talking about sound panels – building sound panels that is; and if you’re anything like me, you’ve been in a few studios and loved the look and feel of those expensive looking ones on the walls.

When I moved into our new house, my goal was to create a project studio where I could plain and simply put, have fun.  My jobs before Cakewalk at Elektra Records and Capitol Records allotted me enough pressure-cooker studio situations to last a lifetime, so this studio was about doing things I wanted to do, when I wanted to do them, and maybe also making some college money on the side for my boy Mack (now 8). Continue reading “Building Your Own Professional Sound Panels – 5 Years Later”

The Dynamic Gate | A Cleaner Way To Mix Drums

by Daniel Gonz

Gates are wonderful processors that can clean up background noise and bleed in your audio tracks. They’re a bit tricky to understand because the key to successfully using one is often a specific feature that’s hidden or buried in the interface. The feature I’m referring to is called the sidechain. It’s a powerful element of my mixing workflow and I’d like to show you why.

To follow along with this post, you can download the audio examples here.

In its simplest form, a gate allows a signal to pass through it only when its decibel level is above a set threshold. This means the gate is ‘open’. If the signal falls below the threshold then no signal is allowed to pass. This means the gate is ‘closed’. The sidechain becomes an integral part of this entire process because it’s what the gate uses to detect whether or not the signal is above or below the set threshold.

Sonitus Gates On Kick and Snare in SONAR
Top Left to Bottom Right: Kick In Gate, Kick Out Gate, Snare Top Gate, Snare Bottom Gate

Continue reading “The Dynamic Gate | A Cleaner Way To Mix Drums”

CakeTV Live Ep 4 – Mixing Drums in SONAR Part 1

by Dan Gonzalez

In this episode, we’re diving into drum mixing, and doing little things at the beginning of the mix that will have a HUGE impact right away.

If you’re interested in more drum production, check out our FREE eBook about editing multitrack drums.

SONAR Facility, The Sound Foundation in Dallas gets global recognition with Ford Motors

Something inspiring is happening in the Dallas music scene, and Cakewalk is excited to be a part of it with SONAR Platinum. When Norman Matthew gets off the road from touring with his band Murder FM, or finishes up a major video or full length record, it’s not time to chill out.  In fact for him, that’s the time when he buckles down and digs into his “little side-thing” which is a major music operation called The Sound Foundation (TSF) in Dallas, TX.  Dallas has always been known to be a great music town, but Norman’s TSF has a great angle to its existence that resonates to the very core of his soul.  In fact just recently, TSF caught the eye of the Ford Motor Company who took notice of Norman and his operation and were so impressed, they featured the establishment on their “Good Works” series.

If you’re reading this article, I’m sure you are aware that the Major Label system has pretty much all but collapsed.  Look anywhere on the internet and you will find all the articles you can handle about how evil all the labels were, how they had this coming to them and how the lavish lifestyles of the greedy executives fostered this meltdown.  But what you may not know is that “back in the day,” a good piece of that excess cash folks paid down on an $18 CD that cost $1.76 to make went right back into a pool of starving artists (not directly of course).  It was called “Artist Development” and it helped pay and pave the way for many iconic artists who started out with the ole “Label Demo Deal.”

Continue reading “SONAR Facility, The Sound Foundation in Dallas gets global recognition with Ford Motors”

Ben Cantil on Z3TA+ 2 – Teaching Synthesis & Sound Design at Berklee Valencia

We recently had the opportunity to catch up with our friend Ben Cantil (aka. Encanti) – EDM Producer, author of the Mutant series Expansion Packs, and evangelist for Z3TA+ 2.

Who is your Masters Sound Design Course at Berklee Valencia geared towards?
I am working with young professionals from all walks of life who have come to Berklee Valencia to earn their Master’s degree, especially as part of the Music Technology Innovation program. My curriculum emphasizes practical and professional applications of creative music software. Some of these students will become sound designers, but many others will become engineers, stage musicians, film scorers, and installation artists, so I try to find common threads to make the content really relevant and useful no matter where you take your skills outside the classroom.


What are your goals for the students in your class?
This course is all about the fundamentals of sound design. The first goal is to equip students with creative and technical skills for generating sounds from scratch, emulating sounds, and composing unique sonic gestures intuitively. Another goal of this course to produce content using a variety of different medians. I think it is an ideal class for anyone that learns best from hands-on experience.


What are some of the Cakewalk Products being used in your class?
Z3ta+ 2 is a major part of my masters sound design course. We spend several weeks building patch libraries and sequences to make the synth really sing. I’ve found this is the ideal plugin to use when teaching synthesis, because it’s so unrestrained and versatile without being a processor hog.


Mixing Tips: Know Your Signal Flow in SONAR

Signal Flow is an important concept to understand, and it may be easier to think about when presented with a diagram of how audio is passes through SONAR.

Inputs and Outputs – Easier than you think!

The first concept to understand is the relationship between Inputs and Outputs. There isn’t anything complex about the subject unless you over-think it.  It is the underlying theme to just about anything within your Digital Audio Workstation. Always remember the following:

  • Outputs: Always feed Inputs
  • Inputs: Always fed by Outputs

Sometimes Outputs can be named “Outs or Sends” and sometimes Inputs are labelled “Ins or Returns.” If you’re a guitar player then you can associate this concept with the FX Loop that exists on the back of your amp. You use this to Send audio to your effects pedals and then back to your Amp’s Return.

First, let’s start where audio starts. Typically it begins with an instrument or audio file:

Upon opening SONAR many users will head straight to their Media Browser and Continue reading “Mixing Tips: Know Your Signal Flow in SONAR”