Take Control of Your Mix with Mix Recall

Mix Recall is a powerful way to organize mixes within a project—Whether you want to have a mix without vocals or a version of the song using a different processing chain on the drums—Mix Recall is the perfect solution for these types of situations, but it can do more than that. Say you are handed a project from someone else using SONAR or you got a new plug-in you want to try out using a previously recorded song, Mix Recall can help you handle this as well by getting your project reset back to a neutral position.

Adding the Mix Recall Module

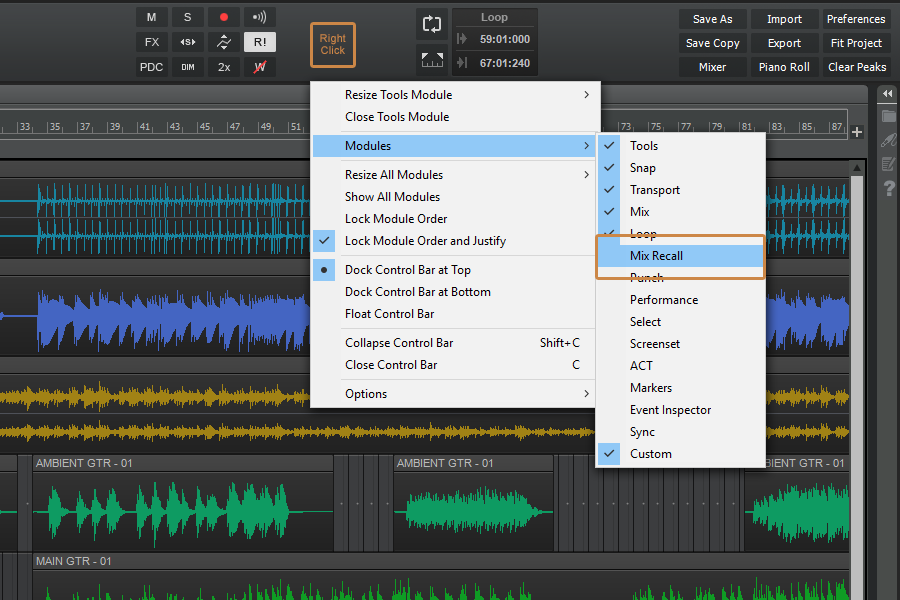
Check that you have the Mix Recall module available in the Control Bar. You can add it to the Control Bar if it’s not already there by right-clicking in a blank space and adding it from the menu.

Creating a Mix Scene

Start by creating a new Mix Scene with the current project setting using the [Save As New Scene] button.  This will allow us to make a change and then come back to the original point to see the difference.

Make a change to the mix by adjusting the volume on a couple of tracks or muting a track previously un-muted.

Click the [Save As New Scene] button on the Mix Recall module again to save these changes into another mix scene. Give this mix a unique name and save it. Now you can reload your previous mix and see the changes reverted back to where we started. Selecting the second mix scene with bring us back to the present state of the mix. You can also use the [Recall Previous Scene] button to toggle back and forth between 2 mix scenes or simply go back to the last mix scene you were at.

Resetting a Mix

Using a project you want to reset, click the drop down arrow on the Mix Recall module and select “Reset Mix…” from the menu. This will remove all automation envelopes, plug-ins, and reset the ProChannel back to the default modules along with any controls in SONAR.

That’s It! Now you can get back to working on your mix instead of trying to manage multiple saved versions of the same song or trying to manually remove each plug-in or automation envelope.

Advanced Techniques

  • Create a save point as you begin your mix once you have basic levels and panning so you can always go back and hear your project from the start.
  • Create save points within your mix to go back and see how it has progressed.
  • Save several iterations of a mix and bounce each when sending it to a client or friend. Here are some common iterations to save as Mix Scenes.
    • Vocal Up Mix (Plus 1-3dB)
    • Vocal Down Mix (Minus 1-3db)
    • No Vocals
    • Radio Edit Mix
  • Time box your mix by only giving yourself an allotted amount of time and dividing that up over what you need to do.  Save each stage as a Mix Scene to go back and look at your progress and how you did at each stage.

Mix Recall is available in SONAR Artist, Professional and Platinum

Building Your Own Professional Sound Panels – 5 Years Later

[Links to building the sound panels below]

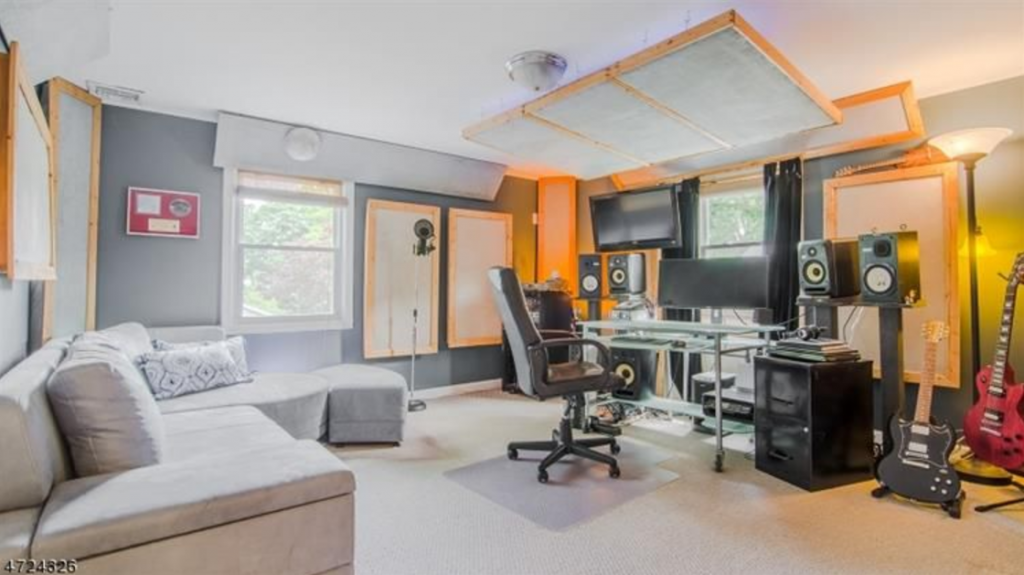
Time flies when you’re having fun the old cliché saying goes.  For me, five years ago, I was in the trenches for a good week going down a rabbit hole not knowing exactly where I would end up.  I’m talking about sound panels – building sound panels that is; and if you’re anything like me, you’ve been in a few studios and loved the look and feel of those expensive looking ones on the walls.

When I moved into our new house, my goal was to create a project studio where I could plain and simply put, have fun.  My jobs before Cakewalk at Elektra Records and Capitol Records allotted me enough pressure-cooker studio situations to last a lifetime, so this studio was about doing things I wanted to do, when I wanted to do them, and maybe also making some college money on the side for my boy Mack (now 8). Continue reading “Building Your Own Professional Sound Panels – 5 Years Later”

CakeTV Live Ep 4 – Mixing Drums in SONAR Part 1

by Dan Gonzalez

In this episode, we’re diving into drum mixing, and doing little things at the beginning of the mix that will have a HUGE impact right away.

If you’re interested in more drum production, check out our FREE eBook about editing multitrack drums.

How To Create Easy Tempo Maps in SONAR with Melodyne 4

Thanks to Melodyne’s advanced tempo detection and SONAR’s powerful ARA drag-and-drop integration, your projects can now follow a live recording’s tempo. Simply drag a standard audio clip (or Melodyne region effect) to SONAR’s timeline, and SONAR creates a tempo map that follows the clip tempo. Watch the new video for more information.

Parallel Compression: Now Easier Than Ever

A few years back, we showed you a bit about Parallel Compression in SONAR. Now that we’ve introduced Patch Points in the Jamaica Plain update, you can do these same things with a much more efficient workflow.

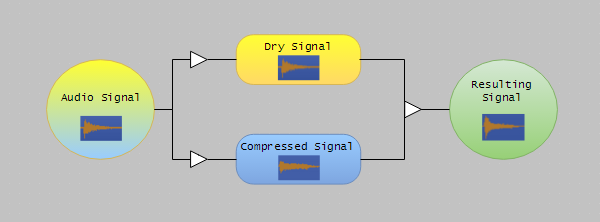
Let’s quickly define parallel processing: In parallel processing, a signal is duplicated into two or more signals. Each copy of the signal is processed differently but plays back simultaneously with the original. The copy/copies are then mixed together.

Parallel Compression Diagram_600x222

Parallel Compression, aka “New York Compression,” is most commonly used on drums to add body to the drum mix without flattening the snappy transients.

Check out the video below to see just how easy (and great sounding) this technique can be:

You might also like…
Tape Emulator Gif SONAR Patch Points Multiband Processing
5 TOOLS TO GET “THAT ANALOG SOUND” FROM SONAR UNIVERSAL ROUTING TECHNOLOGY 202: THE AUX TRACK

Improving Your Synth Sounds With Real-Time Upsampling

By Craig Anderton

Some plug-ins and virtual instruments sound better when recording at sample rates higher than 44.1/48 kHz because high audio frequencies can interfere with lower clock frequencies, which causes foldover distortion. This adds a “wooliness” at lower frequencies, and can also compromise high-frequency response. Plug-ins that include internal oversampling do not have this problem, but not all plug-ins—particularly older ones—use oversampling.

The Foxboro update introduced Upsample on Render, which provides the benefits of using higher sample rate processing even in 44.1 kHz or 48 kHz projects by internally 2X up-sampling plug-ins of your choice, rendering them as audio, then down-sampling the rendered audio back down to the original sample rate. While it may seem counter-intuitive that the audio quality from rendering at 96 kHz is preserved at lower sample rates, the lower sample rates have no problem reproducing signals in the audio range, and by rendering at 96 kHz, the problematic frequencies no longer exist.

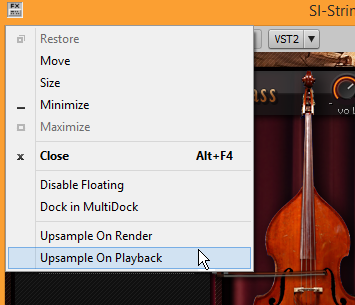
The Jamaica Plain update now offers Upsample on Playback, so you can preview and compare the difference in real time. To enable either Upsampling on Render or Upsampling on Playback on a per-plug-in basis, click the FX button to the left of the instrument name in the virtual instrument interface.

SONAR Upsample On Playback Option

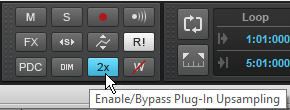
To turn Upsampling on or off globally for plug-ins that have Upsampling enabled, use the 2X button in the Control Bar’s Mix module.

SONAR Plug-in Upsampling

Universal Routing Technology 202: Unlocking the Creative Potential of the Aux Track

By Craig Anderton

Here are some representative applications for using Patch Points and Aux Tracks. There are often several ways to accomplish the same functionality, so use whichever is most comfortable. For example, if you already have existing tracks that you want to connect to Patch Points, it’s probably easier to assign their inputs to Patch Points than create new Aux Tracks. However, if you’re setting up a new recording scenario, it will probably be easiest to create an Aux Track as that will create both a track and a Patch Point assignment.

Application #1: Recording the Metronome to a Track

Note: If your project already contains a Metronome bus, skip to step 7.
  1. Choose Insert > Stereo Bus to create a new bus for the audio metronome.
  2. Rename the new bus to Metronome.
  3. Choose Edit > Preferences > Project – Metronome.
  4. Select the Recording check box and clear the Playback check box (you will hear the recorded metronome instead during playback).
  5. Select “Use Audio Metronome.”
  6. Click the Output drop-down menu and select the bus named Metronome, then click OK to close the Preferences dialog box.
  7. Click the Metronome bus’s Output control and select New Aux Track on the pop-up menu.
  8. Arm the Aux Track for recording.
  9. Begin recording.

Continue reading “Universal Routing Technology 202: Unlocking the Creative Potential of the Aux Track”

Universal Routing Technology 101: Improving Your Workflow With Patch Points

By Craig Anderton

Cakewalk has been quietly developing a Universal Routing Technology that gives tremendous flexibility when routing signals within SONAR. One of the first examples was the FX Chain, which provided a “container” for routing effect inputs and outputs together, and had the intelligence to disconnect controls if the effects being controlled were removed. The ProChannel and FX Racks are a basic example of taking the “insert jacks” on mixers to a more flexible level by providing two ways of inserting effects, where one block could be pre or post compared to the other.

Synth recording took the concept another step further by allowing real-time recording of synth outputs, but now Patch Points and Aux Tracks introduce a mind-boggling level of flexibility: you can feed tracks (audio or instrument) into tracks, buses into tracks, sends into tracks, or even (get ready!) tracks, sends, and buses into the same track—and much more. It’s even possible to do something like feed track outputs and bus outputs into an Aux Track, when can then feed with other Aux Tracks and a Send into a different track. This may sound complicated enough to make your head explode, but it’s all implemented in a smart, intuitive way that not only adds no clutter to the Track or Console view, but even cleans up unused patch points if the routing changes.

Please note: Projects that contain Patch Points and Aux Tracks cannot be opened in SONAR versions prior to SONAR Jamaica Plain (Update 9). If you need to open a project in an earlier version, first back up the project, unassign any patch points, then re-save the project.

For detailed Patch Points information, see the New Features section in SONAR’s online Help.

Creating, Choosing and Assigning Patch Points

When you open a track input or output picker, or a send or bus output picker, you’ll see the option “New Patch Point.” Select this to create a Patch Point. This is also how you pick an existing Patch Point. Continue reading “Universal Routing Technology 101: Improving Your Workflow With Patch Points”

Five Reasons Why Patch Points Rock

By Craig Anderton

Looking for some advanced, interesting, or downright weird ways to use the new Patch Points feature? Here you go:

Signal Splitter

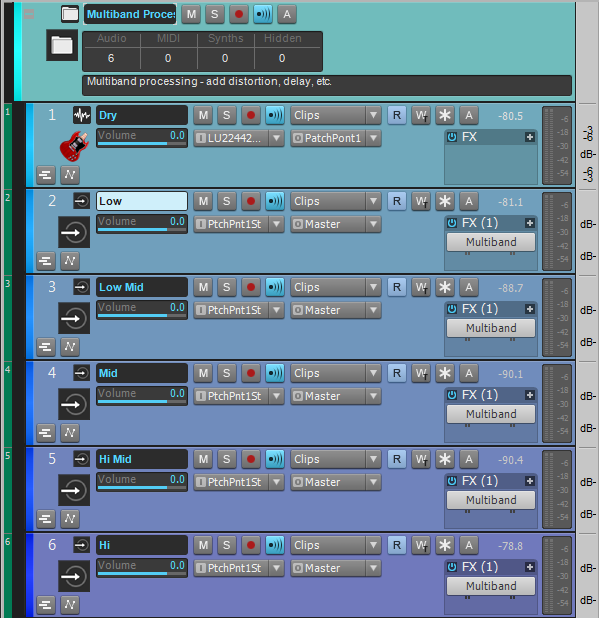
Suppose you want to split one track to several outputs, for example to do multiband processing. Here’s how:

SONAR Patch Points Splitter

The Dry track output goes to Patch Point 1 instead of the master bus. Five tracks, each of which filters a different band of frequencies, have their inputs set to Patch Point 1. The Dry track now feeds all five channels simultaneously. Placing all these tracks inside a track folder makes it easy to fold them up when you want a tidier setup.
Continue reading “Five Reasons Why Patch Points Rock”