At some point, nearly every mixer has experienced this:
“My mix sounds great, but this mix by (Bob Clearmountain, George Massenburg, Joe Barresi, etc.) sounds so much wider… How do they do that?”
Aside from the highly classified mixer voodoo magic that they still swear isn’t real, there are a number of techniques you can employ to get a little more width out of your mix.
PANNING
I already know what you’re about to say: “But I pan my parts hard left and right, and it still doesn’t sound wide enough.” I struggled with this for a long time myself, but trust me, panning is listed first because it’s the first step toward a wide mix.
If you’ve got things hard-panned, you’re already halfway there. One trick to making this work is contrast; if everything is hard-panned, there’s no point of reference for what is narrow or wide.
EXAMPLE: In a rock or metal mix, it’s fairly common to find extremely wide guitars. What many folks don’t notice is that the drums are not always quite as wide.
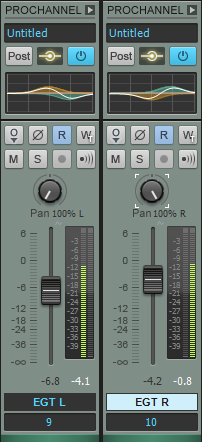
A pretty standard template for me is: guitars panned hard, drum overheads panned at about 50%, and if applicable, the drum room track at about 60-75%. This makes for a full stereo field and helps isolate the parts, creating a very wide image of the guitars while still having good stereo separation for the drums. It also helps prevent distorted electric guitars from eating up all that gorgeous drum ambiance you worked so hard to track perfectly.

Contrary to the above, I’ve heard a lot of folks swear by what’s known as “LCR Mixing,” or Left-Center-Right mixing, where – you guessed it – everything is either panned, hard left, center, or hard right.
I personally am not a major advocate of LCR Mixing, but I highly encourage everyone to try it out. It might work for one song or one style, but not another. If nothing else, it’s an excellent starting point in helping you quickly decide the rough stereo placement of each mix element .

And of course, never forget about automation–the most important part of any mix, in my opinion. Try panning a stereo track to about 80% width, and then at an appropriate point in the song, bump it up to 100%. I guarantee this will add apparent width to your mix.
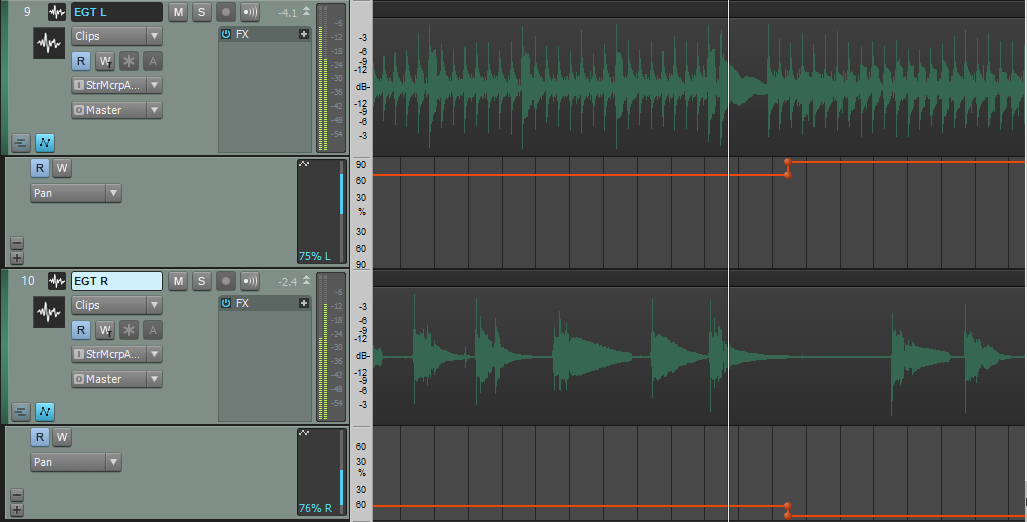
This goes back to contrast — you’re listening to the song and at its widest point, it’s at 80% width. Your ears believe that everything is as wide as it can be. Suddenly, everything gets wider and the apparent stereo width seems enormous! I’m not saying go crazy and use this trick all the time, but try it out and hear the effect for yourself.
EQ
Sometimes EQ can help you make your mix sound wider. And you’re probably thinking, “how is adjusting frequency content going to expand stereo width?” Well, technically it’s not…
It’s a psychoacoustical phenomenon that causes a bit of separation of the parts, making their perceived width much greater. That’s right, it’s not real. But we can fool our ears into thinking we’re actually adding width.
Here’s what to do: take a look at your left guitar track and find a place in the midrange where you might like to boost. Let’s say just for example’s sake, that we’ll add 2dB at 600Hz. Now we’re going to find another frequency and cut it: -2dB at 2.8kHz (again, just for example).
Now, go to your right guitar track and do the opposite: -2dB at 600Hz; +2dB at 2.8kHz.
Be careful — I wouldn’t add or subtract any more than about 2 or 3 dB here lest altering or totally destroying the tone (trust me, the guitar player will hear it and reveal his or her darker side very quickly). Make an adjustment that’s just enough and you’ll trick the listener into hearing an expanded stereo width.
Delay
This is how you get a mix to sound like it’s actually wider than the speakers themselves. It became ubiquitous in the 80s, but much like gated reverb, it’s used more tastefully in modern mixes.
First, a word of warning: this can completely dismantle the mono compatibility of your mix — proceed with caution!
The technique is quite simple, and is another one of those psychoacoustical tricks (come on, you didn’t think you could actually get your mix to be wider than the speakers themselves… did you?).
Insert a stereo delay plugin on your stereo track or bus (IMPORTANT: make sure the delay plugin has independent controls for the left and right sides) and set the mix to 100%. You could also use the Channel Tools plugin, which has this sort of functionality built in. Just add a few milliseconds of delay to one side of your stereo track or bus, and you’ll hear quite a difference right away.
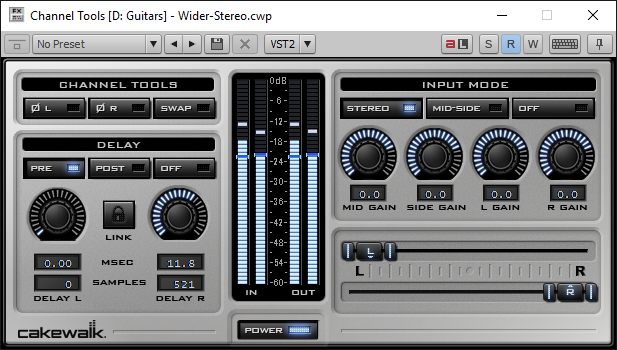
Of course, there’s always the question of how much is enough. Here are some tips:
-
Does it sound like one side is playing before the other? Too much. You’ll definitely want it below 20-25ms, or it’ll start actually sounding like, well, a delay.
-
More delay time will not always make it wider. The effect is caused by the phase relationship between the two sides, so you may find a sweet spot with hardly any delay at all.
-
Collapse the track/bus to mono. Does it sound terrible? Try making it a little narrower.
-
Does the tone change too much? Move the delay time up or down a little bit and see if that helps.
-
Remember, phase can truly make or break your mix, so again, tread cautiously when applying this effect.
Reverb
There are a few different ways reverb can help increase the apparent stereo width of your mix.
The first way is quite simple: Applying reverb to an already-wide signal can make it sound even wider. This has to do with those phase relationships we were just talking about.
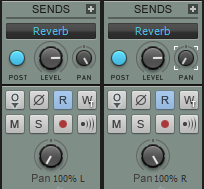
To take things a step further, try panning your reverb sends to the opposite side (Hard Left Audio w/ Hard Right Send; Hard Right Audio w/ Hard Left Send) to see if it makes any difference. If nothing else, it makes for a pretty cool creative effect.
The second way is also quite simple. What is reverb but a few thousand delay signals right after one another? What we’ll do is apply reverb to only one side of the stereo track or bus.
What this is doing, in addition to the delay trick mentioned above, is making one side sound slightly more distant. It’s ultimately creating a distinction between the left and right side (again, in your mind) that creates the illusion of greater width.
Mid/Side Processing
This is a bit of an advanced technique. There are plug-ins out there that will do all the thinking for you (The Hoser XT, for example) by allowing you the option to make separate adjustments for the individual “mid” and “sides” channels.
However, there are a few ways to make this work, even without a “smart” plug-in… I’ll keep this as simple as possible.
The best way to set yourself up for Mid/Side processing is to use the Mid/Side microphone configuration when recording. This is what I consider a true Mid/Side configuration, and I feel it balances better, has better mono compatibility, and is more “true to the source” when it’s being modified than its “fabricated Mid/Side configuration” counterpart.
If you don’t know how to do Mid/Side recording, I’ve provided you some resources here, here, and here.
Now, as for converting a standard stereo track or bus to Mid/Side tracks, you’ll have to do a bit of extra work…
-
Clone your stereo track or bus.
-
Collapse the original to mono with the interleave button. It should look like this: [mono interleave button]. This is now your “Mid” track.
-
Insert a plugin like Channel Tools, or any comparable plugin, on the cloned track.
-
Flip the phase on the left side (or the right side; one may sound better than the other). This is now your “Sides” track.
What we can do from here is process these tracks individually. A good starting point would be to apply some fast compression to only the “Sides” track, somewhat eliminating the dynamic peaks and valleys and making the sides seem louder, thereby increasing the apparent stereo width.
Similarly, you can add some upper-midrange frequencies to the “Sides” track, increasing their presence, and/or reduce the same frequency range in the “Mid” track.
Try all these techniques and take note of the qualities that each impart. Remember, the more techniques you have in your arsenal, and the more practice and experience you have with each of them, the quicker you’ll be able to make creative production decisions.


