DAW Best Practices: How To Choose The Right Audio Interface

The goal of this article is to help you shop for an audio interface. These concepts can get very deep, but for now I will keep to some of the more basic points about the subject. Here are 9 questions you should ask yourself when comparing audio interface options.

1. How many instruments do I need to record at the same time?

The first thing you should consider is the environment that you will be working in and how many instruments you need to record at once. Some people only need the ability to record 2 tracks at a time and others need a minimum of 8. This is the first and most crucial step to understanding your set-up. Continue reading “DAW Best Practices: How To Choose The Right Audio Interface”

6 Creative Ways to Use The VKFX Delay – Free with SONAR X3 Studio or Producer

SONAR X3 Producer’s ProChannel comes loaded with great effects for every channel like Compression, EQ, Saturation, and Reverb. Now, for a limited time, if you purchase SONAR X3 Studio or Producer before November 30th, 2013 you will also get Overloud’s incredible VKFX Delay ProChannel Module for free. Here is a description and some creative ways to utilize this wonderful new tool.

Overloud’s VKFX Delay Module is a rendition of a classic tape delay with an incredible set of parameters that virtually allows you to get just about any sound you please.

The Parameters

Feedback adjusts the amount of repetitions of the delayed signal. This has varying tonality as you increase or decrease it.

Tone adjusts the brightness of the delayed signal. Sometimes it’s important to taper off the high end of a signal so that it does not get in the way of itself. Bright acoustic strumming or picking could become engulfed by a series of shearing delays if your tone is not adjusted correctly.

Time is a crucial parameter on any delay unit. This determines the intervals of time between each delay repetition. When the time parameter is not synced to SONAR, the intervals of time range between 0.0 – 2.7 seconds.

When the sync button is enabled the VKFX Delay syncs to musical denominations ranging from 1/32t to 4 based around the tempo set within SONAR.

Mix controls how much of the delay effect makes it into the actual passing signal. Increasing this to 100% would produce the delayed effect only.

Lastly, the 8 different Modes within the VKFX Delay module control two sets of settings.

  • The panning scheme for each repetition
  • On what beat each repetition falls on

As seen in the figure, the first five different modes repeat within the mono spectrum and vary with each beat they fall on. Settings 6, 7, and 8 spread the repetitions from Left, Center, and Right making for an intense panning/delayed effect.

1. Chorus Effect Continue reading “6 Creative Ways to Use The VKFX Delay – Free with SONAR X3 Studio or Producer”

8 Steps for Comping The Perfect Vocal Take

Comping is a term used for editing multiple instances of the same performance together into one flawless track. Cakewalk has adapted this functionality in order to bring this kind of workflow right to the fingertips of every SONAR X3 user. Within this article I am going to show you my own workflow for comping together a vocal track.

1. Create Markers for the different sections of your song. This should have been done during the actual recording. As I’ve stated in other posts, it’s really important to label your sections so that you can move from one place to another without a second thought. Fast paced environments are not very forgiving when the engineer loses their spot. It creates distractions and impedes the artist’s or group’s concentration.

2. Identify the individual sections of the song with split points so that you can understand where each section edit starts and ends. This works in tandem with Markers to help isolate the larger sections of the song. Simply expose your take lanes by using the short-cut Shift+T, expand the track height of the takes, and then click and swipe on the lower half of your audio regions to make split points.

Clicking and swiping can be viewed here Continue reading “8 Steps for Comping The Perfect Vocal Take”

DEVELOPER NOTES – SONAR X3 QUADCURVE EQ (UI ENHANCEMENT)

Introduction

Since it first appeared in SONAR X1 Producer, the QuadCurve EQ has become my go to EQ. That’s saying something given the abundance of killer plugins in my collection (yes, like many of us, I own far too many plugins).

Maybe I’m just lazy, but I love the fact that it’s always there, ready to go on any track or bus at a moments notice. No need to wade through plugin menus – it’s already waiting patiently in the ProChannel.

And it’s no slouch either. There’s no trade-off for that convenience. The QuadCurve EQ is up there with the best of them.

But, as much as I love it, I admit I have, in the past, occasionally found myself reaching for one of the alternative plugins in my arsenal.

Why? The QuadCurve EQ user interface could be, well, a bit cramped. The small EQ plot is fine for quick adjustments, but not so great for fine-tuning. Metering is also important to me, which the QuadCurve EQ was lacking.

The good news? SONAR X3 Producer addresses these issues, and much more besides.

So what’s new?

See me!

First off, it’s easier on the eyes. The UI is cleaner, clearer, and you no longer need a magnifying glass to read the knob values!

Then there’s the EQ plot, or should that be “plots”? The small ProChannel plot is still there of course, and it’s as useful as ever, but now there’s a new secret weapon at your disposal…

…the QuadCurve EQ Zoom Window:

As you can see, it’s essentially a much larger EQ user interface which, among other benefits, provides a much finer degree of control.

I say ‘secret weapon’ because it may not be immediately obvious how to get to it Continue reading “DEVELOPER NOTES – SONAR X3 QUADCURVE EQ (UI ENHANCEMENT)”

47 Reasons Why AAS Instruments Are Incredible (Sound Examples)

We’ve put together some sound examples of the instruments in the AAS Modelling Collection available on the Cakewalk Store for SONAR X3 Producer users. SONAR X3 Producer now includes Strum Acoustic Session and Lounge Lizard Session, but here are a whole bunch of reasons you should consider picking up the entire collection.

Listen to just a few of the stock presets from Chromaphone, Studio String, Tassman, Ultra Analog, Strum Electric, Lounge Lizard, and Strum Acoustic Continue reading “47 Reasons Why AAS Instruments Are Incredible (Sound Examples)”

DAW Best Practices: 11 Easy Tips For Project Organization

1. Categorize your tracks by Color

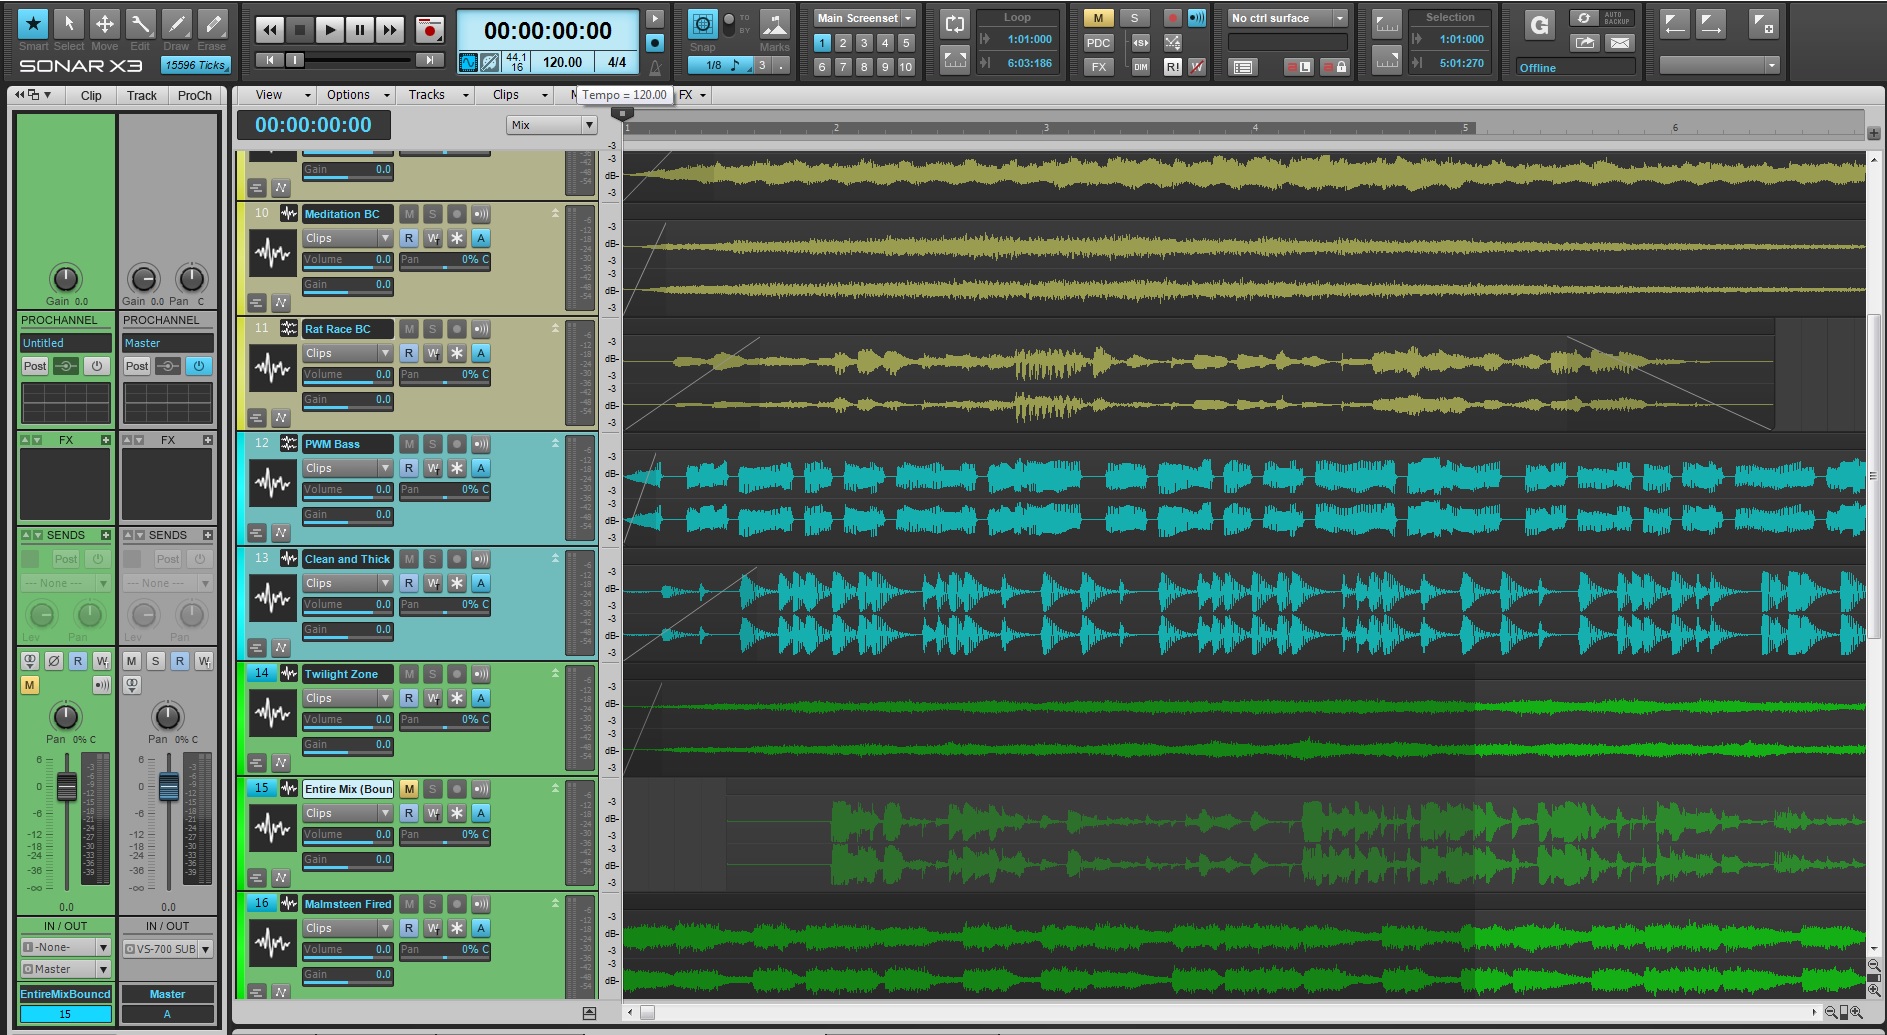
Categorizing your tracks by color can be one of the biggest advantages to keeping a solid workflow when recording or mixing. If your DAW has the ability to do this then figure it out, it should be fairly obvious where these options are located. Try dedicating color schemes to instruments, types of tracks, and the buses associated with your tracks. This makes the overall environment easier to work with, especially if you are handing your work off to another engineer or the artist themselves.
2. Dedicate a Bus to each one of your tracks or groups of tracks

Making final adjustments to your tracks will become easier and more organized once you take advantage of the bus section within your DAW. Setting your tracks to their own dedicated buses reduces them to a single track so that you can adjust an entire section of instruments with one fader, compressor, EQ, or any other plugin you feel is needed. If you are in the final stages of mixing with an artist at your side, I’ve found that typical comments can consist of “The drums could be louder.” or “Can the vocals come up a bit?” These kinds of adjustments could be difficult if you have tons of automation already laid down on your individual tracks. Sending your tracks to a bus will allow you to adjust overall levels easier and more efficiently.

SONAR X3 allows you to organize your tracks by color or choose to follow bus colors based on routing. Read more about Color Customization in SONAR X3.

3. Name your tracks in a way that makes sense

Audio files will take the names associated with the tracks they were recorded on. If your tracks are set to “Audio Track 1-16” then your audio files will be recorded as “Audio Track 1-16”. Make sure to name your tracks in a way that someone could understand them in a passing glance. My naming convention consists of the instrument type, number, amp name (if applicable) and microphone or DI box used. Here are some useful ways to name your tracks.

  • Guitar 1 Egnator 57
  • Guitar 1 5150 421
  • Bass 1 DI
  • Bass 1 Ampeg
  • Vocal 1 U47
  • Kick IN 52
  • Snare Bottom 414

Here are some examples of inefficient ways to name your tracks:

  • Mic 1 John
  • Drum 1 AWESOME
  • Guitar Right 1
  • Bass HEAVY tone 3
  • Kevin
  • Audio Track 27

Notice the difference? Figure out a system that works for you and stick with it.

4. Group tracks that have variations of mic placements

When recording or editing multi-mic’d instruments its useful to group your tracks in a way where all the tracks can be edited at once. At one point in your career you will record an amp that could have 5 microphones on it or a drum set that consists of 20 microphones. Setting up this type of group will allow you make alterations to these tracks without too much headache.
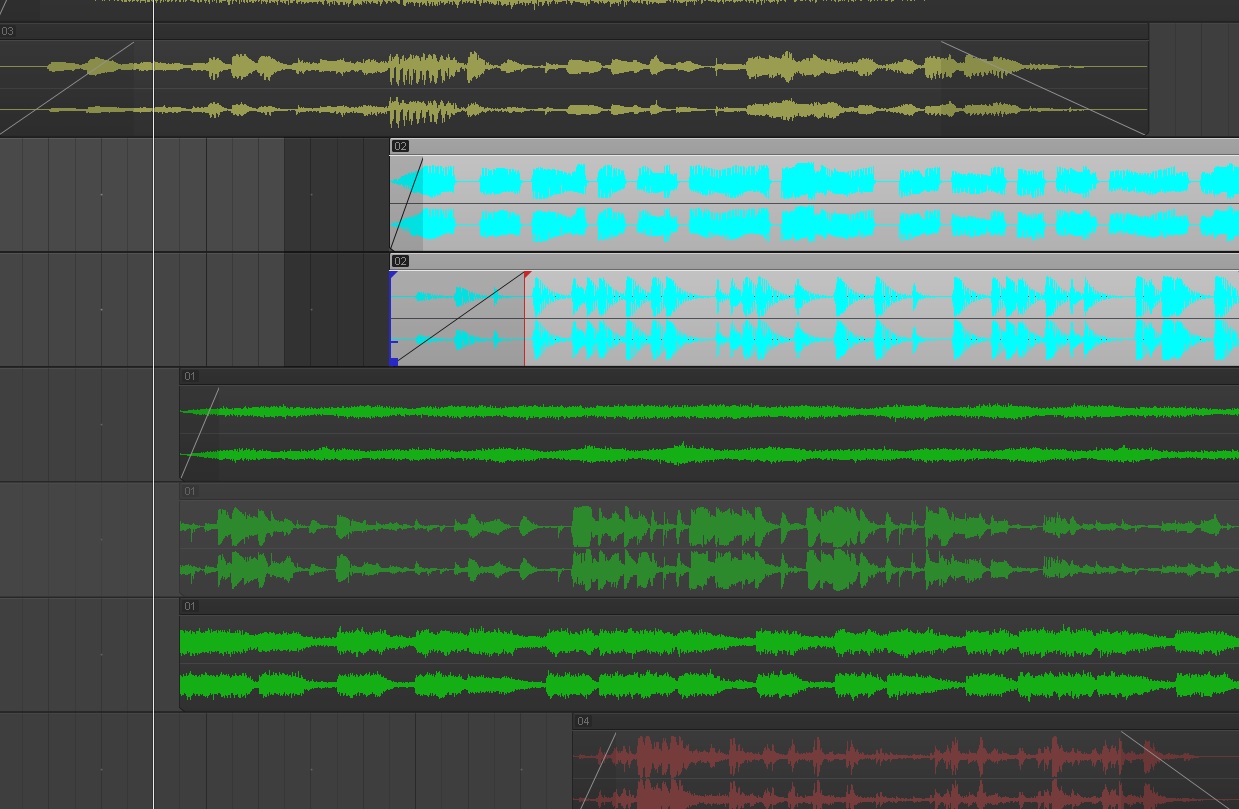
SONAR X3‘s “Region Groups” feature makes it easy to group and edit multiple audio regions at once.

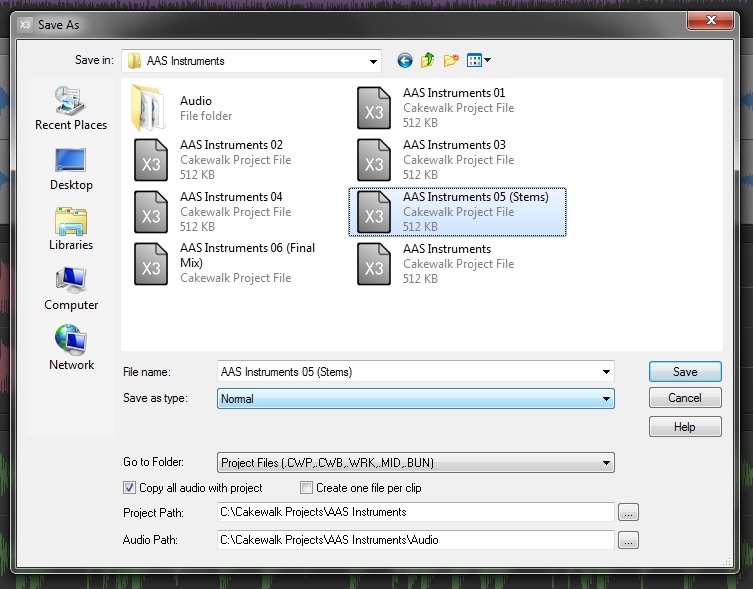
5. Version your projects manually

Manually versioning your projects should be second nature regardless of whether or not your DAW contains an automatic save feature. Every 5 minutes go to Save As and label your project as “Project Name” followed by a number. This keeps your projects organized in a way that allows you to recall your work at a moments notice without relying on some sort of invisible background process. It’s important to have a system in place for saving your projects. It will save you in some of the worst case scenarios.
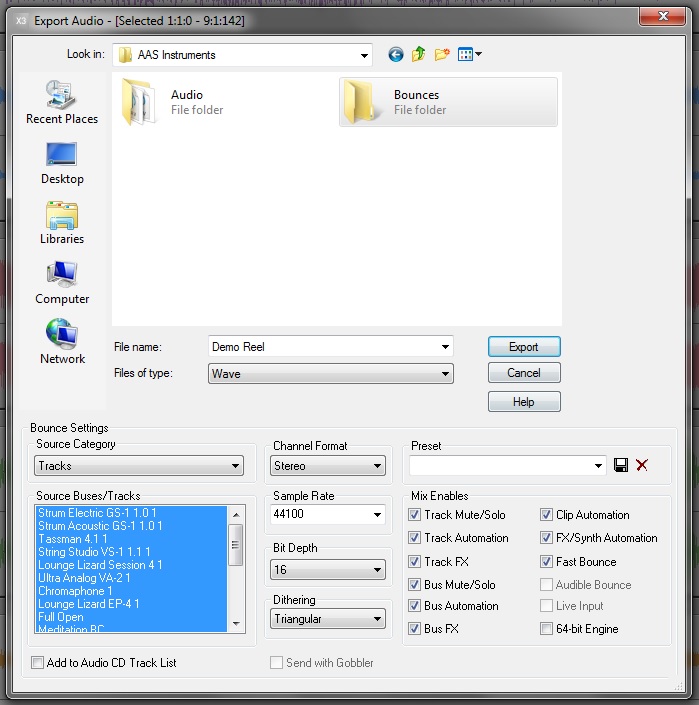
6. Make a dedicated “Bounce” or “Stems” folder

Some DAWs perform this function by default, but you don’t have to change your platform to take advantage of this easy tip. When processing your mixes or rendering stems always make sure to save this audio data to a dedicated folder separate from your audio files folder. This will save you the headache of scrolling through your audio files folder looking for your latest mix or batch of stems.

Just about every DAW has an “Export Audio” window. Change the filepath for this to your project folder and make a new folder called “Bounces” or “Stems”.

  • PC shortcut is CTRL+SHIFT+N for a new folder

  • Mac short is Cmd+Shift+N for a new folder

Once you make the new folder, make another new folder within your Bounce or Stems folder with the current date. Save your audio accordingly.

Now as you send mixes out for review you, will know what mixes were sent and when they were sent. Obviously you can use email for this information, but why not have this data available right in your project folder?
7. Save your plugin presets

This might come as an obvious detail to some, but to others it doesn’t sound so obvious. Saving your plugin presets is definitely worth your time and effort. Everyone eventually switches to another computer or needs to rebuild a project. Having a folder with your presets saved as separate files can be useful in the event your presets do not load or load incorrectly. Never assume that your presets will stay intact, especially with projects that are a few years old.
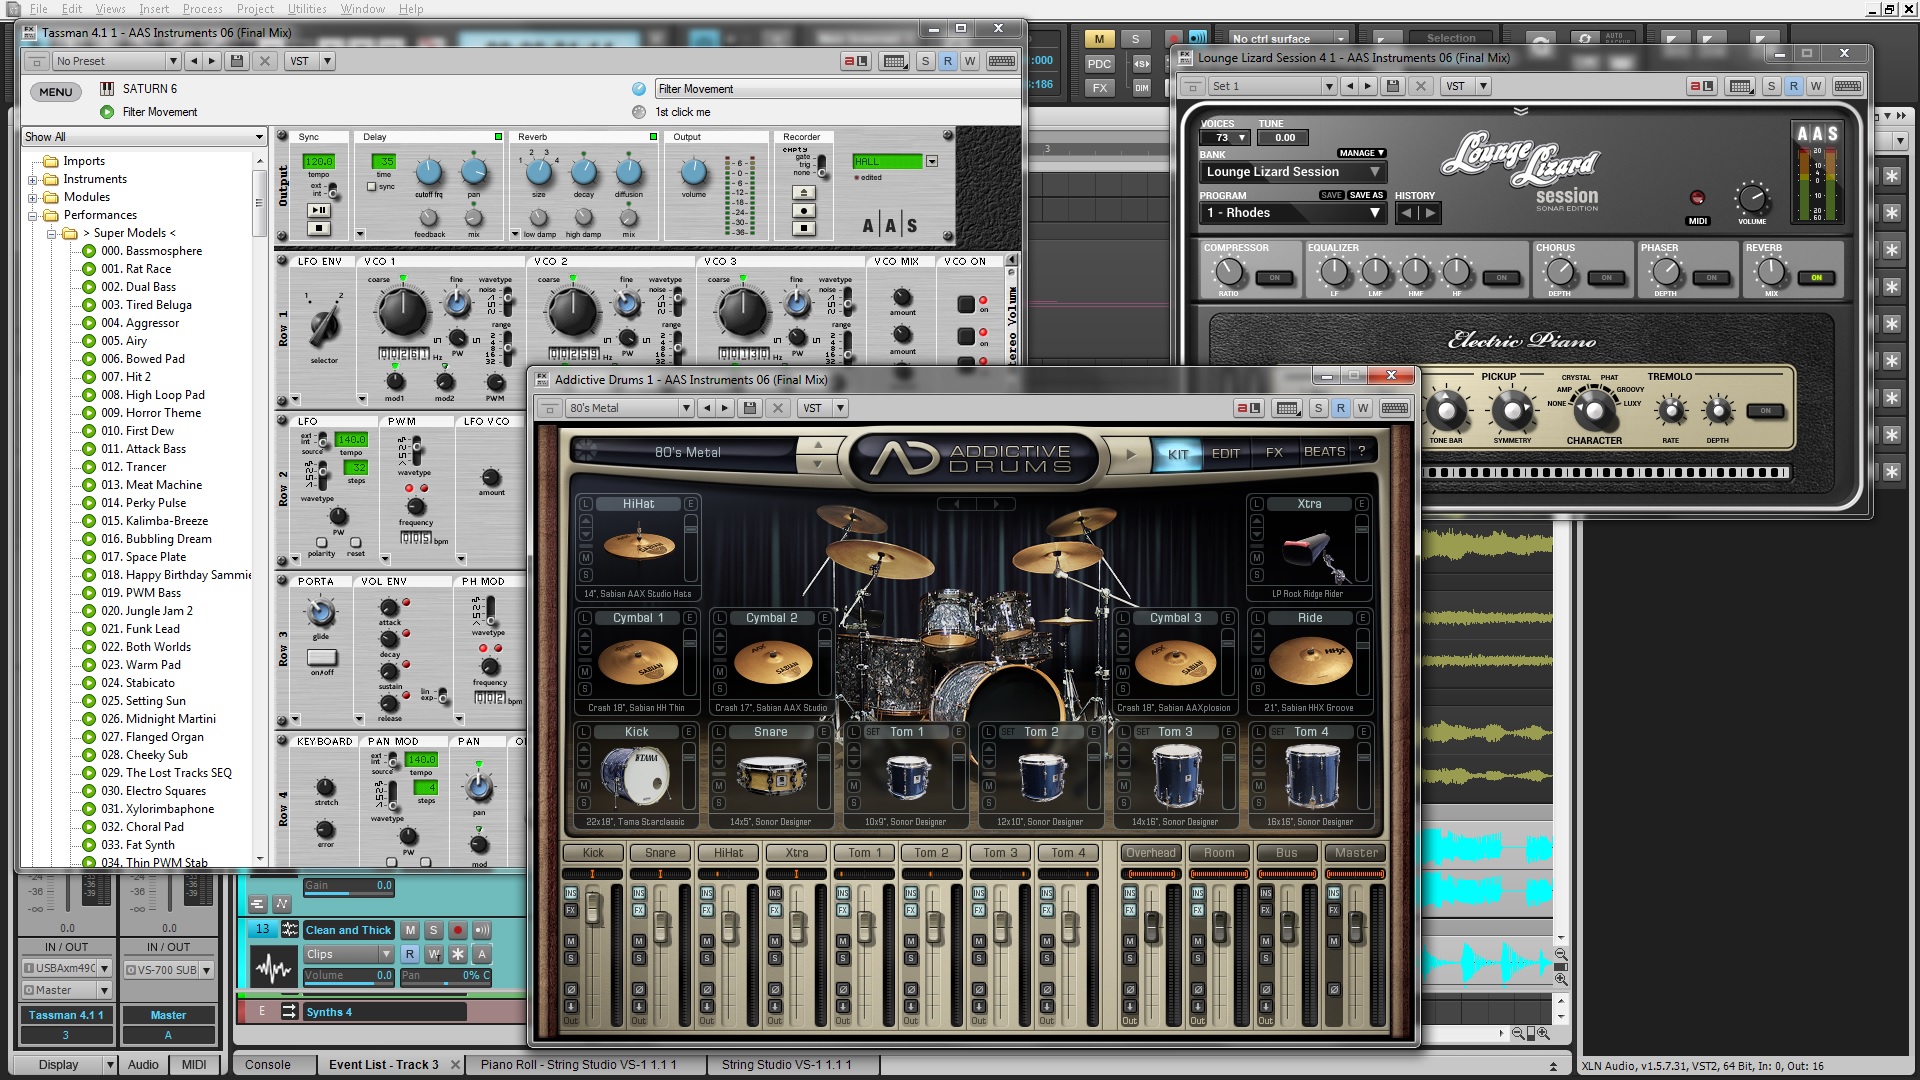
Learn how to set up your Addictive Drums in SONAR X3.

8. Always render your instrument tracks

Make a decision and stick with it. Once you find a sound you like, render it, or mix it down so that idea is encapsulated in an audio file. Loading large sample libraries or syncing external sound generators slows down your session flow. It’s hard to hit the creative ground running when your computer and DAW are constantly keeping you waiting and waiting for unneeded reasons. Do not be afraid to make a decision about a sound. It boils down to knowing your tools and how they work. If you achieved a specific sound once, then you can definitely do it again and better than before.

Rendering your instrument tracks has other benefits too. You don’t need to worry about the MIDI sequencing misaligning with your project tempos, or other computers not having the same plugins you’ve purchased. Saving your data as workable stems or mixes will keep your ideas flowing without any technical speedbumps in the way.

SONAR X3 has been using Fast Bounce capabilities for over 10 years. Choose to bounce your tracks in place, bounce your tracks with buses, bounce tracks to a new track, bounce through your mixbus, or just simply freeze your audio in place.

9. Create templates

Templates will save you time and keep your session organized. Working on full length records can be tedious depending on the style of recording that needs to be done. Some albums start with the drums, move to the guitars, and then vocals, etc. Other albums can be made one song at a time regardless of instrumentation. In the end it’s the engineer’s job to make sure that transitioning from project to project is an easy task with quick setup. Making templates with plugins, routing, and naming conventions already inputted will allow you to move faster than you would think.

The same kind of logic can be applied to the mixing world. Make a template of your typical 2Mix bus, audio buses, and favorite processing plugins so that you can just drop in audio files and begin working. Time saving is important, but being organized is what makes or breaks your session flow.
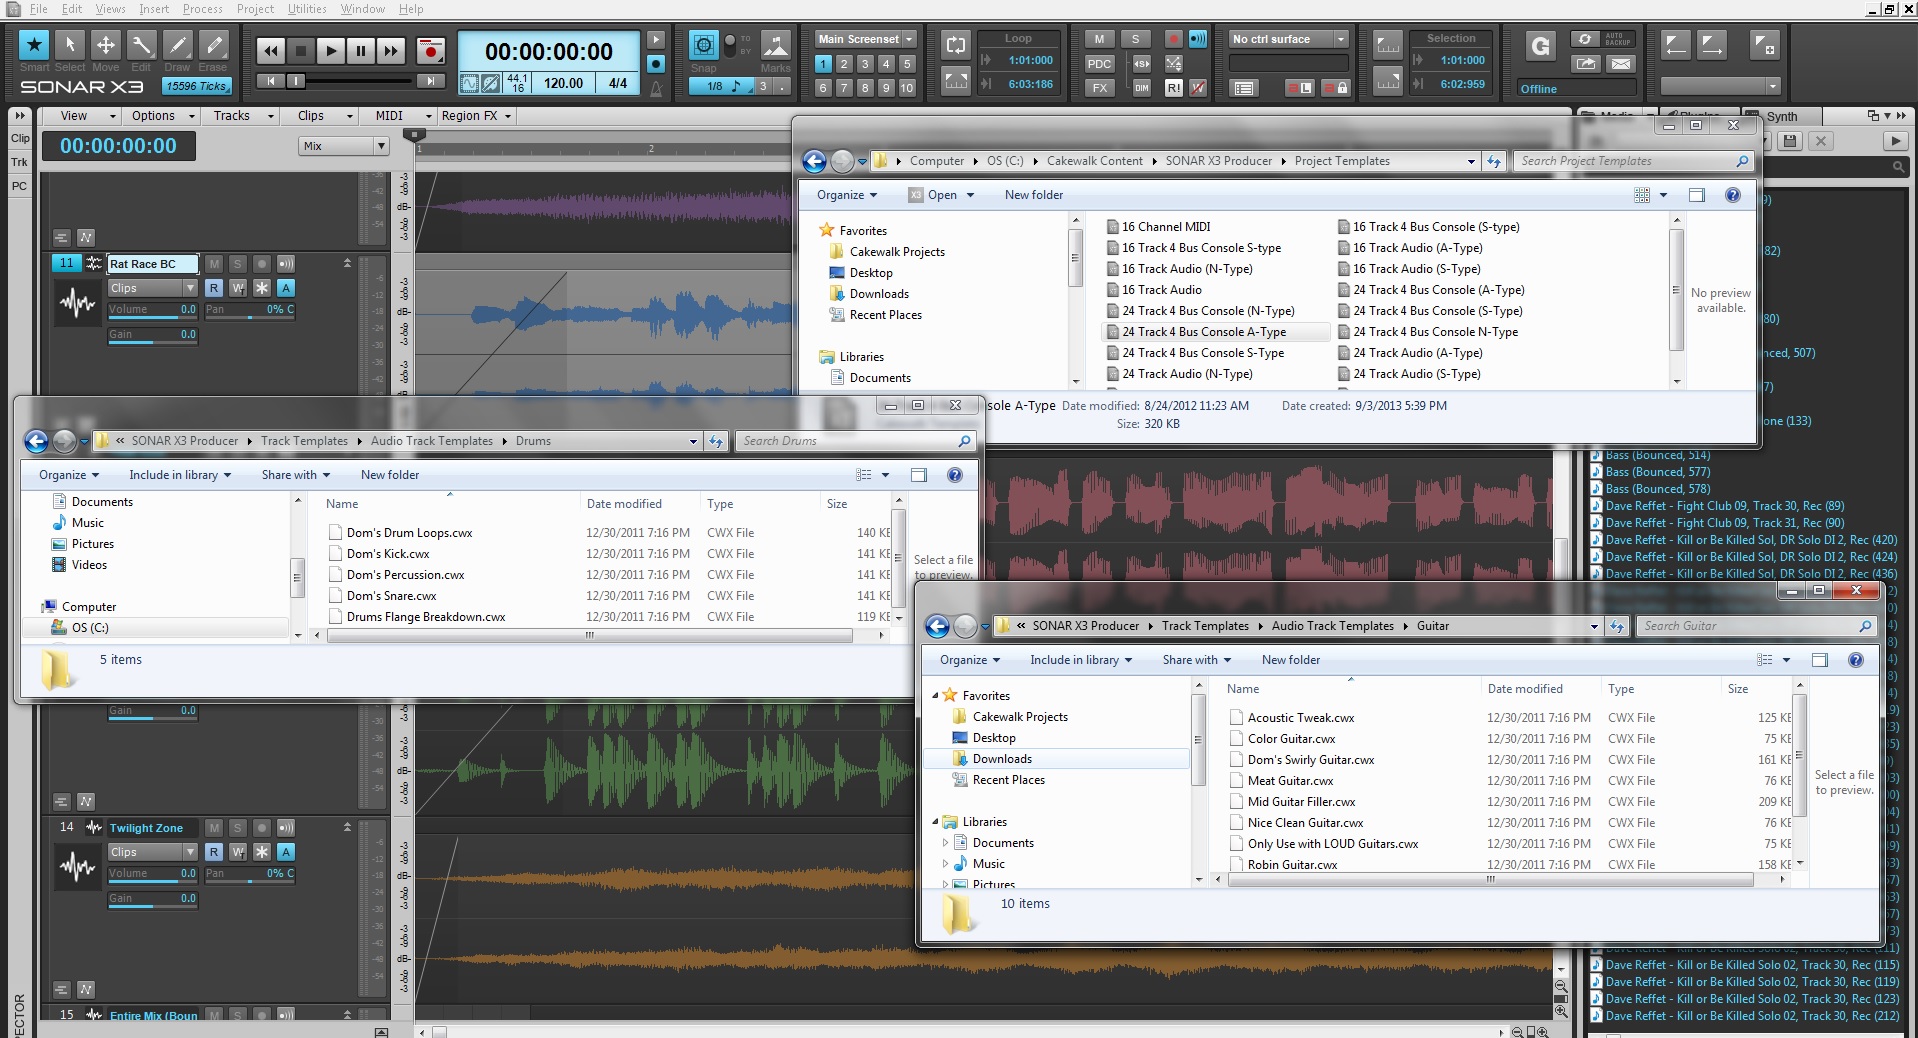
SONAR X3‘s powerful track and project templates allow users to fully customize a project for any environment.

10. Master your keyboard shortcuts

Everyone should have a set of their favorite keyboard shortcuts within their DAW. Know them and master them so that your workflow does not suffer from mis-clicking or awkwardly sensitive mouse scrolling configurations. Some DAWs allow for customizable keyboard shortcuts and the ability to import and export shortcut libraries. Get to know these types of features because speed and efficiency is what will save you time in the studio and allow you to focus on the music. Create shortcuts for recording, mixing, composing, or even audio editing so that you can fly between different workflows without fumbling around in menus and with mouse clicks.
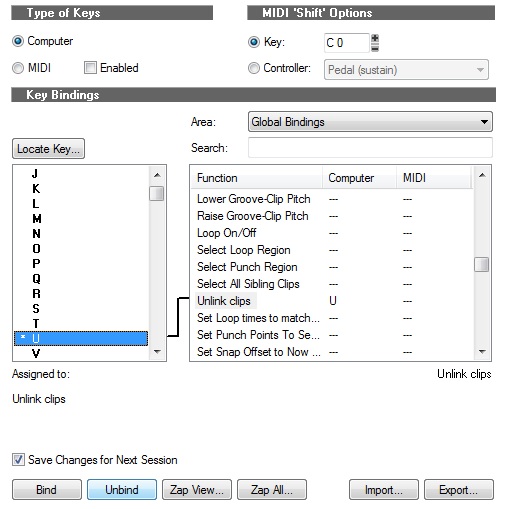
SONAR X3 comes with keyboard shortcuts from other DAWs and allows it’s users to make their own and save them externally.

11. Use Markers and name them accordingly

Markers can be overlooked by aspiring engineers and producers, so make sure to understand how to generate them and modify their names. Mark the verse, chorus, lead section, bridge, intro, outro, and possible punch points so that you know exactly where to go when the artist or producer needs to jump to different sections. You are never going to know exactly where every small important detail of the track starts or even its timestamp unless you are very close to the music. Markers are there to be used, so use them!

\

SONAR X3 was used in these pictures, click here to find out more.

8 Reasons Why Gobbler Cloud Collaboration Is Awesome for Musicians

Cloud collaboration has become the new standard within today’s music industry. Before this, artists, engineers, and producers would collaborate through the mail and other various delivery systems. Here are 8 reasons why collaborating with Gobbler is awesome for musicians.

1. Saves You Time

Gobbler saves you the time and exhaustion of gathering files, uploading files, and sending files to someone on the other side of country or world. Within SONAR X3, Gobbler acts as a native component right within the control bar so that you don’t even have to export your ideas from the program to send them. Think about the time you spend bouncing your ideas to an audio file, accessing your email, uploading to an FTP site, and then making sure that the person on the other end can gain access to your one idea. That’s time you could have spent creating another great idea.

2. Distance Doesn’t Matter

Let’s say you wanted to collaborate on a track with someone that you met at a festival or a trade show. Your studios are 2500 miles away from one another and your budgets don’t include that kind of airfare for one on one collaboration anytime soon. The beauty of cloud based collaboration is that your idea can be in someone else’s studio almost immediately, regardless of distance. You don’t have to send a package through customs for it to get to another country, or worry about it getting lost in transit. Creativity shouldn’t have that kind of baggage and Gobbler makes sure of that.

3. Easy to Use

One of most important things to note about Gobbler is its ease of use. This service requires minimal setup with very few concepts to get tangled up in. With the service now completely integrated into SONAR, it’s a matter clicking one button and entering the email address of the recipient. It doesn’t get much easier than that.

4. Saves You Money

Something that could be overlooked in a home studio is having a dedicated method for delivering products to your clients. This method should not incur too much spending on your business and should be highly effective. For as little as $4/month, you can send as many files as you like to anyone you want. Situations where you need to deliver upwards of 200GB to someone across the country would involve buying hard drive (plus tax), spending money on the gas to get to the FEDEX shipping store, paying for parking (if you’re in a big city), paying for boxes, shipping, and the handling. All of that would come out to more than $30 – which is what Gobbler offers for 250GB of storage on their servers per month.

5. Worry Less

Integrating a product like Gobbler into SONAR X3 comes with more perks than just collaboration. Within the Gobbler module there’s an auto-backup feature. When activated, Gobbler will automatically save your changes as you work and includes versioning, just in case you ever erase something by mistake. You can work and collaborate on your music with confidence in knowing that Gobbler has you backed up.

6. Collaborative Status Icons

Gobbler’s advanced file transfer window keeps you in-the-know on your projects once they are sent to a recipient. Within this window there are 5 different icons under the status column to look for:
 Closed Envelope. File sent, but unopened.
Open Envelope & Checkmark. File has been downloaded successfully.
Closed Envelope & Green Arrow. File is currently being downloaded..
Exclamation Point.  File sent has failed.
Red X-Mark. Email address is not valid.

Having real-time feedback on the files you send to your collaborators is one of the most useful benefits to working with Gobbler. These help you understand if something has gone wrong on the other end of your file transfer and is especially useful if your recipient gives you an incorrect email address.

7. Your collaborators don’t need Gobbler to receive your files

You may have taken the plunge into the Gobbler world but some musicians haven’t for various reasons. You can still send your work to other people regardless of them having the service or not. Each recipient will get regular browser based emails with a link to the files that you send them. These links could be private or public. Using the public link will allow anyone with that link to download it. You can send a revision or a mix to your client and then that client can forward that link to the rest of the band. Public links will expire after 7-days or 20 downloads for security purposes.

8. Upgrade before Dec. 31st and you get an additional 20GB of space for 6 months

If you’re looking to get started on your next Single, EP, or Full-Length record then now is a great time to upgrade to SONAR X3. That upgrade gets you 20GB of space on Gobbler’s servers for the next 6 months. That is in addition to the free 5GB available for all SONAR X3 users to use as long as you like. Gobbler will make collaborating easier so that you can stay focused on your creativity.

SONAR X3 Users: Save 50% off Nomad Factory Plug-ins through Oct. 31st

Nomad Factory

One of the exciting new additions to SONAR X3 Studio & Producer is the Nomad Factory Blue Tubes FX.  These 19 FX recreate the vintage sound you have loved from decades ago.  If you love the Blue Tubes FX, then you need to check out their other bundle packs which are available at the Cakewalk Store for a special price through October 31st.

Nomad Factory: Analog Mastering Tools (Download) $75/£59/€69 (Save 50%)

  • Includes A.M.T Amp Leveling, A.M.T Max Warm, and A.M.T Multi Max multiband peak limiter.

Nomad Factory: Analog Signature Pack (Download)  $99/£79/€89 (Save 50%)

  • Includes the Program Equalizer EQP-4, the Limiting Amplifier LM-662, and the Studio Chanel SC-226.

Complete Bundle: Integral Studio Pack 3 (Download) $299/£239/€269 (Save 50%)

  • This bundle from Nomad Factory contains everything you might ever need to get the best out of SONAR in a professional studio environment.

Visit the Cakewalk Store to save big on other SONAR X3 Extras.

Feature Spotlight: XLN Audio Addictive Drums in SONAR X3 Producer

Addictive Drums

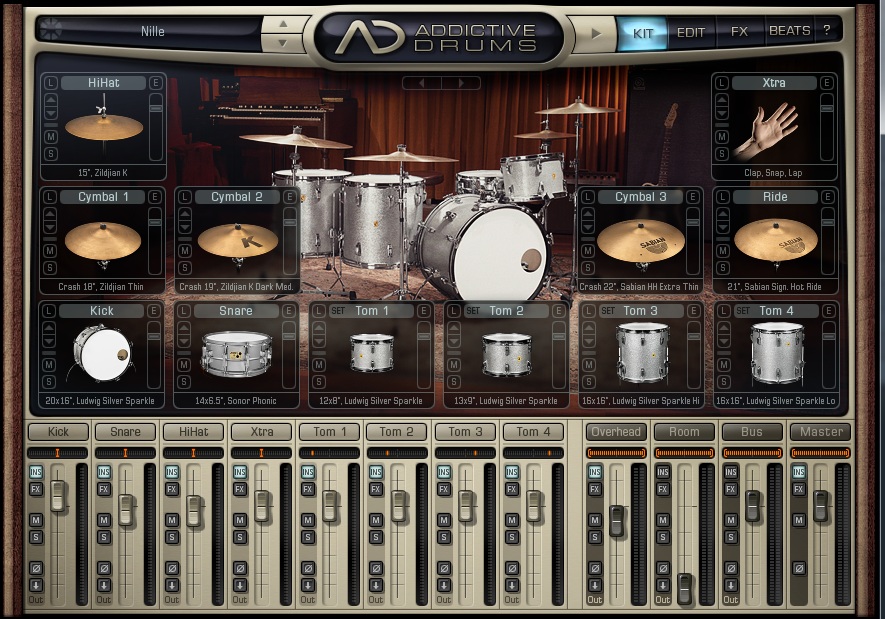
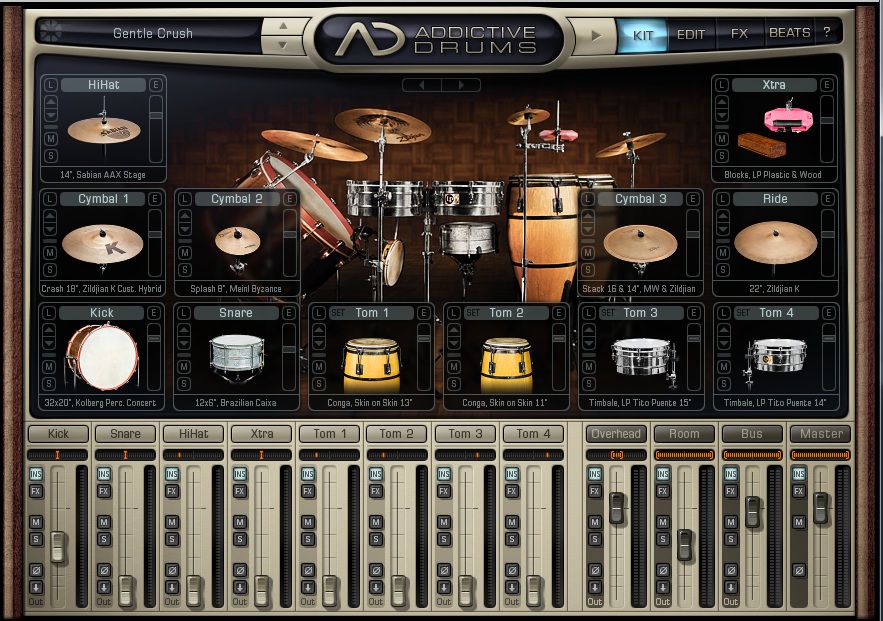
SONAR X3 Producer now includes XLN Audio’s critically-acclaimed Addictive Drums. Some customers have have asked whether this is a cut down version of Addictive Drums and are shocked to hear that this is in fact the full version (retail price $149). We often hear from customers that one of the most difficult aspects of recording is getting great drums sounds. These problems are now a thing of the past thanks to Addictive Drums – now included in the SONAR X3 Producer upgrade.

Addictive Drums is one of the most powerful and popular drum programs in the world and can be heard on countless hit songs and albums. The unique architecture, fast loading times and flexibility makes it the first choice for many musicians and music producers. Three pristine drum kits, 100+ producer presets and thousands of MIDI rhythms are included. Load a complete drum kit with mixer settings and insert effects – with one click!

Learn more about Addictive Drums in SONAR X3 Producer

Tip: Setting up your Addictive Drums
Addictive Drums is the brand new drum synth available in SONAR X3 Producer. The sounds, fast load times, internal mixing, and abundant groove clips makes this possibly the only drum synth you’ll need to use from now on. There are a couple ways to insert this new synth into SONAR X3 Producer. The first way is to insert Addictive Drums as a simple instrument track.

Learn how to setup Addictive Drums

Tip: Drum replacement with ARA and Addictive Drums
Within SONAR X3 converting Audio to MIDI has never been easier thanks to our deep ARA integration. This opens up many doorways for users to convert their mono audio tracks to MIDI. One great use case for this is replacing drums or adding samples to your drum tracks to enhance their sound.

Learn how to replace drums with ARA integration and Addictive Drums

XLN Audio

Now available on the Cakewalk Store, choose from nine unique Addictive Drums ADpaks from XLN Audio starting at $49. Each ADpak includes a variety of real kit pieces meticulously recorded from real drum sets with iconic sound. Plus dozens of mix ready Producer presets and MIDI patterns to add to Addictive Drums (included with SONAR X3 Producer).

Shop now