Developer Notes: SONAR X3 Comping

Introduction

SONAR X3 continues building on take lanes and goes into overdrive. We baked several ground breaking workflow enhancements including the new comp record mode, speed comping, integration with dim solo, rapid click audition and so much more.  In addition we integrated comping with the smart tool for improved workflow.


It all starts with the recording

The default in the normal template is a new comping record mode.  Simply record multiple takes and previous takes are muted with regions created for the new takes.


If you’d like to record with a classic mode instead Continue reading “Developer Notes: SONAR X3 Comping”

SONAR X3 Workflow Tip: Organize with Color Customization

Organization during a session is a skill that should come second nature to any engineer or artist. Some aspiring engineers are reluctant to see the value in organization until they receive a session that has a track count higher than their usual intake. One of the best tips that just about anyone can benefit from is organizing your tracks by color.

Color organization is a new feature within SONAR X3 and supports just about any shade you need to organize your tracks.

By hovering under the number of the track Continue reading “SONAR X3 Workflow Tip: Organize with Color Customization”

Convert Audio to MIDI in SONAR X3

Converting Audio to MIDI has never been easier. Now in SONAR X3 Studio and Producer, Melodyne Essential with deep ARA integration makes it a very simple process.

  • Open up SONAR X3 Studio or Producer
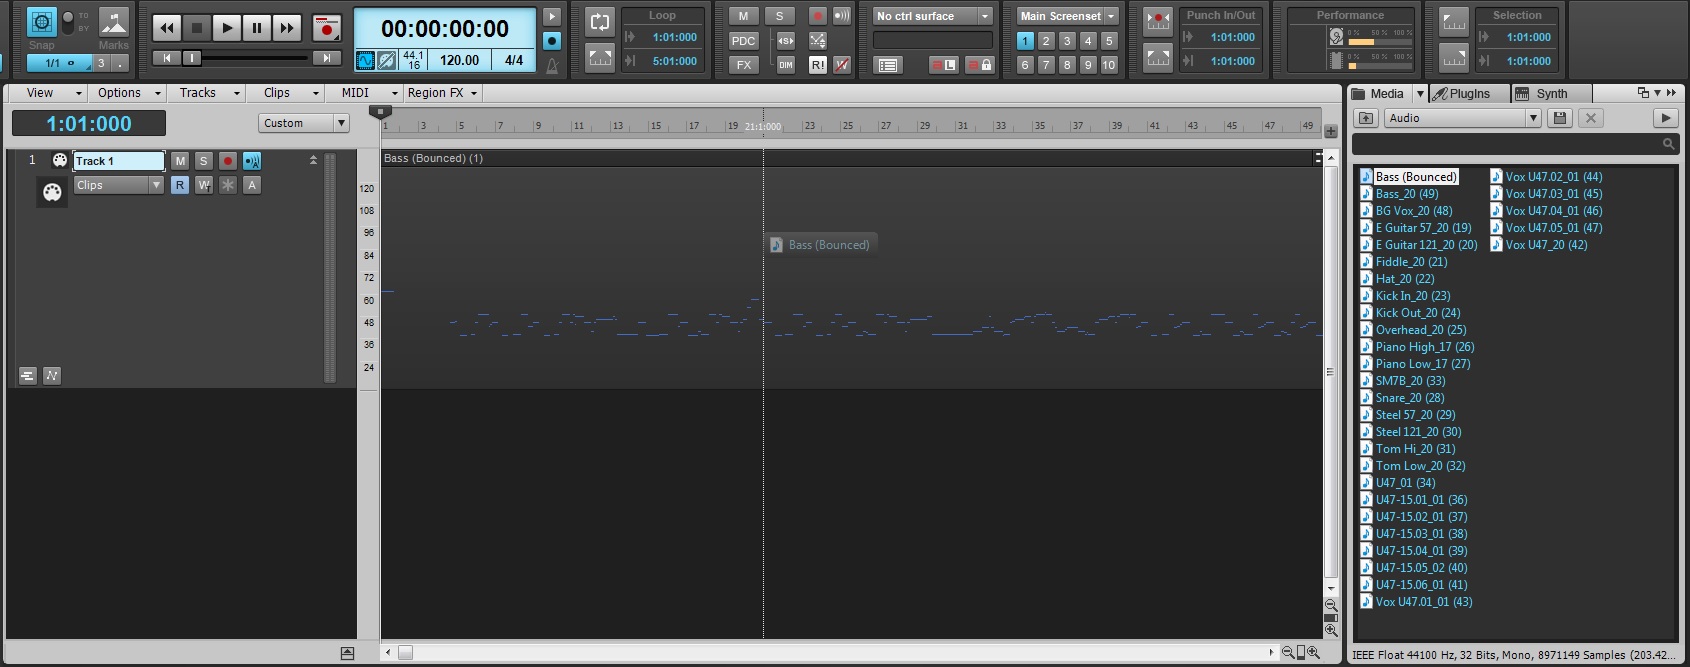
  • Go to the Media Browser and make sure you are on the “Media” tab – Selecting the letter B on your computer keyboard will open and close this view.
  • The drop-down menu below “Media” will give you the different content options for SONAR X3.
  • The “Move up one level” button allows you to move backwards through the file hierarchy of your computer. Selecting this 2 times will bring you to your Cakewalk Projects folder.
  • Use the Media Browser to locate a mono audio file.
  • Once located simply drag and drop it onto a MIDI Track.
  • You can also drag an audio clip from an audio track onto a MIDI track.

Conversion will occur.

All this is made possible with the newly integrated ARA technology from Celemony.

Learn more about ARA and SONAR X3.

Did You Know That BiFilter2 is a Sound Designer's Dream?

When installing SONAR X3 Producer your eyes may have sailed across a plugin by Tone2 called “BiFilter2”. This program is more than just a filter, its a sound designer’s dream. It’s simplicity is misleading at first glance, but once you open up the hood of this plugin you’ll be grateful of it’s existence.  This filter has everything from basic EQ cutoffs, Comb Filtering, to even FM filtering.

Most of the time plugins of this nature are limited to the filter type being set as a preset and then the user having the ability to automate and modulate the different parameters within that preset. BiFilter on the other hand allows you to radically switch between filter types without hassle and even automate distortion types all within a single automation lane.  Essentially, one could use a single BiFilter per track and switch distortion filter types without stacking up on multiple plugins or introducing unwanted CPU usage.

BiFilter alone is worth cracking open and listening to.  Once you hear this unbelievable plugin every template you make will have one pre-loaded into your FX Bin.

Learn more about Bifilter 2 and SONAR X3 here.

SONAR X3 Quicktip: Gating unwanted noise using the NEW logical gate/expander GX622

Using the new Blue Tubes Logical Gate/Expander you now have yet another incredible tool for your day to day projects. A pretty common problem that happens when recording an entire band is noise bleed from other instruments when one stops and another is still playing.  In this particular case there is quite a bit of drums leaking  in the quiet parts between chord stops of this piano part.  Some would argue that throwing a Gate on there can make your signals sound robotic and choke your signal if not set correctly. So, let’s go through a step by step way of setting up your Gate setup correctly.

Developer Notes: SONAR X3 VST Enhancements

Introduction

SONAR X3 is packed with enhancements and updates to the VST engine, including a brand new VST scanner with industry leading automatic background scanning, support for the VST3 plugin format and an updated plugin browser that supports plugin categorization. Many of the changes apply equally to VST2 and VST3 plugins.

VST background scanning

Users of prior versions of SONAR and other DAW software will be familiar with the process of scanning for VST plugins when the application starts up. SONAR has always had a fast scanner that only scans what’s needed. X3 kicks this up several notches by introducing Continue reading “Developer Notes: SONAR X3 VST Enhancements”

Developer Notes: SONAR X3 ARA Integration

Background

It was back in 2005 that Cakewalk first added Roland V-Vocal to SONAR 5 for integrated audio stretching and pitch correction. While VVocal was an exceptional tool in its time and is still used by many for its ability to do fine editing of a vocal performance, the industry has advanced since then and companies like Celemony with their dedicated focus in this area have made great strides. A couple of years ago Celemony released their ARA SDK to integrate Melodyne integration into a DAW host application. Since VVocal’s integration in SONAR is similar in principle to what ARA does, it was natural for us to consider integrating ARA technology into SONAR.


What is ARA?

ARA (Audio Random Access) is a general protocol that allows host integration with any audio edit capable plugin such as Melodyne. Technically speaking ARA itself is not a plugin protocol. It is a protocol that allows the host and ARA capable plugin to transfer parameters and audio region data back and forth either offline or in realtime Continue reading “Developer Notes: SONAR X3 ARA Integration”

EDM Production Tip: Ducking Synth Melodies using Sidechaining

Ducking is a popular technique used in EDM music to apply percussive processing to pads, leads, and bass lines using side-chains on compressors. This technique is also used as a method for getting bass and drum passages to subtly fit together in mixes. In order to successfully apply ducking to your track you must have the following:

  • Compressor inserted on a pad or lead track with side-chain capabilities
  • Percussive source to key the side-chain

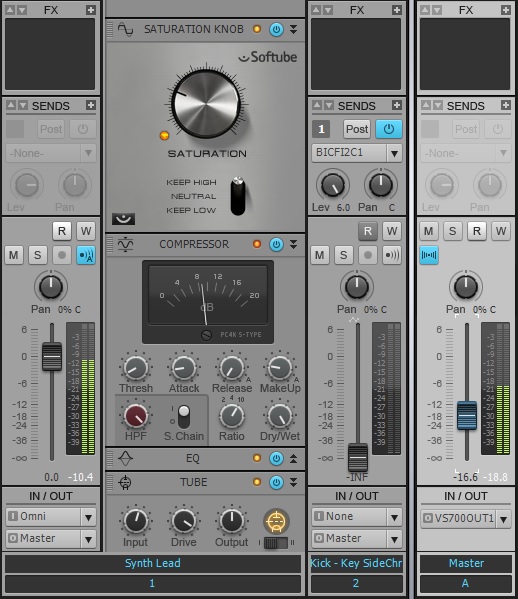
First, grab a kick drum sample and align it to the desirable rhythm you need.  Next, insert a compressor onto your synth lead or pad track.  Afterwards insert a send on the sampled kick drum track and set the send to “Pre-fader”. In SONAR, deselecting the [Post] button enables pre-fader sends.  Mute the kick drum sample and turn up the gain on the send.

Once you have the signal flow set, enable the Sidechain on the Compressor.  Now, every time the kick drum sample plays the Side-Chain will trigger the compressor and “Duck” the signal.  You can set the compressor using the Threshold, Attack, and Release settings to shape the kind of effect you want.

Try it yourself with the SONAR X2 Producer free 30-Day trial.

The Distance Effect: How to make audio sound far away using Reverb

Creating distance in a mix or sound design project often results in the use of a distance effect.  This effect can make anything sound as if it’s 50 ft away, and is quite easy to setup.

1) Insert a pre fader send onto an audio track. Within just about every DAW and/or mixing board there is a setting on the Sends sections called “Pre”.  Within SONAR this setting is enabled when the “Post” button on the send is deactivated.

2) In SONAR, I right-click on the Sends area in the console view and select “New Stereo Bus”.

3) Rename the bus “Distance Effect”. Now my audio is routed to this Bus. It’s often good practice to label your buses, or else mixes become confusing to work with.

4) Insert an instance of Reverb onto that bus. In this example I used BREVERB SONAR and called up a Plate preset.

5) Mute the audio track and hit play.


To read more about BREVERB SONAR check out Breverb: A 2013 Sound Design Odyssey on our Knowledge Base.

Try the BREVERB ProChannel Module for free – Download the SONAR X3 Producer Trial

How to make your Kick and Snare sound more aggressive using compression

Compression can be used in many different formats but one of the most useful methods is for adding an aggressive sound to your Kick and Snare. A typical compressor’s settings involve Threshold, Attack, Ratio, and Release.

  • Threshold is a setting in decibels. Once it senses that audio surpasses the set decibel level it activates the compressor.

  • Attack is a measurement in milliseconds for how fast the compressor should begin compressing audio that exceeds the set threshold.

  • Ratio is the amount of gain reduction applied to the compressed signal.

  • Release tells the compressor how fast to stop compressing the signal once the threshold is no longer exceeded.


By setting the Attack and Release times relatively fast it allows for each drum’s initial hit to sound and then afterwards reduce the audio transient in gain. From our ears’ perspective, each hit sounds more aggressive.

Pictured above: The ProChannel in SONAR X2 Producer.  Try it free!