Introduction
Who doesn’t like bass? Especially synth bass. Z3TA+ 2 is the answer to all of your sound design needs especially when you are looking to improve your production in the low end. I’ve put together a short tutorial on how to make a simple bass synth inside of Z3TA+2. Once you understand how everything works together you’ll be able to really start to make this plugin work for you.
Picking the right Oscillators
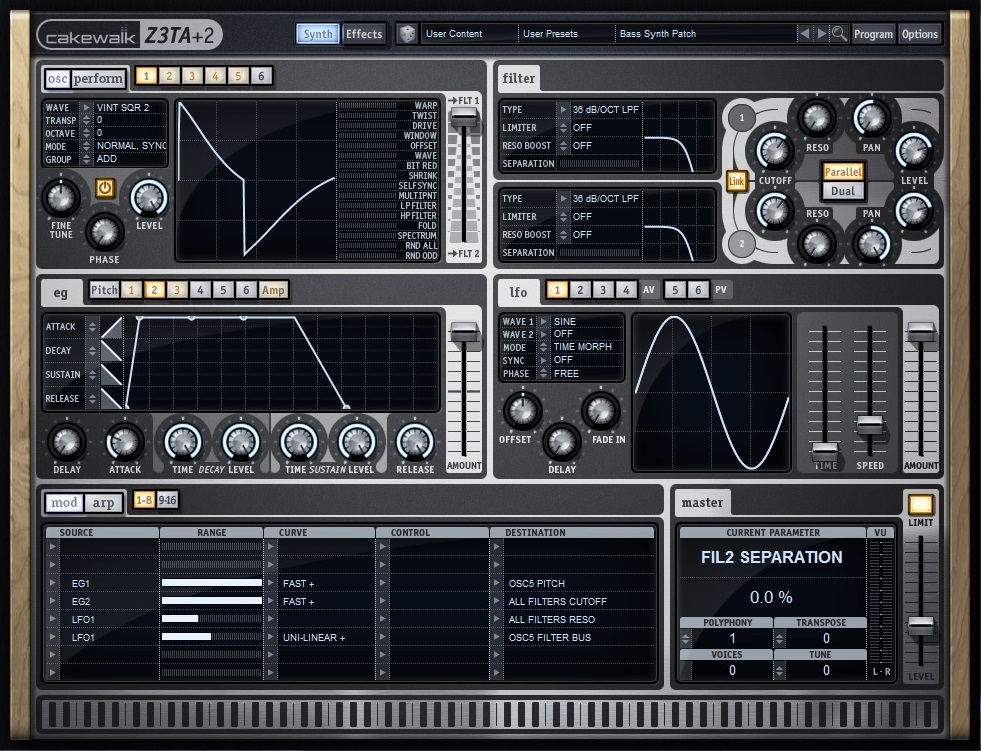
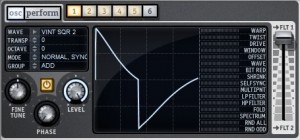
Within Z3TA+2 the first section you need to start working with is the OSC section. First I’ve selected two different square waves for OSC 1 and 2. They were Vintage Square 1 and Vintage Square 2. When creating a bass synth you need to make sure that your patch will not break up in the low end so be sure not to drop the octaves on the individual oscillators too low. I typically set mine to -2 at the most. Once you get to a certain range the instrument will sound weak and lose it’s driving Bass Synth sound.
Next, since the nature of the bass is to have a presence in the sub frequency domain both OSC 3 and 4 have been assigned a simple Sine Wave. OSC 3 and 4 have “octave” set to -1.
Lastly, to add some flavor to the overall sound of the patch I tossed in a “Half Saw” wave on OSC 5. This will help complete the sound of the patch once I begin panning OSC 1, 2,3, and 4. OSC has the “octave” setting set to -1.
Stereo Panning via Filter Section
Optimum bass synths retain a thick presence in the stereo image of a track. One way to help achieve this wide stereo image is by using the synth’s panning parameters.
First, within the filter section select the “Link” button so that both filters are locked to one another. Move one of the pan knobs and the other will move in the opposite direction. They are inversely proportional when “Link” is activated.
Temporarily move back to the OSC section and you’ll notice that there is a fader to very right of this section, this is the Filter Bus. Moving the fader to >FLT 1 sends the selected oscillator to Filter 1 and moving it to >FLT 2 sends the selected oscillator to Filter 2. Since the Filters are panned hard left and right assigning differing oscillators to opposing filters will widen the sound of the patch.
First, select OSC 1 and 2 and assign them to opposing filters. The waves are not identical to one another so their varying types will make for a more discernable stereo image.
Next, select OSC 3 and 4 and assign them to opposing filters like we did with with OSC 1 and 2. Since each Sine wave is identical we can use the “Fine Tune” parameter to slightly detune them and introduce more separation in the stereo image between the two oscillators. Leaving OSC 5 midway between Filter 1 and 2 centers the patch and figuratively glues the whole panning scheme of the patch together.
For this particular patch I will be modifying the filter cut-off in the Filter section, so it doesn’t matter what this parameter is set to. The actual filter type is the 36 dB/OCT LPF and the cut-off set to 13k. Like stated before, both Pan parameters are set oppositely and the filter Levels are at unity gain.
Using the Modulation Matrix (MOD) section to your advantage
First, let’s look at the AMP Envelope Generator for Z3TA+2. Since this synth needs to have some sort of fast attack and shorter release I activated the AMP EG. This affects all 6 oscillator’s Attacks, Decays, Sustains, and Releases at once. Everything in the AMP envelope generator is pretty much set to 0 except for the Release which has a setting of 0.05 seconds. Having a global AMP EG like this one can save you time so that you do not have to assign each oscillator it’s own specific EG. That being said, we can use the other EG to control other elements within the synth using the MOD section.
The MOD section is a virtual patchbay for Z3TA+2 and allows you to modulate, control, and modify parameters in the synth. Having something like this allows you to really get under the hood of your synthesizer and make detailed tweaks the sound of your synth.
The first tweak that I made to this patch was modulating the Pitch of the OSC5 using the first envelope, EG1. This row follows this signal flow:
The Envelope’s Attack is set to 0.03 second while the other parameters are maxed out. When you play a note you’ll notice that oscillator 5 comes in just after all the other oscillators. This helps keep the initial attack of the patch less cluttered as well as throw in a “ramping up”.
Next, EG2 controls the All Filters Cutoff parameter to ramp upwards at the beginning of every key press. This adds a level of dynamics to the beginning of every note by slightly moving the cut-off frequency upwards. This increase the amount of detail in the patch as well as dynamically changing the sound as the player plays. This row looks like this:
EG2 > Range (100%) > Fast + (Fast Variation) > (No Control) > All Filters Cutoff
After that I set LFO1 to modify the filter resonance. Setting the LFO to simple Sine wave allows the resonance to change smoothly instead of a square wave that may have a more abrasive sound.
LFO1 > Range (36% M) > (No Curve) > (No Control) > All Filters Reso
Lastly, to give some variation to OSC5 I set the same LFO1 to slightly modulate this Oscillator’s Filter Bus. This moves the center oscillator back and forth in the stereo image and keeps the patch from sounding dull over long held out note lengths.
LFO1 > Range (48.8% M) > Uni-Linear + (Unipolar Processing) > (No Control) > OSC5 Filter Bus
Don’t blow off your ears!
In the Master Section of the synth it’s important to lower the volume of your Z3TA+2 patch so that it doesn’t blow up your ears, or your speakers. Throw on the limiter and you start to hear a nice over-compressed sound on the synth’s output.
Special FX
In listening to the state of your current patch you may think that it may need some more work. Well, you were right. Tab over to the Effects page and active the distortion. I’ve put mine in a “Soft Drive” mode with the Tone turned to 58.5%. This is the growling bass sound that I’ve been looking to put on this patch.
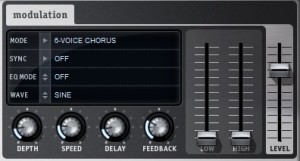
After that, simply move over to the Modulation section and place the 6-Voice Chorus on after the Distortion. Turn each parameter in the 6-Voice Chorus to about 9’oclock and your overall sound will transform immensely.
Here is the synth in it’s final form used in context to a drum loop.
Check out more on the Cakewalk Blog.


2 Replies to “EDM Production – How To Create A Bass Synth with Z3TA+ 2”
Comments are closed.