When you need to get really detailed, object-oriented mixing is a convenient solution
by Craig Anderton
Many times when mixing, you’ll want to apply an effect or volume change to a small, specific section. Clip Automation makes it easy to handle Gain or Pan changes, but you can also work with effects by isolating specific “objects” in a track, then processing them individually. This is different from the usual method of applying effects to an entire track, but can come in really handy for detailed work. Also note that object-oriented effects processing works with any type of clip—audio, MIDI, or groove.
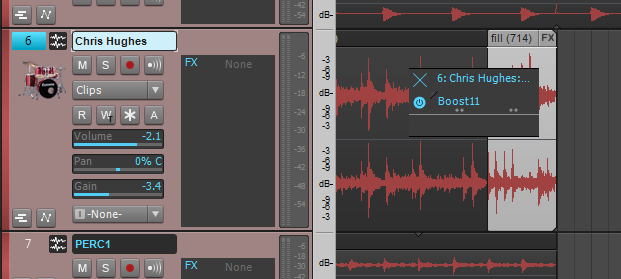
Here’s a step-by-step example of how to apply object-oriented mixing by adding maximization to one drum fill to make it really stand out. Download SONAR X3 to give this a try.
1. To isolate the object from a selected track, alt-click with the Smart tool at the beginning of the section you want to isolate, or place the Now time at this point and type “S.” Do the same at the end of the section.
2. Right-click on the object, and select “Open Clip Effects Bin” from the context menu (keyboard shortcut: Alt+K).
3. An effects bin opens up that’s similar to the standard track effects bin.
4. Right-click on a blank part of the effects bin, choose Audio FX from the context menu, then drill down to find the effect you want.

5. The effect will now appear in the bin. Like a standard effects bin, the small “power symbol” circle (blue for enabled, gray for disabled) appears to the effect’s left. To insert more effects Continue reading ““Object-Oriented” Clip Mixing in SONAR”


 PUTTING MY FACE ON YOUR NAME: