Virtual Instruments: 5 Tips For The Z3TA+ Junkie

Here are some of our favorite Z3TA+ tips and videos from our archive:

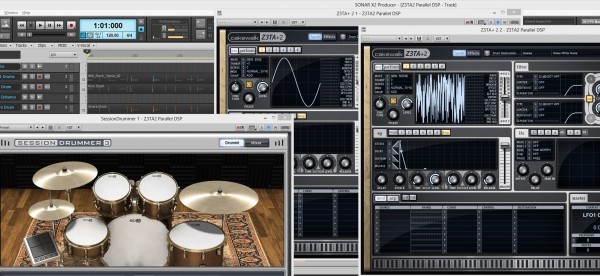
1. EDM Production – Enhance Your Drums with Z3TA+ 2

  • Insert two instances of Z3TA+ 2.
  • Copy your drum sequence to both Z3TA+ 2 tracks.
  • Isolate the Kick on one track and the Snare on the other.
  • Setup the first Z3TA+ 2 to generate a Sine Wave for the Kick.
  • Setup the second Z3TA+ 2 to generate White Noise for the Snare.
  • Adjust the Amplifier Envelope to match the duration of each hit.
  • Within Z3TA+ 2 add Reverb, Compression, and EQ.
  • Mix in under your existing Drum Loop.

2. How to Customize Z3tA+ 2’s Stock Arpeggios

Z3TA+ 2 comes packed with a massive pool of MIDI programs that power it’s internal Arpeggiator, but why stick to the stock programs when you can make your own?

Here’s how:

  • Open Z3TA+2 and activate the Arpeggiator Section
  • Right-Click on the sequence in the arpeggiator and make sure the following are checked
  • Auto Disable Pattern When Dragged to Host
  • Auto Fit Patterns to One Measure When Loaded
  • Load one of the Arpeggios from the Pattern menu
  • Drag and Drop the Arpeggios right into SONAR X2
  • Edit the MIDI Clip to your liking
  • Go to File > Save As
  • Select MIDI 0 in “Save as type”
  • Go to C:\Cakewalk Content\Z3TA+ 2\MIDI Arpeggios and Save it
  • Load it into Z3TA+2′s Arpeggiator by going to Pattern > Load MIDI File…

3. How to create a bass synth with Z3tA+ 2

Who doesn’t like bass? Especially synth bass. Z3TA+ 2 is the answer to all of your sound design needs especially when you are looking to improve your production in the low end. I’ve put together a short tutorial on how to make a simple bass synth inside of Z3TA+2. Once you understand how everything works together you’ll be able to really start to make this plugin work for you.

Picking the right Oscillators

Within Z3TA+2 the first section you need to start working with is the OSC section. First I’ve selected two different square waves for OSC 1 and 2. They were Vintage Square 1 and Vintage Square 2. When creating a bass synth you need to make sure that your patch will not break up in the low end so be sure not to drop the octaves on the individual oscillators too low. I typically set mine to -2 at the most. Once you get to a certain range the instrument will sound weak and lose it’s driving Bass Synth sound

[READ THE REST OF THE TIP HERE]

4. [VIDEO] Digital Sound Factory Z3TA+  Sound Design

5. [VIDEO] Mixing and Mastering a song using only the Z3TA+ effects engine in SONAR

International German Composer Jochen Flach Chooses SONAR X2: Interview from MusikMesse – Frankfurt

Recently and fortunately, I had the opportunity to attend MuskMesse in Frankfurt Germany where I demonstrated the powerful workflow of SONAR X2a.  Similar to The NAMM Show, MusikMesse brings gear junkies like you and me into one centralized location to discover all the new products for anything-music-creation.  The one constituent factor I noticed that sets MusikMesse apart from The NAMM Show is the undeniable international presence; both on the company side, and the consumer side.

Roland Germany's Michael Menze with Jochen Flach at MusikMesse

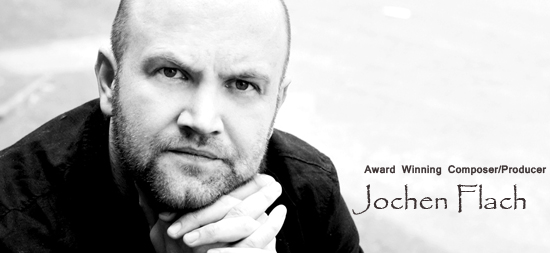
I was able to discover some great new products as well as meet some great new artists.  One artist that I was looking forward to meeting was composer/producer (and SONAR X2 user) Jochen Flach who is doing some great things on an international level based out of Germany.  I was excited to meet Jochen after becoming a fan of his compositions as the music he is creating on SONAR X2 is nothing short of innovative and captivating.

As a member of DYNAMEDION – Germany’s leading game-audio company, he was awarded back in 2009 for the best game soundtrack (for the game ANNO 1404).  In addition to usages in games, his music is being used for international promotion-campaigns for movies, TV-series, TV-shows as well as for soundtracks.  You can find his tracks on numerous releases for the movie-trailer business of several major companies – all composed in SONAR.

I got a chance to sit down with Jochen in a somewhat controlled environment at MusikMesse and had a great conversation with him about music production, and why he chooses SONAR for his complex music compositions.

Download the SONAR X2 Producer trial today and find out why more and more award winning producers and musicians from around the world are switching to SONAR. The trial is fully-functional for up to 30-days and includes the award-winning Skylight User Interface and the innovative ProChannel.


Learning to Record Guitar on a Laptop… In Space!

Cakewalk software is so essential to the recording experience that astronauts don’t leave earth without it! Future commander of the ISS, Chris Hadfield, visited the Larrivée Guitar factory in Vancouver, Canada – builders of the Space Station guitar. He talks about challenges of playing in the weightless environment and recording original music in Space using Cakewalk.
Credit: Larrivée Guitars

Watch the video at Space.com: Zero-G Guitar – Re-learning how to play in Space

Try Cakewalk’s flagship SONAR X2 Producer Free Trial

Highlights from NAMM 2013: New Products from Cakewalk and Roland

Cakewalk and Roland at NAMM

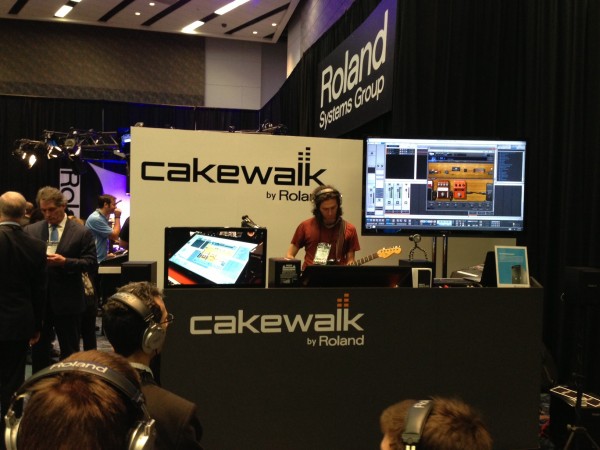
If you weren’t able to make it to sunny Anaheim California for the 2013 Winter NAMM show, you missed out on quite a show from Cakewalk and Roland.  Ballroom A was packed with press, dealers, artists, and engineers hoping to get a look at our latest technology and new products.

Cakewalk kicked off the show by announcing the new CA-2A T-Type Leveling Amplifier – now available for download at the Cakewalk Store for only $99/£79/€99. This legendary vintage electro-optical tube compressor, originally released as a ProChannel module, is now available in VST or AU format.

CA-2A

The other big showpiece at this year’s show was touch support in SONAR X2. We had multiple experience stations where users could reach out and touch SONAR X2 for themselves. Station setups included a 27″ touch display, Z420 PC from HP, 2 Intel Ultrabooks with built in touch screens, Roland A-300 PRO MIDI Keyboard Controllers, Roland Octa-Capture Audio Interface, and a brand new Roland Studio-Capture USB 2.0 Audio Interface.

Our main stage demos included Working with Touch in Skylight, Mixing with Touch, Touch in the Matrix View, plus SONAR Technology including R-MIX SONAR, ProChannel, and Virtual Instruments like Z3TA+ 2.

We had some special guest demonstrations as well. Our friends at Overloud joined us to show of TH2 Producer and BREVERB SONAR.

We also had TC, Paul Oakenfold’s main engineer, discussing techniques for remixing and vocals in SONAR X2.

As usual, Cakewalk’s NAMM booth was surrounded by all the other the other members of the Roland family.  We were fully impressed with all the new Roland product announcements.  You should be sure to check out the entire lineup for Roland Connect 2013.

SONAR X2 Feature Peek: R-MIX SONAR (Video)

I will never forget witnessing a demonstration of R-MIX software for the first time.  Fast-forward a bit, and I will also never forget being in a meeting where I discovered that R-MIX was going to be incorporated into SONAR X2 Producer. Music production light-bulbs started going off in my head imagining what I was going to be able to do with multiple instances of R-MIX inside SONAR (see video below.)

What is R-MIX? 

Technically speaking it is an audio manipulation plugin that is powered by Roland’s newly developed V-Remastering technology in conjunction with VariPhrase — lets you see the components of a stereo mix as color-coded clouds of energy and harmonic matter as the track plays.  Speaking as a musician, the only way I can describe it is by calling it “visual sound,” and it is truly impressive as well as creative.

Mixing and Mastering a Song Using only the Z3TA+ Effects Engine in SONAR

One of the great aspects about SONAR X1 is that it’s a very diverse D.A.W.  There are so many different ways to create music and it’s great for people who like to experiment with sounds and develop unique sonic pallets.  One of the main reasons why many pro users choose SONAR is because there are a lot of veiled jewels and tools that help musicians to sculpt a unique and individualized sound.

Similar to the Beatscape Content articles that were posted, I decided to dive into another one of my favorite hidden treasures of SONAR of which some people may not be aware; the pristine and fat FX engine of Z3TA+ that can be used as a standard VST effects unit.

When I first started using SONAR I loved the fact that it came with so many great VST plugins.  It wasn’t until 6 months into using the program when someone pointed out to me that you could use the Z3TA+ synth as an actual VST effect anywhere you use regular plugins – on clips, in bins, on busses… etc.  After dragging Z3TA+ onto a track I was instantly surprised at what I heard. Continue reading “Mixing and Mastering a Song Using only the Z3TA+ Effects Engine in SONAR”

Create Unique Percussion Beats with the Beatscape Factory Content In SONAR X1: Part 2; ProChannel

In Part 1 of this blog series, I highlighted the basic information to get the Beatscape content going in SONAR X1 Producer  without using the Beatscape program.  If you read that post and starting working a bit with the Beatscape content you probably found out that there’s some really good samples in there from which to draw.  In this post, I will dive into a few tips and techniques and focus in on The ProChannel to show how fast and easy it is to create a more tailored sound with Beatscape content (and any other sample based content for that matter.)

For me and my style of music production, it’s all about layers and a multi-dimensional vibe.  I started out like a lot of folks, on 2” tape and followed a lot of rules, but in this new digital era I rely more on my ear than I do on following fundamentals.  Don’t get me wrong, I think it’s more important now than ever to understand the fundamental concepts of recording and producing music, but it’s also just as important to rely on what you are hearing in relation to what you are going for.  Sometimes I will start out with something that sounds quirky or not pleasing to the ear; a person in the room will look at me like I have two heads, and then within minutes they don’t even recognize what I started with.

I like to blend multiple elements together to create a “part.”  In this video example by simply using the Beatscape content and The ProChannel, I will take 8 samples that sound cluttered together, and then shape them into one interesting loop that will sound more professional than where it began.

1.)    I started with the basics by finding 3 kicks I liked, and 3 snares [snare and claps] I liked and shaped both using the ProChannel so that they worked well together as a groove.  As you will notice, working with the ProChannel is lightning fast in terms of a workflow; everything is right there so there’s no inserting plugins or switching back and forth between screens and menus.

2.)    I then arranged the snares and claps using the Smart Tool so that they created a unified part.

3.)    Next, I added top loops to add depth and dimension to the groove.  As you will hear, when these loops are first pulled into the mix they are very prominent and overbearing.  Again using the ProChannel I was able to quickly sculpt these top loops to add character to the groove as a whole.  Using the Smart Tool once again, I copied over one of the loops and reversed it to set up a dramatic effect.

4.)    Finally, using the ProChannel I called up a mastering Preset which instantly added thickness, volume and control over the whole new loop.

In this video you will see and hear not only how great the Beatscape content is, but also how powerful the ProChannel is in terms of sound, workflow, speed and ease of use.  There’s a solid reason behind the fact that SONAR X1 is buzzing in the music industry.  There’s no other DAW on the market that covers the territory of SONAR X1 Producer.  If you are serious about music creation and production, go to our Dealer Finder here and pick up an investment in yourself and your future; The SONAR X1 Production Suite.

Create Unique Percussion Beats with the Beatscape Factory Content In SONAR X1: Part 1

There’s no doubt that SONAR X1 comes with a lot of great content, but one component that I think is sometimes overlooked is the Beatscape content.  Beatscape originally came with SONAR 8 and it’s a great sampler machine for mixing and mashing up content.  And now with the power of the Browser, Drag and Drop and the ProChannel, anyone who is looking to make creative drum beats that really stand out from the crowd can utilize all this content right at their fingertips in SONAR X1.
The Beatscape content is great for creating drum tracks from scratch, or embellishing existing drum tracks.  Whether or not you have Beatscape installed does not affect the ability to utilize this content in X1.  In fact I prefer to use the content in X1 without Beatscape at all.  Here’s how easy it is to utilize the Beatscape content.

1.       If you do not have Beatscape installed, copy all of the “Beatscape Factory Content” from your SONAR X1 install disc or from the file in your download purchase and place it somewhere on your hard drive.

*If you do have Beatscape installed, you will navigate to the Beatscape Content folder in the next step.  Your Beatscape folder is usually in these locations depending on whether or not you are running a 64bit system:

If you are running a 32bit system of Windows:

“C:\Program Files\Cakewalk\Beatscape\Library\Beatscape Factory Content\” or you can search for the folder easily in Windows. 

If you are running a 64bit system of Windows:

“C:\Program Files (x86)\Cakewalk\Beatscape\Library\Beatscape Factory Content\” or you can search for the folder easily in Windows. 

2.       In the SONAR X1 Browser, navigate to where the “Beatscape Factory Content” folder is and save that location by simply clicking the “save content location preset” button.  You can also rename this location by double-clicking inside the text rectangle.

3.       In the “Media” tab, make sure Auto Preview, Preview at Host Tempo and Loop Preview are all checked.

4.       You can preview any loop by clicking on it.  With the Beatscape content file system; the word “combo” is used in the files that have the complete loop.  The great thing about this content is that for most loops, the parts are broken apart so you can use them all together for the complete “combo” loop, or you can pull in just single elements of the loops.  When pulled in separately you can combine them with other loops or you can pull them all in and then layer them on separate tracks.

5.       Experiment with different individual loops by simply dragging and dropping them into the track view and layering them on different tracks.

You can get quite creative with the Beatscape content, and it’s just another quick and simple way to get up and running fast on SONAR X1.  Next week I will show some of my favorite tips and techniques to get unique sounds from the Beatscape content using the ProChannel and other effects.

Upgrade to SONAR X1 Producer to get Beatscape and it’s massive content library.

How Building Cost Effective Acoustic Treatment for the Music Studio Will Help Your Music Production; Final Links and Video

A 3 Part Resource for D.I.Y. Acoustic Sound Treatment and Room Development

As a conclusion to my series on Building Cost Effective Acoustic Treatment, I wanted to put a link to all three articles in one place along with a “before and after” video.  I also wanted to put this up on our forum in one place in case anyone has any questions about what I did with my studio.  If you are planning on trying to save some money by building your own acoustic treatment panels these three articles are worth reviewing.

Part 1: Building a sound cloud over your mix position

Part 2: Building corner traps

Part 3:  Building wall panels

The effort to build all this acoustic treatment was not minimal, but well worth it.  Besides saving a lot of money I was able to customize the panels so that they fit the room well.  Using the QuadCurve EQ which comes with SONAR X3Producer is where I can really tell the difference in my environment.  The QuadCurve EQ is very advanced and allows the user to surgically tailor frequencies.  Now that I have my room treated properly, I can really hear the difference between the EQ modes.

So the first step is to get going with a version of the SONAR X3 family, and then do your homework and figure out the best listening environment FOR YOU.