by Craig Anderton
Ask songwriters about writing on a computer, and many of them will tell you it’s a creativity killer—as they reach for an acoustic guitar or piano to get their ideas down. But it doesn’t have to be that way. Although DAWs are thought of traditionally as being all about recording, editing, and mixing, for reasons we’ll cover here I’d rather boot up Sonar for songwriting as well.
Approaches to songwriting vary considerably, from those who strum some chords on a guitar for ideas, to those who start with beats, to those who seem to draw inspiration out of nowhere, and want to record what they hear quickly—before the inspiration fades. As a result, this article isn’t about what you should do to write songs, but rather, describes some particular Sonar tools in depth—some (or all) of which might be very helpful if you’re into songwriting.
Although songwriting styles are very personal, I think we can nonetheless agree on a few general points: While songwriting, you want your tools to stay out of the way and be transparent. You want a smooth-flowing, efficient, simple process; songwriting isn’t about endlessly tweaking a synth bass patch, but about coming up with a great bass part—thanks to the fluid nature of digital recording, just about anything can be replaced or refined at a later date. You want an environment that can simplify turning your abstract ideas into something tangible, while losing as little as possible in the translation. So, let’s look at some Sonar techniques that can help you accomplish that goal.
THE MIDI QUICK START
Normally you need to arm a MIDI track before you can record on it, but it’s possible to defeat this so that recording starts on any selected MIDI track as soon as you click on the transport’s Record button. I realize the default setting is there to prevent accidental overwriting of MIDI tracks, but personally, I find not having to arm a track liberating—it saves time and makes the recording process flow faster. To do this:
- Go Edit > Preferences > MIDI > Playback and Recording.
- Check the box for “Allow MIDI Recording without an Armed Track” (the 1st box under Record).
- Click Apply then OK to close preferences.
 It’s possible to record MIDI tracks without having to arm them first, which can be a real time-saver over the course of a song.
TEMPLATE FILES
It’s much easier to write when you have a friendly environment ready to go as soon as you boot up. Sonar allows saving files with a special extension, .CWT, which indicates that the file is a template. When you open Sonar and click on the “Create a New Project” button, you’ll see a list of available templates including “Normal.” This is a special template, because it’s the default template that will load when you create a new project (assuming you don’t select a different template).
Odds are you won’t need most of the templates included in Sonar, but will gravitate to a few favorites or create your own. Here’s how to create a slimmed-down, more efficient templates folder without eliminating the ones included in Sonar—you might want to access them someday.
- To find out where the template files reside, choose Edit > Preferences > File > Folder Locations.
- The “Templates” entry will show the file path.
- Create a new Templates folder (preferably in the same folder containing the old Templates folder), and copy over any templates from the existing Templates folder that you think you may want to use.
- Again, go to Edit > Preferences > File > Folder Locations..
- Click on the Browse button for the Templates field, and specify the file path to the new template folder you just created.
Next, create some custom template files to populate your new templates folder. Analyze the type of tasks you do, and what would be your ideal starting point for composition. Template files aren’t just about storing and recalling a particular number of tracks; you can set up particular configurations of virtual instruments, clock and sync data if you’re using Sonar with various pieces of hardware, metronome settings, MIDI and audio data, and more.
After creating the template, you need to save it a little differently compared to the way you’d save a standard file. Go “Save As…,” navigate to your templates folder, enter the file name, and under “Save as Type,” choose “Template” or simply type in the suffix .CWT (Cakewalk Template).
As to what a songwriting template should include, you’ll pick up some ideas from the following sections.
KICKSTARTING A SONG WITH MIDI
If you use MIDI, then having a virtual synth with a large number of sounds available is a good place to start. That way, whether you want to lay down a bass line, play some drums, or work on chords with a piano, you’re covered. And if you don’t use MIDI to kickstart the songwriting process, then consider changing your habits: If you start writing a song with MIDI tracks, it’s much easier to experiment with different tempos and keys to find the right “feel” and key than with digital audio.
For example, transposition is easy—just select All notes with the focus on the MIDI track, then choose Process > Transpose. Specify the transposition amount (don’t check Diatonic Math) and click OK. Alternately, with the MIDI track open you can Select All and shift-click-drag all the notes to a different key.
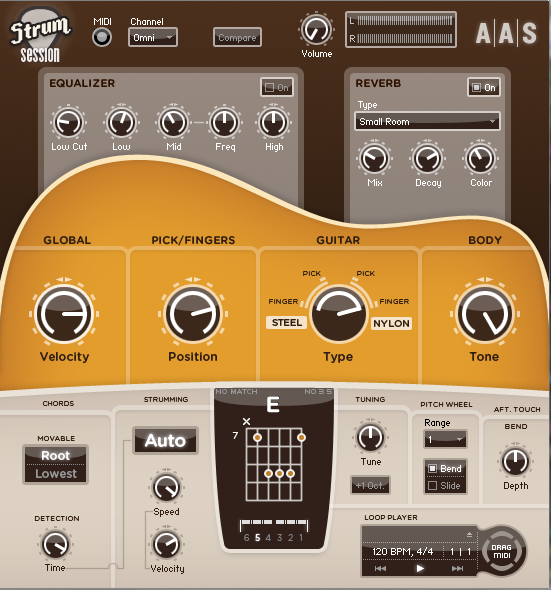
To simplify working with transposed parts, if I have a chord progression in mind I’ll lay down a chord reference track using a pad with a sustained sound. For these chords, I play only the tonic, third (major or minor), and fifth. Once the track notes follow the song, I quantize all the note attacks, insert the AAS Strum Acoustic Session plug-in instrument that comes with Sonar Producer, and use the MIDI reference track to drive it. This isn’t because I want strums (I turn down the track volume), but because Strum Session reads out the chord progression as the song plays.
Strum Acoustic Session will read out the chords at its input. In this example, the notes correspond to E at the 7th position.
When I transpose to try a different key, I don’t have to re-learn the song—just follow the “virtual chord chart.” You can also enter more complex chords, but for the purposes of blocking out the song, major and minor are usually sufficient.
And of course, another MIDI advantage is that if you end up with a “keeper” part but want to change instruments, or edit a few notes you didn’t like, you can edit MIDI data easily…or replace a MIDI track with a “live” instrument.
MIDI “INSTANT EDITING”
I always not advise doing as little editing or mixing as possible when songwriting. The object is to capture creative ideas fast, not tweak things. Also remember that Sonar doesn’t have to be linear. There have been many times when I’ve come up with an idea for a chorus and recorded that first. Group the clips, and then you can move that section around when you start working on verses and such.
However with MIDI, you might want to do editing for quantization so you don’t end up overdubbing against parts that are out of time. The simplest solution is to insert a MIDI plug-in and let it do the quantizing—you can always go back and do “real” editing when it’s time to start editing and mixing.
MIDI plug-ins can apply “instant editing” so you can keep on being creative.
THE MIDI WORKSTATION: YOUR SONGWRITING PALETTE
A multi-timbral instrument can really help the process of getting ideas down fast. Native Instruments Kontakt, IK Multimedia SampleTank, MOTU MachFive, and so on are excellent choices but don’t overlook Sonar’s own overachieving TTS-1. It has some excellent sounds that in some cases, I prefer over similar sounds from far more expensive products. It also requires virtually no CPU power; this makes it easy to maintain low system latency, which can be important if you plan to play acoustic or electric instruments in real time through Sonar. However, the TTS-1 also deserves some props for having several other useful features.
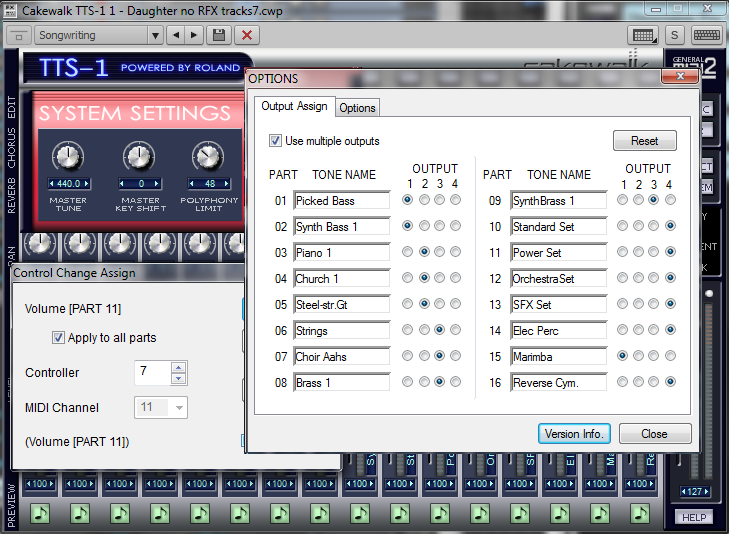
The TTS-1 has several useful options. Clockwise from upper left: the System settings screen is where you can transpose the instrument and limit polyphony, an output assign screen (with an additional Options tab) takes advantage of the four outputs, and it’s easy to assign controllers to the level faders for the 16 channels.
The GM2 set has more presets than a standard GM set. For example, there are seven acoustic pianos instead of the standard GM “Grand Piano,” “Bright Piano,” and “Electric Grand.” The TTS-1 also has four outputs, just in case processing, such as a tempo-synced rhythmic delay, is vital to a particular sound (although generally, I’d advise not concerning yourself with effects too much while songwriting—you can always deal with the effects later).
Furthermore, you can set up control changes for the various volume faders; if you have a control surface, it’s easy to throw together a quick mix without having to spend too much effort. There are other goodies: You can specify a polyphony limit to guarantee minimal CPU consumption, and a Master Key Shift control allows transposing the entire instrument (except for the drum channel, of course) if you decide to change key.
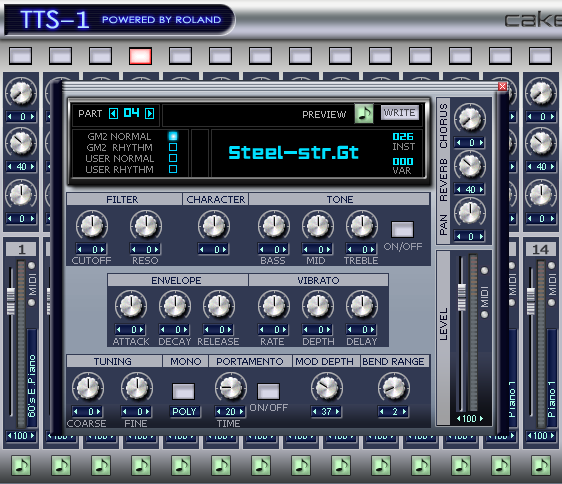
Also note that the TTS-1 is quite editable—just click on the Edit button above each mixer “channel.” I realize that mentioning editability may go against the premise that you want things to move rapidly while writing songs, but in this case, the editing options are quite simple: Filter, tone, envelope, vibrato, and the like.
You can edit several parameters for any given instrument, thus making it more suited for a particular musical context.
Thus, if you like an instrument but need, for example, a more percussive sound, it’s easy to do. And remember, you’re staying within one instrument, so everything you might want to adjust is only a few clicks away.
And I can’t resist mentioning a couple other favorite features. If you click on the System button, select Option, then click on the Options tab, you can tick “Light Load Mode” which saves even more processing power (and also allows th TTS-1 to work with higher sample rates). If while you’re there you also tick “Enable Phrase Preview,” then clicking on the note symbol at the bottom of each mixer channel plays a little riff so you can hear the sound’s intended usage. For more details about these features and others, click on the Help button in the TTS-1 screen’s lower right-hand corner.
The bottom line is that while the TTS-1 may not get the same amount of respect as its more expensive competitors, don’t overlook its talents as a hard-working songwriting companion that delivers a lot and asks for little in return.
TO MIDI FILE, OR NOT TO MIDI FILE?
If you have a workstation in your template, it might make sense to have some tracks with MIDI files for drums, bass lines, or whatever. But be careful, as you don’t want to box yourself in. I suggest having only a few MIDI drum tracks—for example, a four-on-the-floor kick with snare for dance music, and a typical rock pattern for rock music. Treat these more as a glorified metronome than a “real” drum part, or you might influence yourself to do what you’ve done before—and you don’t want to fall into a rut.
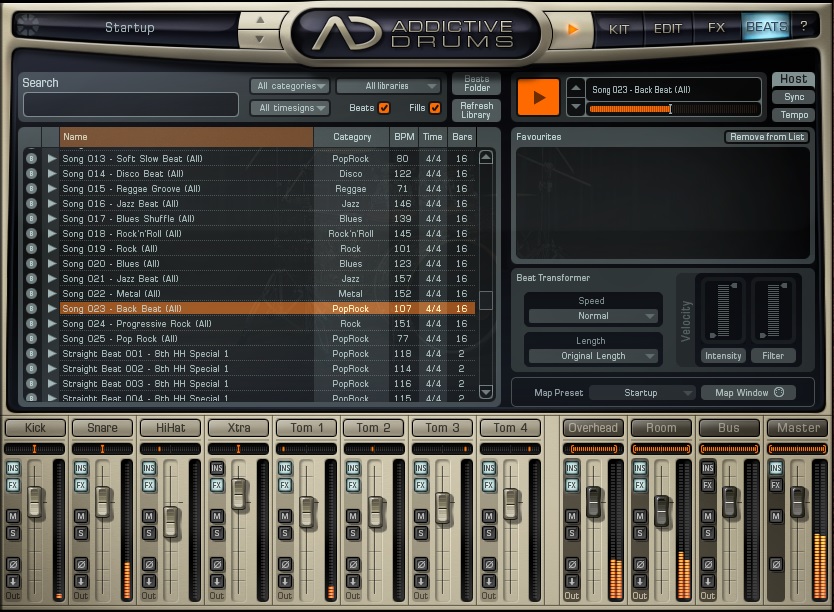
For something more sophisticated, Addictive Drums and Session Drummer 3 (as well as many other drum instruments, like BFD) include MIDI beats you can drag into a project for something much more inspiring than a typical metronome CLICK-click-click-click.
Addictive Drums is loaded with beats to get your rhythmic juices percolating.
This, and the TTS-1 with a particular multi-timbral setup already loaded, can be a part of your songwriting template file.
TRACK TEMPLATES
Track templates save huge amounts of time. For example, you may like particular EQ and compression settings on your vocals, but you may also like variations on these for different mics you use. Although you can include tracks with these settings in your songwriting template, if you add too many tracks to the template you don’t use, the template will end up being cluttered and confusing—the opposite of what you want.
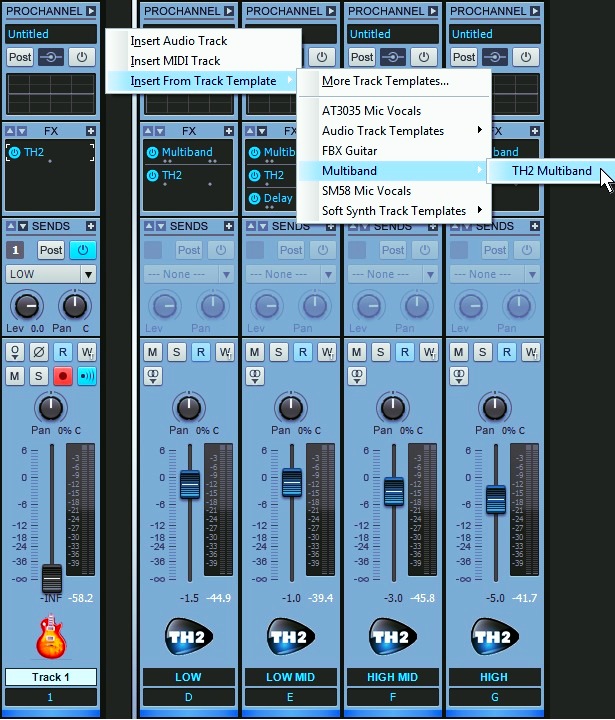
A better strategy is to save track templates for your favorite sounds, and load one at a time, as needed, into your songwriting template. For example, you might want to start off with a lead vocal track template as you start getting lyric ideas together, then call up a different track template for harmony vocals. Or if you use an amp simulator, create a track template with it sitting in the effects bin so you’re ready to rock. Speaking of which, one of my favorite track templates is a multiband distortion template.
This multiband distortion track template brings in an input channel, four buses, 11 effects, and all necessary routing.
Remember that a track template memorizes not just levels, but bus settings, hardware settings (input and output), track parameters and icons, name, etc. The best way to build up a collection of track templates is simply to create one when you come up with a track setup you like. To do this, in Track View or Console View right-click on a blank spot in a track or Console channel and select “Save as Track Template.”
Best of all, you aren’t limited to saving a single track as a template; you can save a collection of tracks, which can optionally be contained in a track folder. To save multiple tracks as a template:
- Ctrl-click on the track numbers to select the tracks you want to save in the template.
- Right-click on any of the selected track numbers and choose “Save as Track Template….”
- All selected tracks will be saved as a single template, and recalled as a group when you call up that template.
To save a track folder of tracks as a template:
- Ctrl-click on the track numbers within the folder that you want to save as a template track folder. You don’t have to select all tracks, but only selected tracks will become part of the template.
- Right-click on any of the selected track numbers and choose “Save as Track Template….” Note that you can’t right-click on the folder track itself, you have to click on one of the tracks within the folder.
You can load a track template from either Track View or Console View. Right-click on a blank space in either view where a track would normally sit, and select “Insert from Track Template.” Here you can choose from one of the presets included with Sonar, or a track template you’ve created yourself. Having a collection of these optimized for songwriting will save you much time.
OTHER TEMPLATE CONSIDERATIONS
Be careful to strike a balance between having enough templates to make your life easier, but not so many as to confuse the issue. I tend to use templates as “points of departure” that can be modified with a few mouse clicks. For example, rather than save track templates with different amp sim settings, I’ll create one amp sim template and recall a preset from within it.
It’s also important to create fairly general templates that don’t force you into a particular sound. One of the joys of making music is the occurrence of happy accidents where you might, for example, pull up the wrong synth preset and find it works perfectly in a song. Be careful that you create templates, not formats; there’s a big difference. To leave plenty of space for your creativity to flourish, let templates take some of the work out of getting a song off the ground—but not all of it.
SCREEN SETS
I’ve dedicated three screen sets to songwriting; these are optimized for tracking, the console, and using the browser.
![]() Tracking: This exposes all the I/O, input levels, and track waveforms.
Tracking: This exposes all the I/O, input levels, and track waveforms.
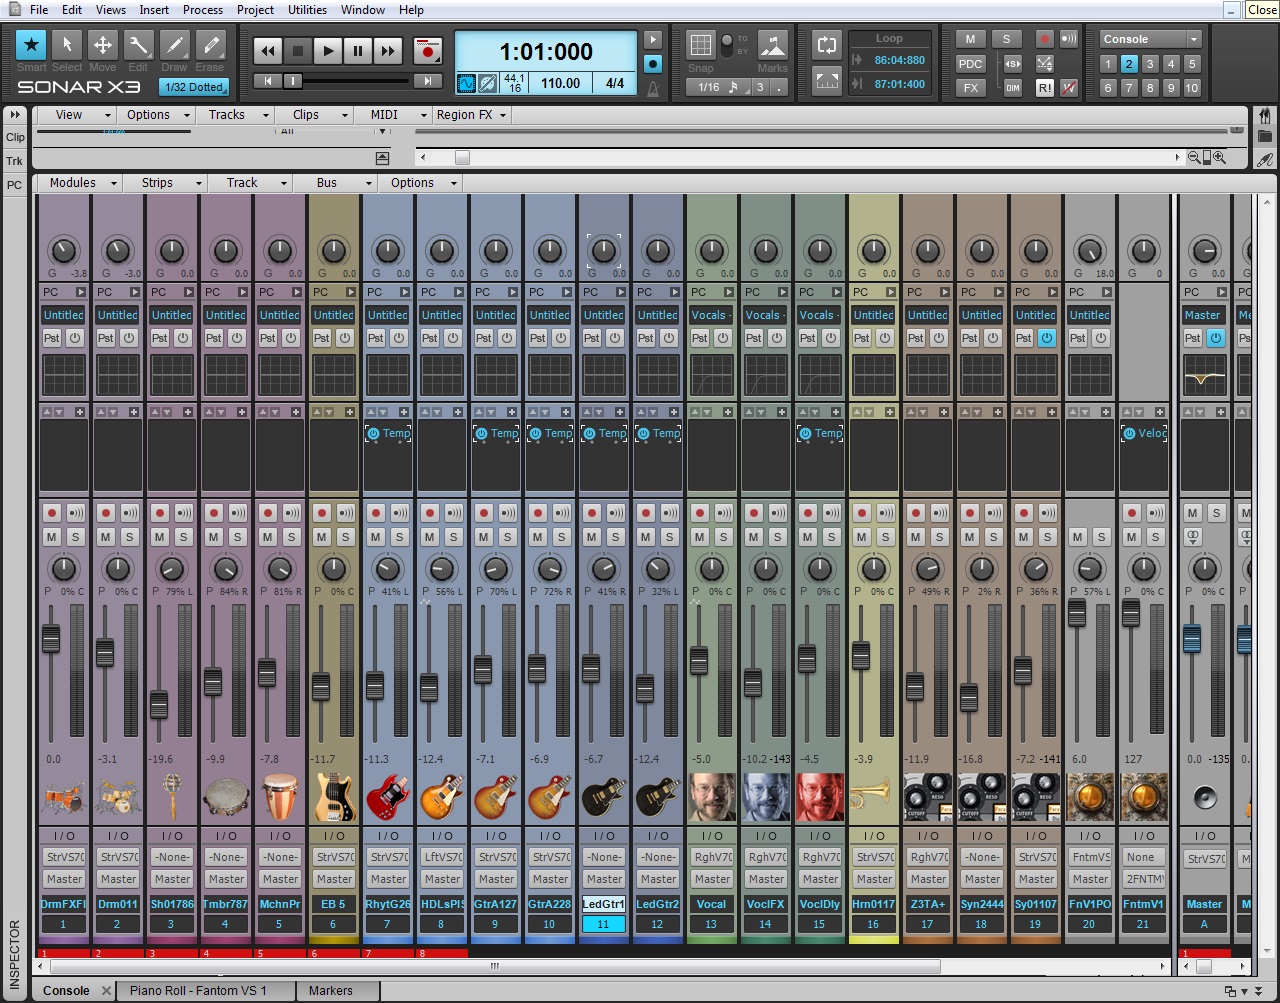 Console: Although you’re not going to be mixing much when you’re songwriting (that gets in the way of your creative flow, you can use this for quick level adjustments. Don’t forget the D command for toggling between track view and the Multidock.
 Browser: I use this for dragging in loops, instruments, plug-ins, FX chains (another time-saver), etc.
OF COURSE, THERE’S MORE…
Anything you can do to get creating faster is worth it. Optimize your computer so it boots fast—turn off all the garbage that loads at startup, and consider putting your system on a solid-state drive. Also, even though much of my work is done solo, I have an interface with lots of inputs—not because I’m going to be playing several instruments at once, but because everything is patched in and ready to use simply by selecting its input in a track’s Input field.
If you’re a guitar player change your strings after the last session, not before the one you’re about to start. And while the automatic tuning available on some Gibson guitars may seem like overkill, I have to say it really helps the creative flow to just push a button, strum, and have the guitar tuned—and there’s a side benefit because if a track is a “keeper,” then I know it’s in tune and won’t have to be redone.
Download the SONAR X3 Producer free trial and explore SONAR for yourself.


