Feature Spotlight: XLN Audio Addictive Drums in SONAR X3 Producer

Addictive Drums

SONAR X3 Producer now includes XLN Audio’s critically-acclaimed Addictive Drums. Some customers have have asked whether this is a cut down version of Addictive Drums and are shocked to hear that this is in fact the full version (retail price $149). We often hear from customers that one of the most difficult aspects of recording is getting great drums sounds. These problems are now a thing of the past thanks to Addictive Drums – now included in the SONAR X3 Producer upgrade.

Addictive Drums is one of the most powerful and popular drum programs in the world and can be heard on countless hit songs and albums. The unique architecture, fast loading times and flexibility makes it the first choice for many musicians and music producers. Three pristine drum kits, 100+ producer presets and thousands of MIDI rhythms are included. Load a complete drum kit with mixer settings and insert effects – with one click!

Learn more about Addictive Drums in SONAR X3 Producer

Tip: Setting up your Addictive Drums
Addictive Drums is the brand new drum synth available in SONAR X3 Producer. The sounds, fast load times, internal mixing, and abundant groove clips makes this possibly the only drum synth you’ll need to use from now on. There are a couple ways to insert this new synth into SONAR X3 Producer. The first way is to insert Addictive Drums as a simple instrument track.

Learn how to setup Addictive Drums

Tip: Drum replacement with ARA and Addictive Drums
Within SONAR X3 converting Audio to MIDI has never been easier thanks to our deep ARA integration. This opens up many doorways for users to convert their mono audio tracks to MIDI. One great use case for this is replacing drums or adding samples to your drum tracks to enhance their sound.

Learn how to replace drums with ARA integration and Addictive Drums

XLN Audio

Now available on the Cakewalk Store, choose from nine unique Addictive Drums ADpaks from XLN Audio starting at $49. Each ADpak includes a variety of real kit pieces meticulously recorded from real drum sets with iconic sound. Plus dozens of mix ready Producer presets and MIDI patterns to add to Addictive Drums (included with SONAR X3 Producer).

Shop now

SONAR X3 Feature Spotlight: Melodyne Essential with ARA integration

Addictive Drums

One of the most talked about features in SONAR X3 has been the new ARA integration. Every version of SONAR X3 now includes ARA Integration which allows you to use Melodyne as if it were part of SONAR X3. In addition, SONAR X3 Studio and Producer also include Melodyne Essential (retail value $99).

While including Melodyne Essential is a huge upgrade in terms of pitch correction, it’s the ARA integration that really takes it over the top. The main benefit of ARA is that it allows SONAR to integrate with plug-ins that can edit and analyze audio, such as Melodyne. ARA greatly improves the workflow when using plugins like Melodyne that do MIDI analysis and pitch and timing correction. Compatible plug-ins can exchange information about the project’s timeline data, including audio clips, tempo, pitch, rhythm and much more, which allows them to behave as if the plug-in was part of SONAR.

In a recent article on CreateDigitalMusic.com, industry expert Peter Kirn stated the obvious: “there’s no other way to say this: Celemony’s Melodyne line of products is just better than any other offering out there.” Kirn later went on to proclaim, “Cakewalk has done more with the SDK for ARA than any other host so far.”

Read the ARA integration article on CreateDigitalMusic.com

Developer Notes: SONAR X3 ARA Integration

SONAR X3 Tip: Easy Audio to MIDI Conversion

SONAR X3 Tip: Make your vocal thicker with Melodyne

SONAR X3 Tip: Drum Replacement with ARA and Addictive Drums

Upgrade to SONAR X3 Producer (includes Melodyne Essential)

SONAR X3 Quicktip: Drum Replacement with ARA Integration and Addictive Drums (Producer)

Within SONAR X3 converting Audio to MIDI has never been easier thanks to our deep ARA integration. This opens up many doorways for users to convert their mono audio tracks to MIDI. One great use case for this is replacing drums or adding samples to your drum tracks to enhance their sound.

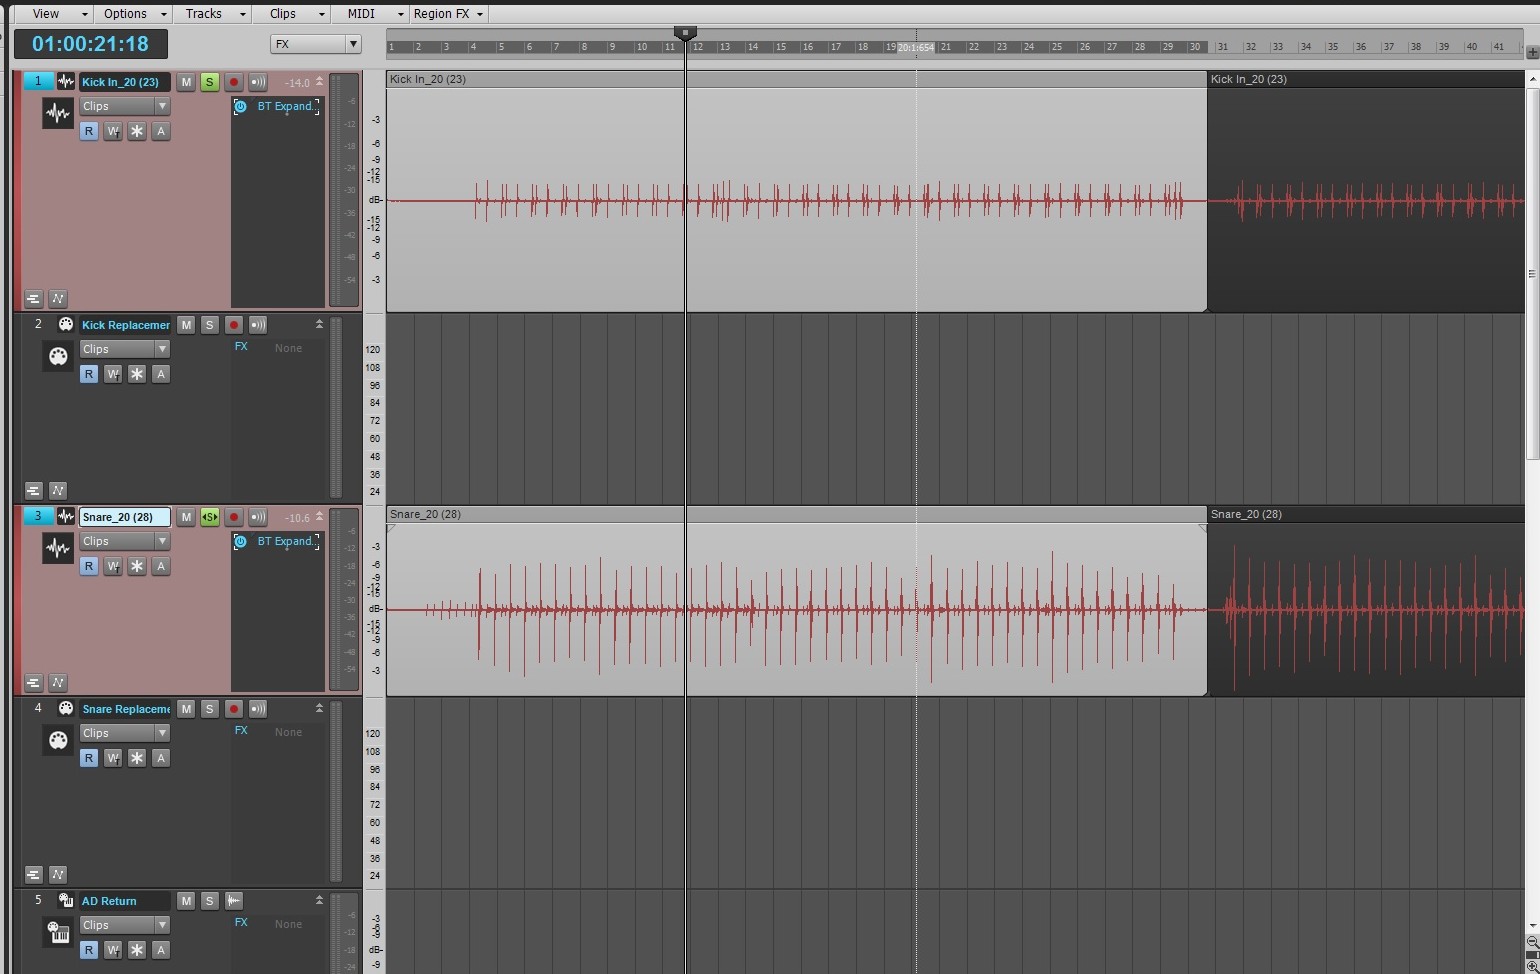
Within SONAR open up your Kick and Snare tracks.

Add a MIDI track below each audio track that you wish to replace.

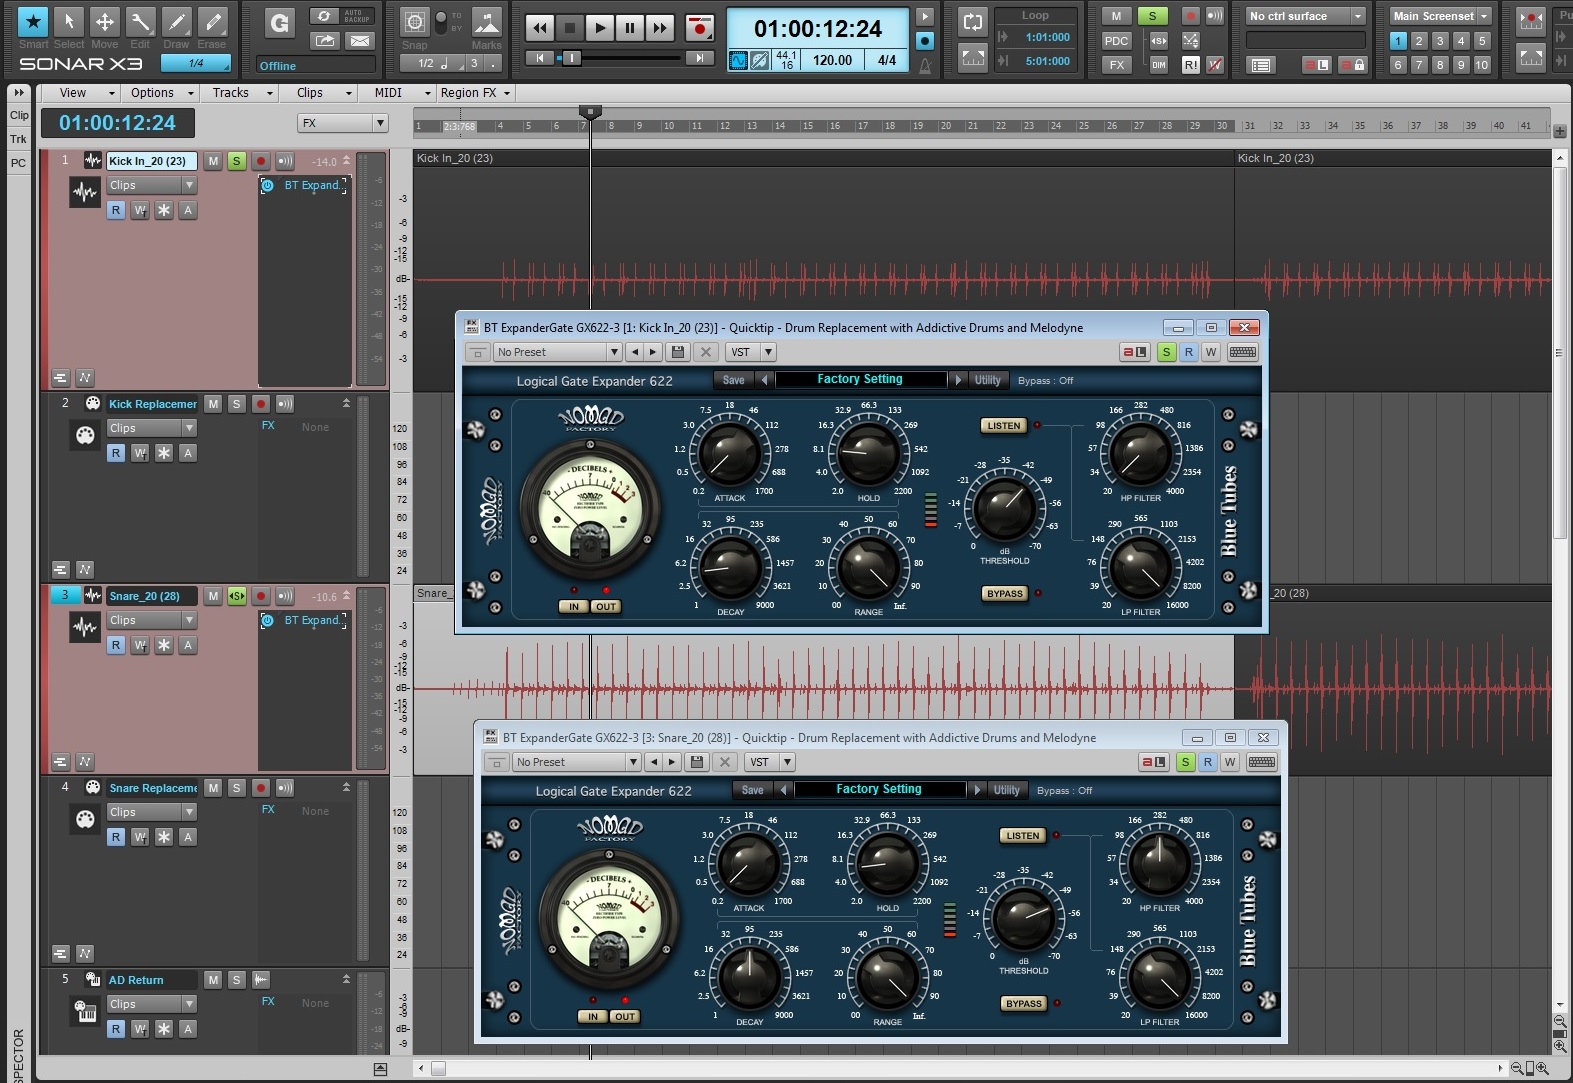
Add our new Logical Gate/Expander to both the Kick and Snare and adjust the effect so that instruments are heavily gated and sound like the following:

After this, Freeze both tracks.  This is going to render the Kick and Snare tracks with the gates embedded in the audio tracks.

Next, latency.  Let’s drop the latency to the lowest settings. Go to Edit > Preferences > Driver Settings and set your latency low. This will help with timing.

  • If you are using MME (32bit) set your latency closer to [Safe].
  • If you are using ASIO then select [ASIO Panel] and set your buffer size very low.

Drag and drop your kick and snare tracks to their associated MIDI track. Conversion will occur.

Next up, open the PRV and move your MIDI Clips to the drum you wish to use. You can highlight the entire row of MIDI clips by selecting their associated piano key and transpose them easily by going to Process > Transpose.

Once this is done insert Addictive Drums. Make sure to have the following ticked after selecting Insert > Soft Synth > Addictive Drums:

  • First Synth Audio Output
  • Synth Property Page
  • Recall Assignable Controls
  • Ask This Everytime

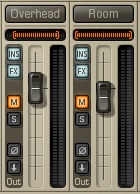
Mute the Room and OH microphones within Addictive Drums.  This reduces any additional ambiance.

Workflow Tip: It’s good practice to do this type of replacement section by section at first so that you can get an idea of how it works.

Mix these drums in behind your current mix.

Learn more about ARA Integration, Addictive Drums, and SONAR X3 Producer here.

SONAR X3 Quicktip: Make Your Voice Thicker (Studio & Producer)

Vocal production can lead to many different types of processing. Sometimes subtle enhancements to your vocals can make all the difference in the final mix.

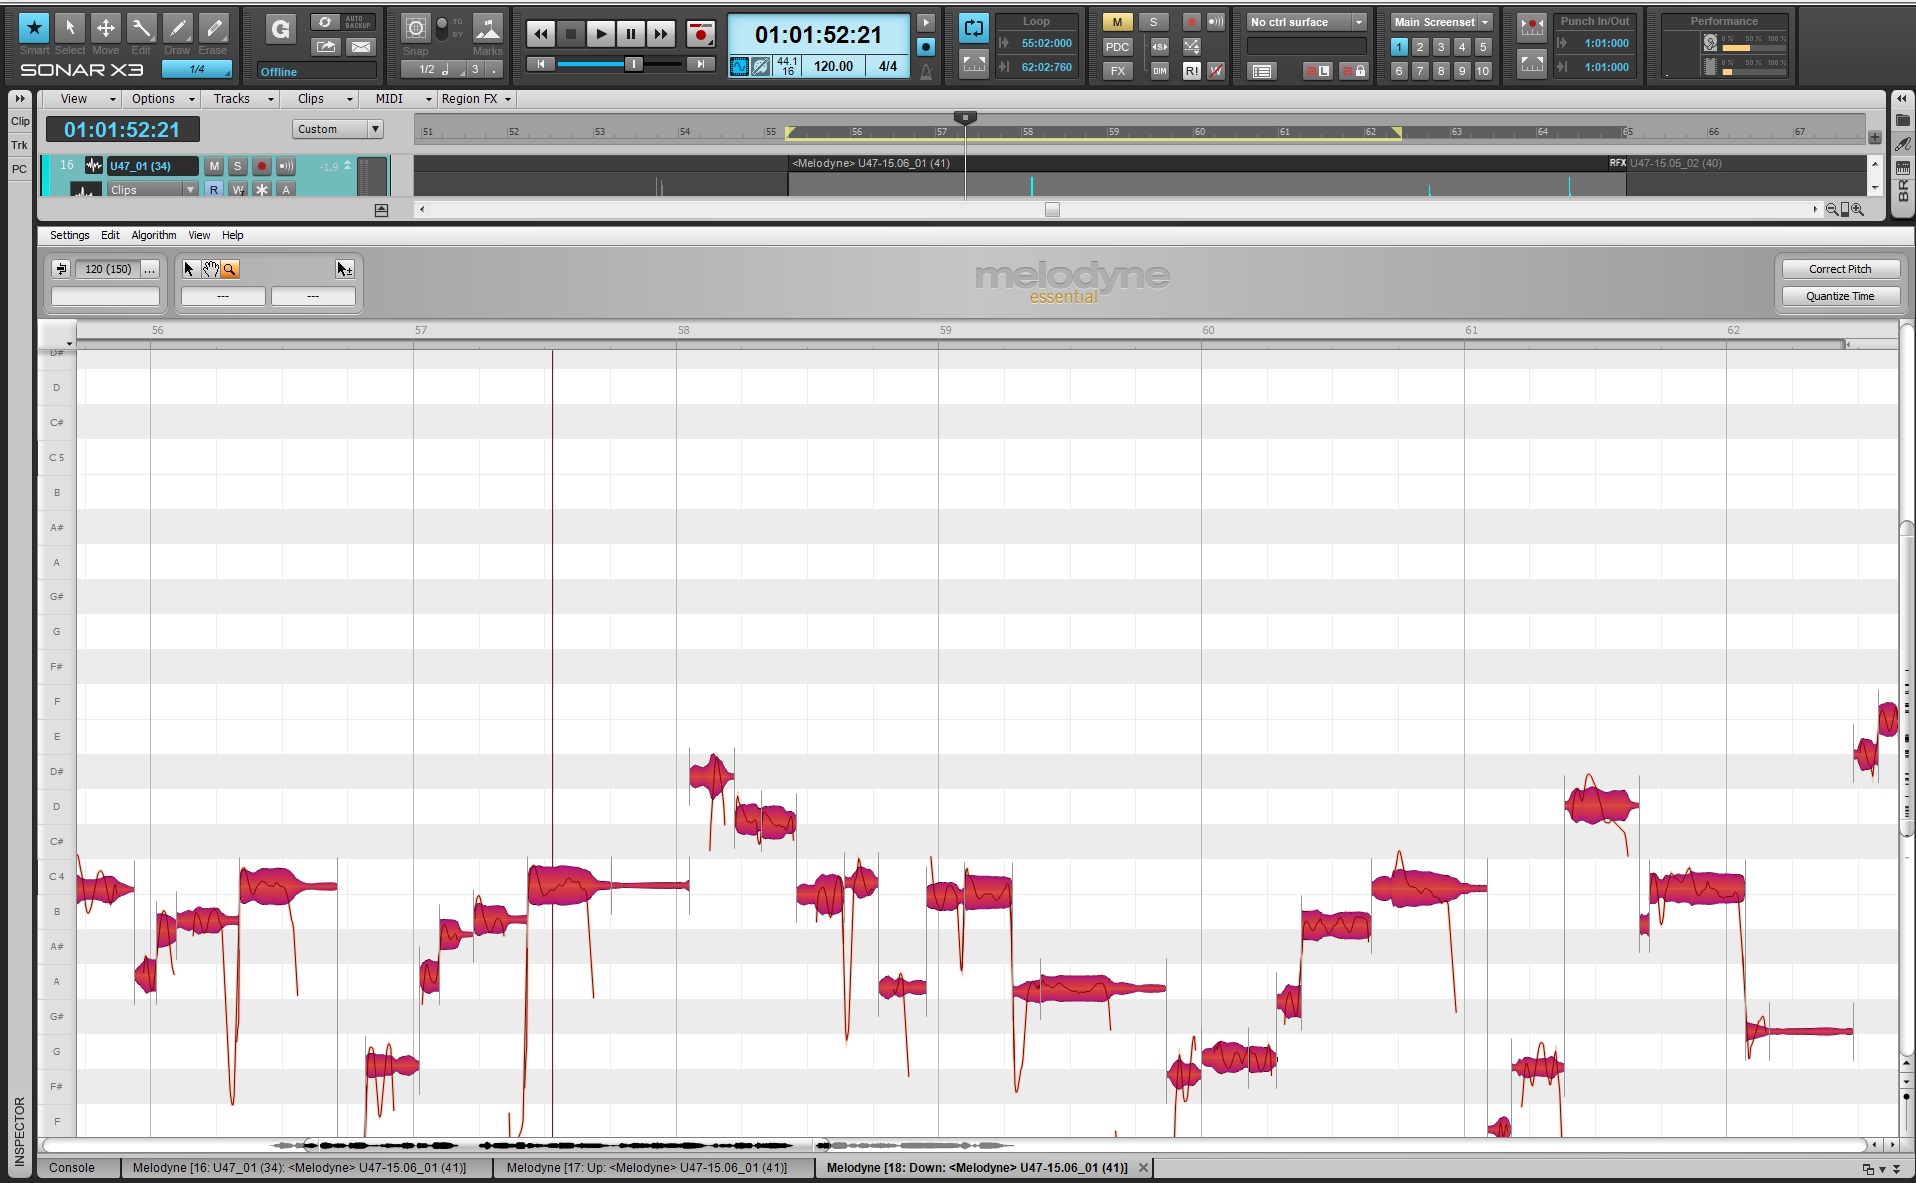
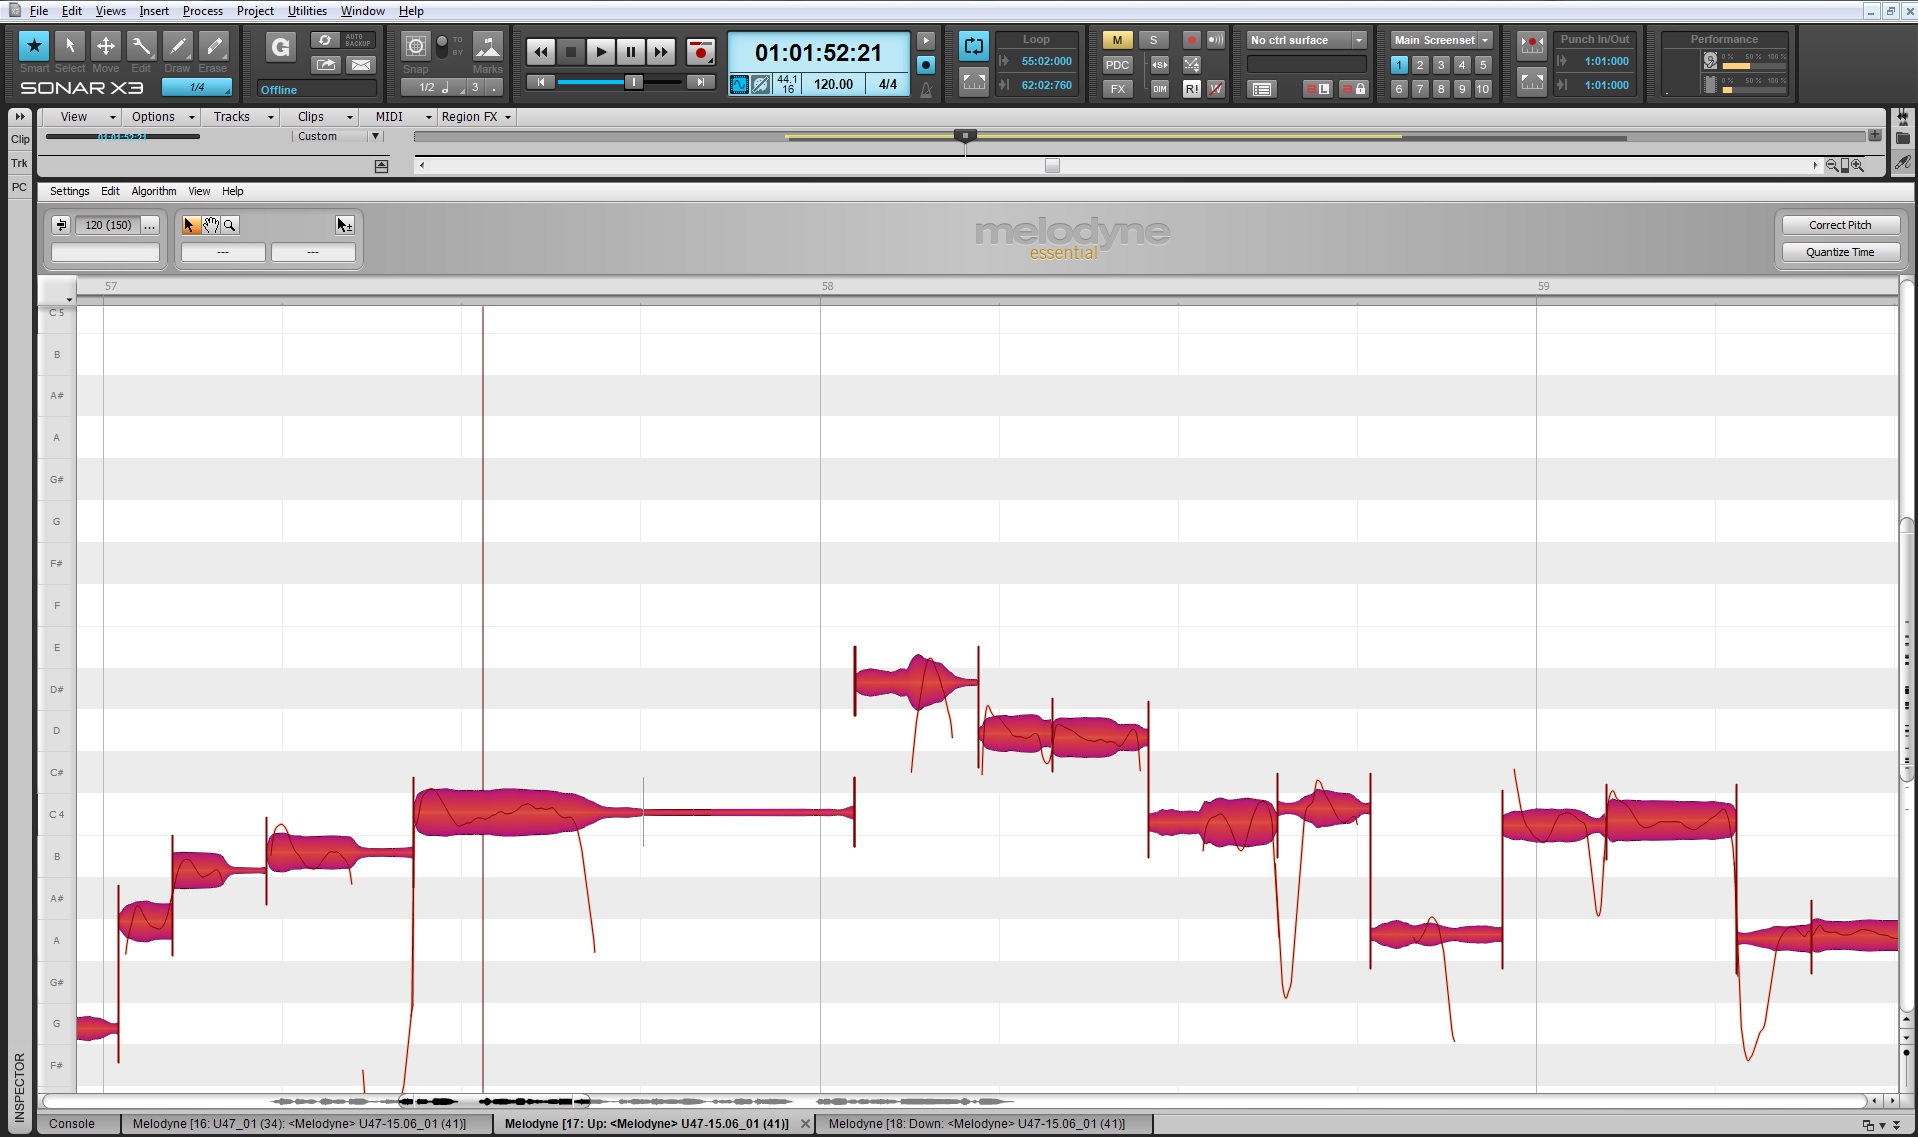
SONAR X3 Studio and Producer introduces Melodyne Essential as a fully integrated and pitch correction editor.  This easy to use software allows users to access their Melodyne right from the Multi-Dock without needing to perform any special tricks within the software.

One great way to process vocals is to add low end to them without using EQ. Thickening up a vocal can be a tricky task but now with the use of Melodyne you can take advantage of it’s pitch correction abilities.

With the deep integration of ARA technology simply do the following to edit pitch:

  • Insert a vocal track that needs some help in the lower register.

  • Highlight the desired audio region

  • Go to Region FX and highlight Melodyne

  • Melodyne will appear in the Multi-Dock

Minimize the Melodyne Editor for now and do the following in the Track View

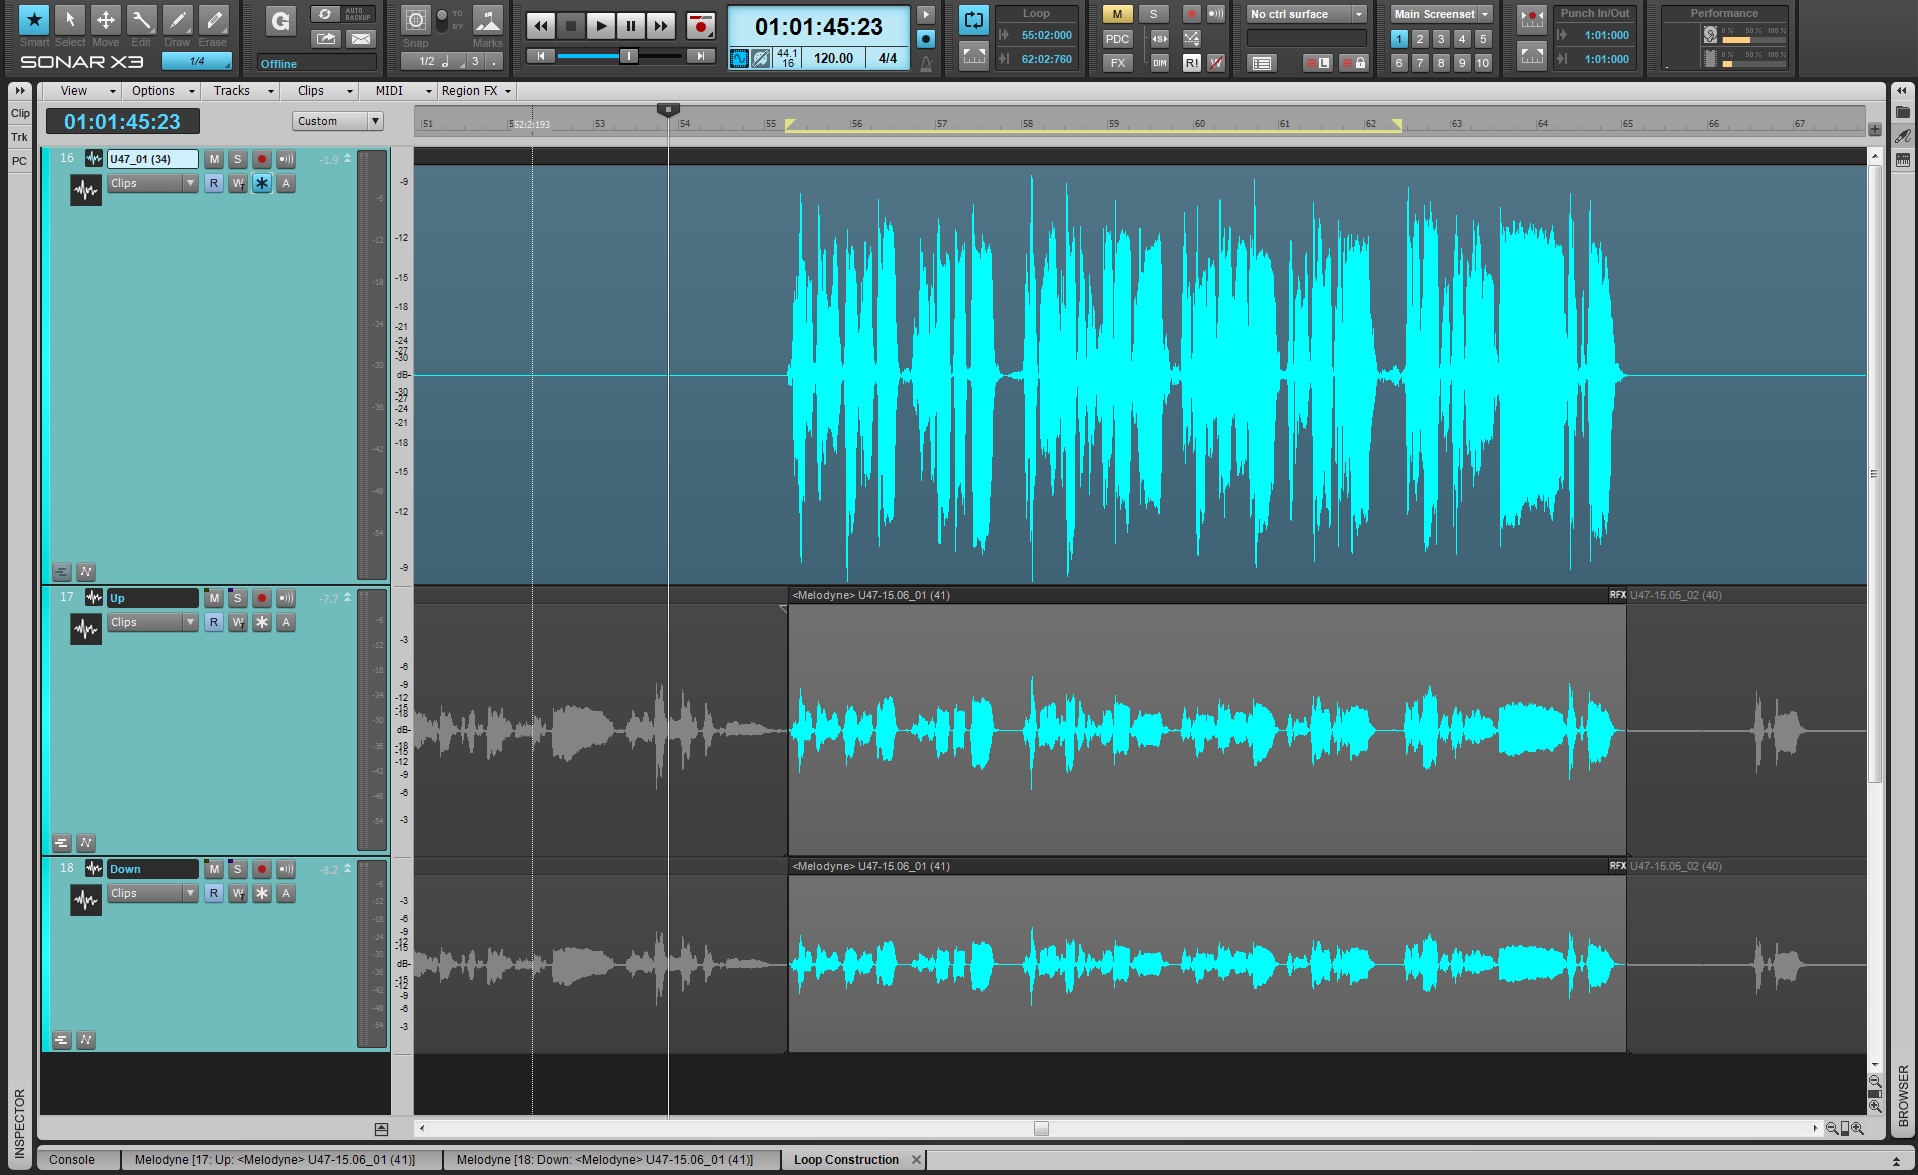
  • Highlight your audio track and right-click on the Track Pane

  • Select [Clone] and make sure to enter 2 in the selection for “repetitions”

This will load two tracks with the same Melodyne region enabled.

  • Open up the first region within Melodyne

  • Go to Edit > Select All or simply hit CTRL+A

  • Within Melodyne use the magnifying glass tool to zoom in on one specific blob

  • Within Melodyne go to Edit > Pitch Grid and select No Snap

  • Using the “Main Tool” click and drag the entire selected track down every so slightly

  • Do the same with the second cloned track but in the opposite direction

  • Now pan both tracks somewhat out in width and mix them underneath your main vocal track

  • Apply a Low Pass Filter to both and any other processing you want to experiment with, here I added some saturation to both tracks

The goal here is to create a parallel thickness underneath your track so that your vocal becomes more present in the lower and punchier frequencies.

Try it out, and experiment with more parallel DSP effects and you’ll start down a route of unlimited effects.

Learn more about SONAR X3 here.

SONAR X3 Quicktip: Slam Your Tracks with the Tape Emulation Module [Producer]

The audio industry has made strides in the past 25 years. In the 90’s we had mostly analog studios with analog gear and digital audio was just making an appearance. By the turn of the century we had plugin developers making all kinds of digital effects unimaginable through circuit design. Those digital plugins were met with some backlash from people who were really attached to their analog sound. Digital was flexible, sounded clear and pristine, but “too perfect” for analog purists.

But plugin design has come a long way. We now have digital effects that are emulated, modeled, or inspired by real analog gear.

In SONAR X3 Producer, the Tape Emulator ProChannel Module is a great new addition to the analog family.  This emulates the sound of a vintage tape machine and allows you to saturate your tracks and even push them until they start to compress just like a real tape machine. If you really want to get that analog feel in your music then the Tape Emulator is your best bet.
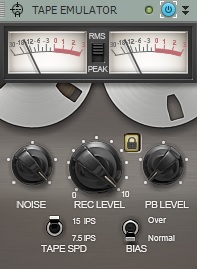
THE PARAMETERS

Noise

This adjusts the loudness of the noise-floor and tape hiss for both tape speed settings.

Rec Level

Adjusts how much of the audio signal passes through the processing of the Tape Emulation. An increase in the Rec Level will increase the saturation and compression that the Tape Emulator produces.

PB Level

Adjusts the overall output gain of the Tape Emulator

Link [Lock Button]

Locks both the Rec Level and the PB Level so no additional gain is added to your passing audio signal, only the processing of the Tape Machine.

IPS

IPS, short for “inches per second”, is the speed of the tape machine reels.  Within SONAR X3 Producer’s Tape Emulator ProChannel Module we have modelled the characteristics of 7.5 and 15 IPS speeds.

15 IPS in comparison to 7.5 is much more welcoming to the high end and tends to roll off the low end quite a bit when pinned to it’s highest setting.  This setting will bring a bit more clarity to your instruments that live in the high mid range and overall high end. In this example specifically, the High Hats on the drum set took to this setting well.

7.5 IPS is a much darker and fatter sound than 15 IPS. This setting will roll off the high end of a signal and product a more focused sound.

BIAS

Bias adjusts the harmonic distortion that the Tape Emulation produces on the passing signal.

Normal keeps the distortion at the normal operating level for the effect.

Over attenuates harmonic distortion in the low and mid range of each signal, especially in the sibilant frequencies.

Applied to Addictive Drums

Here we have some drums that were sequenced using Addictive Drums.  The Drums are mixed down in SONAR using a multi-track setup so that I could mix each individual drum.  This kind of setup is outlined in this blog post. I mixed the drums for a Rock track and applied the Tape Emulator on every track.
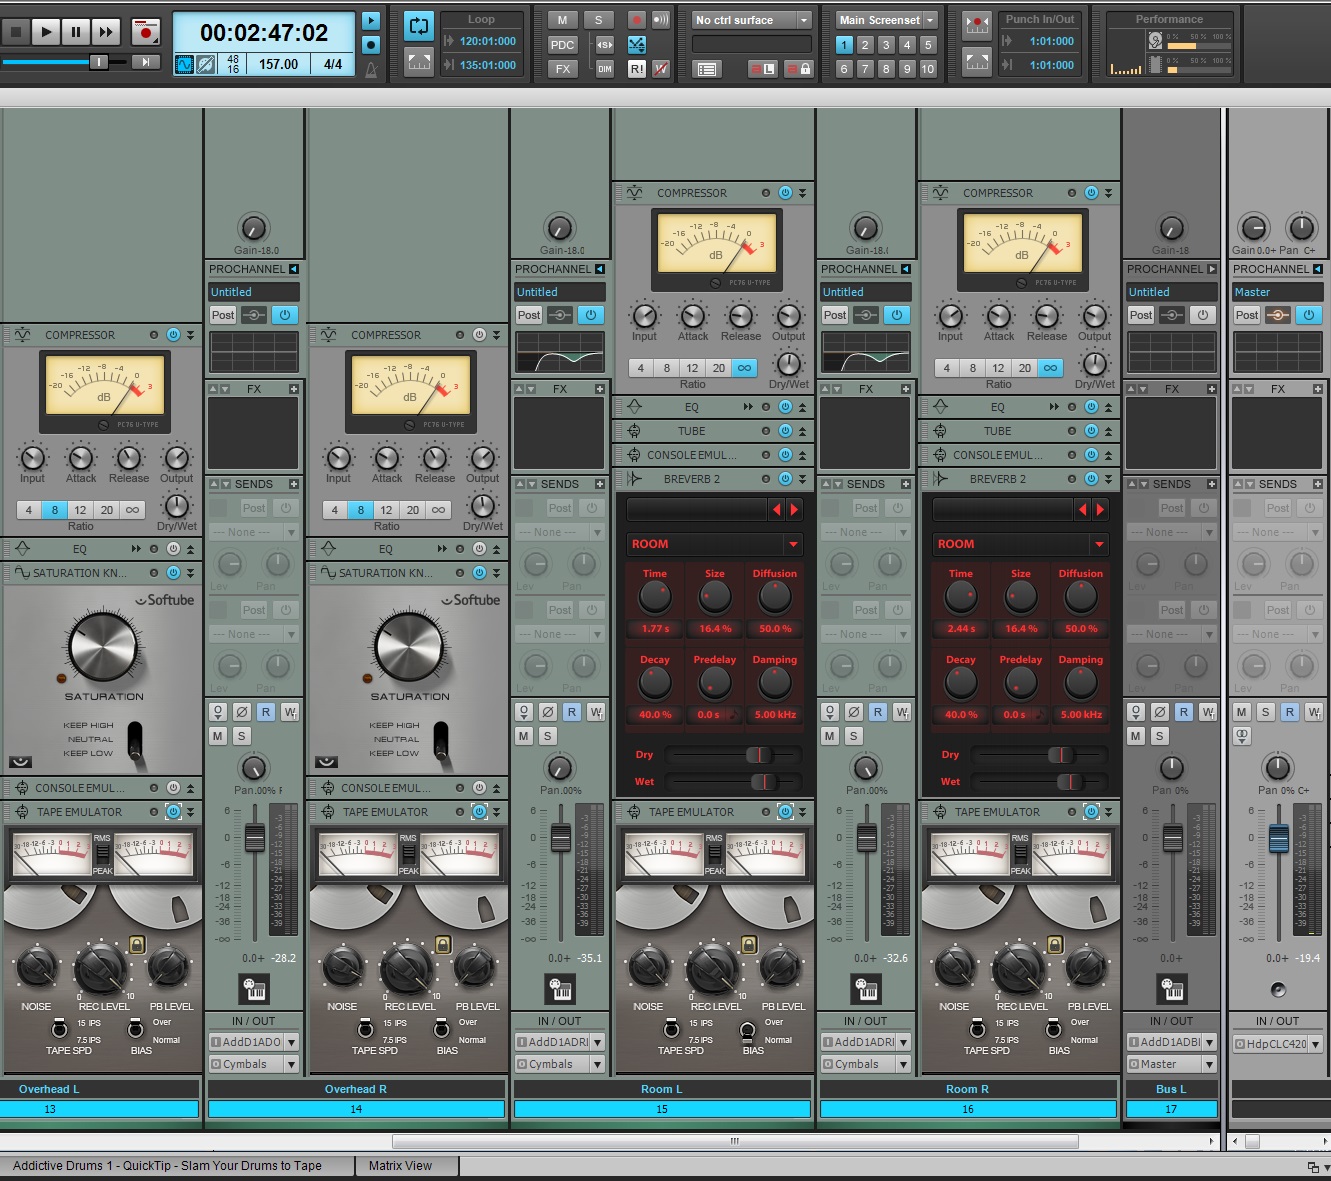
Each drum takes to the Tape Emulator a bit differently so it’s important to listen intently on the sound that you are getting when applying this effect.

First I added this to the Kick Drum and then locked the Record Head and the Playback head so that no additional gain is added.

The Tape Emulator started to taper off the low-end meat of this drum as I increased it’s processing. Taking it to an extreme caused the drum to sound tiny and frail so I decided to stay frugal with it’s use here. Using the lower IPS setting and gently applying the Tape Emulation made the Kick Drum sit right where it needed to.

The Snare Drum took well to the Tape Emulation sound and gave it a nice focus in the lower mid-range. I flipped the IPS to 7.5 to give the Snare a darker and fatter tone and was more generous with the amount of processing that I used on it in comparison to the Kick.  Applying the 15 IPS setting and too much REC Level caused the Snare to thin out and was not very useful. For Rock purposes we want something that is aggressive so sticking to the 7.5 IPS was needed.

Moving to the Hat – This couldn’t get enough of Tape Sound. I cranked this up and flipped the IPS to 15 and the Hat cut well through the drum mix.

The OH and Rooms mostly focused around the sound of the kit as a whole as well as capturing the clarity of the Cymbals so keeping the IPS at 15 was necessary to roll off some of the low end of this signal. On the Rooms microphones I displaced the BIAS setting on one side to increase the stereo effect.

Here is the entire drum set without the Tape Emulation and just some basic mixing:


Here is the same passage with Tape applied to all drums:

I then took both passages, imported both files back into SONAR, and flipped them out of phase. This results in hearing just the processed Tape Emulation while all other frequencies and sounds are cancelled.

Learn about SONAR X3 and the new Tape Emulator

Did You Know SONAR X3 Comes with a Dual Phaser and Chorus?

SONAR X3 Studio and Producer have included the mind-bending Dual Analog Phaser and Dual Analog Chorus units from Nomad Factory.  As you might know both units are time based effects and are variations of delay units. Both types of effects split the signal into two parts and then combine them again after the signal passes through the unit.


  • Phaser – When the audio passes through the unit the signal is flipped out of phase and then a LFO-controlled notch filter sweeps through this signal’s frequency spectrum.

  • Chorus – One part of the signal is unaffected and the other is delayed anywhere from 20ms-50ms and then it’s pitch is modulated by a Low Frequency Oscillator


The included LFO on both units has Square, Sine, Triangle, and Sawtooth options for even more sound design options. Within the Chorus users have the ability to control each side of the stereo audio signal independently as well as change the different LFO rates.

Check out the destruction done to a simple jazz drum loop. There really are not limits to the sounds that these plugins can produce.

Learn more about these plugins and SONAR X3.

SONAR X3 Quicktip: Focus the Low end of your Kick and Snare with a Program EQ

Program Equalizers have been around since the 1950’s and in SONAR X3 Studio and Producer users will receive two of these incredibly emulated modules.

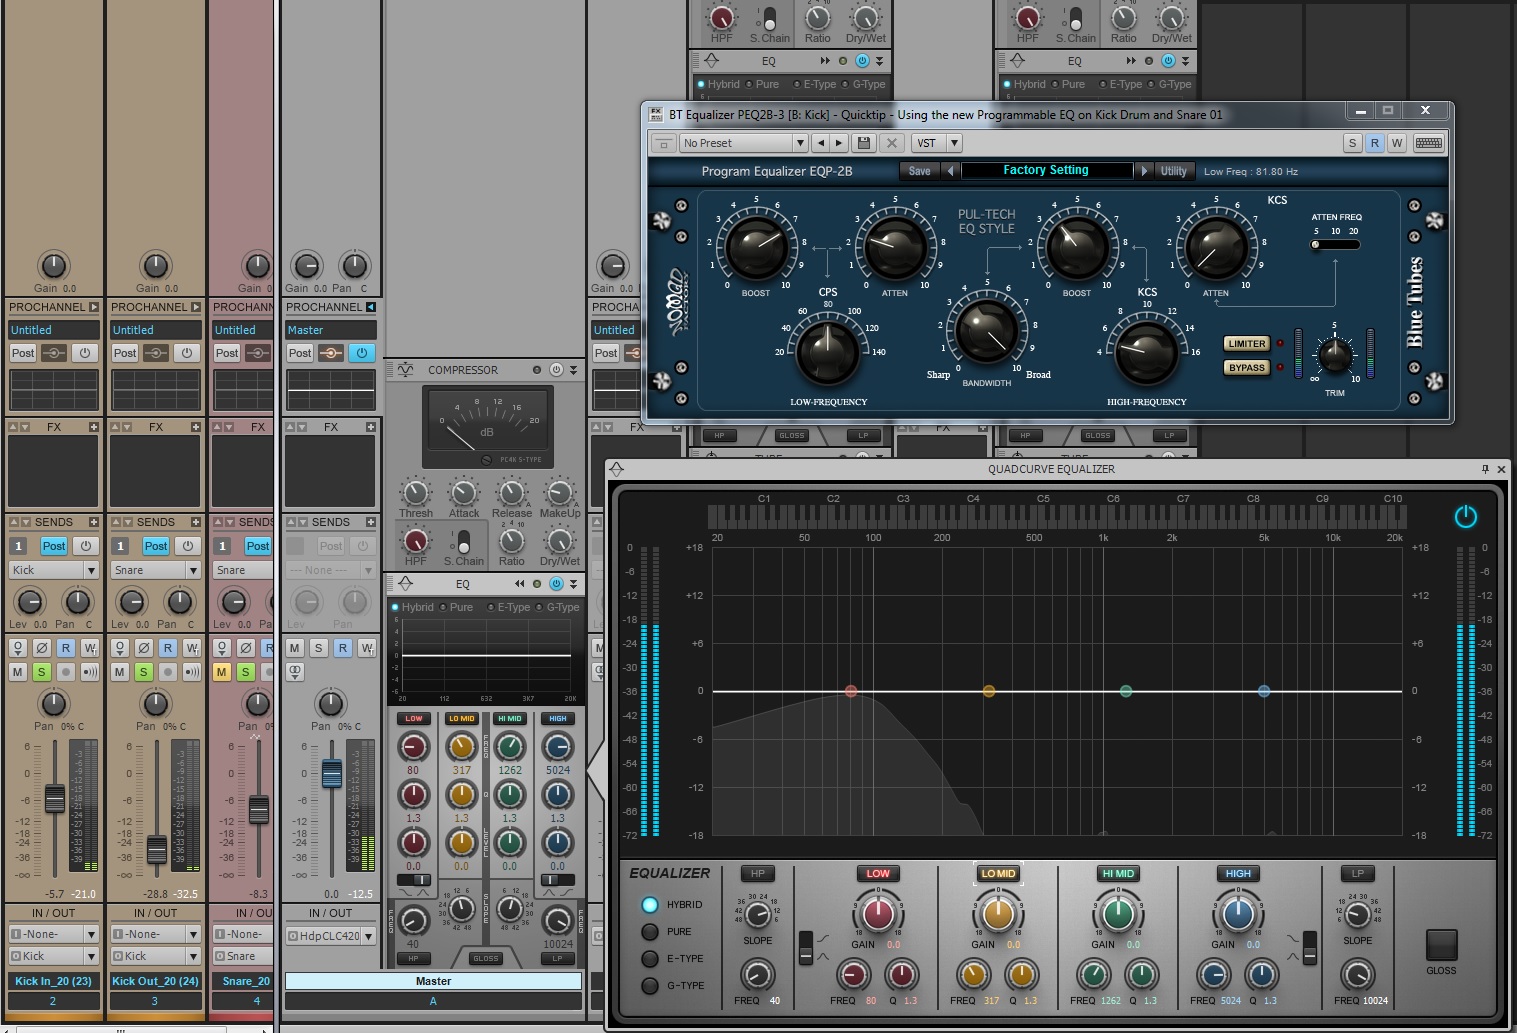
Let’s take a look at what the new Program Equalizer EQP-2B can do for our kick drum. You’ll notice that we have the ability to both boost and cut the same frequencies on this EQ. Choose a low frequency from the variable adjustment and then begin increasing the Boost parameter.  Increase it all the way and your kick drum signal will become quite overpowering. Adjust the Attenuate knob and the signal will begin to smooth out and focus your signal a bit better.

For this country kick drum I picked 80Hz for the low end and boosted the signal to it’s ceiling.  Next, I adjusted the Attenuate knob to it’s lowest setting. This effectively sharpens out the boosted signals and gives the signal a unique focus in the lower spectrum. After that, I adjusted for clarity and the end result is very useable.

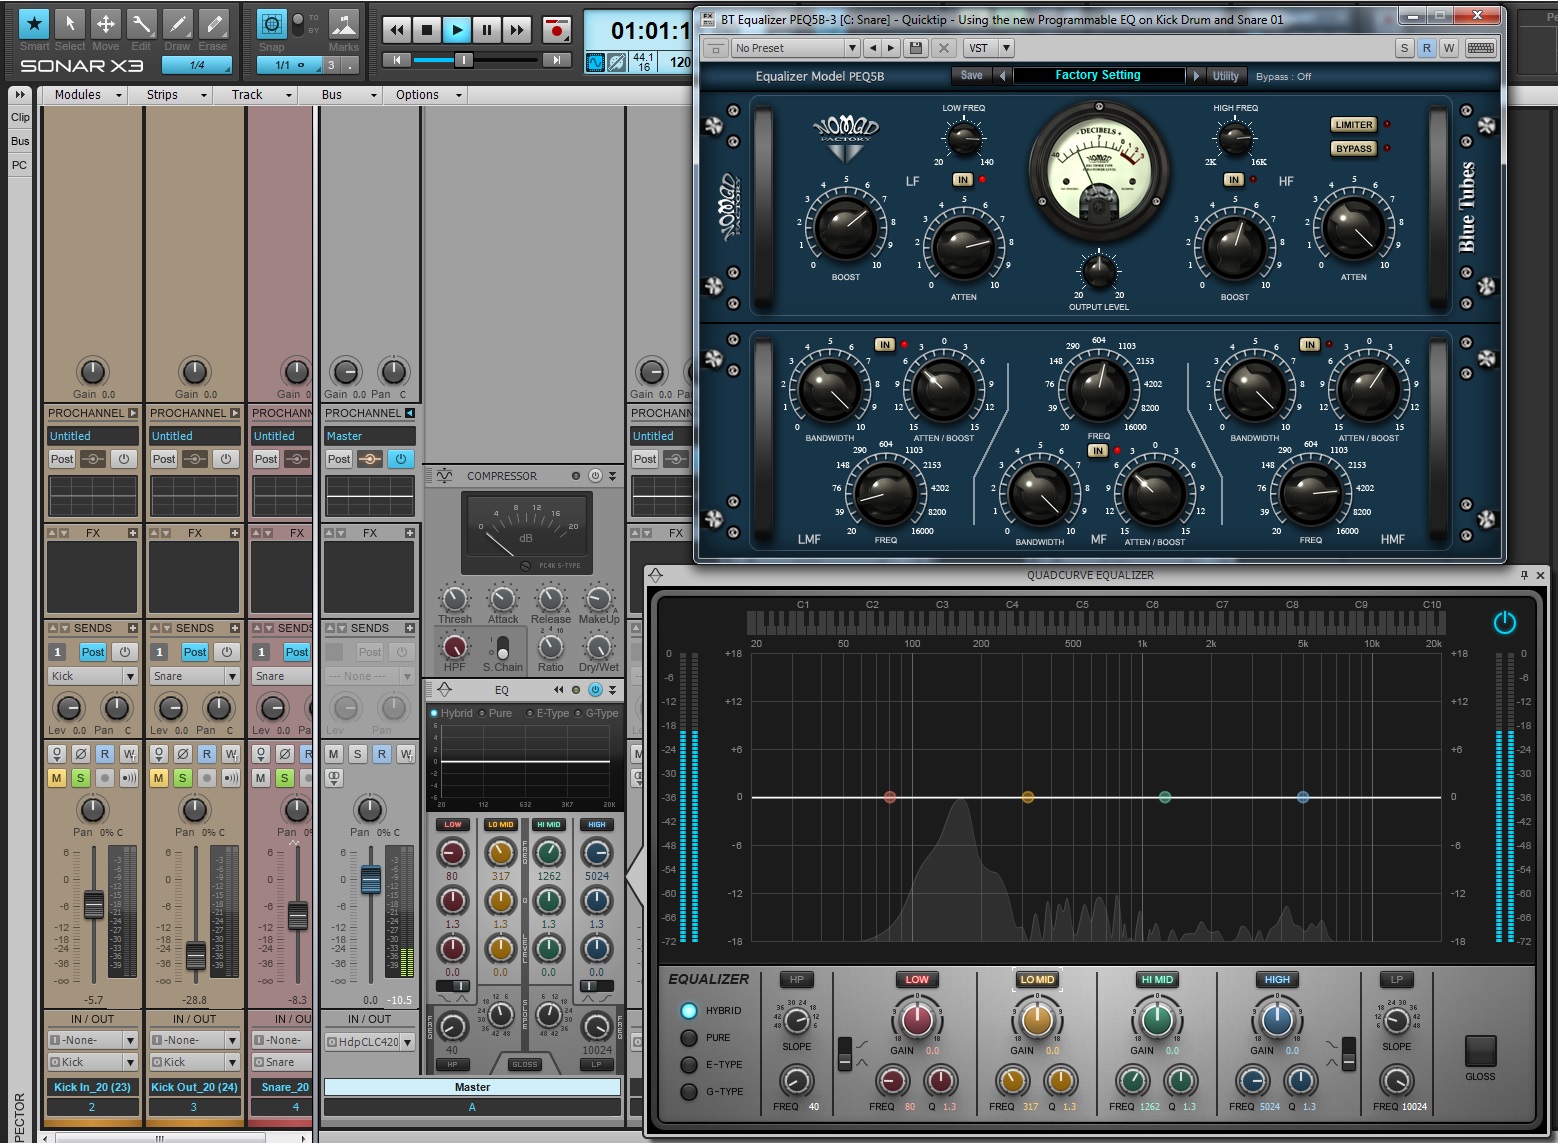
Moving to the snare, user’s can get the same effect using the PEQ5B.  This has some of the same algorithms as the EQP-2B but with an added EQ section in the bottom of the plugin. At first listen the Snare sounds a bit boxy and grainy in the low and mid-range.

I applied a sharp reduction around 50HZ with the Low Shelving EQ and then another sharp cut around 800Hz.  This seemed to make all the difference. Afterwards, I moved to the upper half of this EQ and applied the same thinking that I did to the Kick but instead I focused the EQ to around 122HZ.  This will allow the snare to get out of the way of the Kick.  Next, boosting and then attenuating the signal seemed to focus the shape of the Snare right where I needed it.

Learn more about these plugins and SONAR X3 here.